
If you somehow get tired of the Karka threat to Lion’s Arch this weekend, you can always check out the new dungeon: Fractals of the Mists. A solution to the never ending MMO problem of “What should I do tonight,” this splintered dungeon should keep the Guild Wars community playing for months.
The structure of the dungeon is immediately interesting: It has a central hub named “Mistlock University”, from which you are transported to one of nine fractals. And inside one of these fractals is a huge boss, easily compared to any of the world dragons. You will want to fight it.
One last thing to note: the Fractals of the Mists is a randomised dungeon. Boss placements, enemy placements and routes through will vary. So will the difficulty. To construct this guide, I played alongside a team of Arenanet employees. The difficulty was always set to one or two: and the agony condition was disabled. Agony is exactly what it says on the tin: it takes away your health as a percentage, but is only introduced at very high difficulty levels.
If you want to have an edge when the dungeon lands, read on for my complete guide, including how I beat all nine fractals.
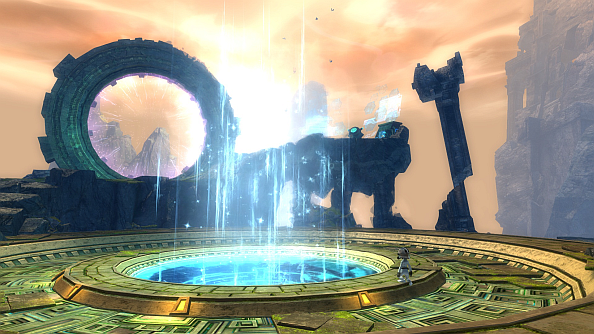
The dungeon itself is located just west of the Fort Marriner Waypoint, just by the dock with the ship. The Asura gate there will take you to the hub pictured above, where you can rest and resupply.
I’ll explain how exactly the difficulty works. For every three fractals you complete in succession, your difficulty will increase by one and your progress is saved. At every even number in difficulty, you will face a huge boss named the Jade Maw. More on that boss later. The difficulty slider will scale the enemies numbers, damage and health. When forming a group, it will take the highest common attained level of difficulty.

Included above is the dungeon vendor for the Fractals of the Mists. Here you can trade in your Fractal Relics for some juicy loot:
- Obsidian Shard are a very sought after component for legendary items.
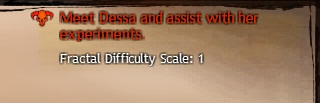
- Dessa’s Experiment Journal will grant you a single skill point.
- Infusions are used to slot into Ascended infusions slots, I’ll do a separate post Ascended gear in the future.
- The Fractal equipment boxes will hold twenty items, prioritising the named item quality.
- Gift of Ascension is used to craft Ascended items in the Mystic Forge.
- Finally the Prototype Fractal Capacitor is a precursorbackpiece eventually turning into an Ascended version once used in the Mystic Forge with the necessary materials.
Lets talk about how fractals differ to normal dungeons. Their length is considerably smaller. They’ll take roughly between 30-45 minutes to complete depending on how successful you are. There are no waypoints within the fractals themselves, but they’re replaced with invisible checkpoints. If your entire party wipes you will all be transported there. That means putting a greater emphasis on keeping allies alive. And at the end of each fractal you will be rewarded with a chest, containing loot and Fractal Relics.
So: let’s look at each individual fractal. Please note though that there are multiple routes and bosses within each fractal. These are determined at random, so your experience might be different to what I write below.
Snow Blind Fractal: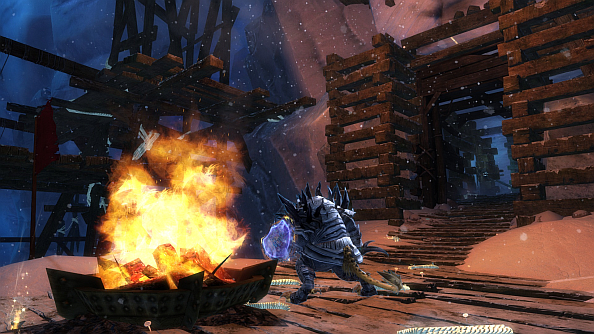
Located somewhere in the Shiverpeaks, the first thing that is apparent is the biting cold as a blizzard rages on. Unlit campfires are spread out around the area, needing to be lit to counter a new stacking debuff. If you’re away from warmth for too long, you will stack this frostbitten debuff and take periodic damage. Take one of the torches and light the campfires along the way to ensure safe passage.
When you reach the bottom, light the huge campfire in the middle and prepare for onslaught of Son of Svanir’s. Remember to stay near the fire to avoid the debuff, and attack them from range. Once they are defeated, you will then face the Ice Elemental that is causing this blizzard.
The Ice Elemental is pretty straightforward, just avoid the big AoE rings of death and the fight is simple. Once it is down you have to make your way in near darkness, following tracks of survivors. The tracks lead to an ominous cave where a powerful Svanir lies in wait.
Again watch out for his AoE attacks, especially when he runs to his ledge. His local scenery is also destructible, although I hadn’t seen a purpose in doing so apart from creating more space.
With him down, don’t forget to collect your loot and chest before heading off for the next fractal.
Volcanic Fractal: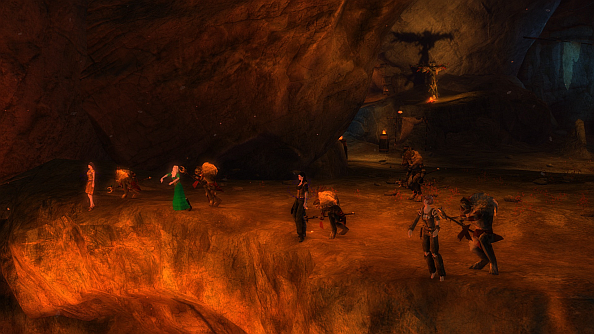
This fiery pit is home to a number of Grawl, who think it’s ok to sacrifice prisoners in return for promised power.
There will be plenty of Grawl at the start that will need dispatching to continue. Once they’re taken care of it’s time to see everyone pretend to be Indiana Jones. Flaming boulders will lick at your feet as you run down a tunnel. There are areas on the right in which you can seek safety before continuing the ‘running for your life’ bit.
At the bottom you will face a Grawl Shaman who’s attempting to sacrifice four humans to the lava depths below. Use the fiery stones around the area to break his shield so you can damage him. Be careful though as other Grawl will spawn and make themselves slowly to any of the four prisoners. If they reach them before being slain they will push them to their doom. That’s bad.
If you save all four prisoners, you’ll be rewarded with a bonus chest.
At the very last moment, the Shaman will seem to commit suicide by leaping into the lava. You should know it’s never that easy.
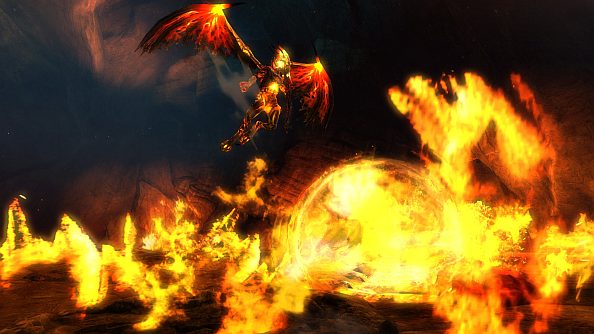
He’ll be reborn as a fiery monster, and you’ll be asked to kill him off a second time. The first job: make your way down the makeshift jumping puzzle without being claimed by the lava below.
In this fight, you’ll want to pay extra special attention to the adds he spawns. They’ll clump together and in turn cast down their own AoE spells. If you’re caught in the middle of them while they’re stacked on top of each other it will mean certain death.
Keep moving and he eventually succumb to your efforts. Loot the chest and get ready for your next fractal.
Urban Battlefield Fractal:
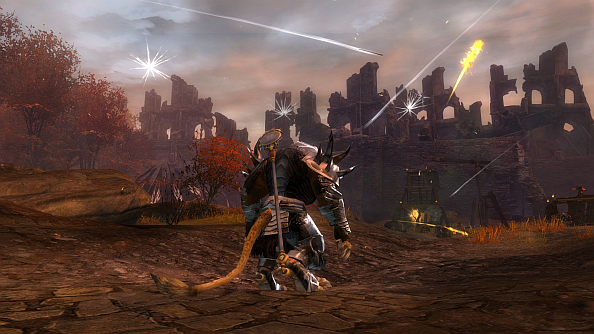
Yes, to answer the obvious question. This is Ascalon, mid-searing. You get to play as the Flame Legion. Side note: as a lore junkie, when I saw this Inearlyjumped for joy.
The first stages are relatively chaotic: there are many siege weapons flying around. Don’t worry: just make your way to the gate where you will face your first mini-boss.
I’m not going to spoil it, but the name of this boss is a direct credit to a very prominent member of the Guild Wars 2 community, who writes some fantastic guides herself. Prominent enough that during my early access, I immediately made the connection, while the ArenaNet developers noted my “keen eye”.
If you want to continue, this siege master is going to have to be taken down. First, aim your DPS at the the siege weapons that surround her to lessen the incoming damage. Watch out for burning oil pots if you go into melee range. She will replace the weapons throughout the fight: take them down as soon as they spawn.
With her dealt with, break down the gate and enter the town. Depending on random factors, a path will be blocked by a blockade, forcing you to go down one route.
During my playthrough, a path led to an open area filled the brim with siege weapons and Ascalon soldiers. You can hide behind pillars to avoid the majority of the incoming fire, although some arrow cart fire will still hit. You need to be systematic: take down each group until none remain. Then it’s time for the big boss: Captain Ashym.
Your top priority here is to take down his Squires when they spawn. While these guys are they’ll not only want to hurt you, but they’ll also provide Captain Ashym with buffs that will make the fight much more difficult. He hits pretty hard, so evading is a must. I found that spreading out is best to avoid him catching multiple people in his attacks.
After a lengthy fight, take your rewards and move on to the next fractal.
Swamp Land Fractal: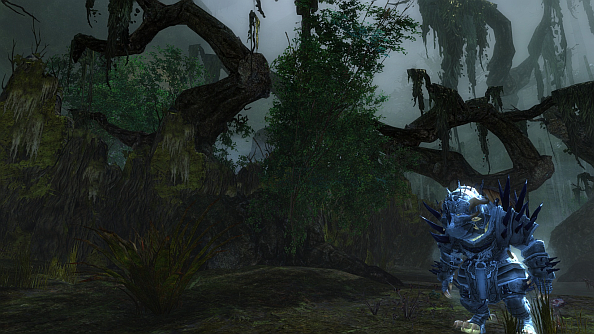
Don’t move.
I’m serious. This place is littered with traps that will cause you a huge headache. Look out for trip wires and bear traps. Also just to make things even more deadly, a half naked Norn known as “Mossman” will appear and try and murder you.
You will see three tree trunks that require Wisps to allow you to proceed. These are randomly placed on the map, and usually guarded by traps or powerful monsters. Your party must grab each Wisp simultaneously and run them back to the trunks. When the first Wisp is picked up you will only have roughly half a minute to get them back before the entire thing resets.
I recommend professions with increased survivability and mobility to match. Traps will hinder you if you don’t keep an eye out, not to mention the various swamp life. A Mesmer portal would come in useful as well, decreasing the distance needed to run.
With the Wisps back in their trunks, the way forward is revealed. For our group, the way was right into Mossman’s lair.
He wasn’t too happy that we found it.
He has a nasty charged axe attack that will smacks good chunk of health out of you. He also leaps around the place: this a very mobile fight. And, you’ll want to watch out for his animal allies that will continuously spawn throughout: they need to be eliminated before they overrun you.
You will eventually put the Mossman to rest. Don’t forget to collect your treasure and move onto the next fractal.
Cliffside Fractal:
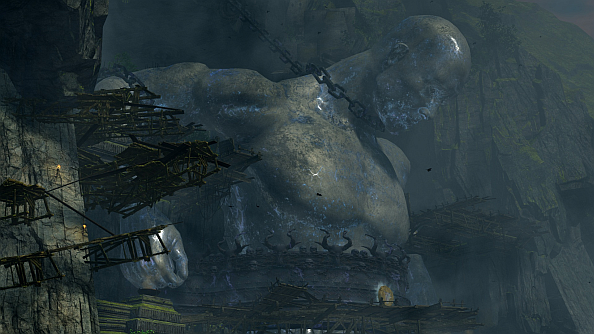
Before you rush on in with your hunger for blood, take a moment to look up.
Yes, that’s a sentient statue.
Now that you have regained your composure… your task is to free him from his evil cultist captors. To let him out, you’re going to need a pretty big hammer.
You’ll receive it after clearing the initial bunch of cultists.
But the hammer has a cost.
For every second you hold it you gain a stacking debuff. When it reaches thirty you will be knocked down and take some damage. If it reaches forty you will be instantly killed. Your party will be tasked with playing hot potato with the hammer to ensure everyone stays alive. Note that you’ll take initial damage when you pick it up. Avoid it if you’re low on health.
Every time you kill a foe with the hammer, it gains a charge and it’s fourth skill is unlocked. This skill is used to damage the seals that hold the statue in place.
Make your way up the statue and break the seals. Take care for some traps: they can launch you to your doom.
Once at the top you will need to smash the last seal holding the giant statue in place. Start beating down on the priest who wields it. At every 25% health he will drop the hammer and be dazed. This is your chance to attack the seal. Just be aware that other cultists will flood the room and try and hinder you: but you can use them to gain charges for your hammer.
Once the statue has been freed watch for a truly breathtaking scene. Oh and remember your manners for a nice achievement.
Grab your loot, there’s no time to waste!
Uncategorized Fractal: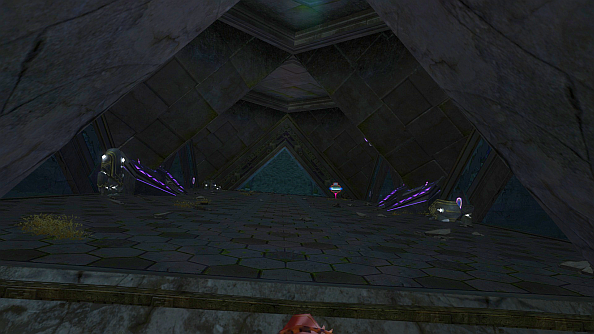
I hope you like jumping puzzles, because this one is going to test your patience. Make your way up the platforms until you reach a dark room. There are a number prisons here, which you will have to open to get further forward. These can contain a number of hard champions of various species.
Once they have been dealt with make your way onwards for another round of jumping puzzle goodness. But this time with added challenge.
Harpies inhabit the platforms: you need to kill them to grant safe passage. They can knock you off: making skills that can reflect incoming abilities superbly useful here. If you’re worried about falling, you should be taking the harpies out from range.
You’ll then come across a lone golem, programmed to kill intruders. It will stay in the middle of the room, casting a constant AoE poison. Try and move out of the incoming waves and watch his AoE spinning attack.
Around the room you will notice three consoles and some “Tears of Dwanya”. The consoles power up if you drop a tear in them. If the power runs out, the room will stop venting the poison gasses coming from the golem, causing huge damage. Have people continuously run crystals to the consoles to keep the power topped up; it’s then an easy fight.After the golem it’s only a short walk to the final boss, a crazed feline fancying Asura.
She’s an Asura, which means they’re not cats: they’re Golems with cute names. She’ll activate them one by one. Each has a unique set of skills. The fun really starts though when all four become active after you have beaten them one at a time.
Each player will receive a different buff represented by a positive or negative charge. You must avoid players with the opposite charge to you and move next to players with the same. Sounds simple but things can get hectic with all the fighting going on.
Eventually, you’ll silence all four of her golems. She’ll run her crazy Asuran noggin off the cliff edge. Claim your loot and head on to the next fractal.
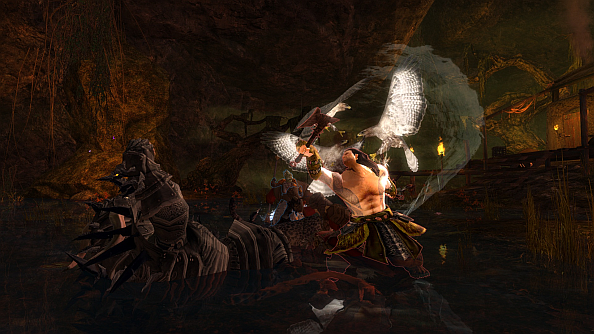
Underground Facility Fractal:
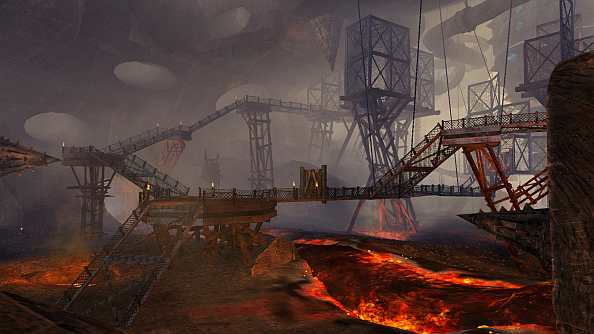
The Dredge inhabit this place. They’re on their constant quest to dig to the center of the earth. Gates will bar your way. You need to split up to continue on your path.
Walk up the ramp in front of you and head to the left. Clear the Dredge out of the meshed room and take note of the pressure plate in the corner. Someone will need to stand on it while the rest of the group goes to the opposite room to stand on the one located there. This will open the gate in the centre.
The three players remaining head into the central room with the drill and activate the two pressure plates in there to let the two players that remained back in.
Continue on until you find a wall that seems impervious to conventional attacks. You will need to kill the Dredge holding special guns that can burn through the wall to advance. Once in you will have to face a hard hitting big Dredge who spawns a huge amount allies that will need chewing through. Keep control of the level of Dredge and it’s a simple fight.
After he is silenced it’s only a short walk to the next foe, a super Dredge mining suit.
The fight is quite simple once you get a hang of his special mechanic. It takes minimal damage unless you pour one of the four lava buckets on him. This makes it superheated. The temperature boosts your damage and prevents him from using his self repair ability.
Run him around the buckets while having someone ranged pull the levers. Grab your loot and it’s off to the next fractal.
Aquatic Ruins Fractal: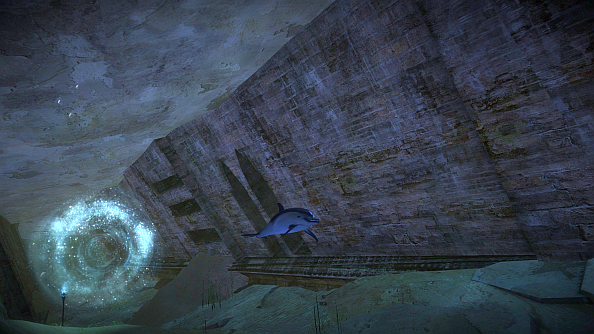
Aquatic Ruins seriously tests your group chemistry. This fractal is all about timing and moving as one. After a quick moment to take in the scenery, jump into the water and start swimming.
Your task is to release three prisoners that the Krait are keeping captive. They should be easy to find: just try not to overextend yourself and aggro too many krait.
When you have freed them continue on. Our party had to transform into Dolphins in order to evade the hidden Krait that patrolled the next area. As you swim, you’re given a set of unique set of skills that can detect hidden Krait, distract them, and also give you a big burst of speed. The group will need to stay together in order to make it through without aggroing the adds. Watch out if you do get caught: as a Dolphin you are more vulnerable to attacks.
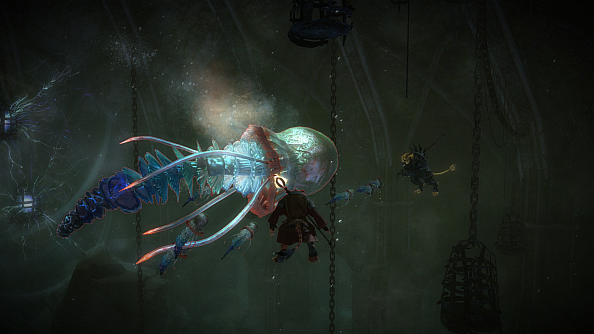
After dodging death at the hands of the Krait, we were faced with a giant Jellyfish. When I played it for the first time, I found it a difficult fight: mainly because I was unfamiliar with an Elementalists aquatic skills.
What I learned: make sure you kill the baby Jelly Fish that spawn as fast as possible: otherwise they will end up mobbing you. The giant Jellyfish will do a huge AoE electric attack that you need to stay clear of. This will also charge the various metal cages around the room and cause them to deal damage to you.
Once you have killed this monstrosity, there is only one fractal left to guide you through.
And it’s the big one.
Solid Ocean Fractal: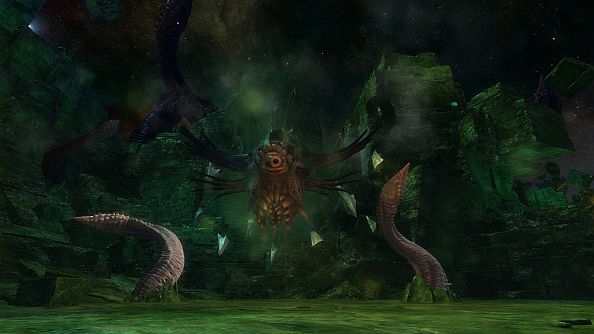
This fractal is home to the Jade Maw. It’s a vast leviathan which tests your group to the limit.
Make your way to the Jade Maw, defeating the enemies along the way. Watch out for the jumps needed to cross the huge gap: some of them are quite sneaky. Once there the fun begins.
Prepare for a hard and long fight.
You will notice crystals on the floor named “Reflective Crystals”. These are key to defeating the Jade Maw. It will periodically charge up to attack someone with a laser attack. If you possess one of these crystals you can steal the energy and turn it back on the Jade Maw. This takes nice big chunks of its health.
The Jade Maw will also spawn tentacles. Their number increases as its health gets lower and lower. So: the fight gets harder as he starts to die. Take the tentacles out as soon as possible to prevent your group from being overwhelmed. Finally, Jade Maw spawns crystal shards: they need dealing with too.
The key is to play it safe and patient. Take care of all the enemies in the area before focusing on damaging the Jade Maw. If you’re too greedy you will be crushed under the sheer number of additional tentacles.
That about sums up the Fractal of the Mists, but this was only my experience. Each fractal has different possibilities, and I only experienced one path on each. There are different routes and bosses so your run through could be completely different. Use this guide as a basis on what is to come.
And enjoy. I loved every second of the Fractals of the Mists.