When I’m not writing about or playing video games, I’m watching them. Sometimes I’m doing both. It’s an incredible medium where you can meet and interact with some of most talented and friendly people around, not to mention catch some of the biggest eSports events on the planet from the comfort of your own home.
With this guide, we’ll walk through exactly what software and know-how you need to start streaming successfully today.
Check our Twitch Tools platform, for tracking stuff like Twitch following.
Streaming can be a fun experience for both the broadcaster and the viewer. We’ll be talking about primarily streaming on Twitch.tv; the worlds biggest streaming platform focused on video games. Your first job with will be to head over there any make an account so you can stream to the service. Once that’s done, follow the contents below and you’ll be streaming in no time.
Internet speeds
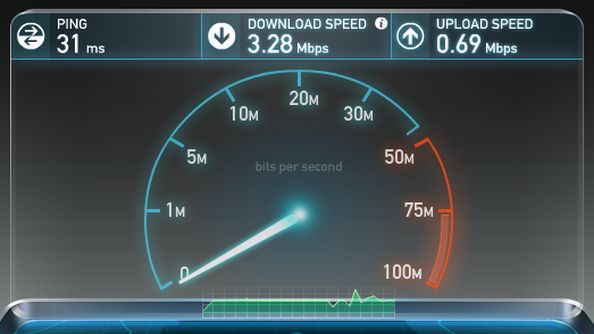
If you lack the appropriate internet speeds then your streaming journey could end before it even begins. The biggest determining factor is your upload speed: the rate at which you can send data from your PC to another location (Twitch) via the internet. A low upload speed will result in a bad quality stream with constant lag and buffering, while also causing lag issues for yourself.
You can test your download and upload speed over at Speedtest.net. It’s a good idea to run the test two or three times, while also making sure any devices and/or programs aren’t affecting the results by shutting them down. This will ensure an accurate result. With your upload speed in hand, check below for what you can expect when aiming for a problem free stream.
- 800 kbps – you’ll be limited to a 480p resolution and will have to put up with some severe pixelation during fasts scenes e.g. FPS games. Not recommended.
- 1500 kbps – at this speed you’ll be able to put up a solid 720p resolution stream at around 20-30 FPS
- 2000 kbps – as long as your hardware supports it, you can now stream 720p with up to 60 FPS.
- 3000 kbps – you can now stream at 1080p at 30 FPS, which is the most popular native resolution.
- 3500 kbps – the maximum recommended bitrate. If you’re at or over this upload speed then you’ll have the best stream quality possible: 1080p at 60 FPS. However there are caveats which will be explained in the tips section below.
If you find yourself at the lower end of the spectrum, all is not lost. While your stream might not look pretty, streaming is more than just about quality. If you can provide great content and heavy interaction with your viewers, you can overcome these seemingly daunting obstacles.
Hardware
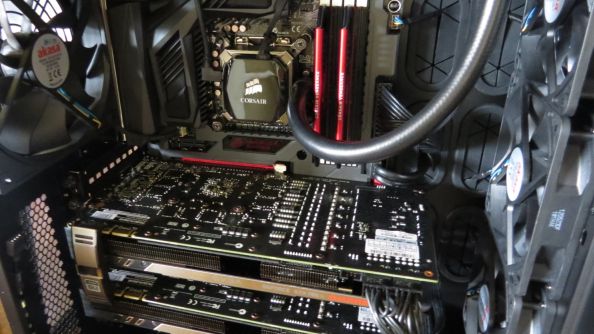
With your upload speed identified, it’s time to take a look at your hardware. There are three main components that will factor into stream quality and capabilities:
- CPU – the workhorse of your PC and the most important component, your CPU will affect your speed at encoding what’s happening on your screen before uploading it to the stream. Recommendation: 2nd, 3rd or 4th generation i5 / i7 (especially the K versions) from Intel.
- GPU – determines your performance and graphical fidelity when playing video games. The more recent the GPU the better, but a minimum recommendation would include anything after the GTX 560 series from Nvidia, or any AMD equivalent.
- RAM – the ability to run multiple programs at once efficiently, having enough RAM is key to not slow your PC to a snails crawl when you’ve got one too many tabs open. You’re looking for a minimum of 4GB but a more comfortable 8GB is recommended.
If you’re looking good with your PC specs and internet speed, we can now get stuck into broadcasting software and settings.
Software
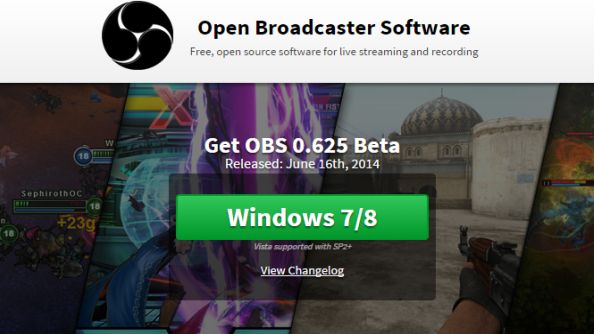
There’s a choice when it comes to what software you want to use to stream. XSplit is popular, but you’ll need to fork out some cash to make the most of it. Nvidia have their own streaming program that’s present on any GTX 600 GPU or later, but it’s still in early development. Open Broadcaster Software (OBS) is our program of choice for this guide. It’s free, light on resource consumption and relatively easy to use. Download it here.
Once you’ve got it installed, it’s time to dive into the settings and get it ready for streaming. Open up OBS and click settings, from here I’ll give a detailed step by step guide on each section that you’ll need to alter:
- Encoding – Here is where you can change the bitrate of your stream: the amount of data you commit to your stream via your upload. Head over to this site and enter your PC specs as well as your upload speed we measured earlier; as an example I’ll use 2000 kbps. I can see from the estimator that it recommends a 1700 bitrate, so that’s the number you’ll enter into the “Max Bitrate” field in the Encoding settings. You can leave the sound as it is, but if you’ve got a small bitrate consider reducing the audio bitrate down from 128kbps to 96kbps.
- Broadcast Settings – Click on the “Streaming Service” drop down menu and select “Twitch / Justin.tv”. You’ll then want to head into your Twitch dashboard and click “Stream Key”. This is your unique key that will enable you to stream to your Twitch channel. It’s important that you keep this safe, as if anyone gets a hold of it they can also stream to your channel. Copy and paste your stream key into the “Play Path/Stream key” field in the Broadcast Settings panel on OBS. It’s also worth double checking your selected “Server” is appropriate to ensure a stable connection.
- Video – Make sure your correct GPU is selected for your “Video Adapter”. Your native resolution should already be present in your “Base Resolution” setting, but it doesn’t hurt to double check. The important part is your “Resolution Downscale”, as this is ultimately what you’ll be outputting to the stream. A tip is to look at the last digits in the resolution to see what you’ll want: 852×480 is 480p, 1280×720 is 720p etc. You can also alter your outgoing FPS; 30 is a good number, but you can crank it to 60 FPS if you have a good CPU.
- Audio – Just make sure that you have the correct audio and microphone device selected at the top.
We’re nearly ready to stream, but there’s one more thing we need to tackle: scenes and sources. Ducking out of the settings menu and back to the main window, you’ll want to pay attention to the bottom left. You can play around with this later and customise it to be your own, but here’s four scenes that I used on a regular basis:
- Game – This scene will just stream the game you’re playing and nothing else. Right click the already existing “Scene” and rename it to “Game”. Then move over to the right under “Sources” and right click within the white space. Hit “Add” and then “Game Capture”. You’ll then be greeted by a new window where you can select the game from the drop down menu. It’s important to note that you’ll need to make sure that the game is selected; if you can’t see it in the drop down menu just hit “Refresh”.
- Game/Cam – Exactly the same as above, except you’ll be adding in your webcam to the scene. Right click in the “Sources” section again and this time add a “Video Capture Device”. You can then change settings of your webcam to tailor it to your needs. Do be aware that the sources work in layers: the source at the top of the scene will be displayed over the top of others. In this example you’ll want the webcam source on top of your game capture. To make sure it’s working, hit “Preview Stream” and then “Edit Scene”. You’ll find that you can now drag and resize your webcam window.
- Fullscreen Cam – I find it handy to have another scene with just your webcam in full screen. This is for when you want to hide what you’re doing on your desktop e.g. switching games, changing servers or entering passwords. Follow the same actions as above but just remove the “Game Capture”, and drag the webcam to cover your entire screen.
- Monitor – If you want to show your viewers something on your desktop, you’ll need a monitor scene. Add “Monitor Capture” as a source and a “Video Capture Device” if you want to show your webcam too. Use this for showing YouTube videos, images and giveaways.
Great, you’re now ready to stream! Why not do a test broadcast with some friends and see if everything works. You can use the bottom section of your OBS window to view various statistics such as your current bitrate with a coloured symbol depicting your connection health, and if you’ve dropped any frames. If you do drop a lot of frames – which I determine is above 5% over a 30 minute period – you might need to lower you bitrate in the settings to provide a smoother stream.
Streaming tips
So now that you’re streaming, what do you do next? First it’s important to realise that you probably won’t build a massive audience overnight, and start making money from streaming. The most important aspect of streaming is having fun and being social. Do it because you enjoy it, not because you want to play games and get paid.
Moving on from that, there’s a few simple tips and tricks you should follow to help attract, build and foster an audience:
Interact with your viewers: what makes streaming special is the fact that the audience can talk directly to you about the content you’re showing. I cannot stress enough how big of a turn off it is to be simply ignored by a streamer (unless they have an unusable chat due to thousands of viewers spamming stuff). You will find that even if your stream quality is sub-par, you will develop regular viewers because they like you. Have chat up on a second monitor or device so it doesn’t conflict with your content.
A higher bitrate can limit you: It might sound bonkers but it’s true. Unless you’re partnered with Twitch – a status attained after achieving many views and followers – you will output the bitrate you’ve selected. It’s nice to stream in 1080p at 3500kbps, but if some poor soul doesn’t have a 3500kbps download speed they’re not going to be able to watch your stream without buffering and stutters. Sometimes It’s better to stream in 720p at 1500kbps while you’re growing your audience.
Oh and don’t go above 3500kbps: Twitch will get really angry with your bandwidth hogging soul and smite your channel from the heavens.
Update your Twitch regularly: Make sure to make your streaming title short, attractive and concise, but also relevant to the content/game you’re showing. If you change game, do the same with your title and also make sure to update which game you’re playing in your Twitch dashboard, otherwise you might miss out on potential viewers.
Go through your Twitch settings: Have a gander through your Twitch preferences. You can set stuff like an offline image, social media links, and manage highlights. Something that I always find engrossing is the stats page, where you can see various stats from your stream e.g. viewers, follows.
Make highlights: If something cool happens while you’re streaming, it’s a good idea to make a highlight. You can do this in your Twitch dashboard and it only takes a few seconds. Potential viewers will often check out highlights on a new stream to see what kind of stuff they get up to, and gauge whether they’re worth their time.
Remember, you’re live: While streaming, you should be aware that anything you do is being beamed to the world wide web. Be conscious of what you do and say and how you behave. Someone rings your mobile in the middle of the stream and it’s important? Apologise for the interruption and take it in another room. And don’t give out any personal information, it will backfire severely.
Hopefully this guide has helped, but if something didn’t work out you can always leave a comment below which I will answer asap. I will also update this guide if you have any useful streaming tips of your own. If you have your own stream you should probably post that too; we’d love to spam your chat with some kappas (joke).
