
If you’ve been playing Minecraft for any length of time you’ve probably found Redstone and know what to do with it. However there are many of you out there who may not have embraced it yet, and find it head-scratchingly complex. It may seem like a daunting task to learn for a beginner, but it’s surprisingly fun and easy to pick up, and with countless practical uses there’s no reason you shouldn’t have a go.
For this exercise, I’m going to assume you know diddly-squat about Redstone. The boring answer is that it’s Minecraft’s own brand of digital electronic circuitry, enabling us to make a variety of mechanisms. The fun answer is that it is used to power all sorts of awesome things like minecarts tracks, doors and lamps, to more complicated inventions such as elevators, vending machines and even (just about) working computers. And of course, how could we forget, all-glorious TNT. Really, the sky is the limit (quite literally in Minecraft I guess) to what you can create with Redstone, and it opens up a whole new exciting way to play the game.
To get you started on this wonderful journey of discovery, we’re going to make a simple piston door. Why are piston doors better than regular doors? They’re not really, but they look kind of cool and there is an immense sense of smug satisfaction when you walk through your own creation. So brush off those unused stacks of Redstone dust and let’s get started. There are many different methods out there, but this particular design is the easiest- we will need 10x Redstone dust, 2x Redstone torches, 4x Pressure Plates, 4x Sticky Pistons and 24x blocks of your choosing for the floor and door.
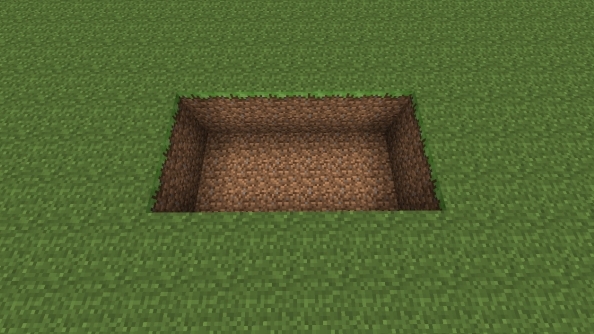
First step is to dig a hole. Six blocks wide, three blocks long, and two blocks deep. Simples.
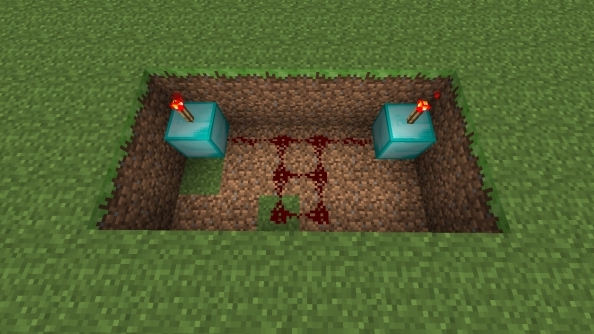
Step two, we place two blocks in the far corners (I used diamond here) with a Redstone torch on top of each- These torches are what power our door. Then connect the two blocks with a line of Redstone dust, and two more lines of dust running through the middle of the hole.
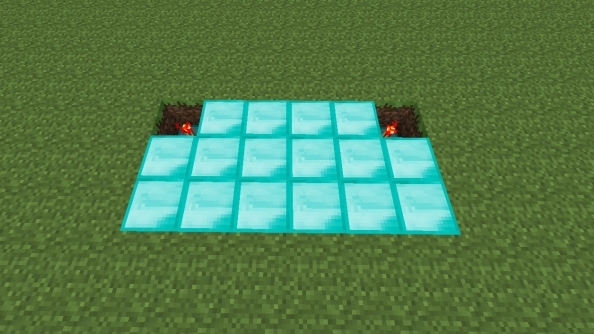
Step three, cover up the hole with blocks, leaving the Redstone torches visible. I used more diamond here to add a touch of class.
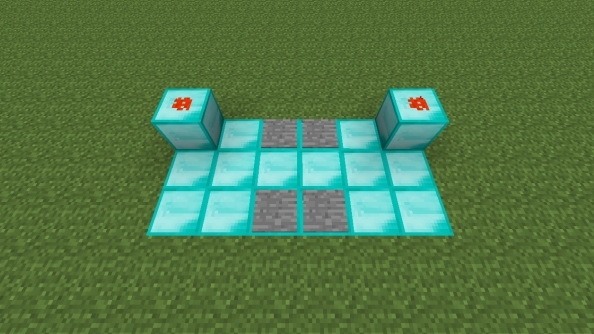
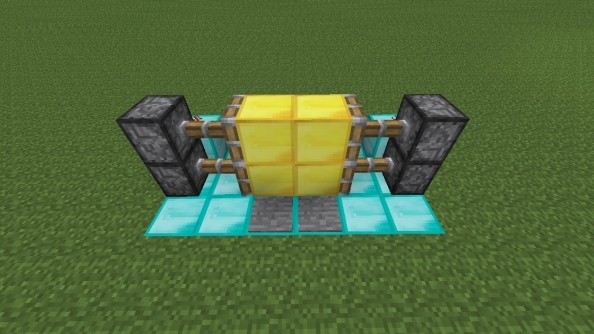
Step four, we place a block on top of each of the Redstone torches, and then place Redstone dust on top of these blocks. You will notice the dust lights up; the Redstone torches power the blocks above them, which thus powers the dust on top. We then place two pressure plates in-between our powered blocks, and two more on the opposite side, as shown in the picture. In Minecraft, if an already powered block receives another charge (say, from one of our pressure plates) it cancels out and turns off. This mechanic is important when using things called logic gates, but you don’t need to worry your pretty little head about those right now.
Step five, almost finished now! We put two sets of pistons next to our powered blocks, one on top of the other and facing inwards. If done correctly, they should spring into life. Hooray. Place blocks on the ends of the pistons to complete the door- I decided to be a little less ostentatious here and used meagre gold blocks for my door. When we stand on the pressure plates, it cancels the power given to the extended pistons, opening our contraption.
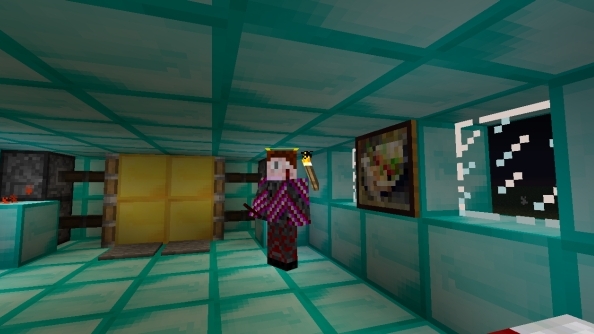
Give yourself a pat on the back, you’ve just made your very own piston door. All that’s left to do now is to implement it in a house or corridor. Here’s a snazzy pic of me chilling in my humble abode. Note the stylish diamond finish.
So now you’ve taken your brave first steps into the world of Redstone, and hopefully picked up a few tips along the way. The bigger and more complex your inventions get, the harder they are to build, of course- but really, all it takes is a little patience. Good luck, and happy crafting.
Main image from RichardRed15