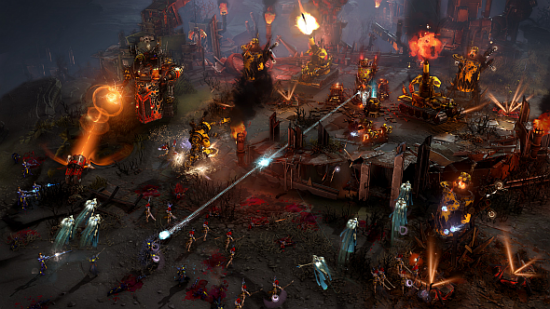
In the eternally calamitous universe of Warhammer 40K, war has dawned for the third time. It makes you wonder whether there’s ever really a dusk to this war. Do they take a break in the interim years, trade and maybe channel their rivalry into something more positive like Blood Bowl, or is Dawn of War III actually more like ‘Continuation of War’? In fairness, each Dawn of War has proved distinct from the last, and the third entry is a mechanical overhaul on what came before; a return to the base-splosive bombast of more traditional RTS games (with a hint of MOBA in the multiplayer). It’s fair enough to call it a New Dawn…
Read more: get the lowdown on all Dawn of War 3’s units.
And with new rules come new strategies for the players presiding over the stern Space Marines, rambunctious Orks, and the snooty, teleporting bastards known as the Eldar. So here are some handy tactics tips and tactics for each army that I’ve picked during my tumultuous time in the distant future.
Space Marines
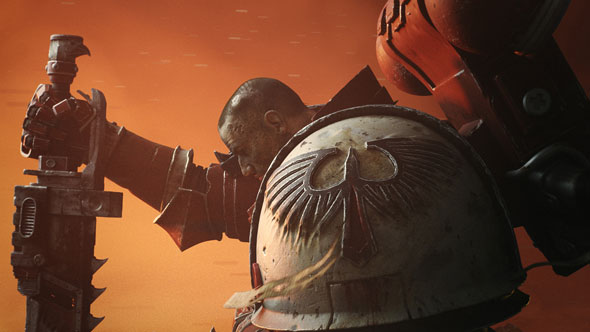
This is as close as you get to the boring all-rounders of the DoW III universe, which is to say ‘not close at all’. They’re sturdy in melees, and have a whole load of concussive moves that stun and knock back your opponents. Their major gimmick is the orbital relay, which lands drop pods at a place of your choosing, knocking back enemies and spawning units using an extra production queue (it also gives you one free complimentary unit on landing). Throw these down in areas that you expect to be hotly contested i.e. around resource nodes or near (but out of sight of) enemy bases.
Space Marine Strategy
Assault Marines are great for sending enemy infantry units into disarray by using their Leap ability that throw them into the thick of battle, and they’ll put up a hell of a fight in a melee thanks to their high DPS and HP. These guys are my preferred unit to throw down in drop pods.
The artillery-striking Whirlwind Tanks are beastly, and should be at the rear of any major assault by your forces – particularly when you attack bases or buildings, because they can remain out of sight of your enemy while delivering huge ‘heavy armour’ damage (most buildings are ‘heavy armour’). Try having at least four of them together, and feel free to use them to bombard enemy resource nodes from afar.
Use the Dreadnought in combination with your Assault Marines to send enemy infantry scattering, remembering to use its Slam ability to stun enemies and avoid getting swarmed. When you embark on these melee assaults, support them with a couple of Predatory Destructor Tanks to ensure you get those first hits in. Generally, tanks give Space Marines a huge advantage at very long distances, so be sure to exploit that.
Dawn of War 3 Space Marines Elite units
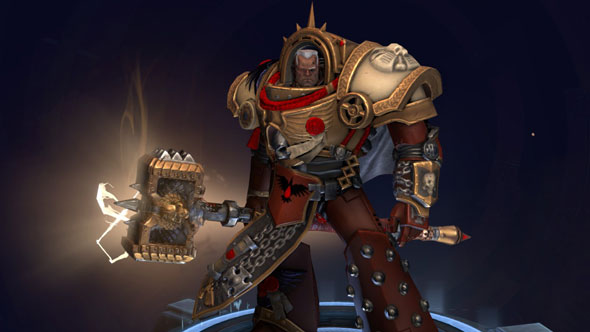
A man with shoulder pads so beefy that they’re higher than his head, Gabriel Angelos is macho enough to make even our resident manly man Simon Miller wilt like a daisy in the shadow of a flowering oak tree. His leaping God-Splitter ability is great for taking out defensive positions held by enemy ranged units. On the other hand, the more charges you clock up on God-Splitter, the longer your shield lasts when you use Retribution, which is worth doing if you’re in a longer combined-arms skirmish, and want to protect Gabriel and his fellow marines from distant ranged attackers.
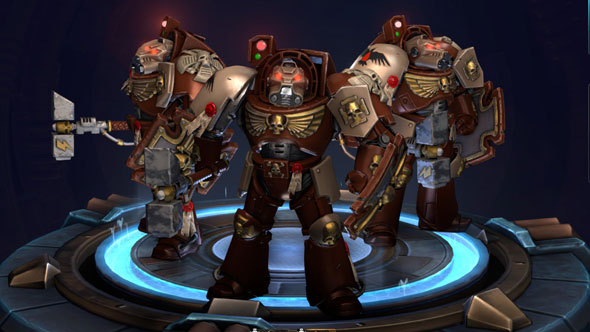
If I was to pick any fictional soldier-types from history to have as a personal bodyguard, the Assault Terminators would be up there – they just look so unwavering, so sturdy… But I digress. Ass Termies (as no one has ever referred to them) are lethal both at range with their miniguns and up close with their Thunder Hammers, so don’t be afraid to throw them into melees, particularly as they have the radial stunning Hammer Slam ability. With that said, they dish out more damage from a distance, so that’s how I prefer to use them. A good strategy is to teleport them around the rear of enemy lines and let them unload their miniguns to cause some serious havoc as the enemy is forced to deal with threats from two sides. When the enemy goes to meet you, whip out the Hammer Slam, then engage or teleport away depending on your health.
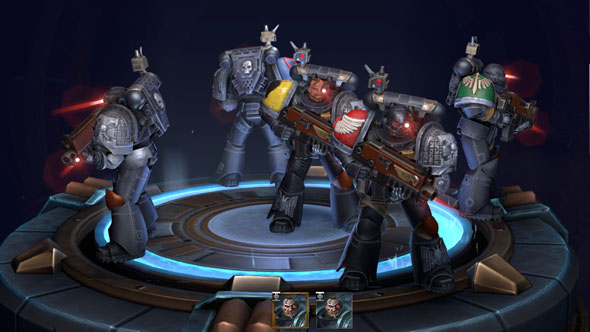
Kill Team Ironmaw aren’t glamorous, but remember that all those fancy mega high-level Elites might not even come into play by the time a battle is over, given how many Elite points they require, so focusing on the early game is arguably more important. Select a flamethrower upon deployment, use it on low-level infantry, then teleport away if the melee scuffle (which Ironmaw don’t excel in) gets too much. In the later game, save your Elite points for Assault Terminators instead of spawning these guys, as they’re basically the high-level badasses that Ironmaw wish they could be themselves.
Orks
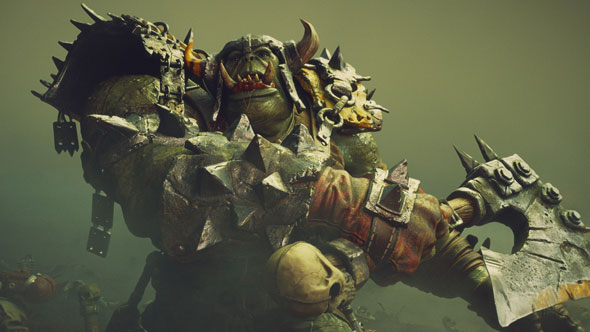
I’ve already swooned over the not-so-noble savagery of the Orks in my review, and awkward though they may initially be to play as, there are few sights in DoW III quite like a horde of heavily-armed Boyz, pumped up by the heavy metal music of WAAAAGH towers and armoured to their red eyeballs in collected scrap, rampaging into battle.
But their unique mechanics make the Orks tough to get to grips with when you’re up against other players (forget the campaign, online is a whole different arena). On the bright side, they’re cheap to build, so don’t hold back in sending swarms of them on your enemies. I suspect that with time Relic will rebalance them to make them stronger, but that’s all the more reason to acclimatise to their mechanics now, so when they are improved you’ll be coasting. Here’s how to overwhelm your opponents using this rabble of green-skinned mockney geezers.
Ork Strategy
Orks start out with the Boyz unit, which likes to rough it up in melees. It’s probably the best starting unit, capable of taking out rival starting units if you get the jump on them. So don’t be afraid to get stuck in there – ideally after upgrading them with some scrap (it’s crucial to always keep your units well fully upgraded with scrap).
Send a couple of Gretchins out with your raiding parties, keeping them out of the battles, but sticking around to turn the scrap left behind from battles into upgrades for your units. If all your units are well scrapped up already, turn the leftover scrap into vehicles (note that these vehicles won’t be as strong as ones made in buildings). You can also build WAAAGH towers using scrap, but generally you want to place these in quite specific positions (more on that in a bit) rather than wherever the scrap happens to fall, so I don’t generally recommend doing this.
The heavy infantry Nobz are a high-damage, high-health unit that, particularly under the influence of WAAAAGH, are one of the most devastating infantry units in the game. Use and abuse them as soon as you can, sending them in as frontline troops, closely supported by Trukkz so you can keep regenerating them. Speaking of which…
Trukkz are an absolute must. These yellow perils act as mobile reinforcing points, allowing you to heal depleted units at a small cost. Don’t hold back on spamming the ‘Reinforce’ option, particularly during battle, as that’ll keep your units constantly healing. Train yourself to select Trukkz and hit that ‘Reinforce’ button (‘R’ key) quickly until it greys out. You can also load up a Trukkful of units – melee units like Nobz and Boyz are best – then catapult them into the midst of ranged enemies. Be warned that Trukkz’ health isn’t huge, so don’t have them right at the front of the fray.
The Killa Kan is a unit that generates rockets (or ‘rokkits’) over time, then fires them off in quick succession when you use the ability. While it’s designed mainly for smashing vehicles and buildings, it’s also surprisingly effective against infantry. Upgrade them with scrap to increase their maximum number of rockets, and concentrate that fire on the enemy vehicle causing you most trouble in battle.
Orks are the only faction capable of building towers other than listening posts, in the form of the wonderful WAAAAGH towers. These are essential to any Orkish strategy, as they not only fire on enemies, but call in scrap for upgrading your units, rouse surrounding units when they charge into battle, and are responsible for upgrading your army. Build them at locations where you’ll be seeing a lot of action. At the start of a match, build a WAAAGH tower on the centre of the map and set it as a rally point for your troops to establish an early dominance.
Dawn of War III Ork Elite units
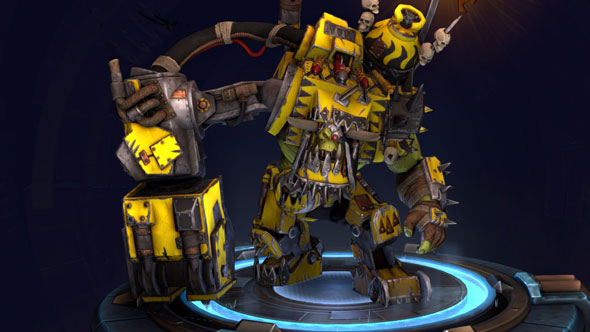
Ork leader Gorgutz is a big, tanky melee unit who can quickly close distances with his Grapplin’ Claw. This way, he can quickly wipe out a couple of squads himself (more if you use his Spinning Claw ability), but also stuns enemies so your Boyz and your Nobz can quickly and brutally follow through and charge them down.
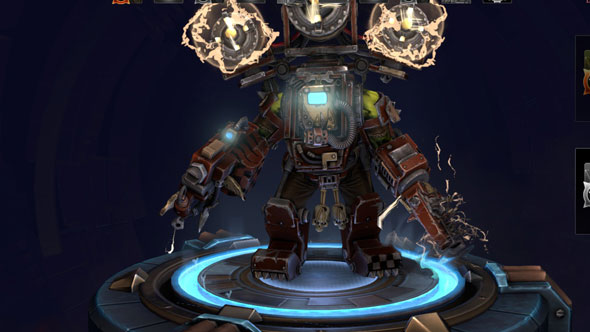
Big Mek Wazmakka’s Traktor Beam slows enemy units, so is particularly effective against those elusive Eldar and their Elites. It also buffs your own units. Orbital Scrap meanwhile, is sort of like a mini artillery strike, dishing out decent damage, and generating scrap while it’s at it. This is particularly useful if you’re in the middle of a large skirmish, as you can then use Wazmakka’s Scrap Turrets ability to – would you believe it – turn scrap into temporary turrets.
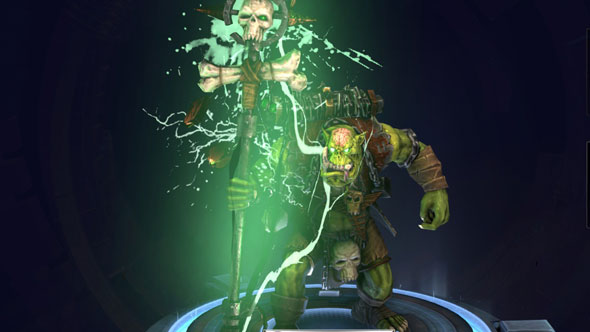
The thinking Ork’s Ork, Weirdboy Zapnoggin is the caster of the Ork faction, and one of its most effective elites. His teleporting Ere We Go ability is great for getting out of those melees you want to avoid, as well as zapping him near skirmishes so he can unleash his Scrap Blast, which damages the enemy in a cone while healing your own Boyz. I’ve seen this move wipe out a squad of Space Marines in a single blast, and it only has a 20-second cooldown too! The caveat is that Zapnoggin is, in RTS parlance, squishy. As in he squishes easily. So don’t have him hanging around for melees too much.
Eldar
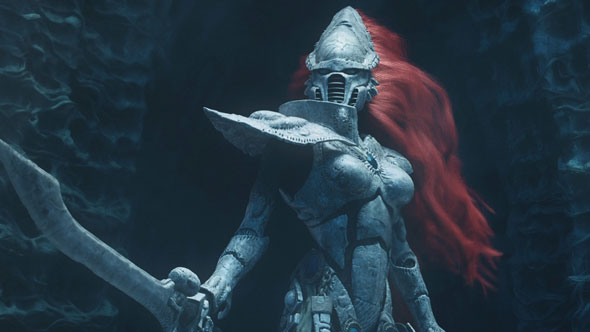
The dainty space elves start off weak, and will require you to be savvy with your micro-management to get them functioning half-well. One you get over the hump though, you’ll find that they really come into their own (teetering on overpowered even, though it’s too early to say at this point). They move extremely fast, and their teleporting abilities make them capable of cropping up by the legion-load in unexpected places around the map. Naturally, you’ll need learn how to utilise these unique skills to get the most out of them.
Eldar Strategy
Eldar start off with the relatively weak Ranger units, but if you use their plasma grenades wisely, you’ll be able to take out their Space Marine and Ork counterparts. Also, these Rangers use stealth automatically, so use them to uncover enemy territory then stay there to monitor their activity on the minimap. They’re scouts rather than soldiers.
Eldar infantry move exceptionally fast, and are endowed with Battle Focus – shields that regenerate when you’re not in battle. Once the shields deplete however, Eldar infantry become very vulnerable, so ‘hit and run’ tactics work best for them. This is all the more important because they’re expensive to build. Deal some damage to your enemies, then if they start dragging you into melee brawls, get out of there.
As early as you can in a match, use the Bonesinger’s Warp ability to zap yourself to the nodes around the centre of the map. There’s no way your enemies will get to those central nodes sooner than you (unless they use this same trick), and it gives you a crucial early territorial advantage.
Eldar vehicles are, from my experience, crap. Next.
The Wraithguards may move slow, but it’s only because they don’t have to move for anybody (not entirely true, but close enough to warrant a Goodfellas reference). Their huge health and armour bars, along with pulverising but slow-charging laser blaster thingies, make them formidable and frustrating opponents. Having four of them in a defensive position will decimate squads-worth of enemies before they can even get close. They’re great against both heavy armour and infantry, though if I have Shadow Spectres in the battle, I’ll focus the Spectres on attacking buildings, leaving the Wraithguards to take out dangerous enemy vehicles. Be sure to use their Infinity Portal ability to recall them if they get close to death, because rebuilding them is horribly expensive.
The floating Shadow Spectres are as elusive as they come, flying around the battlefield irrespective of terrain. Their damage output increases the longer you continuously attack a single unit or structure. This, along with their Heavy Armour damage bonus, makes them perfect for targeting vehicles and buildings. If you get caught while laser-beaming a building, you simply fly away. Beautiful.
Eldar can teleport their buildings around the battlefield, so take advantage of that. The most important building to do this with is the Webway Gate, which you’ll always want to have fairly close to your frontlines to boost your infantry’s shield regeneration and speed. You can also move other structures around, but in games where every second counts, you’re better off setting up Webways between your home base location and webway gates on your frontlines, so you can quickly get your troops to, and away from, key locations around the map – namely resource nodes (due to the general expense of building things as Eldar and said teleporting, you shouldn’t bother with building many forward bases).
Dawn of War III Eldar Elite units

You’ll be spending a fair bit of time with Eldar leader Farseer Macha, so you should probably get used to her and her ethereal ways. Being a caster type, she’s fragile, but can at least dole out better than she gets. Her Singing Spear deals considerable damage in a straight line, then when it reaches its location it boosts surrounding Eldar units. Activate the ability again to call the spear back in, ideally making sure there are enemies in the way so it damages them on the way back.
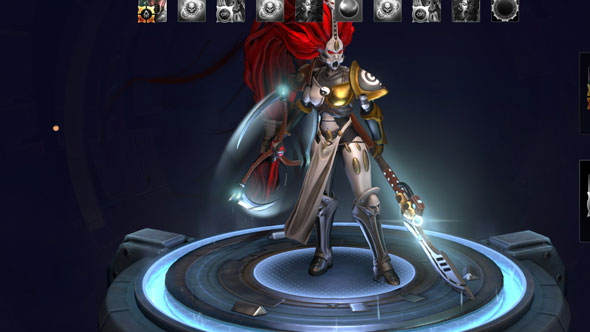
Jain Zar is fiendishly fast, and is particularly lethal when charging into battle (best accompanied by a bunch of Howling Banshees) thanks to her passive abilities that bolster the speed and battle focus of her allies, while slowing enemies down. Use her to spearhead melee assaults, but don’t leave her hanging around in the fray for too long because she’s fragile beyond that initial moment of impact. She’s useful in the early stages of a game alongside Howling Banshees to cause havoc amidst enemy infantry.
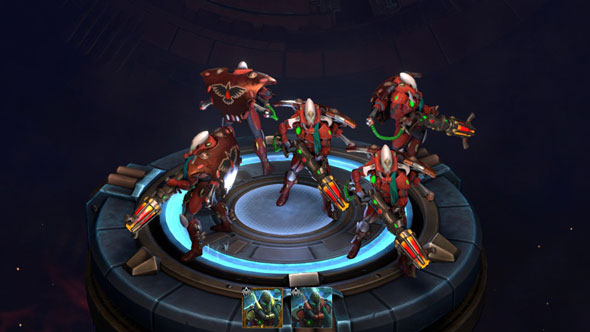
Despite their cyborg ninja appearance, Warp Spiders are, like many things Eldar, gentle creatures, but can drop teleports to send your fleet-footed army gallivanting through, making them fantastic for ambushes. Send them towards an enemy force, drop a portal, attack that force from range, then when the enemy charges you, send your Howling Banshees through the portal to intercept the attackers (ideally, equip your Banshees with the excellent Improved Scream upgrade, and a well-timed Quick Strike ) while the Spiders blast them from afar.
That does it for our tips – now it’s over to you. We want to hear about your own personal strategies and advice, so let us know about them below.
