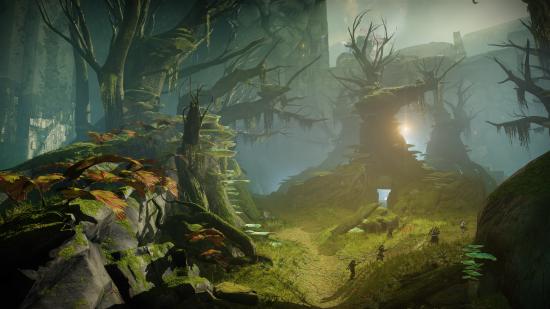
How do you complete the Destiny 2 Garden of Salvation raid? The raid, added in the Shadowkeep expansion, takes place in the Black Garden and pits you against several tough bosses, all of which you’ll need to take down to best the Vex. Raids are Destiny’s endgame activity and require you to recruit five other pals to complete a series of puzzles and boss fights that escalate in difficulty. The rewards are weapons and armor that boast a visual flair in tune with the theme of the raid.
There are several Destiny 2 Exotic weapons to earn, which typically stand above the rest regarding power. Raids do, however, differ in size and scope. Luckily for us, Shadowkeep was one of Destiny 2’s mainline expansions, and the Garden of Salvation is a suitably gargantuan slog. If you think about Forsaken’s Last Wish raid, you’re probably in the right ballpark.
To help you battle through this Vex-riddled gauntlet we’ve assembled a handy Destiny 2 Garden of Salvation raid guide, walking you through the mechanics present in every encounter so you can figure out where you’re going wrong.

First encounter – Evade the Consecrated Mind – Embrace
Here’s how to beat the first encounter in Garden of Salvation:
- Create a tether chain to the Vex barrier to begin
- One group pushes to the next barrier, killing the Angelic on the way, and tethering to open the barrier
- Second group stays near Consecrated Mind to collect Voltaic Overflow
- When Consecrated Mind moves, the second group pushes ahead to the new area
- Continue collecting Voltaic Overflow and tethering to open barriers
- When you reach the open field, collect Voltaic Overflow and run to the other side to complete the encounter
First things first, don’t worry about the massive boss, as you won’t be able to do much to it. Instead, your team will need to tether themselves and connect the tether from a floating cube all the way to a force-field door.
Once open, half the raid team needs to stay and the other three should head through the newly opened door. The team that stays need to focus on clearing ads rather than battling the boss. Watch out for a vomit attack that spews a weird digital mess onto the ground, as you will need one of the three teammates to run over it and collect the Voltaic Overflow buff, which lasts for a couple of minutes. Key point: if you get a second buff you’ll die, so you need to spread the buffs out around the trio. If you don’t pick up one of these buffs, everyone dies.
The trio that heads through the door needs to surge forward slaying every single ad they come across, which prompts the boss to move. In the next room there are some Overflow enemies and an Angelic – after defeating the Angelic there’s another digital box to tether to yet another door. After this the two teams swap roles, so the team who moved through the first door need to stay put, while the team who were mopping up digital vomit initially need to push into the next area. This continues a few times before you’re in the last room.
In the final room the whole raid team is together and you will have three digital boxes to tether together, which opens the very last room. You’ll want as much ad clearing as possible to defeat the cavalcade of goblins and Cyclops enemies around. Your sole focus is to charge through this area, killing as you go, but you have to keep up with the fleeing boss as it’s still spitting out Voltaic Overflow, which you need to survive. Make it far enough and a reward chest will spawn signaling the close of the first encounter.

Second encounter – Summon the Consecrated Mind – Undergrowth
Here’s how to beat the second encounter in Garden of Salvation:
- Kill the goblins in the center to begin
- Two players defend the totem and four players rotate to the next one
- Four players clear the second totem and leave one player to defend, the rest continue
- Three players clear the third totem and leave one player to defend, the rest continue
- Two players clear the fourth totem and leave one player to defend
- One player from the first totem and the last player float between the totems to help clear enemies
- These floating players also refresh the Enlightened buff
- Each totem will be attacked by Angelics, there are 12 in total
- After defeating all Angelics the center barrier will drop
- All players head to the center and defend the final totem until the encounter is cleared.
You can access the second encounter by shooting lily pads and jumping across them, eventually spitting you out in a new arena with yet another tethering mechanic. Your job is to defend four of the tether points, with one person on each tether point, and two people hopping between multiple tether points.
You’ll have a bunch of Angelic enemies to kill and when you defeat one it will unlock the tether point, allowing you to shoot it and tether yourself to it. There’s a catch though: the tether isn’t long enough, so you’ll need two players to link each anchor point. This will grant you a new buff called Enlightened, which will last for 45 seconds and will be crucial for breaking through the immune shields of the next wave of enemies, which is an onslaught of Vex ads charging at the tether points in an effort to destroy them.
You need to keep rotating the buff so everyone is able to defeat these enemies, as if too many break through you’ll wipe. This is why you have two roaming teammates who can keep swapping between the tether points so the buff is constantly being reapplied.

Keep to this pattern and eventually, barriers in the middle of the arena will open up, so everyone can drop what they’re doing and rush to the centre with a shiny new tether point to defend. There will still be new Angelic enemies and some of the immune suicide enemies, so you need to tether everyone to the centre tether point so that you all share the buff. Keep going and a new loot chest will spawn.
Third encounter – Defeat Consecrated Mind
Here’s how to beat the third encounter in Garden of Salvation:
- Create a tether to start the encounter
- Three players head to the bank and kill Minotaurs
- Collect the motes they drop and deposit them
- Three players follow Consecrated Mind
- One player collects Voltaic Overflow and calls out when its eyes turn red and whether they’re inside or outside
- Switch roles if all three players have Voltaic Overflow
- When 30 motes are collected follow the boss
- Shoot all red eyes to stun the boss
- Shoot the center of the boss as it retreats
- Repeat until Consecrated Mind’s health bar is depleted
The next encounter starts exactly where the last one ended. Once again, link all six members in the centre to one of the distant tether points, which will prompt the boss from the first encounter to spawn in the middle. Once again, you can’t hurt the boss, and you’ll need to avoid a lot of damage until the boss moves around. You need to be able to call these movements out to your team as wherever the boss goes, you need to follow as it will perform the Voltaic Overflow wipe mechanic wherever it heads.
You need to divide your team in two, with one group staying to juggle the boss and its wipe mechanic, and the other group in charge of collecting Voltaic Motes and dropping them off at the lit-up tether point. This will grant the Enlightened buff and after collecting roughly 30 Voltaic Motes a boss damage phase will open up.
Now back with the boss trio, who need to be tracking the boss at all times. Follow the boss, and make sure one player collects the digital vomit buff – and only one player at a time – while the other players take up positions on either side. This time the buff is a bit different, thanks to a new Detained mechanic, so whoever is buffed is also trapped in place. At this point, the boss opens up and the buffed player will see which set of lights the team needs to shoot – it’s vital they make this call to the team as shooting the wrong lights will get the buffed player killed.
The easiest call is either inner or outer, and you only get a couple of seconds to get this right. This will cause the boss to flinch, so you can head back to the middle, rinse, and repeat. Just be sure to rotate who is buffed. At one point, all three players will have the buff, so be ready to call out to a member of the other trio so you can trade places. If you die the buff will also reset, so if you’re comfortable using your respawn tokens then feel free to just die and revive.
There will be deaths for the tether point team owing to the sheer number of ads, so just stay agile and above ground as much as you can. Grenades and ad-clearing powers will help you clear packs of enemies on the move.
Keep going until you get a text alert letting you know that the boss is heading to the overloaded tether point, at which point you all just rush there and dish out as much damage to the boss as possible. You need to hit all of the red lights, and then you need to focus fire on the centre light, which is a crit point. The boss will flee and you can’t get too close, otherwise, a wipe mechanic will get you, so use snipers, wells, and grenade launchers to do damage from a distance. Eventually, you’ll take the boss down and it’s time to move onto the final encounter. Except for the move to the final encounter is a slog of jumping puzzles and ads, so settle in.
Final Encounter – Defeat Sanctified Mind
Here’s how to beat the final encounter in Garden of Salvation:
- Shoot the boss to begin the encounter
- Defeat enemies and kill the Angelics
- Destroy the boss’ weak point and send players through the portal to collect motes
- When each player has 15 motes destroy the weak point to bring them back
- Deposit the motes in the totem
- When the boss shows orange or blue plus symbol, make a tether on the correct side
- When it breaks, make a tether with the opposite totem
- Deal damage to the Sanctified Mind
- Repeat all steps until his health bar is depleted
The final Garden of Salvation raid encounter is very tricky, and you will likely die to some of the battle mechanics without it really being your fault – there are a lot of moving parts and very little room for error. Boss resist and Void damage resist are must-haves here, and any survival supers will keep you going. You will be battered by missiles constantly, so any respite is worthwhile.
Stay alive for a bit and you’ll notice several enemies and an Angelic enemy, kill this guy, and two glowing spots will light up on the boss, one red on the shoulder and one blue on the leg. Shooting these will open up a corresponding portal on the map. Whichever portal you open up transports you to a new area with heaps of ads to clear that will drop Voltaic motes. Shoot the red shoulder light on the boss and you’ll get red motes to deposit at a red tether point back in the boss arena. The other light and motes are blue.
The best way to do this is to split into three teams of two, with two staying put to clear mobs, repair the arena floor (more on this below), and open up portals, one team of two heading into the first portal, and the final team of two jumping into the same portal when the first duo return. If four players head into the same portal they should emerge with enough of the same colour mote to power up one tether point. After this, switch to the other colour portal.
The benefit of this is that each portal also spawns a Cyclops, which is a massive pain, so fewer is always better. When you bank your motes you’ll gain the Enlightened buff, which is important as you’ll once again have to deal with immune enemies who are charging at the tether points. If you have the Enlightened buff, make sure to spend a few seconds spraying any immune shielded enemies and removing their shields, as this will allow non-buffed players to finish them off.
Quick thing to note: you may need to send a third duo into the portal as it’s easy to lose one or two motes to missing ads inside the portals or goblins who have managed to sacrifice themselves in the boss arena.
For the team in the boss arena, be on the lookout for collapsed areas of the arena – the boss will delete parts of the arena as the fight progresses, and don’t get caught in the area as it’s deleted or you’ll be instantly killed.
How do you repair the floor in the Garden of Salvation raid?
You can repair these by tethering to the active tether point and tethering a squad mate so they can bridge the gap between the active tether point and the tether point near the deleted area – this is easiest to do when you have a quiet moment.
Damaging the boss
After you’ve got all of these parts moving and you’ve loaded up both the red and blue tether points with 30 motes each, the fight will progress to the damage phase. Here the boss will stop attacking and start creating a new tether point that is either orange or blue. Depending on which colour it is, your team needs to make a tether from the corresponding tether point (orange to the right, blue to the left). This can require four players so be ready to drop everything and quickly form the tether.
When that connection is made it will stun the boss and then you can start pouring on with all of your most powerful weapons. Snipers tend to work well here as it’s a long range, so aim for the glowing crit spot in the boss’s midriff and keep shooting until the damage phase is over.
Now it’s a case of rinsing and repeating three or four times, and whichever new tether point the boss creates, simply tether it to the opposite point you went for during the first damage phase.
And there you go, everything we know about the Destiny 2 raid Garden of Salvation. If you’re looking for a more recent raid to run with your fireteam, why not check out our complete guide to the Destiny 2 Root of Nightmares raid?
