Want to know what the best builds are for each class in Diablo 3 season 23? With the new companions update, a lot has changed when it comes to speccing your followers with decent skills, but it’s important not to forget about your own character’s build.
Each one of the playable characters in Diablo 3 has tons of ways that you can mix up their skills, passives, and equipment to turn them into a damage dealing machine. That said, the classes are very good at specific tasks: Wizards love flinging spells to obliterate their foes, Crusaders prefer smashing demon faces with divine justice, and Necromancers, well, they love their ‘pets’ don’t they?
Our Diablo 3 season 23 build guide gathers our favourite builds across a select few Diablo 3 classes. Each one has a list of the skills you need to spec into, the build items you’ll need to forage from very specific locations, and the global stat priorities you’ll need to take to optimise your build. The builds are listed in order of how viable they are. Not every class has builds that are massively efficient in season 23, so currently we aren’t listing any builds here for Barbarians, Monks, or Demon Hunters. We may add them at a later date if more are discovered.
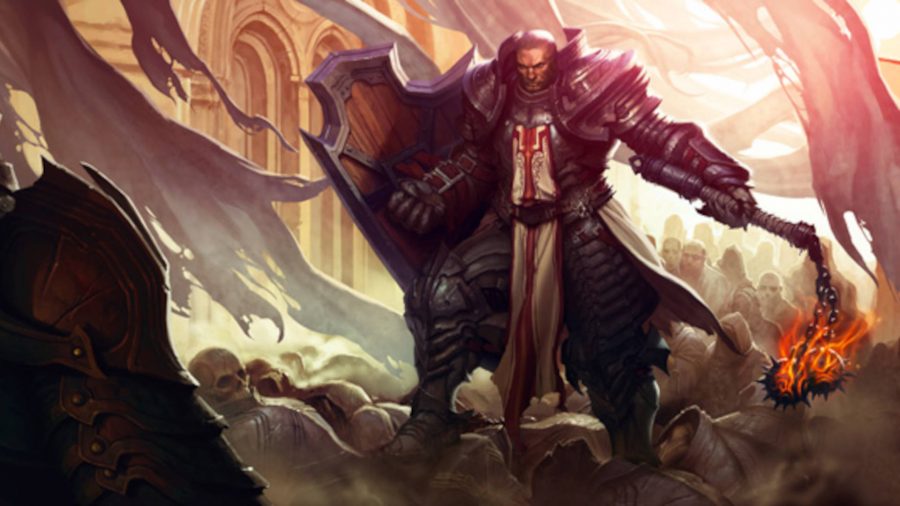
Diablo 3 Aegis of Valor Heaven’s Fury Crusader build
This build comes from Northwar and is a fantastic Crusader build that excels in solo play. It aims to buff damage by up to a whopping 20,000%, particularly with the Heaven’s Fury skill. It’s one of the two strongest solo Crusader builds in the game, despite a few nerfs along the road. Fist of the Heavens also sees some small upgrades with the items equipped.
That said, it does limit your skill choices, has some rather clunky support items, and if your enemies resist being crowd controlled, then you could have some issues getting the ball rolling. As long as you’re using Fist of the Heavens once every five seconds, you’ll retain the bonus.
Aegis of Valor Heaven’s Fury Crusader skills
- Heaven’s Fury: Fires of Heaven – your main source of damage
Fist of the Heavens: Fissure – necessary to activate your Aegis of Valor bonuses - Judgement – for activating Bracer of Fury bonus damage
- Laws of Valor: Unstoppable Force – provides 50% resource cost reduction, allowing you to spam Heaven’s Fury against even single targets. Benefits from 50% damage taken from enemies thanks to Captain Crimson’s Trimmings
- Akarat’s Champion: Prophet – pretty much required for any Crusader build as it provides 35% DPS, over double toughness, crowd control immunity, wrath regeneration, and a full heal when you fall in battle
The last skill slot is free; it’s likely to be either Iron Skin: Flash for the buff to movement and damage taken from enemy attacks, or you could opt for Steed Charge if you’re prioritising speed
Aegis of Valor Heaven’s Fury Crusader passives
- Heavenly Strength – reduces cooldown rate (use with two-handed variants)
- Fervor – reduces cooldown rate (use with one-handed variants)
- Holy Cause – main source of recovery and a damage boost
- Long Arm of the Law – Gives Laws of Valor – Unstoppable Force 100% uptime
- Finery – provides 15% additional DPS and 12% toughness
Aegis of Valor Heaven’s Fury Crusader build items
- Aegis of Valor set: provides 50% damage reduction, nearly infinite Wrath, and a huge +1,600% damage increase to Heaven’s Fury
Captain Crimson’s Trimmings: gives 60% DPS increase and over 100% toughness - Ring of the Royal Grandeur: required to get the full benefit from the armour sets
- Fate of the Fell: increases Heaven’s Fury damage by 500% and adds two extra beams. Enables Fires of Heaven to have all three beams hit the same target
- Shield of Fury: increases Heaven’s Fury damage by 300%
- Bracer of Fury: increases Heaven’s Fury damage by 400%, but only against enemies affected by some crowd control effects
- Convention of Elements: increases overall damage output by over 150% if crowd control is overlapped with Holy as part of the cycle
How to assemble the Aegis of Valor Heaven’s Fury Crusader build
How to get the Aegis of Valor Heaven’s Fury Crusader build:
- Companion: Enchantress
- Complete the Challenge Rift for materials to use with Kanai’s Cube to get Legendary Powers. The cube can be completed once a week to get additional resources
- Gamble using Blood Shards at Kadala to get the full Aegis of Valor armour set. If you get any duplicate pieces, do not salvage them. Instead you can convert them with Recipe 4 in Kanai’s Cube. Extra materials can be used with Recipe 3 to make the remaining pieces, but this is very expensive
- Gamble from Kadala for the following:
- Bracer of Fury
- Shield of the Steed
- Shield of Fury
- Nemesis Bracers
- Goldwrap
- Craft using Kanai’s Cube with Recipe 3 for:
- Flail of the Charge
- Fate of the Fell
- Obsidian Ring of the Zodiac
- Complete bounties for:
- Ring of Royal Grandeur (Act 1)
- Gloves of Worship (Act 2)
- Avarice Band (Act 3)
- Act 4 drops any bounty item from any act
- Turn in the bounties for recipes for:
- Captain Crimson’s Trimmings
- Cain’s Destiny
- Sage’s Journey
- Farm Nephalem or Speed Greater Rifts to get the rest of the items for the build
Aegis of Valor Heaven’s Fury build global stat priorities
- 55% cooldown reduction (for Akarat’s Champion)
- Defensive slots should have Vitality and All Resistance
- DPS stats wherever possible – Holy damage increase, Critical Hit damage, Critical Hit chance, and Heaven’s Fury Damage
- Ignore Area damage
Diablo 3 Masquerade Bone Spear Necromancer build
This is by far Diablo 3’s strongest Necromancer build thanks to a number of changes and additional items that have been added since it was first discovered. Discovered by Northwar, this build is easy to gear up, has great area-of-effect damage, and no long cooldowns.
You will need to actively play the game to use this build effectively, and it takes a while to master due to the need to position yourself and your minions well. It doesn’t do massive damage to a single target, but shines against hordes of foes.
Masquerade Bone Spear Necromancer skill
- Bone Spear – your main source of damage; it gains massive buffs from most of your gear
- Simulacrum – it can use any rune as you’ll get all of them via the Masquerade of the Burning Carnival bonus (2)
- Grim Scythe: Frost Scythe – generates essence and attack speed. Allows you to create more Bone Spears in the Poison – Convention of the Elements cycle
- Bone Armor: Dislocation – provides 30% damage reduction and activates a couple of items in the Poison – Convention of the Elements cycle
- Blood Rush: Metabolism – for mobility and defensive buffs
- The last skill slot is always going to be a curse of some kind. Simulacrum – Cursed Form gives you all the base effects, but you can choose which one to give the special effect to. In group settings, you’ll want to go with Frailty – Early Grave unless you’re running Captain Crimson’s Trimmings. That said, Decrepify is the best, with the following runes attached:
- Wither – for Aughlid’s Authority
- Enfeeblement – for Brigg’s Wrath
- Borrowed Time – for Captain Crimson’s Trimmings
Masquerade Bone Spear Necromancer passives
- Bone Prison – extra stuns to trigger Krysbin’s Sentence
Serration – use alongside Zei’s Stone of Vengeance to give more ranged damage - Stand Alone – doubles armour
- Spreading Malediction – DPS passive for use in groups
Masquerade Bone Spear Necromancer build items
- Masquerade of the Burning Carnival set: provides 83% damage reduction and 70,000% increase to Bone Spear damage while your Simulacrum is active
- Haunted Visions: makes your Simulacrum last forever
- Maltorius’ Petrified Spike: doubles Bone Spear cost, but increases damage by 700%.
- Scythe of the Cycle: +400% damage for Bone Spear
- Krysbin’s Sentence: +300% damage to enemies affected by hard crowd control and 100% bonus against slowed enemies
- Gelmindor’s Marrow Guards: +400% increased damage for Bone Spears fired by your simulacrums
How to assemble the Masquerade Bone Spear Necromancer build
How to get the Masquerade Bone Spear Necromancer build:
- Companion: Scoundrel
- Complete the Challenge Rift for materials to use with Kanai’s Cube to get Legendary Powers. The cube can be completed once a week to get additional resources
- Gamble using Blood Shards at Kadala to get the full Masquerade of the Burning Carnival armour set. If you get any duplicate pieces, do not salvage them. Instead you can convert them with Recipe 4 in Kanai’s Cube. Extra materials can be used with Recipe 3 to make the remaining pieces, but this is very expensive
- Gamble from Kadala further to get:
- Gelmindor’s Marrow Guards
- Goldwrap
- Daynetee’s Binding
- a legendary Phylactery (Lost Time is best)
- Steuart’s Greaves
- Nemesis Bracers
- Convention of Elements
- Krysbin’s Sentence
- Craft using Kanai’s Cube with Recipe 3 for:
- the two-handed scythes to nab Maltorius’ Petrified Spike
- one-handed scythes for Scythe of the Cycle
- Convention of Elements and Krysbin’s Sentence for rings
- Haunted Visions and Squirt’s Necklace for amulets
- Complete bounties to grab:
- Ring of Royal Grandeur (Act 1)
- Gloves of Worship (Act 2)
- Avarice Band (Act 3
- Act 4 drops any bounty item from any act
- Turn in the bounties for recipes for:
- Captain Crimson’s Trimmings
- Aughild’s Authority
- Sage’s Journey
- Cain’s Destiny
- Farm Nephalem or Greater Rifts to find the Haunted Visions. You could craft it by using Upgrade Rare in the Cube, but the best way to get one is to party up with other Necromancers and ask them to drop any duplicate Haunted Visions they find.
Masquerade Bone Spear Necromancer build global stat priorities
- Poison damage
- Critical Hit Chance/Critical Hit Damage
- Area Damage
- Attack Speed
- Bone Spear Damage
Diablo 3 Firebird Mirror Image Wizard build
For the longest time, the Firebird’s Finery was overlooked as a weak and clunky set, but the latest patch has brought it a new lease of life. Like the Phoenix rising from the ashes, this build has been reborn into the best Wizard build currently available.
Created by Chewingnom, this is a high DPS build that excels at melee range, and has some easy-to-get parts. It is a little vulnerable to crowd control and it has limitations to how much DPS it can deal since area-of-effect damage doesn’t trigger the Ignite buffs, but if you’re looking for a fast-paced game, this is your best bet.
Firebird Mirror Image Wizard skills
- Disintegrate – this is the main skill of the Firebird Mirror Image build. Hits monsters to apply Ignite and Combustion stacks to reduce your Teleport cooldown and buff Ignite triggers
- Spectral Blade: Flame Blades – here for your Mirror Images, and deals up to 30% fire elemental damage
Mirror Image: Duplicates – your main damage source alongside Explosive Blast. - Explosive Blast: Chain Reaction – combined with Mirror Image, it hits for lots of damage, triggers the Firebird’s Finery Ignite bonus, and has no casting animation
- Teleport – your mobility skill that is affected by Firebird’s Finery to reduce its cooldown significantly
- Magic Weapon: Deflection – use this to generate shields and protect the Squirt’s Necklace damage multiplier
Firebird Mirror Image Wizard passives
- Galvanizing Ward – works with your bracers to protect your HP and a 100% damage multiplier that works with Squirt’s Necklace
- Elemental Exposure – separate and global multiplier that debuffs each target once for each element for five seconds when you hit them
- Audacity – 1.3x multiplier if target is within 15 yards of you
- Evocation – gives 20% cooldown reduction and a damage boost that works with Captain Crimson’s Trimmings
Firebird Mirror Image Wizard build items
- Firebird’s Finery set: provides 80% damage reduction, 5,000% damage multiplier, and grants the Ignite DoT mechanic that’s central to the build
- Deathwish: a staple item for any channeling Wizard, as it gives a 325% separate damage multiplier
- Orb of Infinite Depth: 80% damage reduction and 40% separate damage multiplier wherever you use Explosive Blast
- Squirt’s Necklace: another staple item for Wizards. It protects your HP for 100% a global separate damage multiplier with constantly refreshing shields
- Ring of Royal Grandeur: compliments Firebird’s Finery with the other sets.
- Captain Crimson’s Trimmings: 20% cooldown reduction, as well as additional damage and toughness bonuses
How to assemble the Firebird Mirror Image Wizard build
How to get the Firebird Mirror Image Wizard build:
- Companion: Scoundrel
- Complete the Challenge Rift for materials to use with Kanai’s Cube to get Legendary Powers. The cube can be completed once a week to get additional resources.
- Gamble using Blood Shards at Kadala to get the full Firebird’s Finery armour set. If you get any duplicate pieces, do not salvage them. Instead you can convert them with Recipe 4 in Kanai’s Cube. Extra materials can be used with Recipe 3 to make the remaining pieces, but this is very expensive.
- Gamble from Kadala further to get:
- Etched Sigil
- Orb of Infinite Depth
- Ranslor’s Folly
- Nemesis Bracers
- Goldwrap
- Obsidian Ring of the Zodiac
- Rechel’s Ring of Larceny
- Craft using Kanai’s Cube with Recipe 3 for:
- Create a level 1 Demon Hunter and upgrade swords to get In-geom
- Create a level 1 Witch Doctor and upgrade Maces to get Echoing Fury
- Obsidian Ring of the Zodiac and Rechel’s Ring of Larceny for rings
- Complete bounties to grab:
- Ring of Royal Grandeur (Act 1)
- Gloves of Worship (Act 2)
- Avarice Band (Act 3)
- Act 4 drops any bounty item from any act
- Turn in the bounties for recipes for:
- Captain Crimson’s Trimmings
- Aughild’s Authority
- Sage’s Journey
- Cain’s Destiny
- Farm Nephalem or Greater Rifts to find the Squirt’s Necklace. You could craft it by using Upgrade Rare in the Cube, but the best way to get one is to party up with other Necromancers and ask them to drop any duplicate Haunted Visions they find.
Firebird Mirror Image Wizard build global stat priorities
- Critical hit chance/Critical hit damage
- Fire damage
- Cooldown reduction
- Vitality
- Life
- Armor (chest and pants sockets)
- Crowd Control reduction
Diablo 3 Mundunugu Spirit Barrage Witch Doctor build
The best Witch Doctor build is a bit of a step down from the other three mentioned, but if you’re able to get the items required, it’s a very good build for dishing out damage to large groups of foes. Created by Wudijo, this build requires some familiarity with the Witch Doctor class to play effectively.
It has a unique playstyle with an incredible area-of-effect damage rate (and some spectacular explosions to boot), but is not well suited to single targets. So if you understand how the Witch Doctor class works well and are familiar with how the Spirit Barrage – Phantasm skill works with The Barber, then you might want to consider speccing into this build.
Mundunugu Spirit Barrage Witch Doctor skills
- Spirit Barrage: Manitou – this is the main skill, and the Phantasm variant is free when you have Gazing Demise equipped
- Locust Swarm: Pestilence – Enables Ring of Emptiness effect
- Spirit Walk: Jaunt or Severance – this is for movement. Activates Mundunugu’s Regalia’s equipment bonus
- Big Bad Voodoo: Ghost Trance – small damage boost and keeps you alive. Change to Boogie Man variant for zombie dogs, or just equip Summon Zombie Dogs instead
- Soul Harvest: Languish – grants you damage buffs and reduces taken damage when used with Sacred Harvester and Lakumba’s Ornament
- Typically, the last slot is for Piranhas – Piranhado to apply debuffs and pull in enemies for massive AoE damage. Sacrifice – Provoke the Pack gives a damage buff instead
Mundunugu Spirit Barrage Witch Doctor passives
- Rush of Essence – provides infinite resources
- Grave Injustice – reduces cooldowns when you kill enemies
- A choice between Swampland Attunement, Blood Ritual, Spirit Vessel or Bad Medicine
Mundunugu Spirit Barrage Witch Doctor build items
- Mundunugu’s Regalia set: provides 20,000%+ damage bonus to Spirit Barrage
- Ring of Royal Grandeur: allows you to wear the Captain Crimson’s Trimmings set using the belt and one other piece of your choice
The Barber: the main item for this build that gives a whopping 500% damage bonus. This effect is the key part of the build - Gazing Demise: adds an additional 150% damage bonus and buffs the Manitou’s attack speed
- Ring of Emptiness: Locust Swarm – Pestilence adds another 300% damage when used with this item equipped
- Lakumba’s Ornament: when used with Sacred Harvester and Soul Harvest – Languish, it gives you 30% bonus intelligence, 100% bonus armour, and 60% damage reduction. It’s your main source of defence buffs.
How to assemble the Mundunugu Spirit Barrage Witch Doctor build
How to get the Mundunugu Spirit Barrage Witch Doctor build:
- Companion: Templar
- Complete the Challenge Rift for materials to use with Kanai’s Cube to get Legendary Powers. The cube can be completed once a week to get additional resources.
- Gamble using Blood Shards at Kadala to get the full Mundunugu Regalia armour set. If you get any duplicate pieces, do not salvage them. Instead you can convert them with Recipe 4 in Kanai’s Cube. Extra materials can be used with Recipe 3 to make the remaining pieces, but this is very expensive.
- Gamble from Kadala further to get:
- Gazing Demise
- Goldwrap
- Krelm’s Buff Belt
- Nemesis Bracers
- Warzechian Armguards
- Lakumba’s Ornament
- Aquila Cuirass
- Frostburn
- Ring of Emptiness
- Convention of Elements
- Rechel’s Ring of Larceny
- The Compass Rose
- Craft using Kanai’s Cube with Recipe 3 for:
- Ceremonial Knives for The Barber and Sacred Harvester
- Swords to get In-geom
- Maces to get Echoing Fury
- Amulets to get Squirt’s Necklace, The Flavor of Time, and The Traveler’s Pledge
- Complete bounties to grab:
- Ring of Royal Grandeur (Act 1)
- Gloves of Worship (Act 2)
- Avarice Band (Act 3)
- Act 4 drops any bounty item from any act
- Turn in the bounties for recipes for:
- Captain Crimson’s Trimmings
- Aughild’s Authority
- Sage’s Journey
- Cain’s Destiny
- Farm Nephalem or Greater Rifts to find the Squirt’s Necklace. You could craft it by using Upgrade Rare in the Cube, but the best way to get one is to party up with other Necromancers and ask them to drop any duplicate Haunted Visions they find.
Mundunugu Spirit Barrage Witch Doctor build global stat priorities
- Cooldown reduction
- Critical hit chance/Critical hit damage
- Cold damage
- Spirit Barrage damage
- Armor on pants, boots and chest
- Mix in vitality and elite damage reduction on chest
- Resistances for a secondary affix
- Flawless Royal Topaz/Flawless Royal Amethyst in chest/pants sockets for additional damage and toughness
There you have it – the four best Diablo 3 season 23 builds. If you want to know everything else that’s in the new season, why not check out our Diablo 3 season 23 release date guide for all of the patch notes.
Loving the new game? Check our guides to the best Diablo 4 builds and Diablo 4 classes.
