Looking to defeat the Diablo Immortal Hydra and Golem world bosses? Well, you’re in the right place. Blizzard Entertainment’s free-to-play RPG game is full of ancient evils to fight, and while you can mash through most of them with ease – provided you’re sporting one of the best Diablo Immortal builds – the multi-headed Hydra and the hulking Golem both require a suitably Herculean effort to defeat. Still, at least this feisty pair of bosses offer high rewards when you get the better of them. So, you’ll want to know how to do it right.
Considered to be some of the hardest world bosses in the game, our guide to beating the Diablo Immortal Hydra and Golem provides the top tips on where to find them, how to kill them, and what rewards you’ll reap from doing so. They’re both mini-zone bosses, and as such they can be farmed, making them a great option for players looking to bolster rare resources.
If you’re in the market for farming spots, you’ll want to check out our guide to all the Diablo Immortal Hidden Lair locations scattered across the map. And, if you want to ensure you’re taking on Diablo Immortal with the best class possible, there’s a Diablo Immortal tier list for that. For now, let’s jump into how you can take down the Hydra and Golem.
Where to find the Hydra and Golem locations
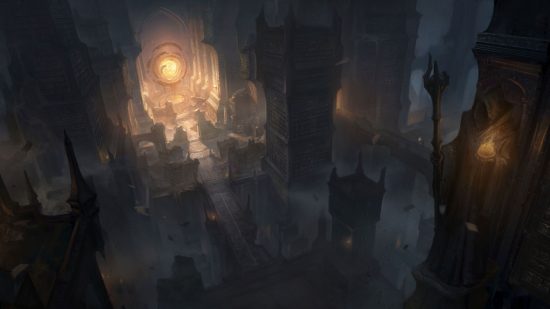
The Fleshcraft Hydra, known more commonly as Hydra, is part of a daily zone event in Diablo Immortal known as Kulle’s Hidden Chambers. This event is located within the Library of Zoltun Kulle zone, to the north of Shassar Sea. Believe it or not, this is also where you’ll find the Sandstone Golem.
Knowing the location is one thing, but in order to gain access to the event, there are a few steps you’ll need to take first.
To find the Hydra and Golem, you will first need to reach Hell I. This means your hero will need to have completed the main campaign and reached level 60. Hell I refers to the difficulty of Diablo Immortal, ranging between I and IV in scale. This can be modified by selecting the skull icon within the Westmarch’s map screen.
Once you’ve successfully completed the main campaign and reached level 60, make sure to raise your difficulty level to Hell I before fast travelling to the Library of Zoltun Kulle. You can access the library from level 35 but reaching Hell I will leave you in better stead.
Regardless of which Diablo Immortal class you are, the key to success against world bosses is preparation. If you’ve reached this point but you still feel your gear score is a little lacking, take a gander at our guides to all the best Diablo Immortal legendary gems, charms and set items you can acquire so that you can be confident you’re ready to engage the Hydra and Golem in combat.
How to summon the Hydra and Golem
Your main objective in order to spawn the Fleshcraft Hydra and Sandstone Golem is to collect the five lost pages dotted around the Library of Zoltun Kulle. These will open portal tomes which will grant you access to Kulle’s Hidden Chambers.
In these hidden chambers, there is a chance for either the Fleshcraft Hydra or Sandstone Golem to spawn from the portals you create. There’s also a chance you’ll open the gates to the treasure chambers, which house lots of loot.
Exactly which of the three you get is randomly generated, which means your chances are slimmer if you’re doing this mission alone. Your best bet is to complete this mission with multiple players to increase your odds of summoning.
You’ll be working alone but in the same location, meaning once each person collects the lost pages and opens the hidden chambers, anyone in the location will see the Hydra if successfully summoned. The summoning will trigger a notification informing all players in the world of the Hydra’s arrival and a three-minute timer to engage in combat.
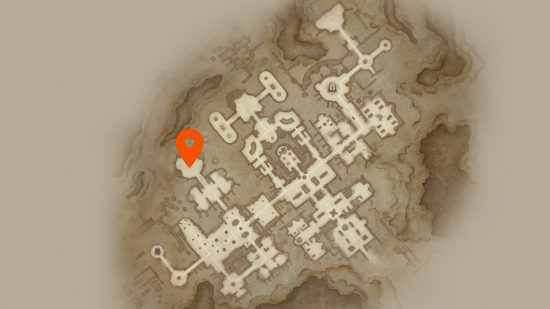
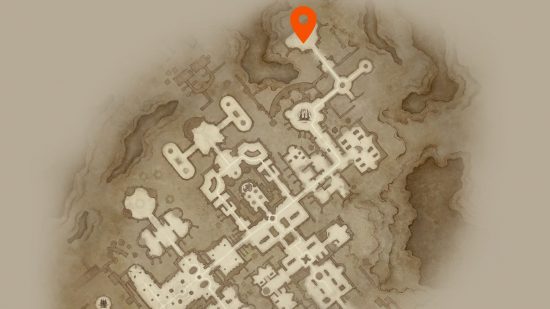
The Fleshcraft Hydra will spawn in its lair, an inner sanctum that’s just to the left of the Writhing Ingress waypoint. The Sandstone Golem, however, will spawn in the north-eastern part of the map, at the end of the long corridor above the Hidden Alcove.
How to defeat the Fleshcraft Hydra and Sandstone Golem
Much like the Diablo Immortal Blood Rose, it’s an absolute necessity to take either of these two punishing world bosses on as part of a group. Both the Hydra and Golem have over 20 million HP, and the more players you have in the area, the more damage you can collectively dish out to whittle down that impressive health bar.
The Hydra has a host of moves it will use against you – Acid Spit, Lingering Pool of Acid, and Tail Swipe are the main ones.
While the Hydra’s attacks are slow, they are devastating, so whether you decide to take on the world boss solo or with other players, using knowledge of its mechanics is essential. Acid Spit and Lingering Pool of Acid are frontal AoE attacks that you can’t afford to hang around in, while Tail Swipe will knock anyone in range back and deal a hefty chunk of damage.
The Golem has a very different skill-set, but no less dangerous – Stomp, Long Dash, and Debris Slam.
As you might expect, Stomp sends out a shockwave that inflicts AoE damage in a wide radius. It’s quite tricky to avoid, so you might find it easier to keep pressing the offensive and make use of your Health Globes as required. Long Dash is a charge attack that inflicts knockback to anyone caught in the Golem’s path. As for Debris Slam, each time the golem hits the ground with its fists, you’ll have a matter of seconds to avoid the red circles that appear on the battlefield before debris falls and inflicts damage upon anyone remaining in those areas.
Diablo Immortal’s Hydra and Golem rewards
Once slain for the first time, both world bosses will drop Diablo Immortal Horadrim Vessels, which can be placed into the Legacy Shrine in Iben Fahd’s Sanctum to unlock permanent attribute bonuses. The Fleshcraft Hydra drops Zoltun Kulle’s Ingenuity, which increases your Potency, while the Sandstone Golem drops Guilt of the Nameless, which increases your Resistance.
There are no fixed rewards for beating the Fleshcraft Hydra or Sandstone Golem in subsequent encounters, and rewards will be dependent on your character type and level. However, whatever loot showers from the beast are guaranteed to be plentiful.
There is one guarantee though and that is that you will receive a broad range of items including experience orbs, legendary items, and enchanted dust, which is great for upgrading your gear. It should also be noted that if you are defeating the Hydra in co-op mode, the rewards will be divided between players.
That’s everything on how to find and defeat Diablo Immortal’s Hydra. For more help crafting the perfect character, check out our guide to the best Diablo Immortal builds. After all, you may need all the help you can get to take down some of these world bosses. Alternatively, if you fancy a break from PvE, why not take the plunge into PvP and check out how to join Diablo Immortal Shadows or Immortals and get stuck in.
Original article by Grace Dean.


