Finding the best FIFA 23 custom tactics can involve a lot of trial and error in the football game, with each person’s style of play, squad, and most importantly, formation playing big parts in how you instruct your team. All of this is done before a ball has been kicked, and having the right custom game plan can be the difference between securing a hard-fought 1-0 win or seeing out a bore draw, whether you’re playing Ultimate Team or career mode. But which tactics are best?
If you’ve ever been frustrated with your team not making runs when they should, or you find yourself constantly exposed at the back, it’s likely due to not having the correct custom tactics in place. Do you want your wingers to widen the pitch and give your CMs more room to weave their magic? There’s a tactic for that. Need your big striker up top to back into the opposition defender to receive the ball to feet? There’s a tactic for that, too. These are the best custom tactics in FIFA 23, though it’s worth noting you’ll want to use all of this advice in collaboration with our guide to the best FIFA 23 formations.
Best custom tactics for defence
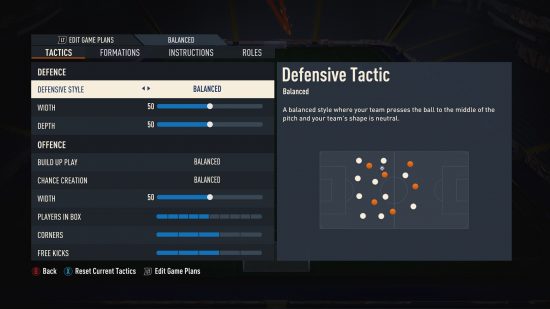
Although the saying ‘the best defence is a good offence’ will occasionally ring true, it isn’t always the case. In football, the best defence usually involves world-class players and a game plan executed to perfection. You can enter the custom tactics menu in Ultimate Team by pressing the left trigger on the squad screen and heading down to custom tactics. In career mode or quick play, the tactics menu can be found under team management.
When in the custom tactics menu, you’ll be faced with a few options under the Tactics: Defence section. Each one of these will change how your team sets up when not in possession of the ball, and by changing them you can set the pace of the match. Complementing your formation with custom tactics is a surefire way to frustrate your opponent and keep clean sheets. Here are the best defensive custom tactics:
- Pressure on heavy touch: For defenders with excellent defensive anticipation, but perhaps those without pace to burn. Pressuring an attacker on a potential heavy touch means that your defender waits for a mistake before pouncing, capitalising on a mistake from your opponent in the process, and re-taking possession. Best for players who sit deep, want to set up counter-attacks, and those without quick defenders.
- Press after possession loss: For those who want to play ‘rock and roll’ football. The high press, high-energy defensive style means your team will burn stamina in an effort to win the ball back after losing possession for approximately seven seconds. The downside to this defensive setting is that if your team fails to win the ball back, the loss of stamina was for nothing. A risk/reward style, this is for those players who want to put the sword to their opponents constantly throughout a game, and for those with defenders agile enough to press opposition players quickly.
- Width: This slider determines how spread out you want your team to play when defending. Changing this will depend on which formation you’re playing – if you have three CBs with no LB or RB, it’s worth setting the width to 60-70 or you’ll be vulnerable on the flanks. With a 4-3-3 for instance, keeping the back four on a width of around 30 will keep them compact, preventing any penetrating passes through the middle.
- Depth: This slider is dependent on the personnel you have at the back. If you play a high line you’re more vulnerable to long balls over the top, but you have more options when attacking. If you have defenders with poor pace, a deeper line of defence prevents them from being caught out with a single pass. Setting the depth slider to around 30 will ensure that you’re keeping it tight at the back. A foot race against Erling Haaland is the last thing you need, especially if your CB doesn’t have the lengthy sprint type. A depth of 70+ essentially keeps your defenders near the halfway line, giving your midfielders plenty of passing options.
Best custom tactics for offence
Goals win games, it’s really that simple. Out-scoring your opponent is paramount, and having the best players in the game often isn’t enough to set yourself apart from what is a very competitive game. Changing your custom tactics can redefine how your players perform in game and gives you a chance to play your own unique style of football.
- Fast build-up: This option is for those who want to play pure tiki-taka style football, bamboozling your opponent with passes before striking the fatal blow. You’ll need players with good technical ability, and obviously ones with high passing stats. Best used in formations like 4-2-3-1, as they contain a lot of CAMs and CDMs. Fluid movement and good space management are vital to get the most out of fast build-up. Best used when you’re confident with your passing game and don’t necessarily have a striker with a lot of pace, the idea being that you create opportunities for the immobile striker by moving the ball constantly.
- Long ball: The absolute classic. When all else fails, make like Stoke and hoof the ball. Traditionally seen as a last resort, the long ball style of play can be very effective when going up against a team playing a high defensive line. Speed merchants like Timo Werner thrive from this kind of delivery, playing on the shoulder of the last defender, waiting to pounce. Use the long ball tactic when you don’t quite have the quality in the midfield to break opponents down with your passing game, but do have a pacey forward who can latch onto the driven balls over the top.
- Direct passing: This style of offence instructs your players to find space wherever they can in order to receive the ball. It’s all about high-percentage play, ensuring the completion rate of your passes is high. Your opponent can’t score against you if they can’t get the ball. This setting goes hand in hand with fast build-up and again requires players with high dribbling and high passing stats.
- Forward runs: It can be incredibly frustrating when you have possession of the ball but there isn’t any movement ahead of your player. Telling your players to make forward runs whenever possible should ensure you always have options when looking towards the opponent’s goal, and pairs especially well with pacey wingers. Wide formations like the 3-4-3 are the go-to for forward runs, as you’ll have two options on either wing.
Best player instructions
Setting up your team instructions is only half the battle, as some of your players may need a little bit of extra tutelage to unlock their potential on the pitch. Player instructions give you a chance to instruct each individual on what you want them to do. Again, these go hand in hand with your formation, and the other custom tactics in place.
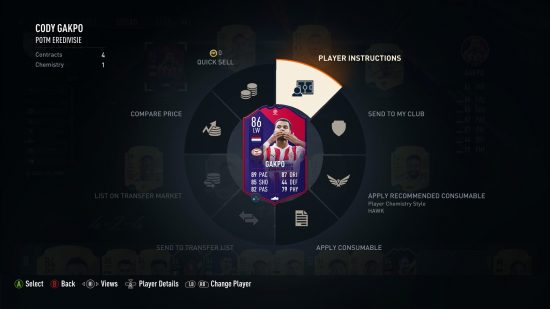
To access the player instructions menu, highlight the player in question, press square (or X if using an Xbox controller), and you’ll find the instructions segment in the top right corner.
Striker
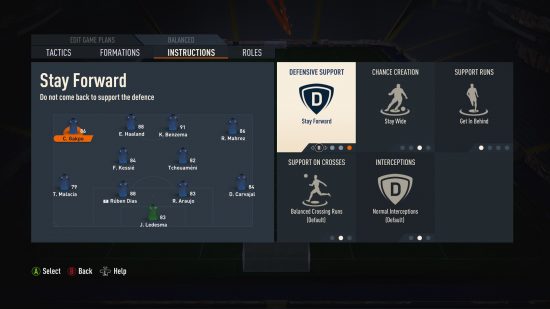
- Support runs – Stay central: Instructing your striker to stay central means they won’t ever drift too far from their intended position. Consistency with forwards is key, and knowing where they’ll be at any given moment is vital as they can often be the lynchpin for any attacking move.
- Attacking runs – Get in behind: This one is dependent on who you have in the striker position, but having your forward making runs in behind is nearly always a good idea, especially if you know they have the opposition centre-backs beat for pace. More runs in behind translates to more chances to shoot. Combine with the ‘long ball’ custom tactic to put the opponent on the back foot whenever you gain possession.
- Defensive support – Stay forward: For similar reasons to the ‘stay central’ instruction, having your main attacker as your most advanced player means you’ll always have a passing option when winning back possession. Having a forward with decent passing stats will help here, as they can begin attacks by collecting the ball, laying it off, then making a deep run of their own.
Winger
- Support runs – Get in behind: For the same reasons as the striker instruction, your wingers making constant runs in behind the opponent’s defensive line can cause havoc. Best used when you have a fairly conservative defensive setup, as having three of your attackers constantly bombing forward can leave the rest of your team exposed.
- Chance creation – Stay wide: If you have wingers with skill and pace, instructing them to stay wide can lead to a lot of 1v1 situations you can abuse. If you manage to beat the opposition’s fullback, it should give you ample opportunity to deliver the ball into the box, or cut in and take the chance yourself.
- Defensive support – stay forward: Combining stay forward with the previous two instructions puts immense pressure on the opposite team. It either means your winger will have a lot of space to work with once they receive the ball, or the opposition defender has to go wide to meet you, creating more space in the centre for your midfield.
Attacking Midfield
- Positioning freedom – Free roam: If your formation allows for a CAM, they’ll likely be the key that unlocks the opposition defence. Provided the player you have in the attacking midfield position has enough positional awareness, giving them the freedom to find space in between the lines will mean they’re always ready to receive the ball and feed it through to your striker.
- Support on crosses: Stay on edge of box: As the CAM position usually skews small, having them in the box to meet a header isn’t usually the best option. Players like Kevin De Bruyne excel at hitting the target from outside the box, especially if they use a power shot. Instructing your player to stay on the edge of the box means that they can pounce on any clearances made by the opposition’s defence.
Defensive Midfield
- Attacking support – Stay back while attacking: Defensive midfielders do the dirty work so your forwards can shine. Asking your CDM to stay back while attacking is your insurance should anything go awry, as they’ll be in a position to stop the opposition’s counter-attack.
- Positioning freedom – stick to position: The CDM role is designed to help your team whenever they need it, but occasionally they can be caught short if you’re up against someone who moves the ball well. Asking your defensive midfielder to stick to their position ensures you won’t get caught out through the middle, with your fullbacks covering the flanks.
Fullbacks
- Attacking runs – balanced: It may seem obvious to keep a setting as it is, but if you’re too overzealous with your defenders, it can leave you short at the back more often than not. Think Alexander-Arnold; Liverpool have conceded on several occasions this season from him being out of position, bombing forward with no cover in behind.
- Run type – Overlap: One of the most basic tactics in football is to overlap when making a run. This means that when you move past your teammate holding the ball, you approach from the side closest to the touchline. Overlapping runs create confusion with defenders, as they momentarily lose which player they should be marking, either creating a passing opportunity, or opening up space for your teammate to run into.
Changing player roles
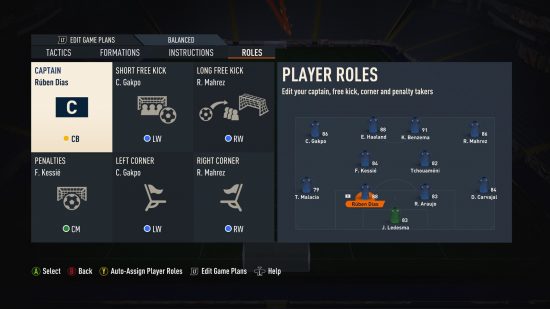
Before you start a match, each type of dead ball situation is assigned a player. In the custom tactics menu, you can change who takes what kind of kick. For instance, you may want a left-footed player taking a corner from the right side, so the delivery bends toward the goal, rather than away. It also lets you change who takes penalty kicks, ensuring you always have the best player for each job.
 Razer BlackShark V2 Pro$179.99VIEWNetwork N earns affiliate commission from qualifying sales.
That is the comprehensive breakdown of the best custom tactics in FIFA 23, and more importantly, why you should be using them. Ultimately, it’s down to you to find out what works for your team, but these options will keep you secure at the back while still giving you plenty of firepower up top.
If you’re playing Ultimate Team and don’t quite have the players that fit your style, we have solutions to the Around The World, Puzzle Master, and First XI SBCs, all of which give rare packs as a reward. With any luck, you’ll be able to pull a FUT Hero or even an Icon, all of whom will elevate your squad to the next level.
