
What are Minecraft villages? Villages in Minecraft are one of the best resources throughout your survival experience, helping you stock up in the early game, and useful for trading for rarer items as you progress.
Villages can be found in most Minecraft biomes, and contain a number of chests and other useful items that can be looted to help you on your way, such as armor, crafting tables, and blast furnaces. The sooner you locate a village into your first days in the Minecraft overworld, the better your chances of survival in one of the best PC games of all time. Here’s everything you need to know about Minecraft villages, villager houses, loot, breeding villagers, and building a custom town.

Minecraft village finder
There are some online resources for finding villages, such as the Minecraft village finder over at Chunk Base. However, you do need to know your Minecraft seed to use Chunk Base finders, and they aren’t too difficult to find without cheating anyway, so don’t fret if you want to go it alone.
Similarly, if you are playing with Minecraft console commands turned on, you can locate a Minecraft village by typing “/locate village” in Bedrock edition, or “/locate structure” followed by the village type, for example “minecraft:village_snowy”, which you can either enter manually or select from a list.
Minecraft villages spawn naturally in the following biomes:
- Plains
- Meadow
- Savanna
- Snowy Plains
- Taiga
- Snowy Taiga (Bedrock edition)
- Sunflower Plains (Bedrock edition)
While they can spawn few and far between, generation is random, so they can also spawn incredibly close to one another. The best ways to seek out a village are to watch for buildings in the distance, or – if you’re kitted up well enough – explore at night, when a village’s lights can be seen from a greater distance. It might also help to increase your render distance as much as you can without destroying performance.
Otherwise, go about your business and wander wherever your heart leads you and you’re sure to find a village eventually, especially since they are among the most common structures in the adventure game.

Minecraft village houses and loot
Like everything in this sandbox game, Minecraft village features generate randomly, and the number and type of buildings inside can vary. So, for example, you’re as likely to find a village with no armorer at all as you are one with several.
Minecraft villager houses:
- Armorer house
- Butcher shop
- Cartographer house
- Fisher cottage
- Fletcher house
- Mason house
- Shepherd house
- Tannery (Leatherworker)
- Temple (Cleric)
- Toolsmith
- Weaponsmith
Each of these types of Minecraft villager house comes with its own loot, from the profession block itself, to chests and other valuable goodies. Each of the above houses can contain a chest, each with their own unique loot – for example, a cartographer chest might include a compass, while a fletcher chest could hold arrows. Some may even contain emeralds or diamonds.
Villages all also contain farms from which you can gather some food, torches, beds, and other useful items. You may even be lucky enough to find an outdoor armory in a taiga village, which contains two Minecraft armor stands, an iron helmet, and an iron chestplate.

Minecraft village trading
All Minecraft villages – except abandoned villages, more below – will house villagers with whom you can interact to trade goods. In Bedrock edition there is an additional chance that a wandering trader will spawn at the village meeting point.
Right-click on these friendly Minecraft mobs to trade with them, and the trading interface will appear, initially only showing the first two trades. As you buy and sell with a villager, more trades will be unlocked. You can see a full list of villager trades on the Minecraft wiki, but like with chest loot, they are relative to their profession. For example, a weaponsmith will sell weapons, while a butcher will sell meat.
The most valuable trades to look out for are librarian trades, as these are predominantly enchanted books, and cartographer trades, as you can purchase a Woodland Mansion or Ocean Monument map. Another incredibly useful villager is the fletcher, as their stick trade is a cheap way of farming emeralds.
Minecraft villager profession blocks
To give a villager a profession, place one of the following blocks. As long as they haven’t already got a profession, can access the block, and aren’t a Nitwit variant, they will take on the new profession. You can also remove a villager’s profession by removing their job block, provided you haven’t already traded with them. Similarly, if you place a job block and don’t want the first trades offered, don’t trade, break and replace the block, and the villager’s trades will refresh. This is particularly useful with the librarian.
- Armorer: Blast Furnace
- Butcher: Smoker
- Cartographer: Cartography Table
- Cleric: Brewing Stand
- Farmer: Composter
- Fisherman: Barrel
- Fletcher: Fletching Table
- Leatherworker: Cauldron
- Librarian: Lectern
- Stone Mason: Stonecutter
- Shepherd: Loom
- Toolsmith: Smithing Table
- Weaponsmith: Grindstone

Can I start a village in Minecraft?
Rather than alter an existing Minecraft village, you can also build your own. The first step, as you may have guessed, is to create some buildings. To house your first villager, you need at least one small house with a single bed. Villagers aren’t picky; an available bed with at least two empty blocks above it (so four in total, see picture above) is enough for them to consider building their new home, but of course you can make these new homes as lavish or as minimalistic as you wish.
As Minecraft villagers have zero self-defense skills, it’s a good idea to create a defensive structure around the buildings. This is especially important if you’re building a large town, as it’s more likely to be attacked by zombies. A wooden fence should be enough to save your village from getting overrun by aggressive mobs.
Related to that, it’s highly recommended to create a village layout before you start building (using either blocks or wooden signs). This will give you a clear idea of how much effort it will take to build a town wall, for example, thus allowing you to adjust your plans if necessary. And while it may not feel like a priority right now, you may want to reserve some space for your own home, a central square, and perhaps some agricultural plots to add later on.

How to populate a Minecraft village
Villagers won’t automatically spawn in your village, so you’ll have to venture out to find at least two lucky victims and bring them back with you. There are two ways to go about this:
- Visit an existing village and kidnap a villager.
- Find a zombie villager, lure them to your village, and cure them.
The so-called ‘boat kidnap’ is the most well-known method to transport villagers. It’s quite simple: place a boat as close to the village as possible and push a villager inside the boat. They won’t be able to leave on their own. You can only transport one villager at a time this way, so you’ll have to repeat the effort once more to enable breeding (more on that below). If you use Minecraft bedrock edition, you can also put a lead on the boat and drag it back to your village over land.
Alternatively, you can use a minecart. The transportation itself will be faster than by boat, but you’ll have to build an entire minecart track all the way back to your own village. If you wish to visit the existing village more often, or if you’re facing difficult terrain, it may be the better option.
While zombie villagers are rare, the zombie-curing method is arguably the easiest, as these mobs will always follow you. Simply lead them back to your village, apply the weakness effect on them (weakness potions will work) and feed them a golden apple to turn them back into normal villagers. Try to start this process right after it turns dark, or create some shelter along the way, because exposure to sunlight will kill the zombie villagers.
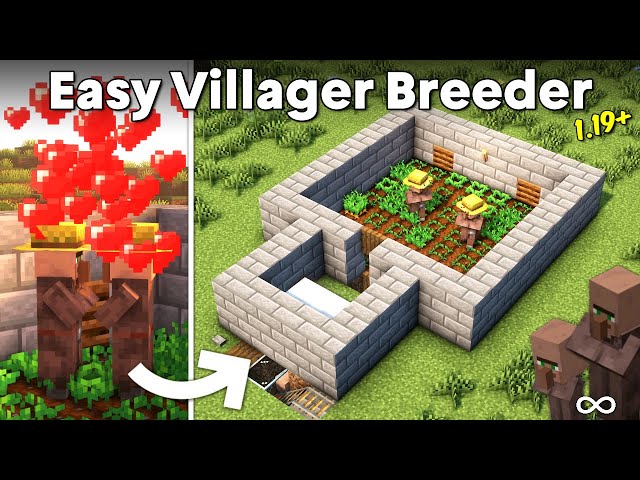
How to breed villagers
Two villagers hardly make a village. To breed more villagers, you need to provide extra beds (one for each expected baby villager) and lots of food. You can either create an actual ‘villager breeder’, or simply leave them to their business. Either way, it takes at least 12 potatoes, carrots, or beetroots to make a villager willing to breed. Three pieces of bread will also suffice. You can give this food to a villager manually by dropping it near them, or use a Minecraft farm and farmers for an automated process. The more food a villager carries in their inventory, the better their chances of breeding.
As for employment, remember that adult villagers can claim a workstation to obtain a profession. For example, placing a smithing table may turn a villager into a toolsmith. It’s recommended to employ farmers first (by placing a composter workstation), as they will gather food. This, in turn, will help you breed more villagers.
Minecraft zombie villages
Every Minecraft village has a 2% chance of generating as a zombie village, or abandoned village. These rare villages spawn without doors and torches, and some blocks will have been replaced by cobwebs, cobblestone is replaced with mossy cobblestone, and the windows contain brown glass panes. Any villagers that generate there will generate as a zombie villager, but the village may simply be deserted.

Minecraft village raids
Here’s one to watch out for: you can cause a raid to happen in a Minecraft village if you enter one while afflicted by the Bad Omen status effect. You get this effect by killing a raid captain, which may spawn among Illagers, but you can remove it easily by drinking milk or waiting for it to wear off.
If you’re up for a challenge, you can keep the Bad Omen status effect and use it to cause an Illager raid by visiting a village in Minecraft. This will cause several waves of Illagers, Evokers, Witches, Vindicators, and Ravagers to spawn, who will attack the player and any villagers. Defeating these enemies will reward you with emeralds, saddles, and tons of other hard-to-find items, while wiping out all the raid waves will give you a temporary discount on the emerald cost to buy items from villagers, thanks to the Hero of the Village status effect.
Finding a village in Minecraft is half the battle, but once you arrive to a haven of goodies, a welcome from the local villagers and wonderful offerings from the village occupants, it will all seem worth it. Just be sure to be kind to the villagers if you see an iron golem roaming about; they don’t take kindly to their villagers being attacked – even accidentally. And if villager houses aren’t quite to your taste, then build your own Minecraft house nearby, or even one of the considerably more spectacular Minecraft builds featured in our inspirational list.
Additional contributions from Gina Lees and Marloes Valentina Stella.