
The Far Cry games have all shipped with level editors. Some were complex, powerful engines like the first game’s CryEngine which baffled all but the brightest budding level designers; others, like that of Far Cry 2 and Instincts, were simpler to control but limited in what they could create. Ubisoft’s latest iteration finds a comfortable middle ground, one which you should definitely have a dabble with.
We’ve already picked out some of the best maps players have been creating. Here’s how you can start making your own.
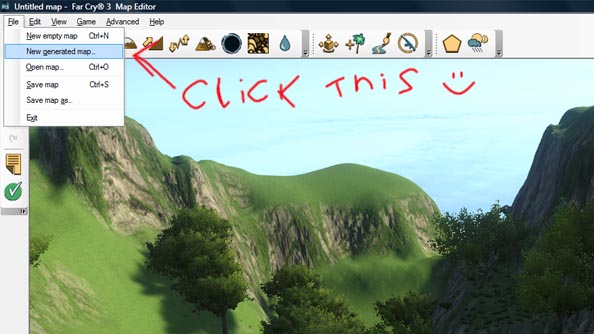
On booting up the editor you’ll be presented with a randomly generated map. Something quite jungly but a little plain. You can start playing about in this but I’m going to be generating a new map, mainly because I like to work with islands – they give you a natural level boundary and we don’t need to worry about stopping players from wandering out of the level’s limits.
To do this, click File > New generated map and select Tropical Islands in the pop-up box that opens.
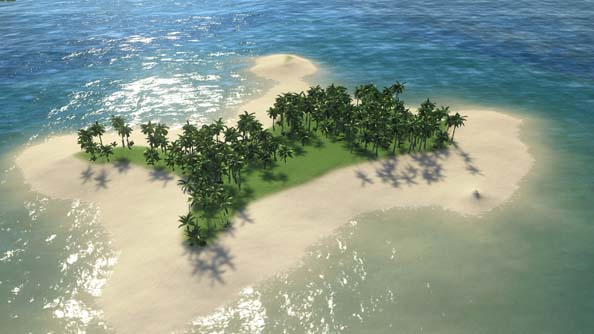
The editor should throw up a plain Jane island for you to play around with. One of the great pluses of Far Cry 3’s editor is its drop-in function. Most game editors ask that you compile a level before you can play it, this can take a while and so testing little changes can be a pain. In Far Cry’s editor you just need to press CTRL+G. Give it a try now, pressing escape will bring you back to the editor.
Right. Now before we start placing a tiger army we need to carve up the island, roughing out the terrain into a shape that directs our players a bit.
Here’s what my generated map looks like. It’s quite bland.
First thing I’ll do is clear away those trees so it’s just the land I’m dealing with. To do this select the Collection Systems button (it’s on the header bar, it looks like a palm tree with a plus sign next to it, or press the hotkey F10![]() ). Later we’ll use this tool to place vegetation but for now I’d like you to hold CTRL and left click to wipe away the trees. Just paint over them and they’ll disappear.
). Later we’ll use this tool to place vegetation but for now I’d like you to hold CTRL and left click to wipe away the trees. Just paint over them and they’ll disappear.
Right, now that we’ve cleared the island I want to shape it into more of an ‘S’ shape with the Terrain Bump tool. That’s the one on the far left of the header bar, looks like a mountain with an arrow next to it (hotkey F1 ![]() ).
).
Left-clicking with this will raise terrain, CTRL+Left click will lower it, and holding shift lets you resize the brush. Have a play around lowering and raising the terrain. I’ve used it thin the island down in the centre and create wide opposing tips, like so:

I’ve created a little bit of a mountain range because, well, I like mountains and down at the southern end I’ve bumped up a few hills.
It all looks a little naff at the moment because there are only the two textures at work, grass and sand. Lets make it a little more colourful.
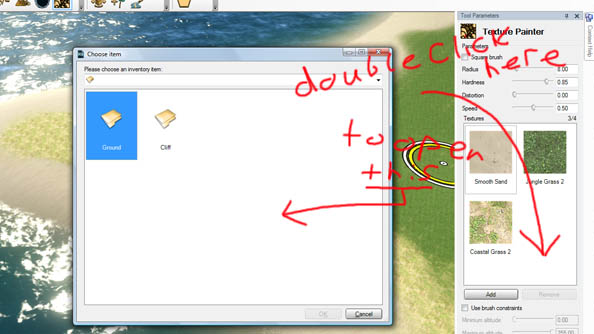
Pressing F9 will open the Texture Painter tool (![]() ). It’s a bit of a mixed bag, the texture painter, you can only work with four textures at a time which is a pain but you can do a lot with them thanks to this thing called brush constraints.
). It’s a bit of a mixed bag, the texture painter, you can only work with four textures at a time which is a pain but you can do a lot with them thanks to this thing called brush constraints.
Because I’m working with an island I want to add a new texture that is called Coastal Grass. It just seems more appropriate than having dark jungle grass all over my map. Double click the white space in the texture box to load up the texture browser and you’ll find it in the Ground folder
With the texture added to your texture browser you can now paint it onto the level. Do play around with this but getting a hold of the brush constraints is the real key to textures.
Constraints let you dictate where a brush can and can’t be painted. With constraints you can make it so when you’re painting coastal grass it will only appear up to a certain height, or won’t grow on steep slopes. It’s easiest to explain with an example.
Create a bit of a mountain range with the terrain bump tool. Then add the Mossy Cliff texture to your texture palette. Tick the use brush constraints checkbox below the palette. Now, set the minimum slope to 50. If you paint over the mountain range you’ll find the cliff texture only paints on slopes which are 50 degrees or steeper. If you now select the grass texture and set its maximum slope to 50 and its minimum slope to 0 and, again, paint over the mountain range. The grass texture will fill in all the gaps without painting over the cliff texture. Pretty neat.
You can get more creative, blending more and more textures in the palette but you may need to keep notes of each texture’s constraints (the editor doesn’t save them).
Okay, with those texture basics in hand, have a go at painting up the island proper nice, like.
INTERMISSION
Here’s what I was doing while you were painting your own island.
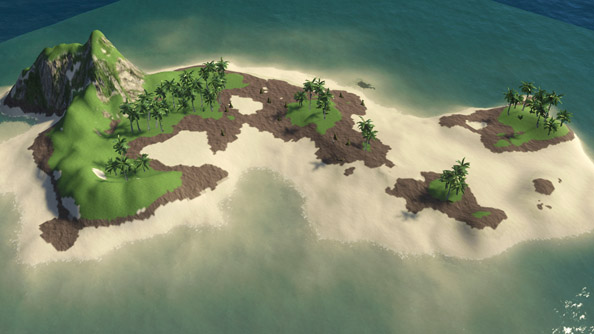
You’ll see that I’ve used a bit of mud to separate the grass from the sand. It’s not the prettiest weed but it’ll do for now. You’ll also see I’ve added a few trees back onto the island. You can do this quite easily with the Collection System tool, the doohickey we used earlier to wipe away all the plants on the island.
Much like the texture painter, this tool can paint life onto your level, though in this instance it is in the form of collections of similar models – palm trees, grasses, bushes, tree stumps, and so on. Double-clicking the palette will bring up the collection browser and you can root through all the plants on offer. These collections, if used judiciously, will really spruce up the landscape of the map.
Okay, we’re almost at tiger placement. We just need to add a little more in the way of map decoration: buildings.
Pressing F9 will open up the Objects tool (![]() ). It’s located next to the Collections System tool and looks like a box with arrows coming out of it. With that open, pressing 4 will let you add objects to the map. Now, objects means pretty much anything that you will find on a Far Cry 3 map: tigers, buildings, bears, vehicles, tigers, weapons, bears, and tigers. It’s also where you will find multiplayer objects like spawn points.
). It’s located next to the Collections System tool and looks like a box with arrows coming out of it. With that open, pressing 4 will let you add objects to the map. Now, objects means pretty much anything that you will find on a Far Cry 3 map: tigers, buildings, bears, vehicles, tigers, weapons, bears, and tigers. It’s also where you will find multiplayer objects like spawn points.
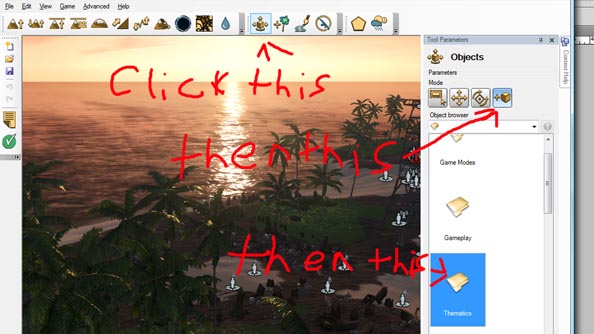
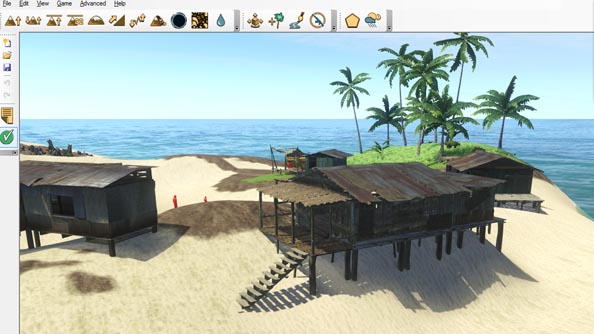
If you open the thematics folder you will find themed objects. It’s good to use these when you’re getting started with the editor because you will find buildings that go well together.
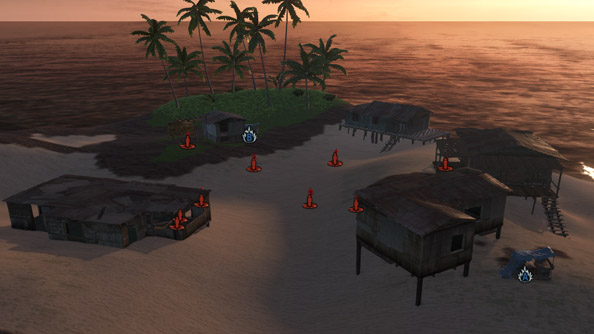
I’ve opted for village buildings and dotted the southern part of my island with a small hamlet. Once you place a structure you can use the other sub tools in the Objects panel to move and rotate it.
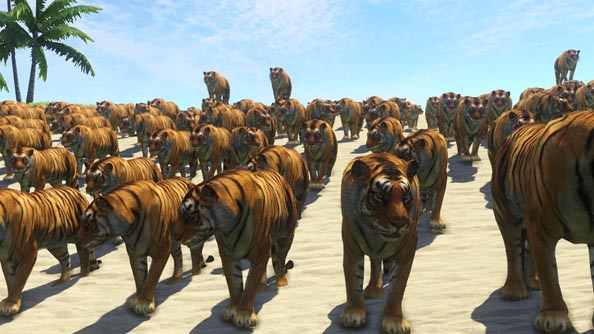
Now, what we came for, the tigers.
As I said, along with buildings the Object tool lets you place pretty much everything else in the game. If you hop up out of the Thematics folder and open the Gameplay folder and then the Wildlife folder you’ll find a whole menagerie to choose from.
You can drop in mercenaries too. This can lead to some fun scenarios.
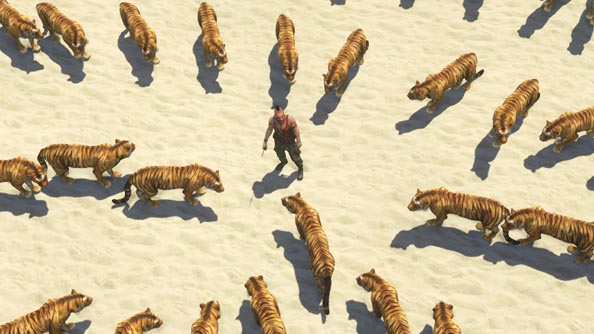
Frustratingly, while you can enjoy all these tigers, weapons, vehicles, and AI fights here on your lonesome, you have to delete all the entities except for statics (buildings, plantlife, and lights) when you take the level online to play with friends.
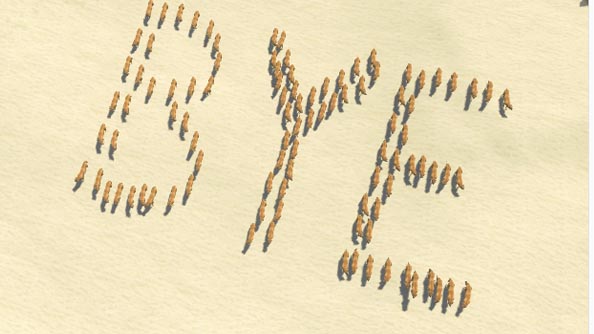
So, delete all those tigers. I’ll give you a moment to say bye. Bye, tigers.
If you click the Map Validation button (![]() )the editor will tell you everything your map is lacking, what needs to be added before it can be a published multiplayer map.
)the editor will tell you everything your map is lacking, what needs to be added before it can be a published multiplayer map.
I’m wanting to make a Firestorm map (a game mode similar to capture the flag) as it is easier to drive where the players travel. You can see that what we’re lacking: a myriad of spawn points, team fuel dumps, and a radio transmitter.
All these missing assets can be found in the Game Modes folder in the Objects panel. Open it up, open the Firestorm folder and there you will find everything you need.
Because I’ve the island set up as an S-shape, the lang gives a natural place for two team camps, the north and south tops. I’m putting the blue spawn down in the village and the red spawn up near the mountains. Happily, it’s very simple to set up: select the red spawn entity in the Firestorm game mode folder and place nine of them about the village. Then, because we want the blue team to be assaulting the red base, find a place for the two blue firestorm points (also in the game mode folder).
Do the same at the north of the island, placing blue spawns instead of red and red firestorm points instead of blue.
Ok, we’re almost ready to publish the map. We just need to place the shared spawn points, the transmitter, and the end movie. I’m putting all this stuff in the centre of the map on a radio tower. You can find all the props for a tower in the Radio Tower folder in Thematics. Though, for a ladder to climb the tower you’ll need to go to Ladders in the Gameplay folder.
This is what I ended up with.
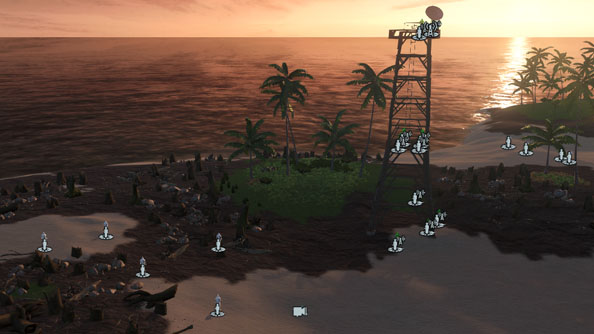
Towers are complicated little things to place. They’re made up up lots of parts and you can create something truly difficult to climb. I’ve opted for a simple ladder to the top tower because in the middle of a multiplayer game I don’t think players would appreciate having to do a platforming challenge.
At the bottom of the image above you can see an icon that looks a little like a video camera (only a little, mind). That’s called the End Movie object. It’s basically your way of telling the game where it should place the cinematic that plays at the end of a round, the one where the winning team either punishes the loses or grants them clemency.
With all those objects added the validation panel should be all green ticks and we’re ready to publish.
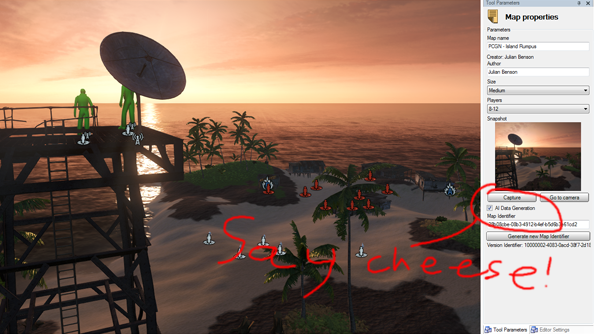
Next to the validation tool is the map properties panel (![]() ). This lets you name your map, put your authorial stamp on it, and take a picture that will show off your map to prospective players. To take the picture simply line up your camera of the level that you think best shows off your work and click the capture button
). This lets you name your map, put your authorial stamp on it, and take a picture that will show off your map to prospective players. To take the picture simply line up your camera of the level that you think best shows off your work and click the capture button
Ok. Save the map and we need to move over to Far Cry 3.
Once the game is booted up, click Multiplayer > Map Editor Archive > My Setup (at the bottom of the screen) > My Maps. With all those menus navigated you should now be looking at the local map screen. It lists all your maps that you’ve created and have saved on your hard drive. Clicking the name of your map gives you the option of making the map available online. It’s that simple.
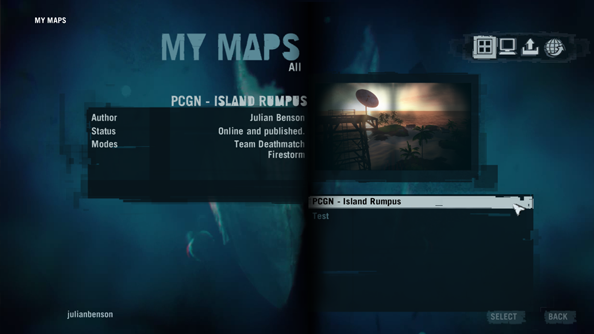
Once you’ve published the map you need to go back to the map editor archive and you can use the search box to type in your map’s name and start playing.
Now, this is really just an overview of the main tools and it’s going to take a lot of practice to get proficient at using them. A great community for helping you improve are the folk over at FCMaps. They’ve been making Far Cry maps since the first game and have dedicated forums for each of the titles in the series. Another good place to go is Ubisoft’s official map making forum. It’s not as old as FCMaps but it is closer to Ubisoft’s hearts so you may have more luck in getting any queries you have answered.