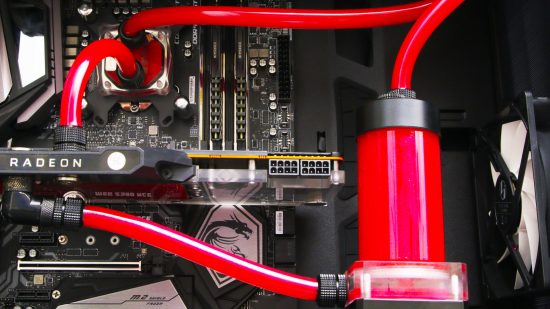
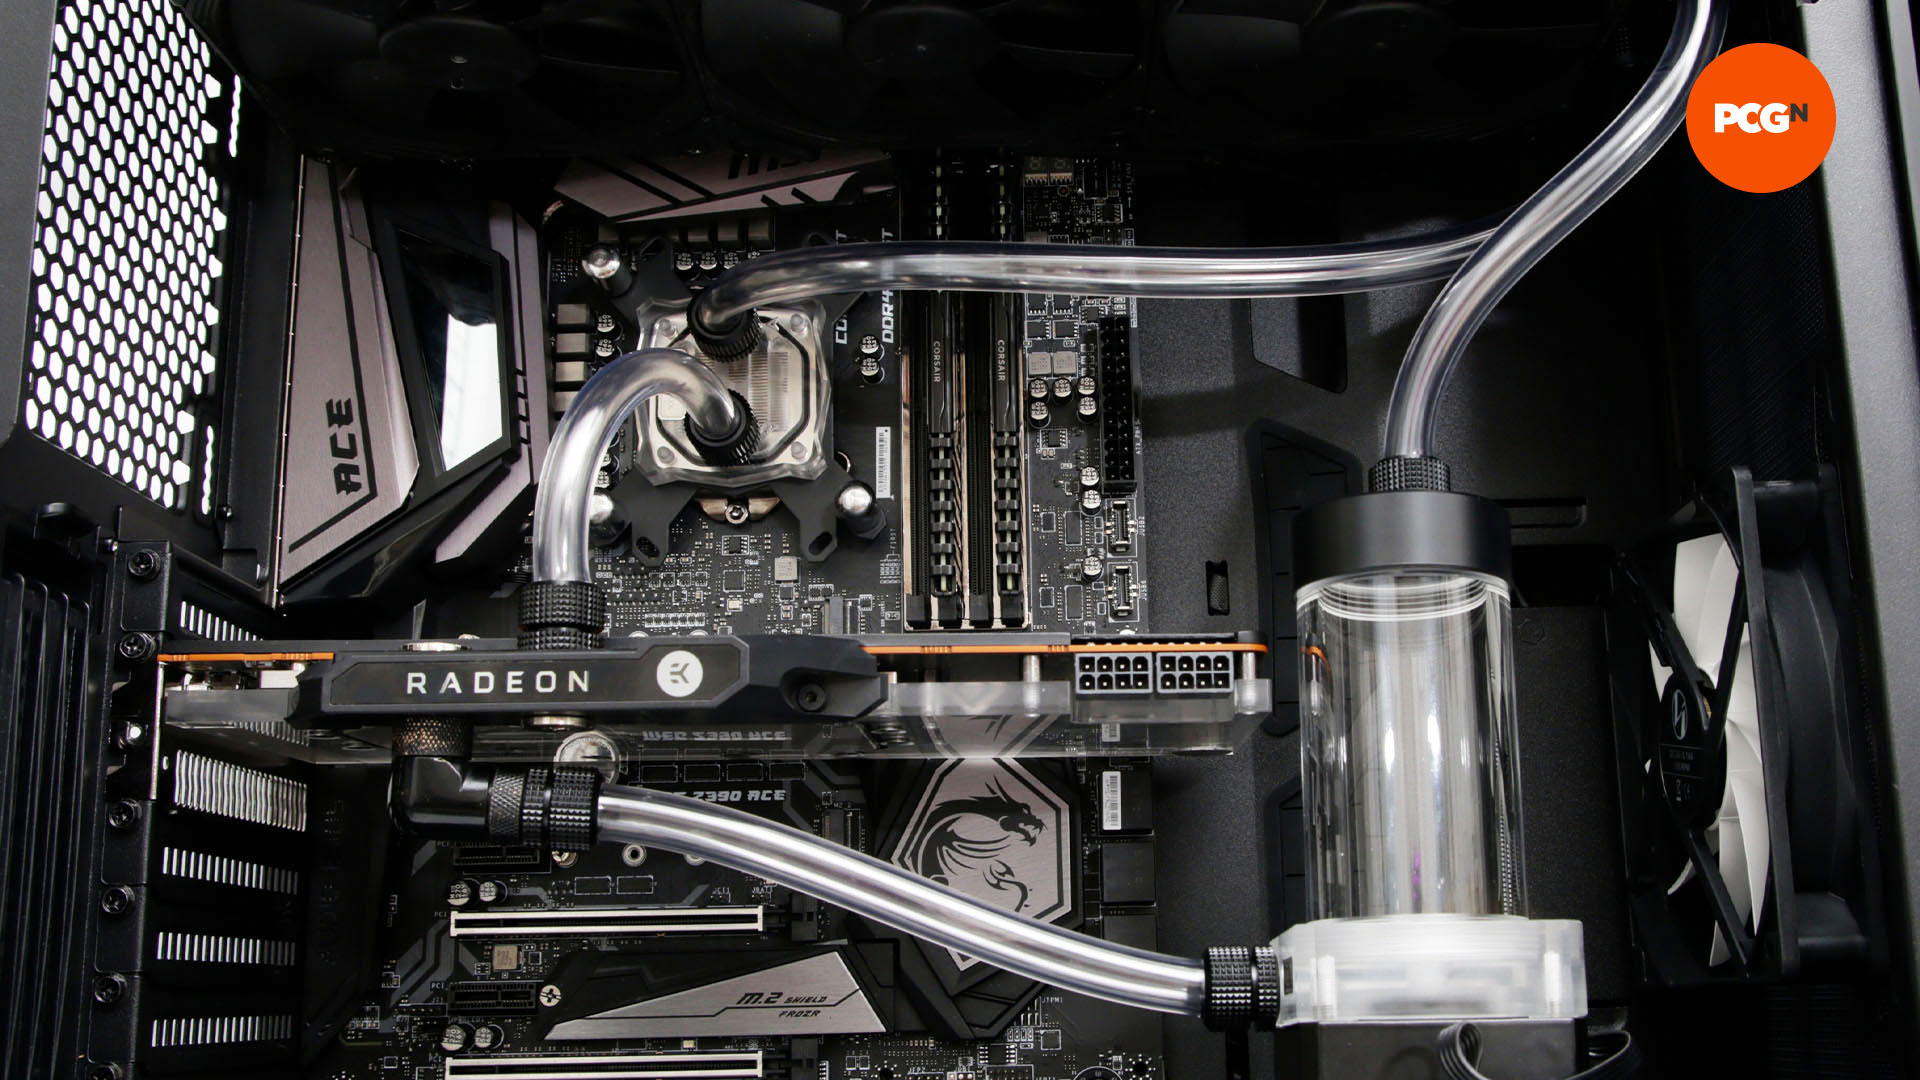
If you’re putting a new build together, you might be pondering how to water cool your PC. Well, the benefits of using a custom loop compared to air cooling are numerous. For a start, PC liquid cooling gear obviously looks fantastic, and you get to pick your own coolant to color-match it with the rest of your PC too, turning heads in the process.
On a less superficial level, the extra cooling capacity you gain over even the best AIO cooler by using large radiators, and the increased heat capacity of using coolant compared to air, means that fans on radiators can run much more quietly, yet still offer better cooling than a large air cooler. In this guide, I’ll take you through the basics of how to get started with water cooling, the components you need, and how to put it all together.
How water cooling works
If you’re familiar with the cooling systems in cars, PC water cooling works in a similar way. A pump drives coolant around a sealed circuit often called a loop. The coolant passes over hot spots, in this case waterblocks heated by your PC hardware, transferring heat to a radiator that’s cooled using fans. PC waterblocks also often use plates and micro fins that increase the heat transfer surface area and turbulence inside the block, helping to boost the transfer of heat.
The principle is identical to the one used in AIO coolers, such as the Corsair H100i Pro RGB, except the latter often combine pumps and waterblocks into single components and have much lower flow rates and less elaborate waterblocks. They’re usually sealed units too, whereas a DIY water-cooling loop can have a reservoir that allows you to fill the loop yourself with your chosen coolant.
What you need for water cooling
Despite the exotic nature of water cooling, it’s surprisingly easy to create your own loop. You’ll need five essential components, which work together to cool your hardware and allow the coolant to flow from one component to the next.
Water cooling pump
DIY water-cooling pumps differ from the ones used in all-in-one liquid coolers in that they’re much more powerful. They have significantly higher flow rates and higher head pressure, so they’re capable of dealing with loops with several liters of coolant and numerous components. There are a variety of pumps available too.
At the top end, the most popular pumps are made by Laing and include the DDC and D5. The former is a small, square unit while the D5 is larger. Both pumps offer similar performance and have been modified or duplicated by mainstream water-cooling manufacturers to offer PWM control, speed control, and flow-boosting components. They’re both fairly loud at full speed, but certain models that offer speed control can be tuned down to inaudible levels with minimal impact on cooling.
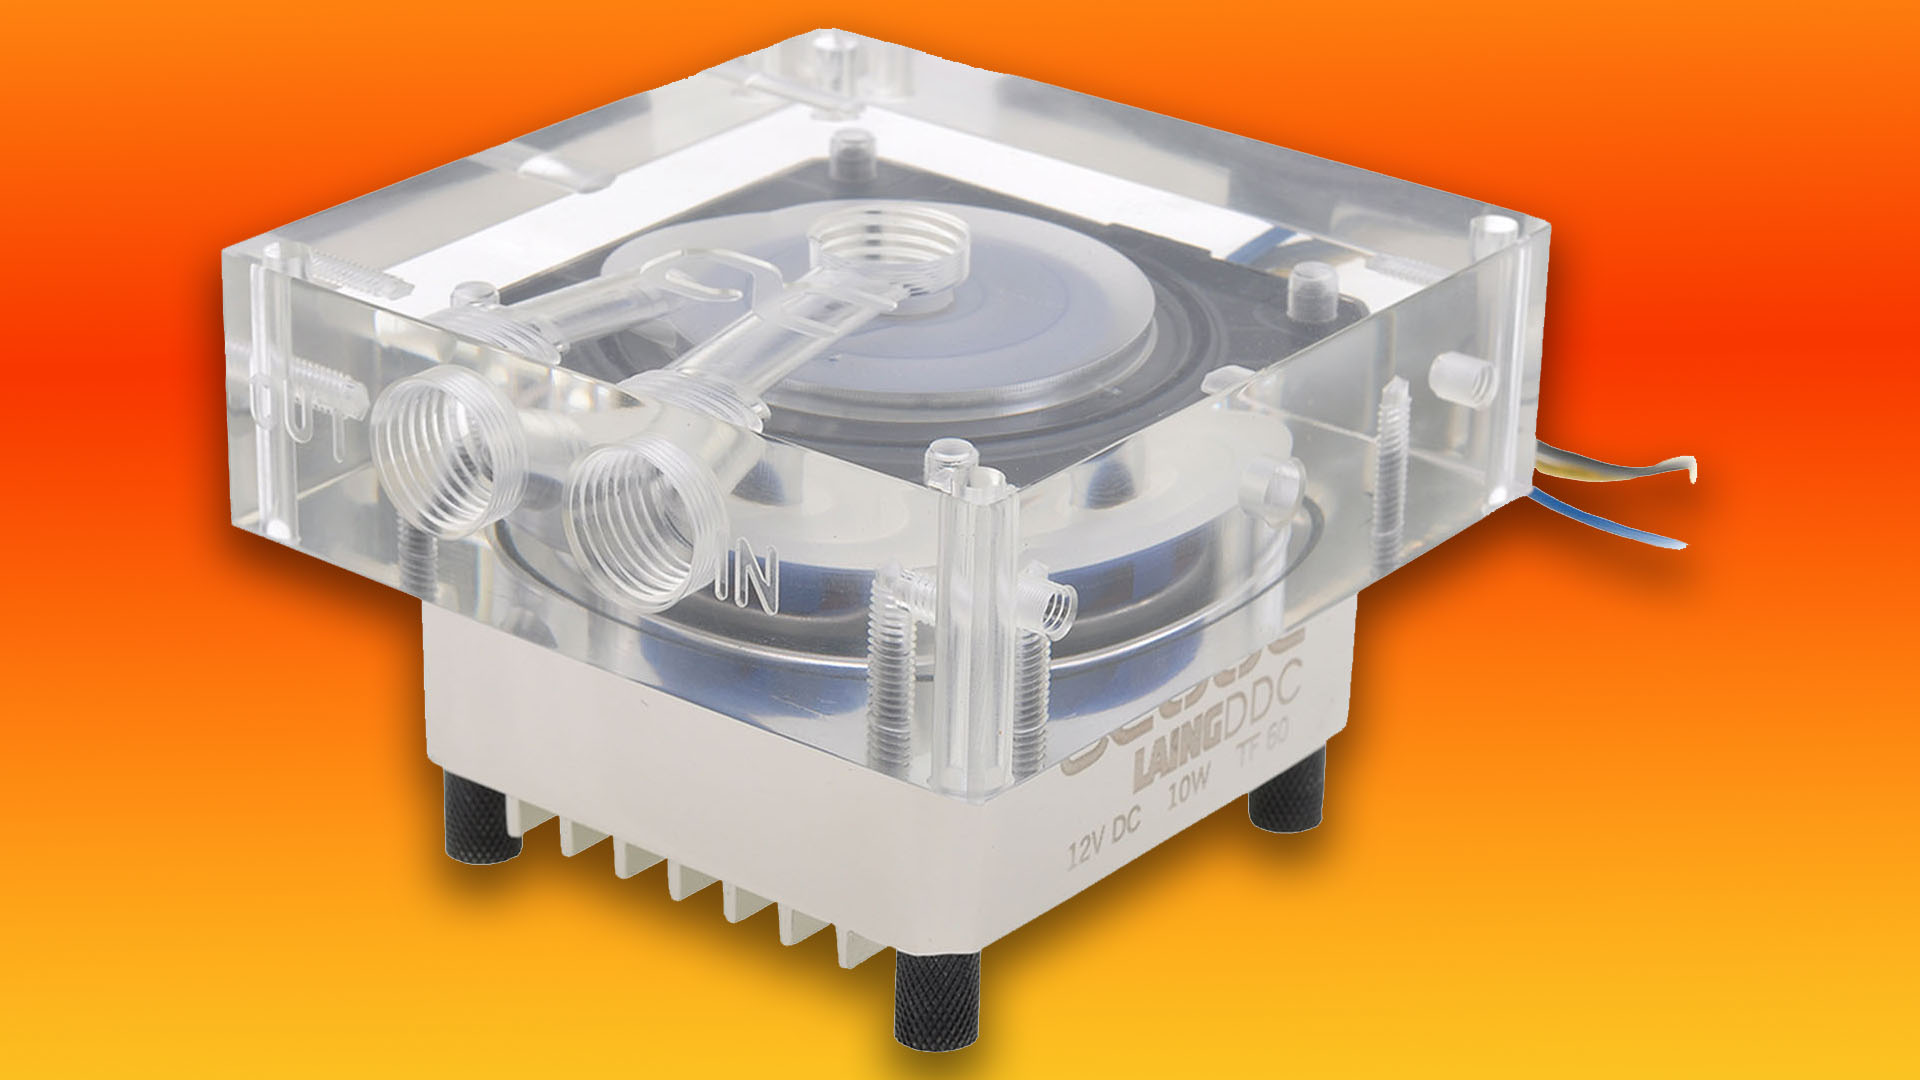
In general, the D5 and DDC pumps, and their variations, are the quietest and most powerful on the market, which is why most water-cooled PCs you’ll see use them. They’re also the most supported when it comes to third-party components too, such as reservoirs that can directly attach to the pump, removing the need to find a separate location to mount it in your case.
There are also pump covers and tops that replace the standard pump tops, improving aesthetics and even boosting flow rates. There are smaller, less powerful pumps available too, which are much cheaper than the D5 and DDC-type pumps, but they’re usually limited to cooling one or two components with a single small-to-medium-sized radiator.
Water cooling radiator
There’s a massive selection of radiators from which to choose. The current range covers almost every conceivable size of radiator from a variety of different manufacturers. We refer to radiators by the number and size of fans they support. For example, a radiator that can have two 120mm fans mounted on one side is called a 240mm radiator, while a 280mm radiator caters for a pair of 140mm fans, and so on. Most radiators also allow fans to be mounted on both sides to improve airflow and cooling.
Radiators differ in overall dimensions, plus they come in a variety of thicknesses. The thicker the radiator, the greater the cooling surface area, meaning it can dissipate more heat. However, increased thickness also restricts airflow, so thicker isn’t always better. For example, to get the most out of a 60mm-thick radiator, you’ll need to have high-airflow fans, or even fans on either side of the radiator, which can cost more, take up more space, and be noisier too.
By contrast, 30mm-thick radiators can reach much higher efficiencies with lower airflow, even if their maximum heat dissipation is lower. A 45mm-thick radiator is often a good compromise. The density of the fins inside the radiator is a factor too. In the image below, from right to left, you can see 30, 45, 60, and 85mm-thick radiators .
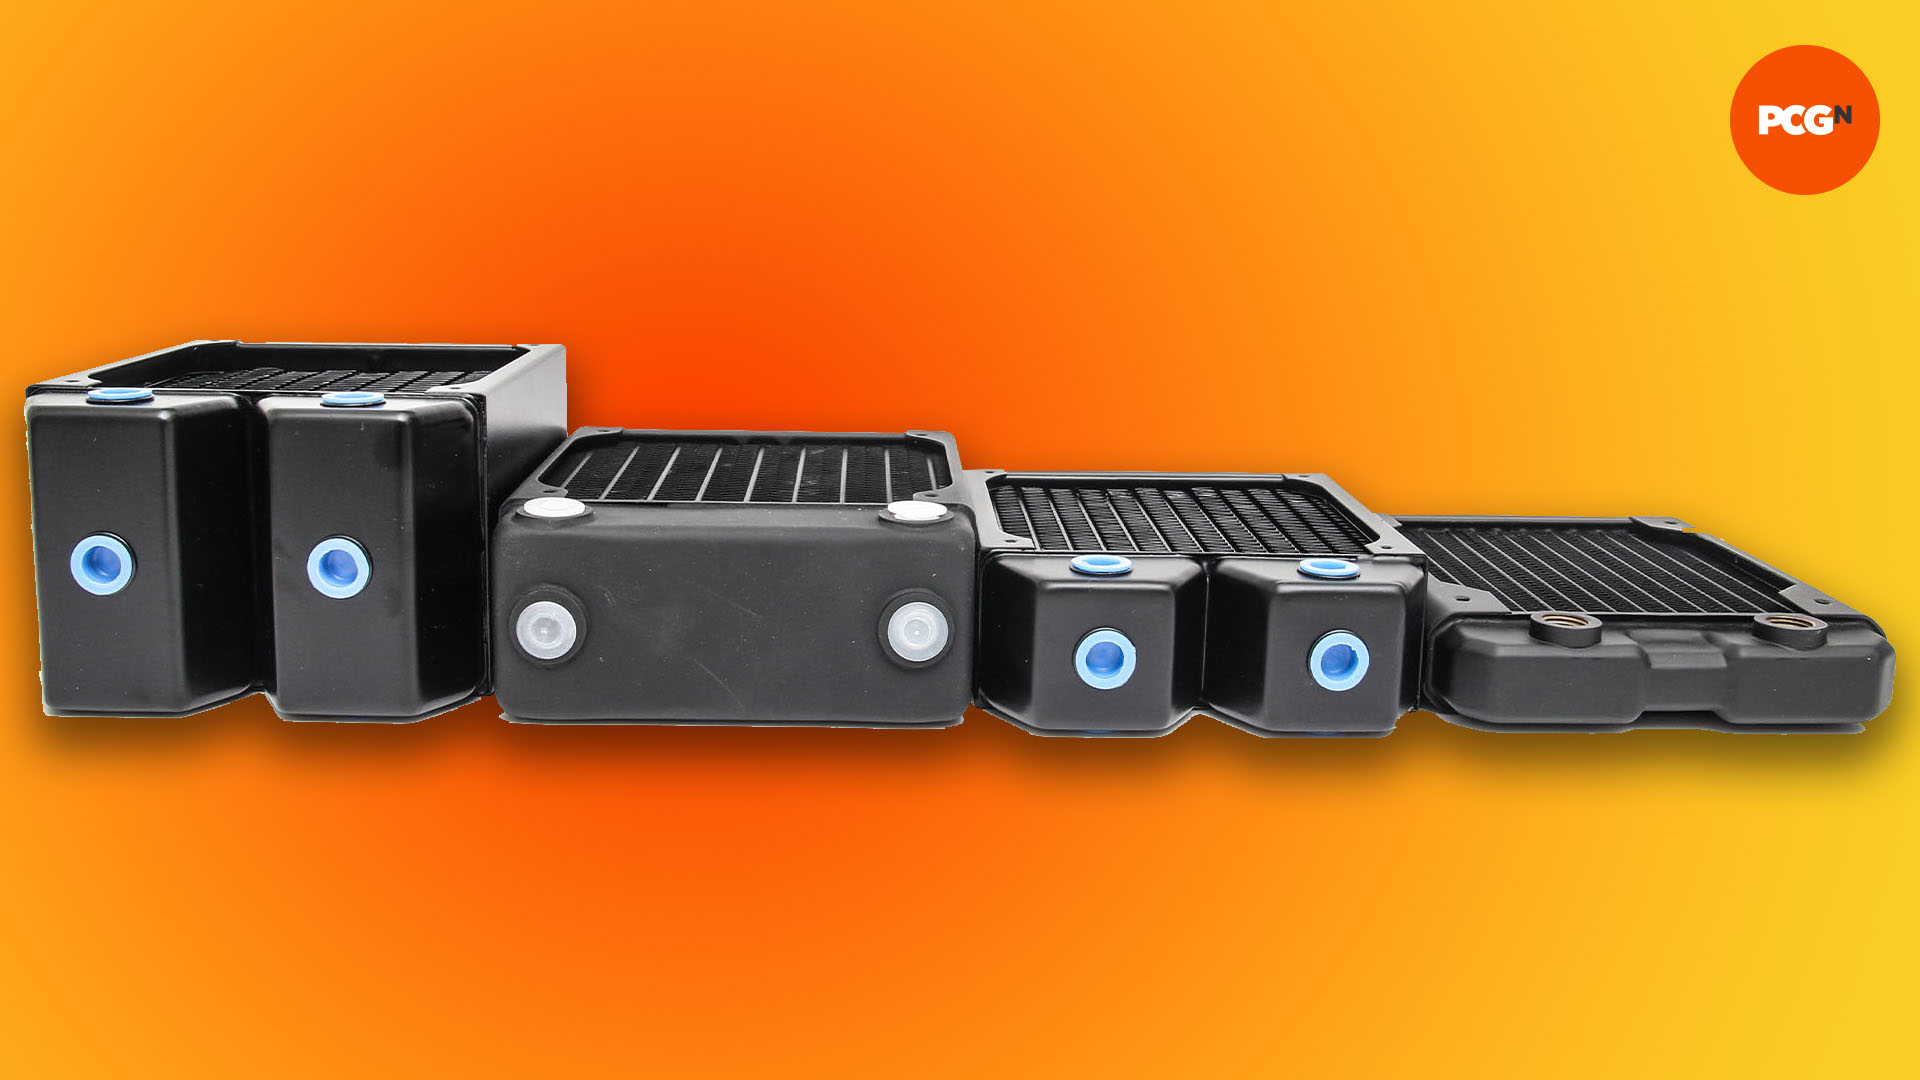
A high number of folds per inch (FPI) will restrict more airflow, but have higher cooling potential, while a lower FPI will work better with lower airflow fans, but offer less cooling. You can also get radiators that support many different fan sizes – not just 120mm and 140mm fan models – there are radiators available that support any fan size from 40mm to 200mm, catering for any fan size used in modern cases.
An easy way to gauge your radiator requirements is to assume that a single 30mm-thick, 120mm radiator, with a single 120mm fan running at up to 2,000rpm, is the minimum needed to cool a single mid-range component such as a CPU with eight cores or fewer, or a mid-range graphics card. If you want to run your fans at a slower speed, such as 1,000rpm, then you’ll need to use a larger radiator or a thicker one with more fans, just as you would with all-in-one liquid coolers or heatsinks.
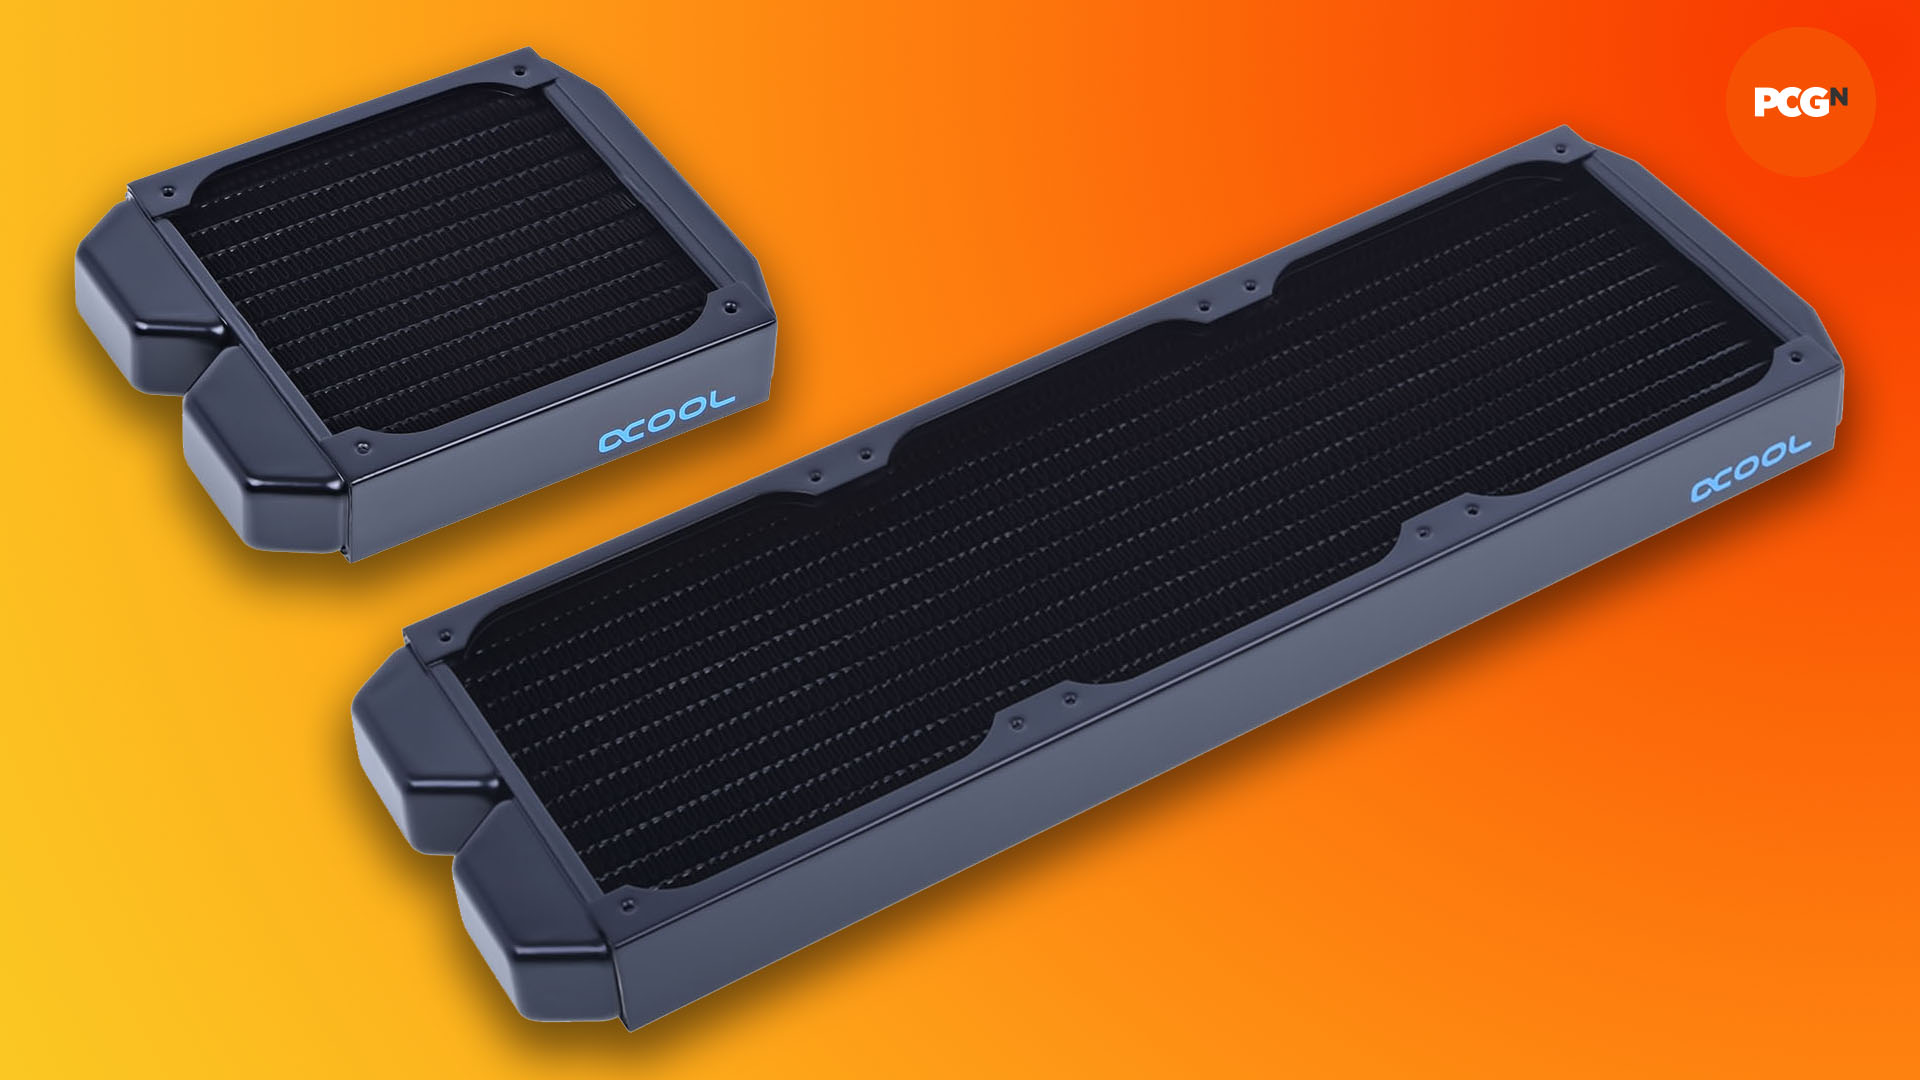
If you’re using a CPU with more than eight cores, a high-end graphics card or you plan to overclock a component, you’ll need to double up on that radiator size. For example, you could use a 240mm radiator that’s at least 30mm thick for each high-end component. In the image above, you can see a single-fan 120mm radiator and a triple-fan 360mm radiator.
We should stress that the suggestions listed below are minimum requirements, but it’s a general rule of thumb to help estimate your cooling needs. Also, bear in mind that 2,000rpm fans aren’t particularly quiet, which defeats one of the main points of water cooling – noise reduction.
As a result, most people opt for radiator and fan combinations with excess capacity, so the fans can remain at lower levels even under high loads, yet still offer awesome cooling. It’s worth considering using external radiators too. If you fit a radiator outside your case, you’ll be able to use a much larger radiator, especially if you have a high-end mini-ITX or micro-ATX PC.
What you need to water cool a CPU (up to eight cores)
- Minimum: 120mm radiator with 1,500-2,000rpm fan
- Low noise or overclocking: 240mm or 45-60mm-thick 120mm radiator with two 1,000rpm fans
What you need to water cool a CPU (up to eight cores) and mid-range GPU
- Minimum: 240mm radiator with 1,500-2,000rpm fans
- Low noise or overclocking: 360mm or 45-60mm-thick 240mm radiator with 1,000rpm fans
What you need to water-cool a CPU (up to eight cores) and high-end GPU
- Minimum: 360mm or 45-60mm-thick 240mm radiator with 1,500-2,000rpm fans
- Low noise or overclocking: 45-60mm-thick 360mm radiator or 2 x 240mm radiators with 1,000rpm fans
What you need to water-cool a CPU (12 or more cores) and high-end GPU
- Minimum: 360mm radiator and 240mm radiator, or 2 x 45-60mm-thick 240mm radiators, with 1,500-2,000rpm fans
- Low noise or overclocking: 45-60mm-thick 360mm radiator, plus 45-60mm-thick 240mm radiator
Water cooling reservoir
A reservoir has several functions in a water-cooling loop. At the start, it allows you to easily fill the loop with coolant, and also remove air from the loop by bleeding it from the coolant as it passes through.
For this reason, it’s the only component that should be placed at a particular point in the loop, which is directly before the pump or even attached to it. This way, the pump won’t initially run dry, which can damage internal components, plus you’ll be able to fill the loop with coolant quickly, and with minimal air bubbles.
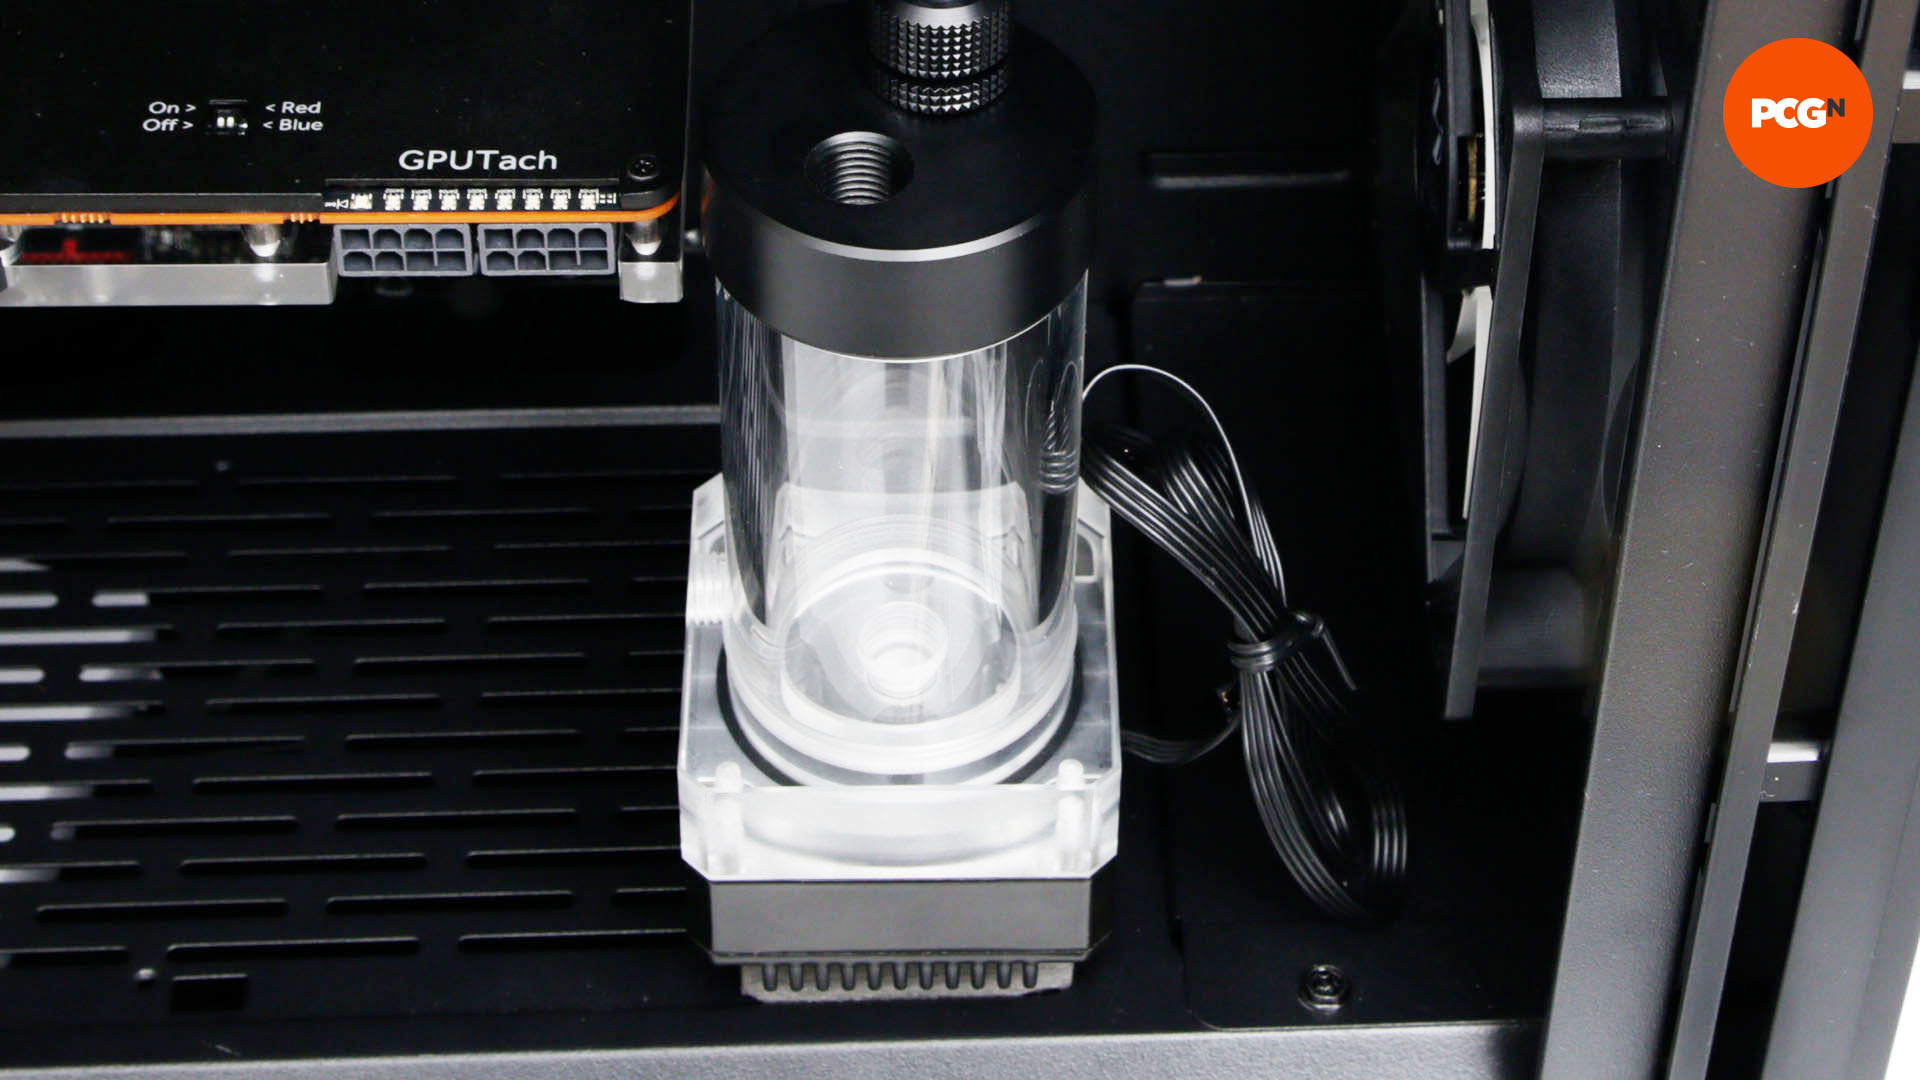
Reservoirs come in a variety of shapes and sizes, but the most common are tube reservoirs, which are mounted in a variety of different ways. The easiest is using a fan mount adaptor, enabling them to be installed onto a fan mount or radiator, usually by being combined with a pump.
Some cases also offer screw points on the motherboard tray to mount reservoirs with mounting plates. There are also bay reservoirs that make use of spare 5.25-inch bays, while some pump tops include built-in reservoirs, removing the need to mount the reservoir separately. The size of your reservoir has no impact on cooling performance.
Water cooling waterblocks
You can buy waterblocks that fit nearly every hot spot in your PC, from the CPU to the graphics card, motherboard VRMs and even memory and even SSDs, but water cooling has the biggest impact on the hottest-running components. The CPU is an easy one, as there’s a large range of waterblocks for every current CPU socket, and many of them have universal designs too.
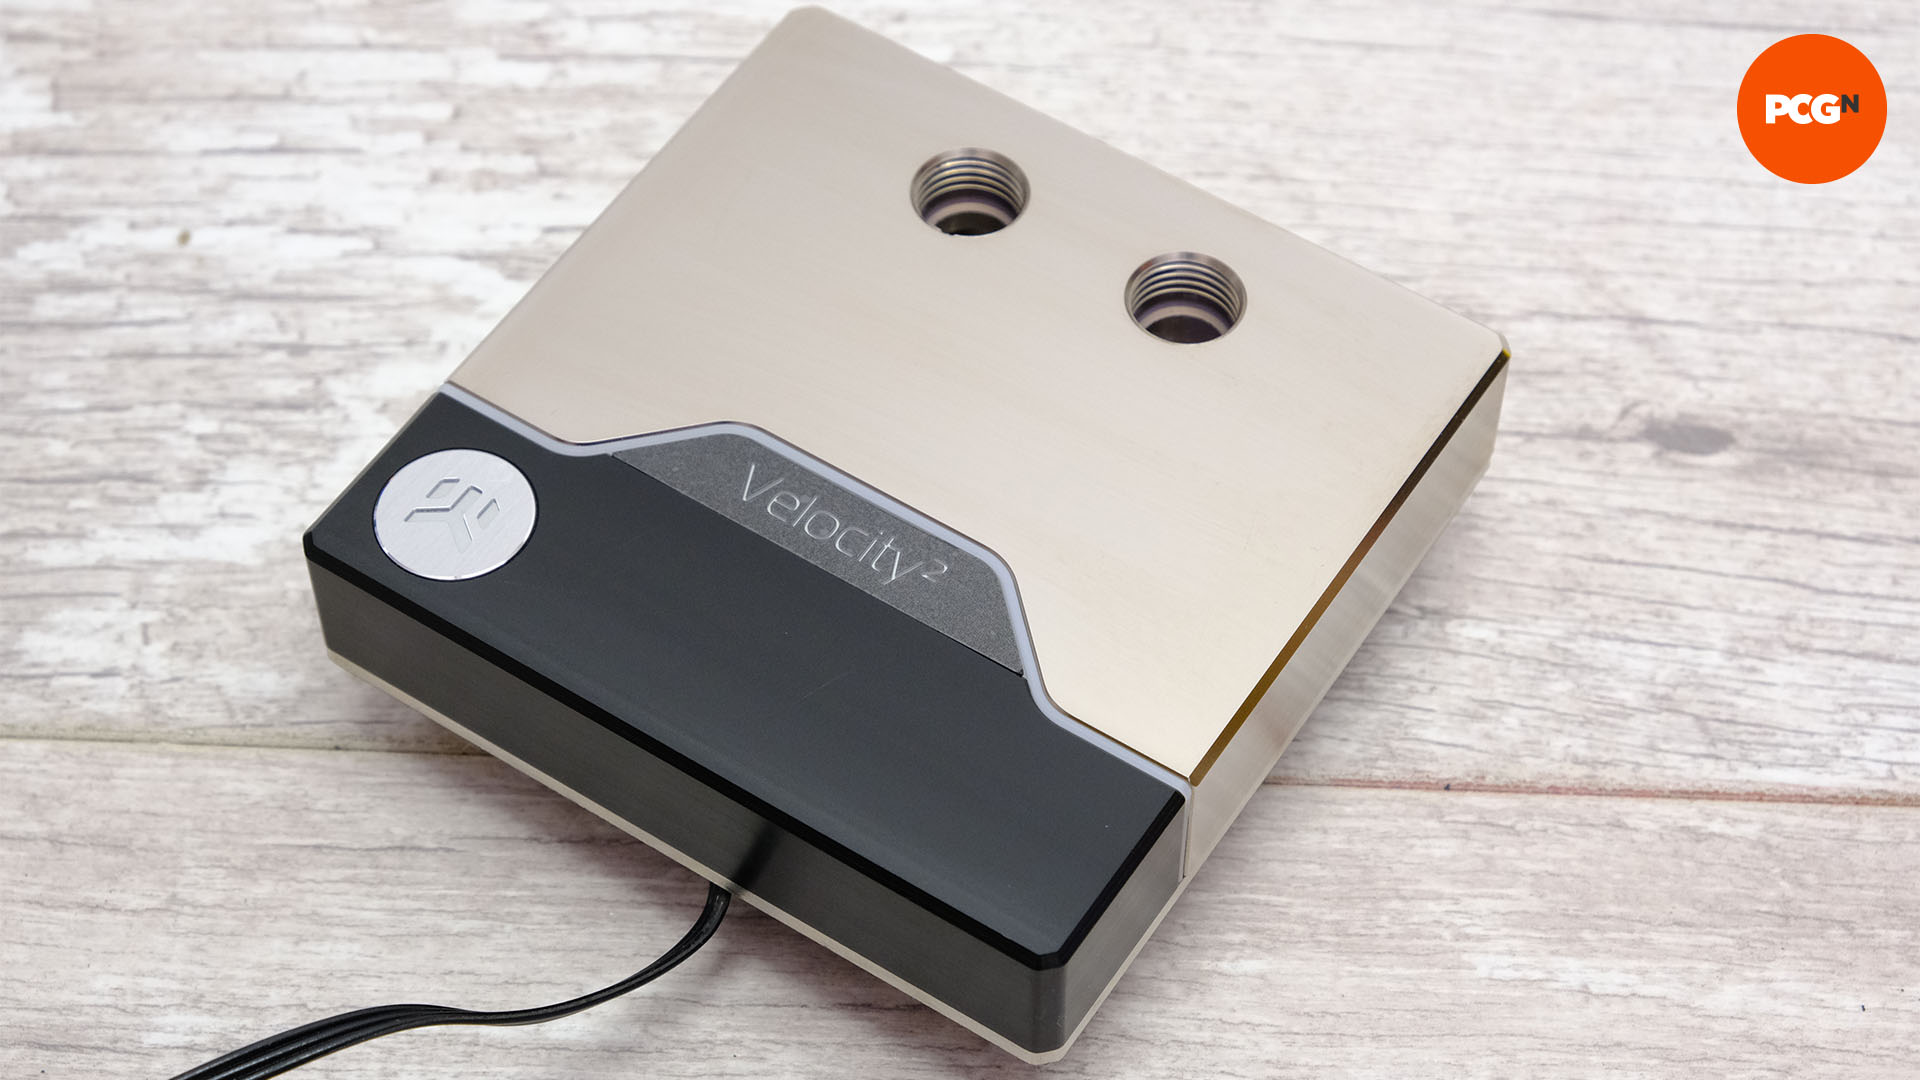
Graphics cards are more complicated to water cool, due to the huge variation in PCB layouts. This situation means that full-cover waterblocks, which cool the GPU core, memory, and VRMs, often need to be made for a specific model, making them more expensive to produce.
If you’re not purchasing a reference AMD card, or an Nvidia Founders Edition, you’ll need to make sure your model has a compatible waterblock. Thankfully, this process is easy, as manufacturers offer databases to help you find waterblocks that are compatible with your particular graphics card. The EK Configurator is a very handy tool for this job.
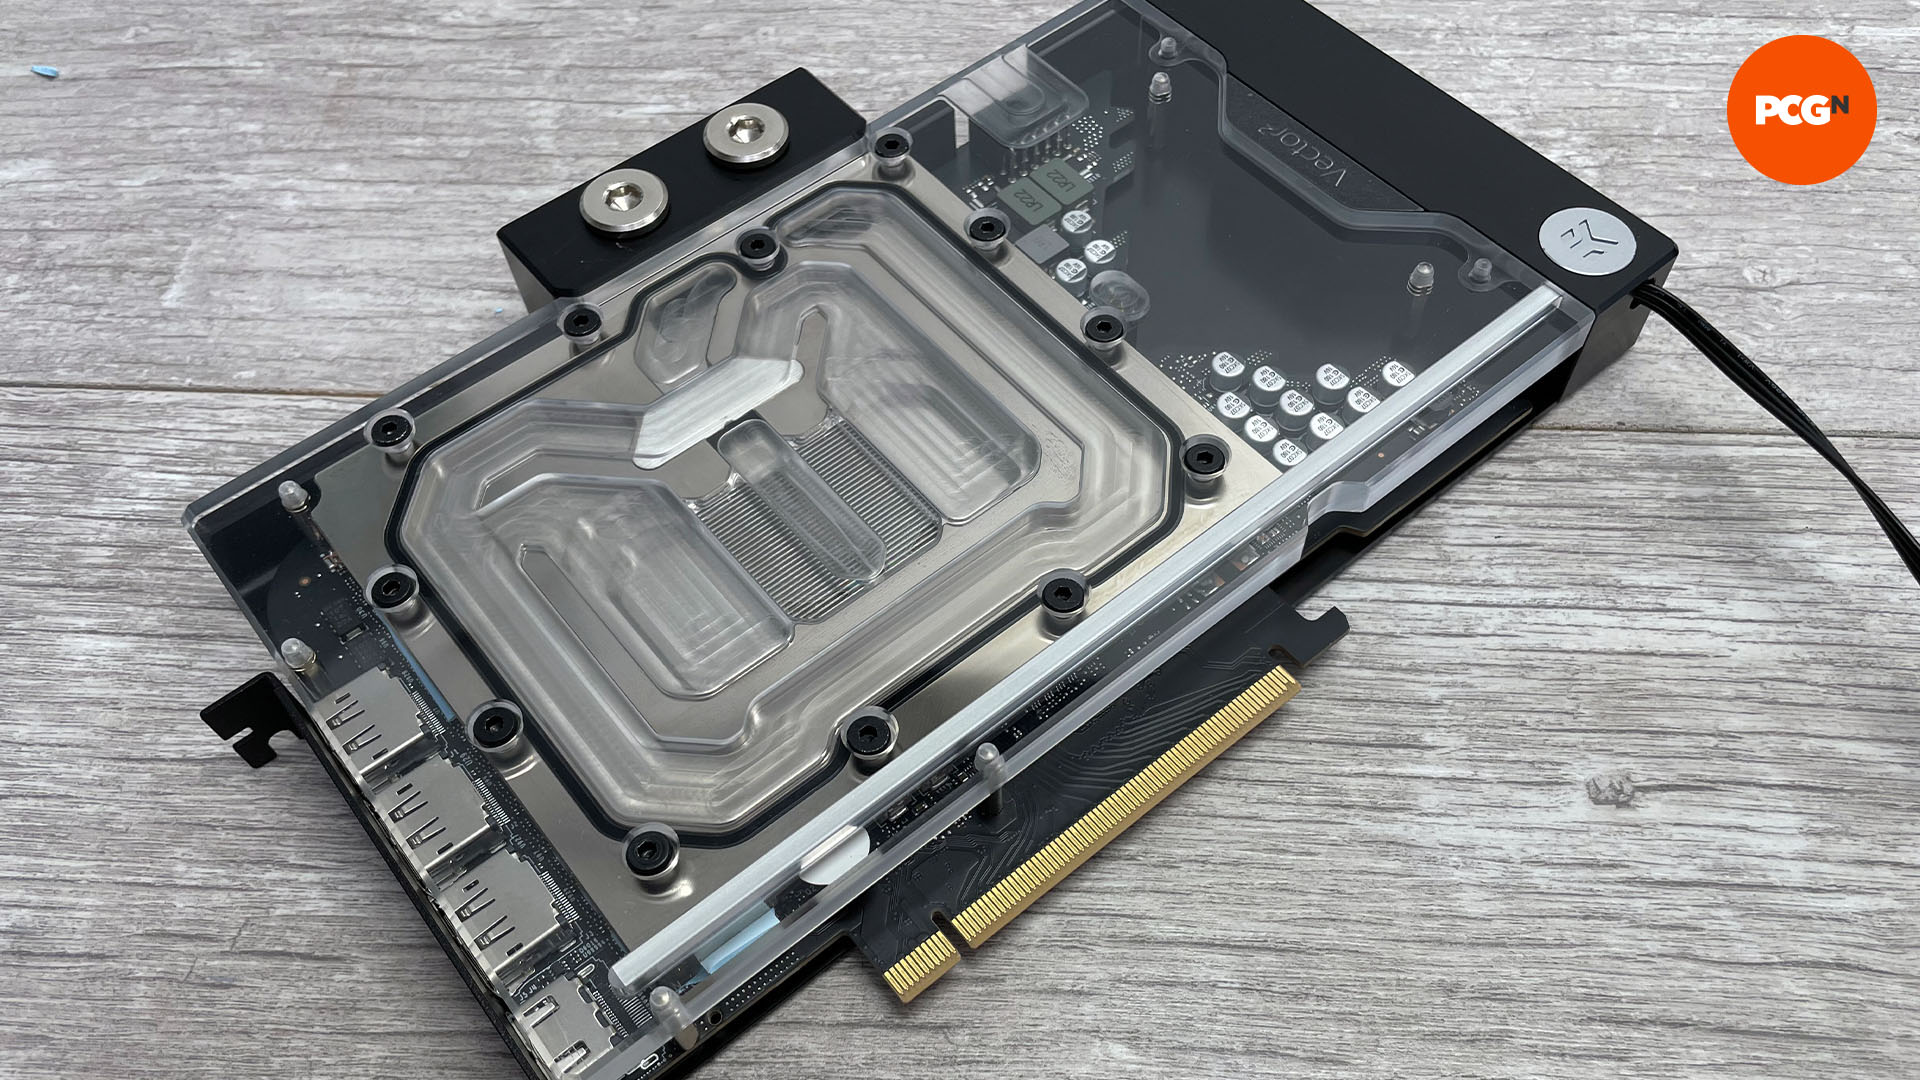
You can also get large motherboard monoblocks, which not only cool the CPU itself, but the surrounding VRMs and chipset as well. These monoblocks give you the advantage of cutting down the number of inlets and outlets you need, with just two ports dealing with the whole waterblock.
In general, there’s very little difference in terms of performance between waterblocks, with the main differences being aesthetic. For example, modern waterblocks sport RGB lighting and are available in a variety of finished such as nickel plating or bare copper, with solid, frosted or transparent tops. They will all offer similar performance, though.
Water cooling fittings and tubing
The key to the interchangeability of the vast array of water-cooling components from dozens of different manufacturers is the G1/4in thread standard. The barbs or fittings that connect to each component using tubing have threads, which allow them to screw into components, and the vast majority of these threads are G1/4 size. That means you can use nearly any water-cooling fitting with any radiator, water block or pump.
Fittings do differ in terms of the tube size and type for which they cater, though. Tubing comes in both flexible and rigid forms, with the latter including acrylic, metal and even glass. Rigid tubing is available in a handful of sizes, and requires specific rigid-tube fittings that don’t have barbs.
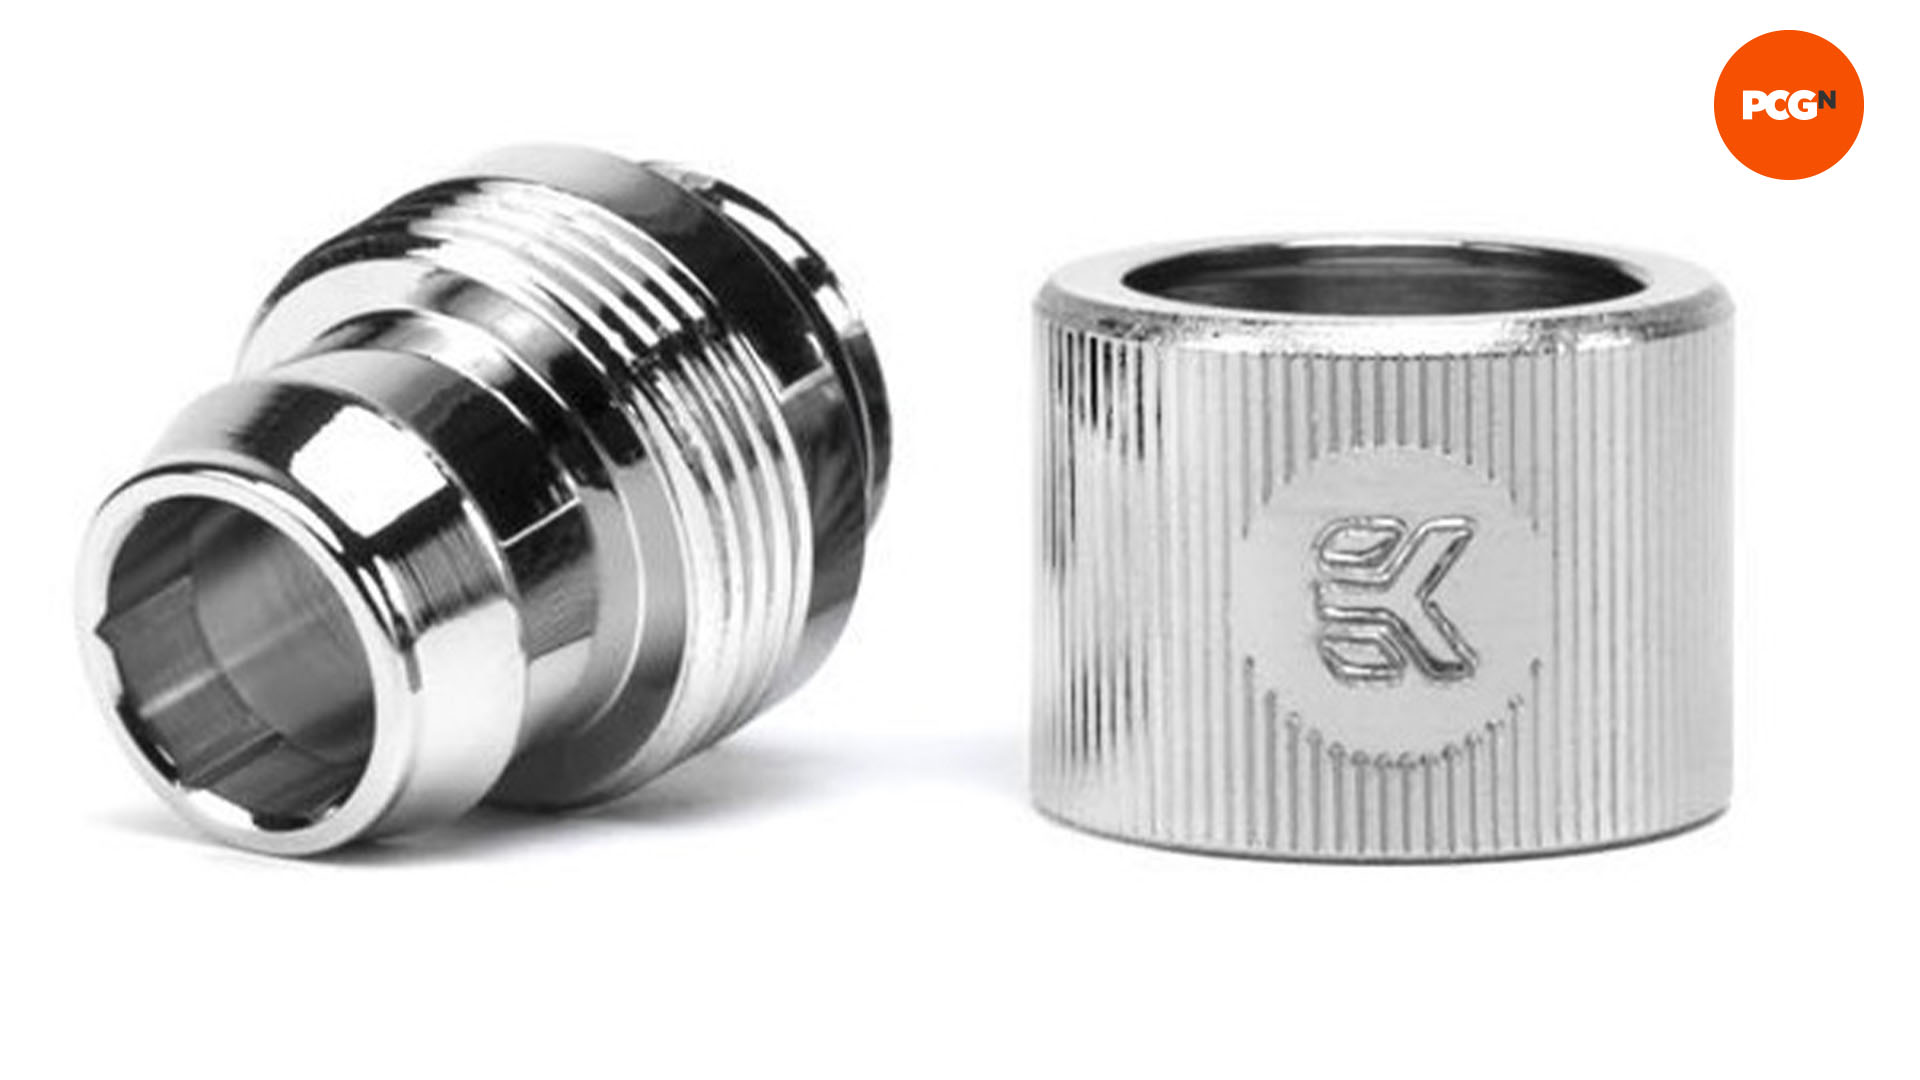
Flexible tubing, which is what you should use if you’re water-cooling your PC for the first time, comes in opaque and transparent varieties, as well as a large range of sizes. However, nearly all these types of tubing use fittings that have barbs sitting inside the end of the tube, with a type of clamp on the outside.
These days, compression fittings are the most popular fitting to use with flexible tubing. They use a locking ring that screws over the tubing, compressing it from the outside onto a barb that sits on the inside. They’re much more reliable and easier to use than traditional barbs with clamps or jubilee clips.
Any fitting that screws into a component will have an O-ring in its base. This O-ring creates a leak-tight seal around the thread, but means you need to make sure the fitting is firmly tightened into the thread in order to compress the O-ring.
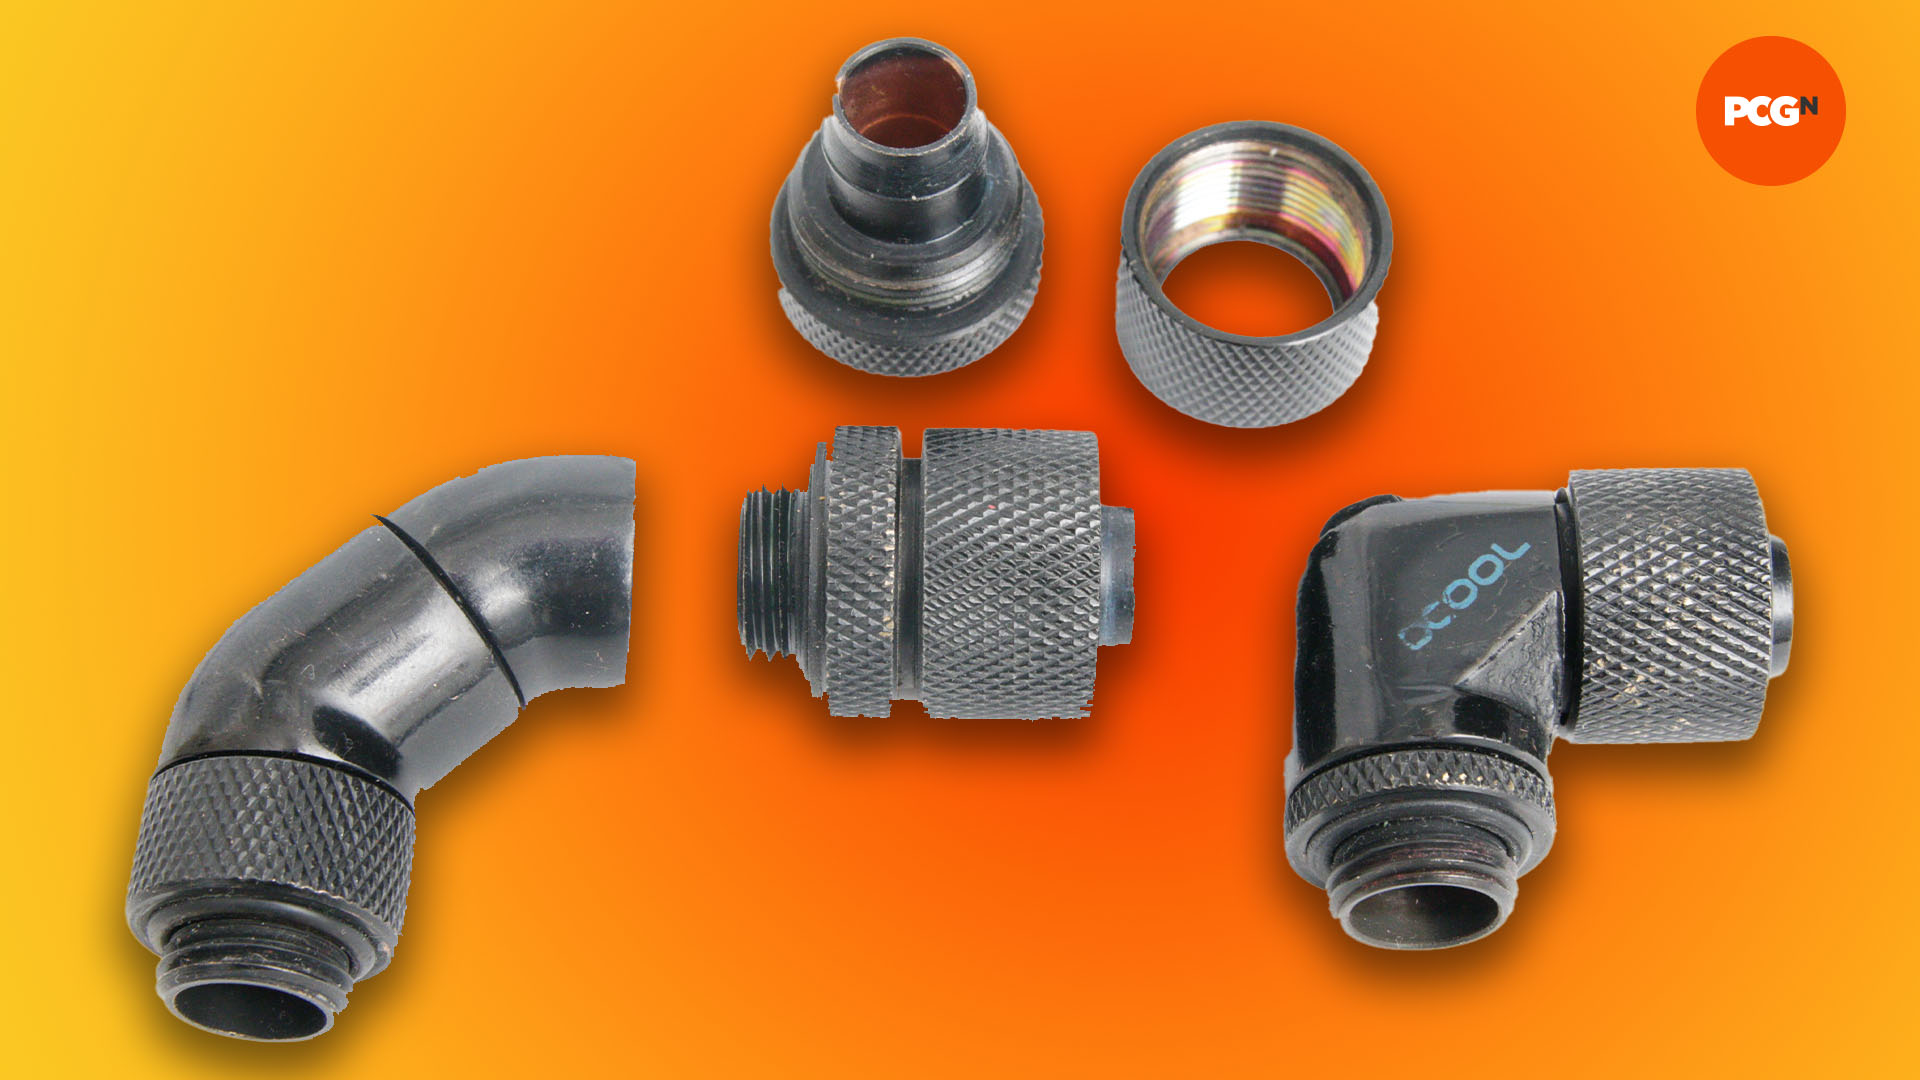
Fittings don’t just come in their standard straight form either; they can be bought with the ends pointing at angles to cater for your particular setup. For example, the fittings on your GPU waterblock or radiator might need a 90-degree bend to avoid features in your case, or to route your tubing directly to the next component.
People refer to tubing sizes in both metric and imperial form, but both methods usually state the interior and exterior dimensions of the fittings with which they’re compatible. For example, the term 10/8mm refers to flexible tubing with an outside diameter of 10mm and an internal diameter of 8mm. A 10/8mm compression fitting for this tubing will therefore have a barb that measures 8mm across to fit inside the tubing, and a locking ring that offers a snug fit around a 10mm-wide tube.
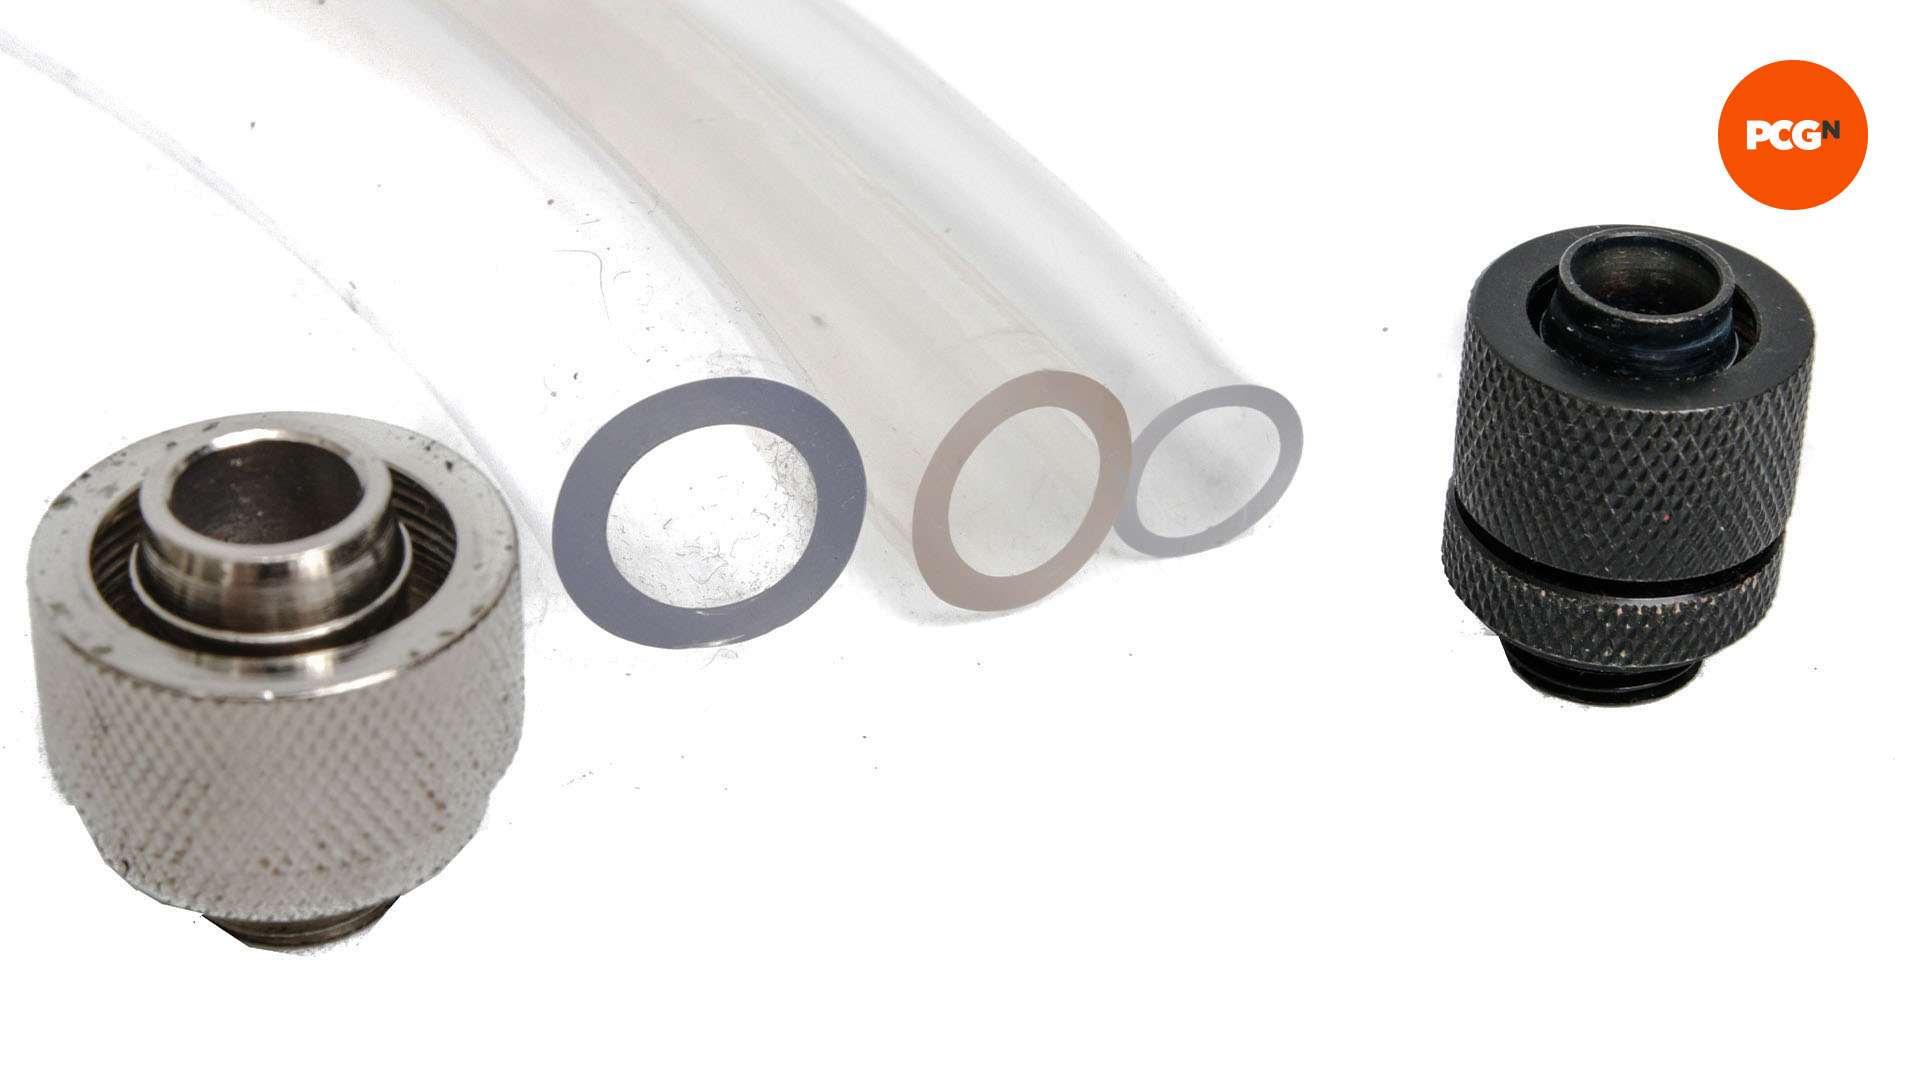
The difference between tube widths doesn’t have a noticeable impact on temperatures, even going from 6mm to 13mm, especially with modern pumps, so your decision on tubing width will be largely aesthetic. However, smaller tubing is a better bet for small systems, as it takes up less space and can bend in tighter turns, while thick tubing looks better in larger systems.
Water cooling coolant
The cheapest coolants are usually home-made, using a combination of distilled or deionized water (cheaply available in car garages and called battery top-up water), mixed with an anti-corrosion and anti-biocide additive that will prevent bacterial growth and corrosion in the loop. Don’t ever use tap water, as it contains elements that can affect the surfaces of your components over time.
Pre-mixed coolants are more expensive but have several advantages. They’re usually ready to use, with all the additives you need. Also, some coolants, such as Mayhems’ Pastel range, are less electrically conductive than plain deionized water, potentially standing you in good stead should the worst happen.
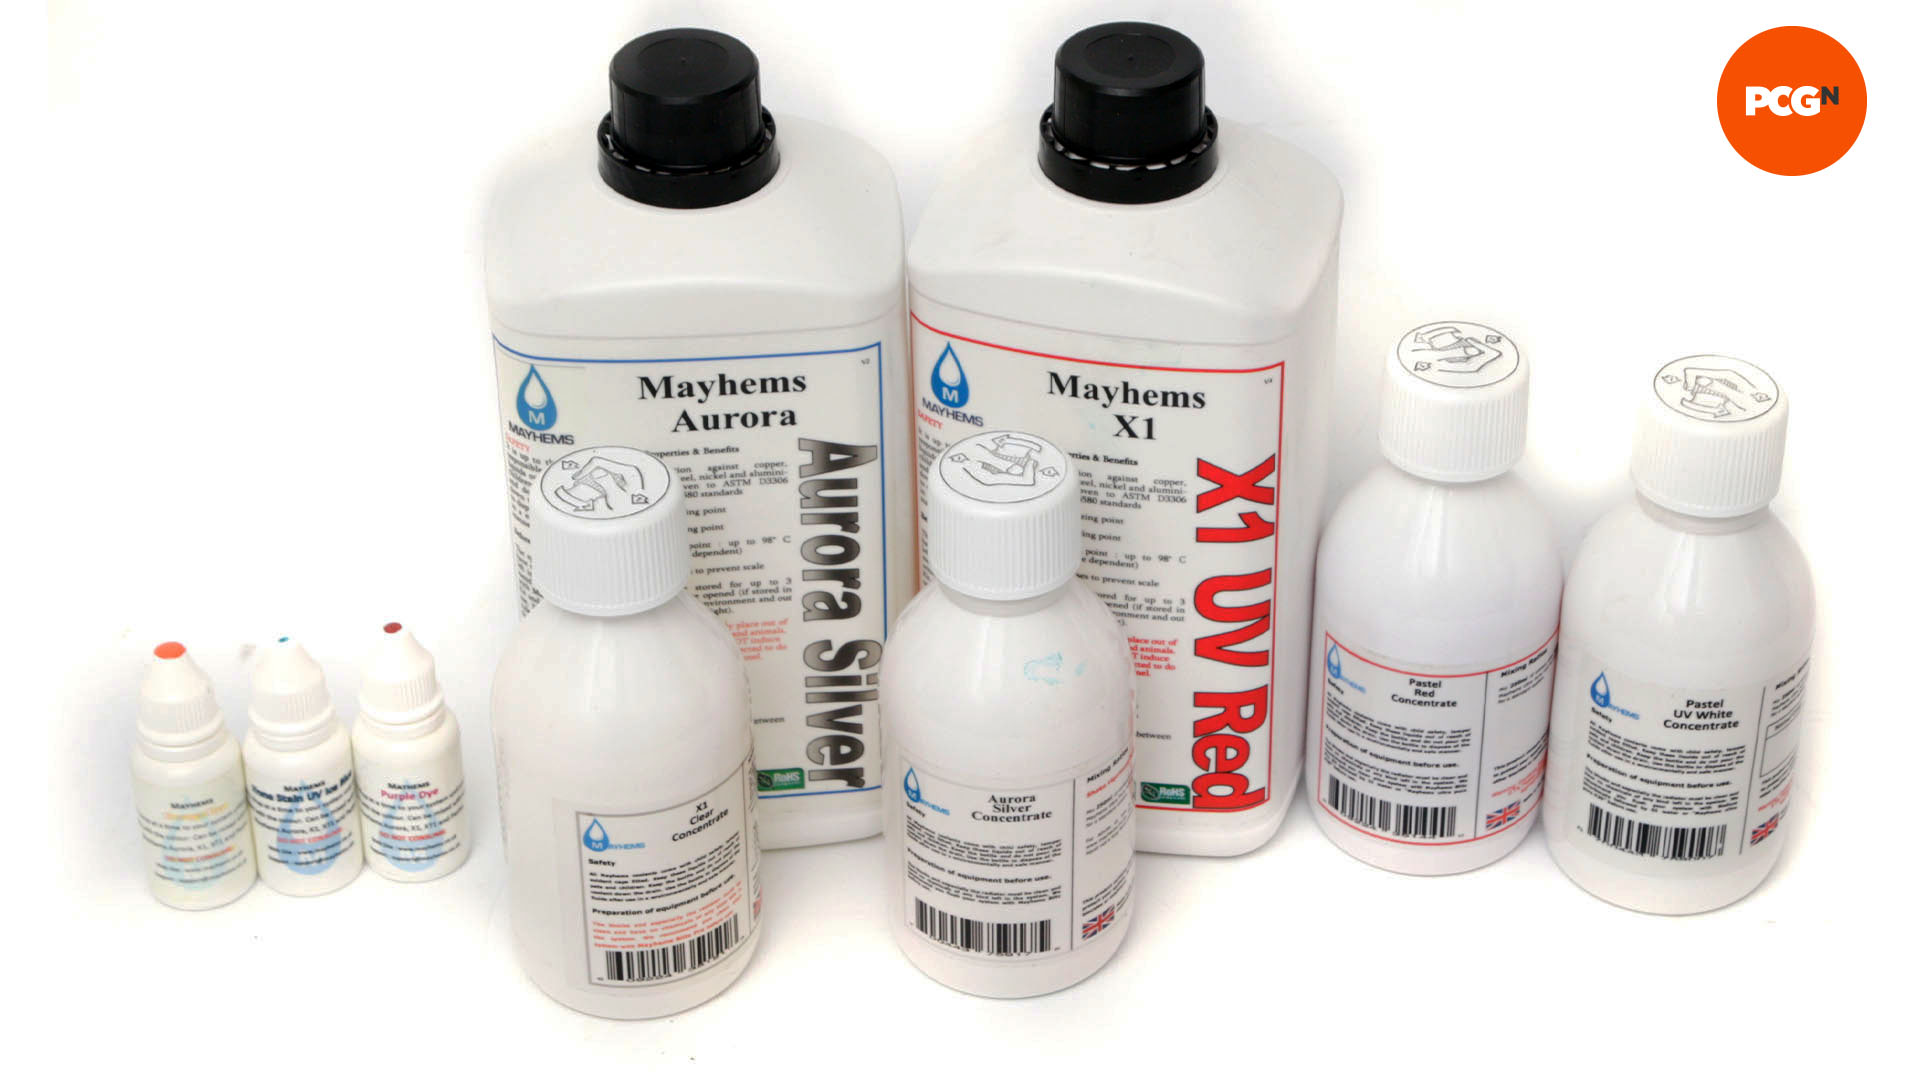
For a typical loop with a 240mm radiator and one or two waterblocks, a one-liter bottle of coolant will suffice. Modern coolant generally lasts a long time, and even the likes of Mayhems Pastel will last a year or more, with most companies recommending you replace it every year.
Install a water cooling system
Your first job is to check the radiators your case supports, which will dictate which radiator size and thickness you buy, and whether you can water-cool all your planned components without the cooling system struggling. In our example, we’re water cooling an Intel Core i5-9600K and AMD Radeon RX Vega 64, so we’ve chosen a 360mm radiator with a single row of fans.
Building the loop
Start by installing your waterblocks on their respective components. We’ll be using a CPU block and a GPU block. Most CPU blocks require thermal paste to be applied, but usually come with a tube of it. GPU blocks often need thermal paste as well as thermal pads for memory and VRMs. Installing GPU waterblocks is well documented in the instructions, so in this feature we’ll focus on other components and how to install the loop as a whole.
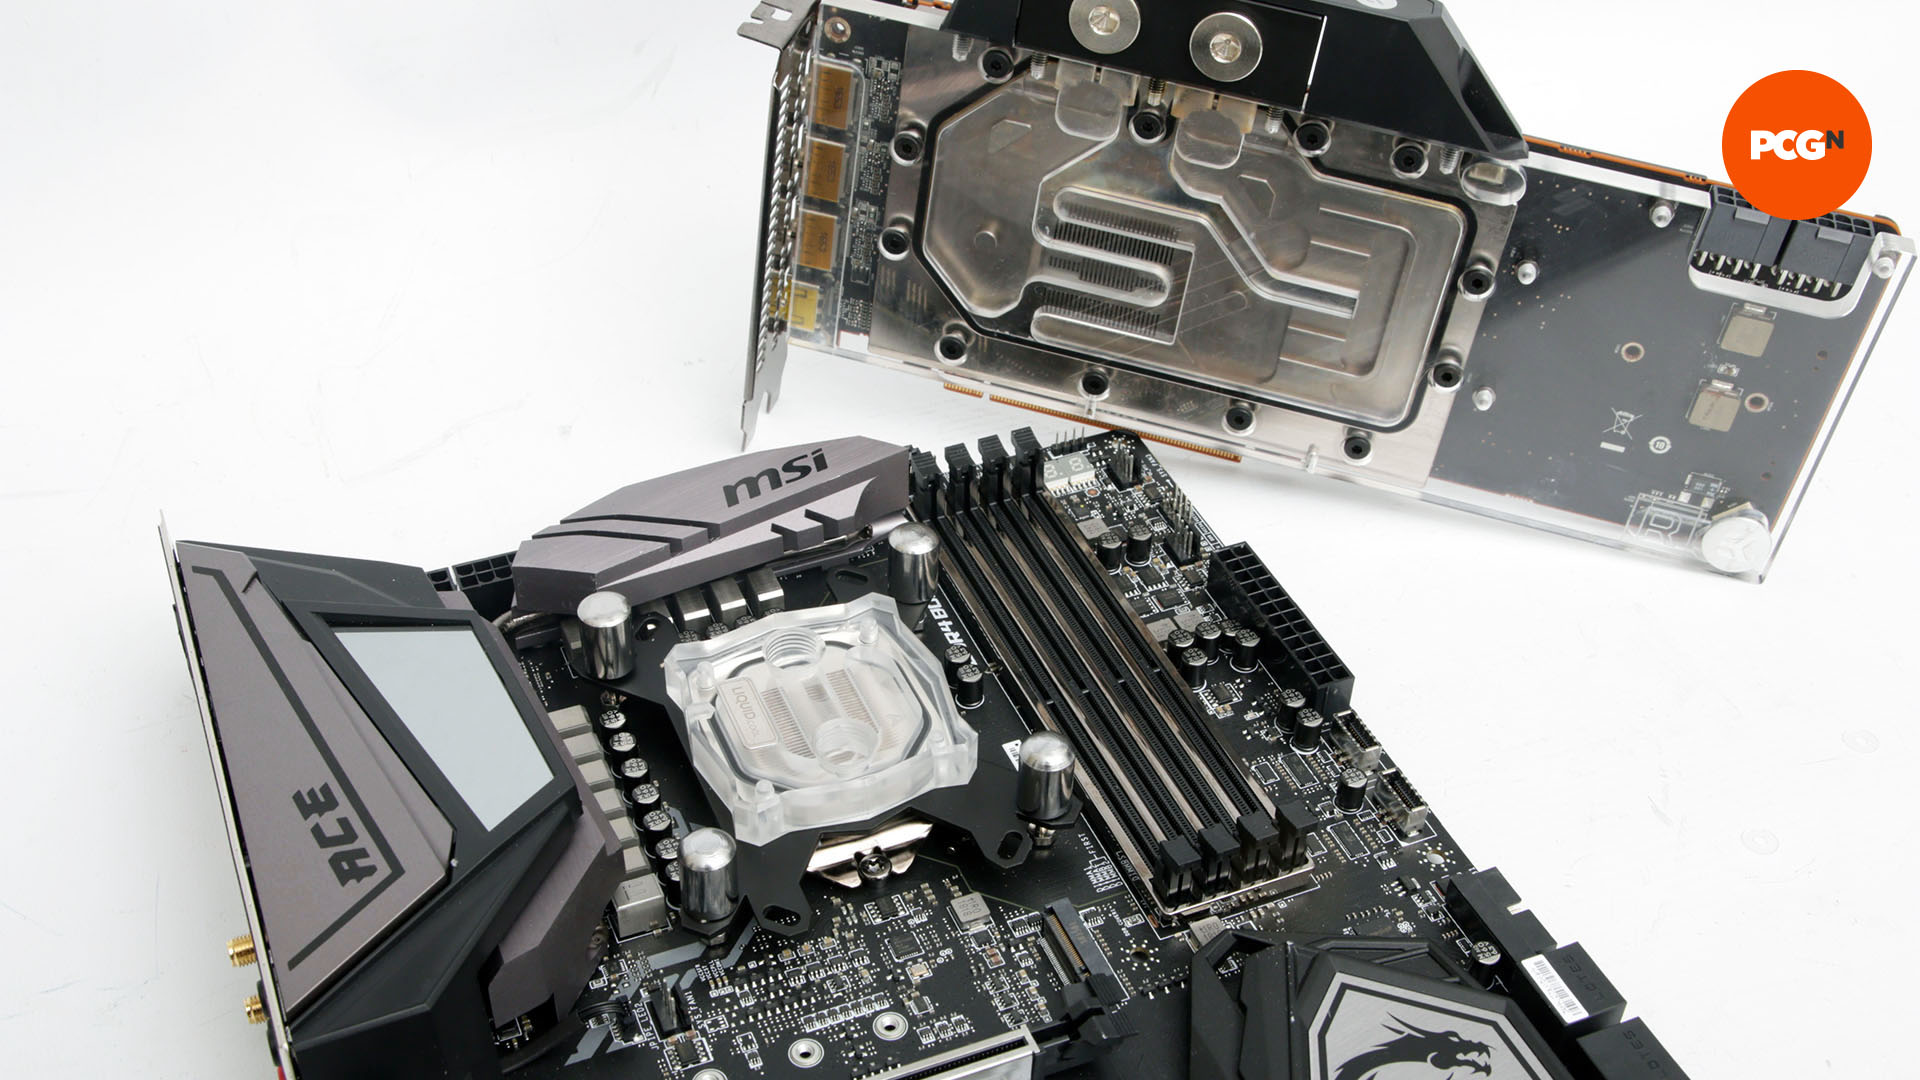
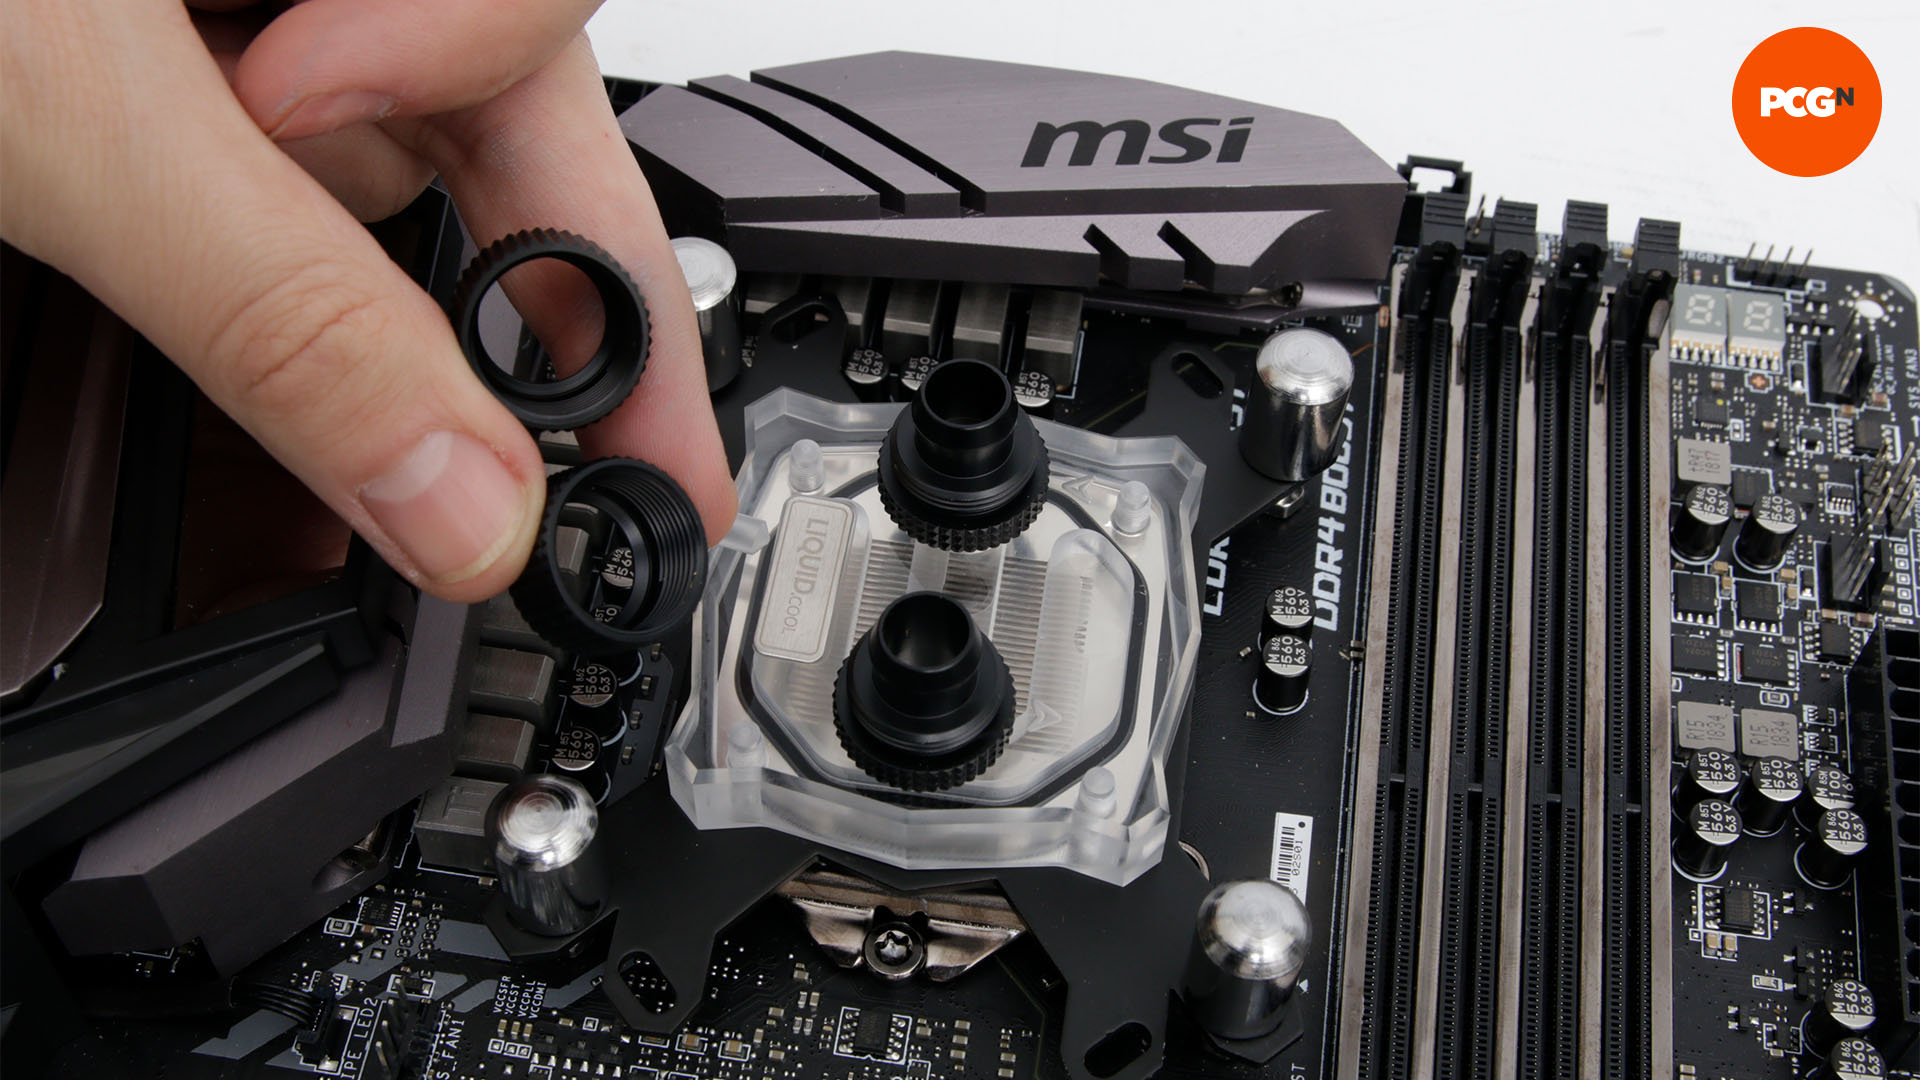
Install the fittings onto the waterblock before you install the motherboard into the case. However, remove the tube locking rings first so you can install them later. Ensure all the fittings are tightly screwed onto the components – you shouldn’t need more than your hand to do this job.
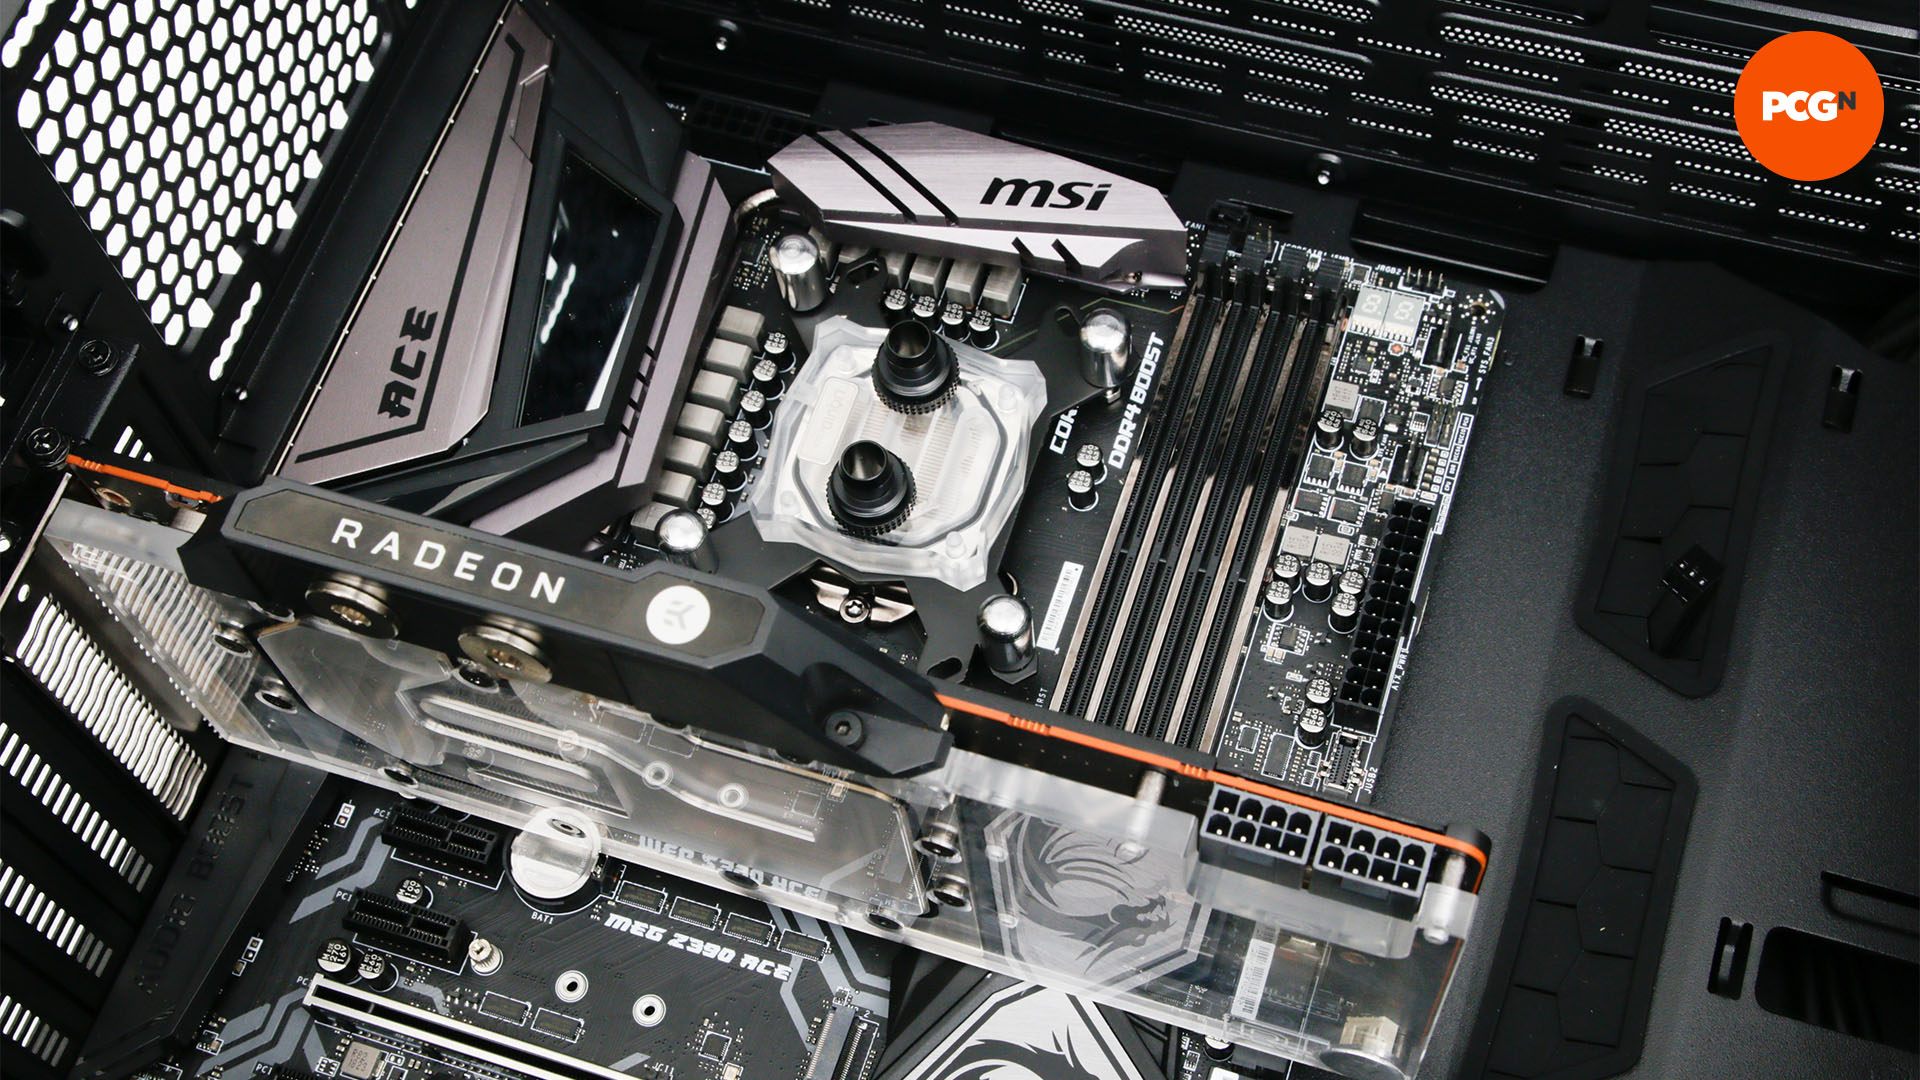
Install your core hardware, including the newly water-cooled graphics card, inside your case. You will then have a better idea of where to route your tubing, and where it’s best to mount your radiator(s). Ideally, you want the radiator in the roof exhausting air from the case, but locating it in the front of the case, drawing in air from the front, isn’t the end of the world and may be your only option.
Now install a tube locking ring onto a length of tubing. You can then press this tubing over the fitting barb. If it’s a struggle, try heating the tube in hot water first to loosen it.
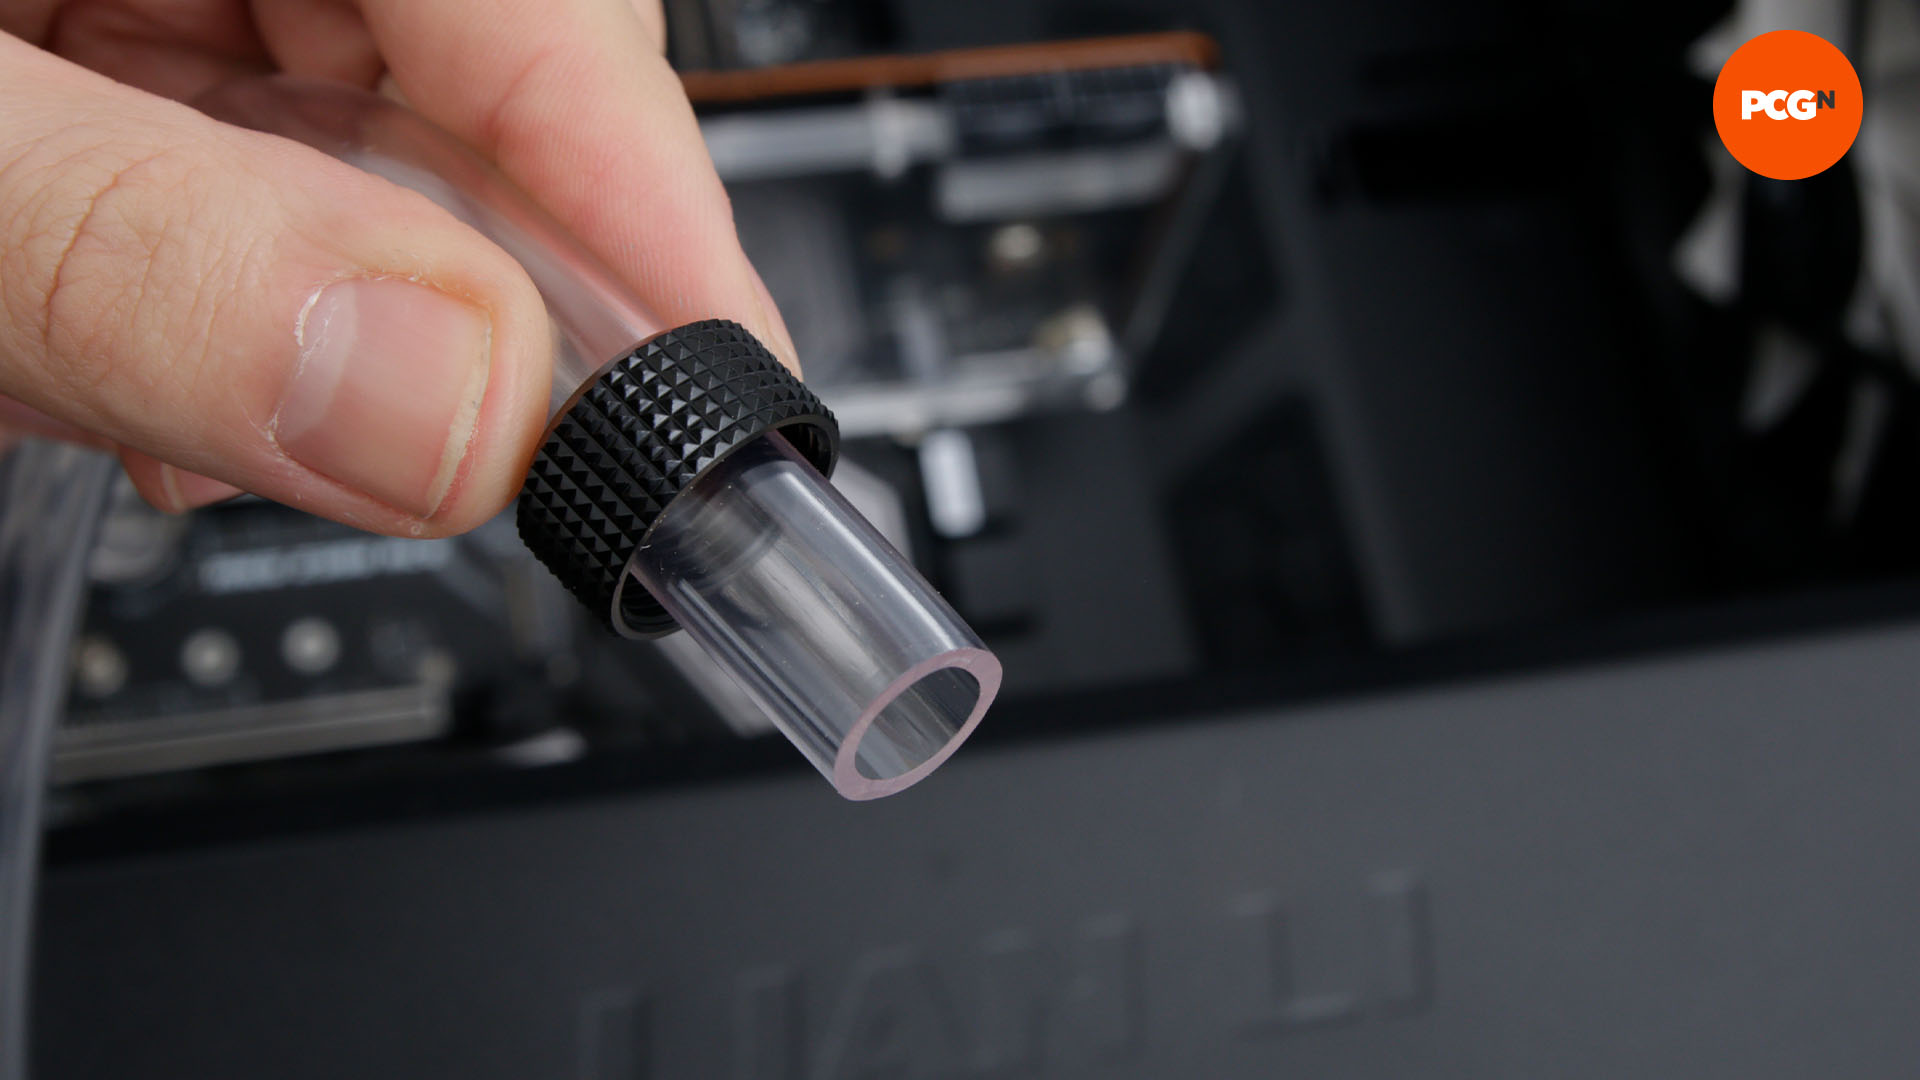
Once the tube is pressed all the way onto the barb, press the locking ring down onto the fitting so it meets the thread, and screw it down as tight as possible. Again, most fittings only need to be hand-tightened, but we’ll check for potential leaks later.
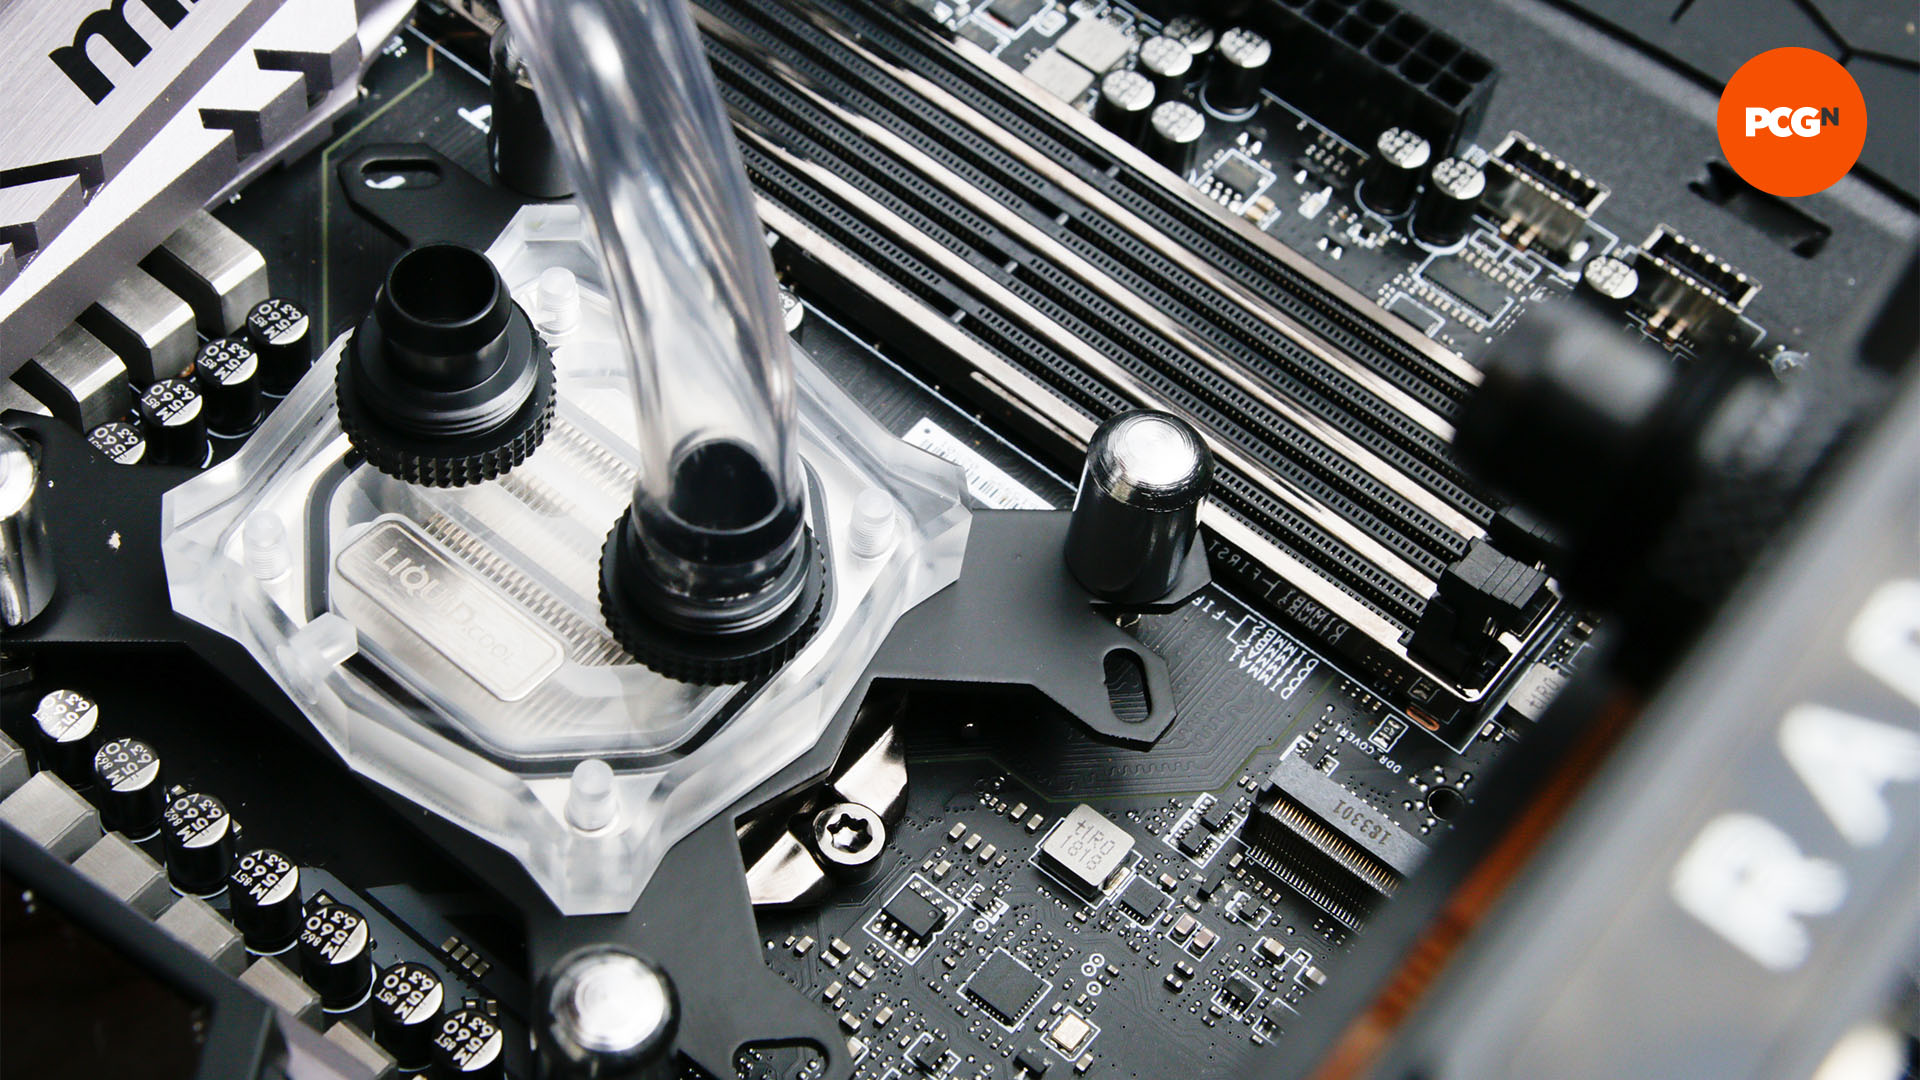
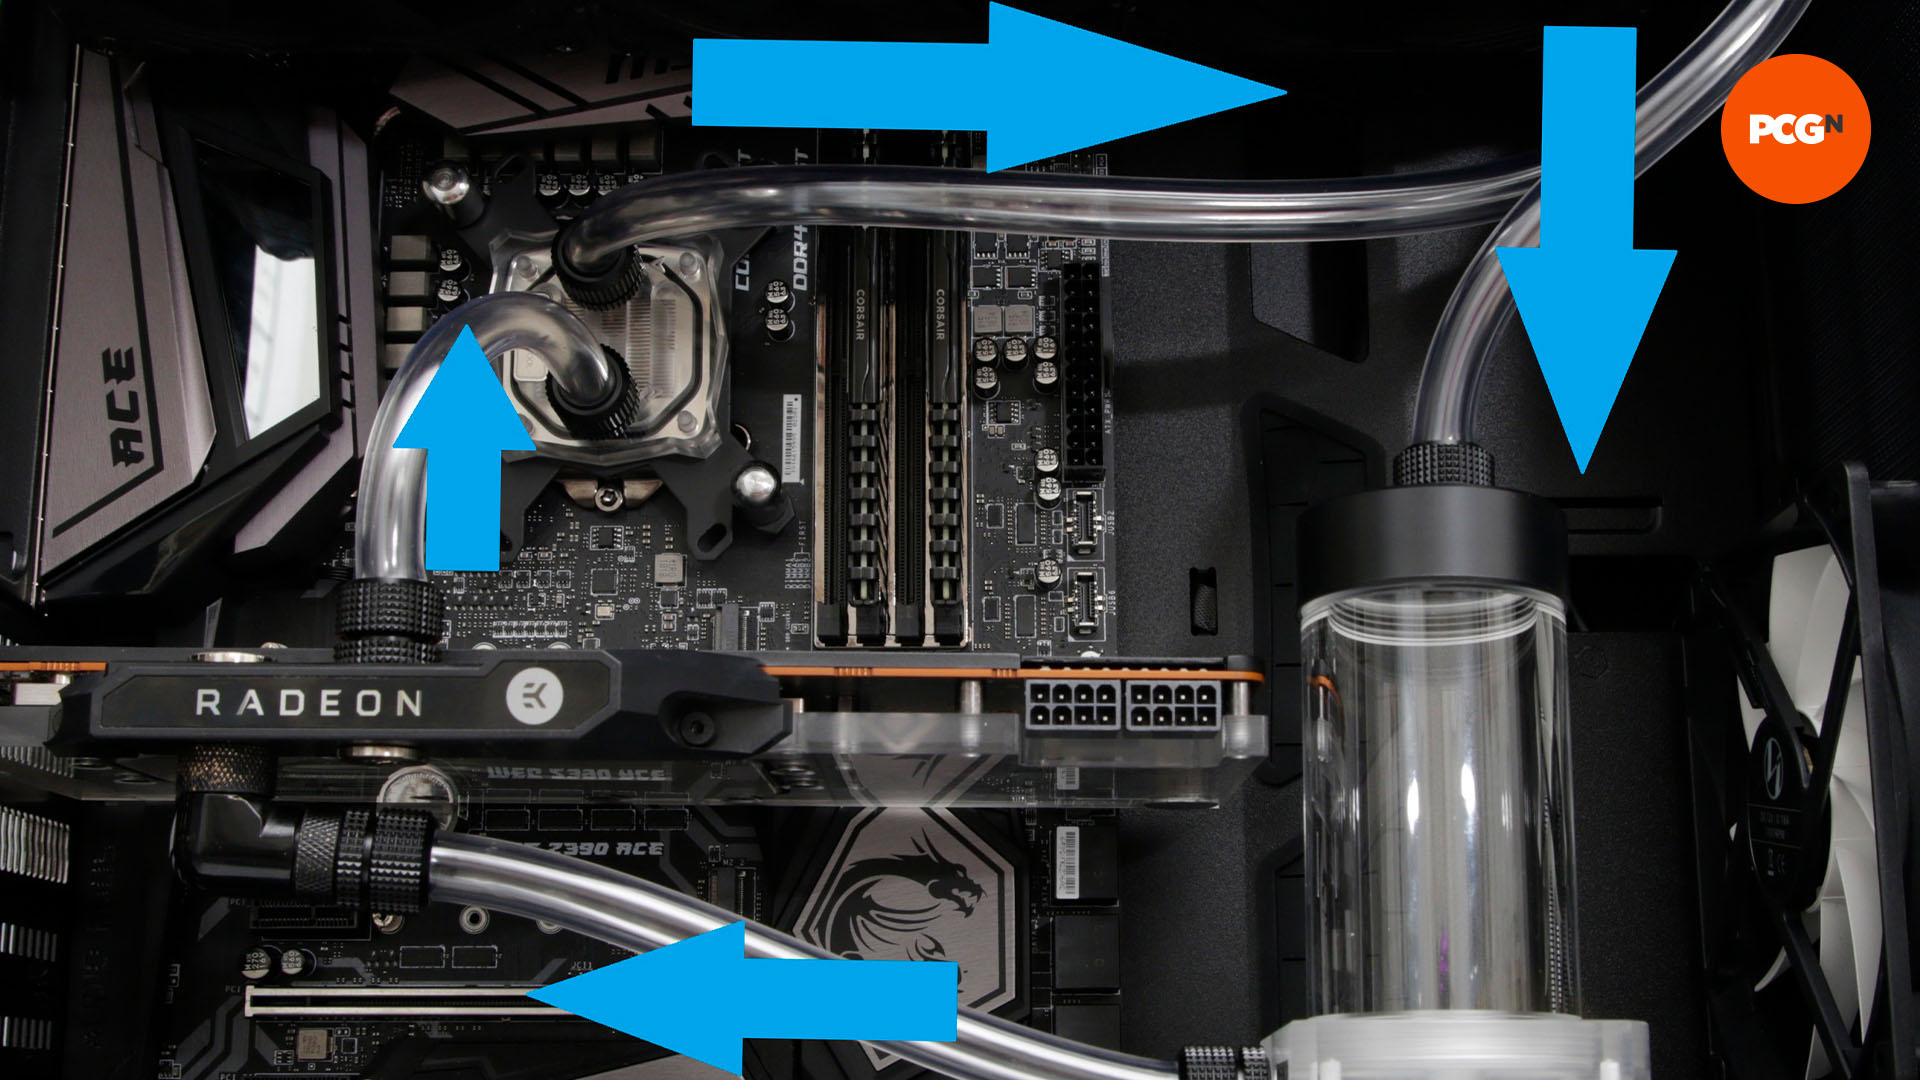
The most logical first tube route is from the GPU block to the CPU block. The former usually has four ports – two on either side – allowing you to point the tube up or down. As long as you use alternate sides, you’ll ensure the coolant is flowing through the waterblock. The spare ports are useful for leak testing or for installing a drain valve.
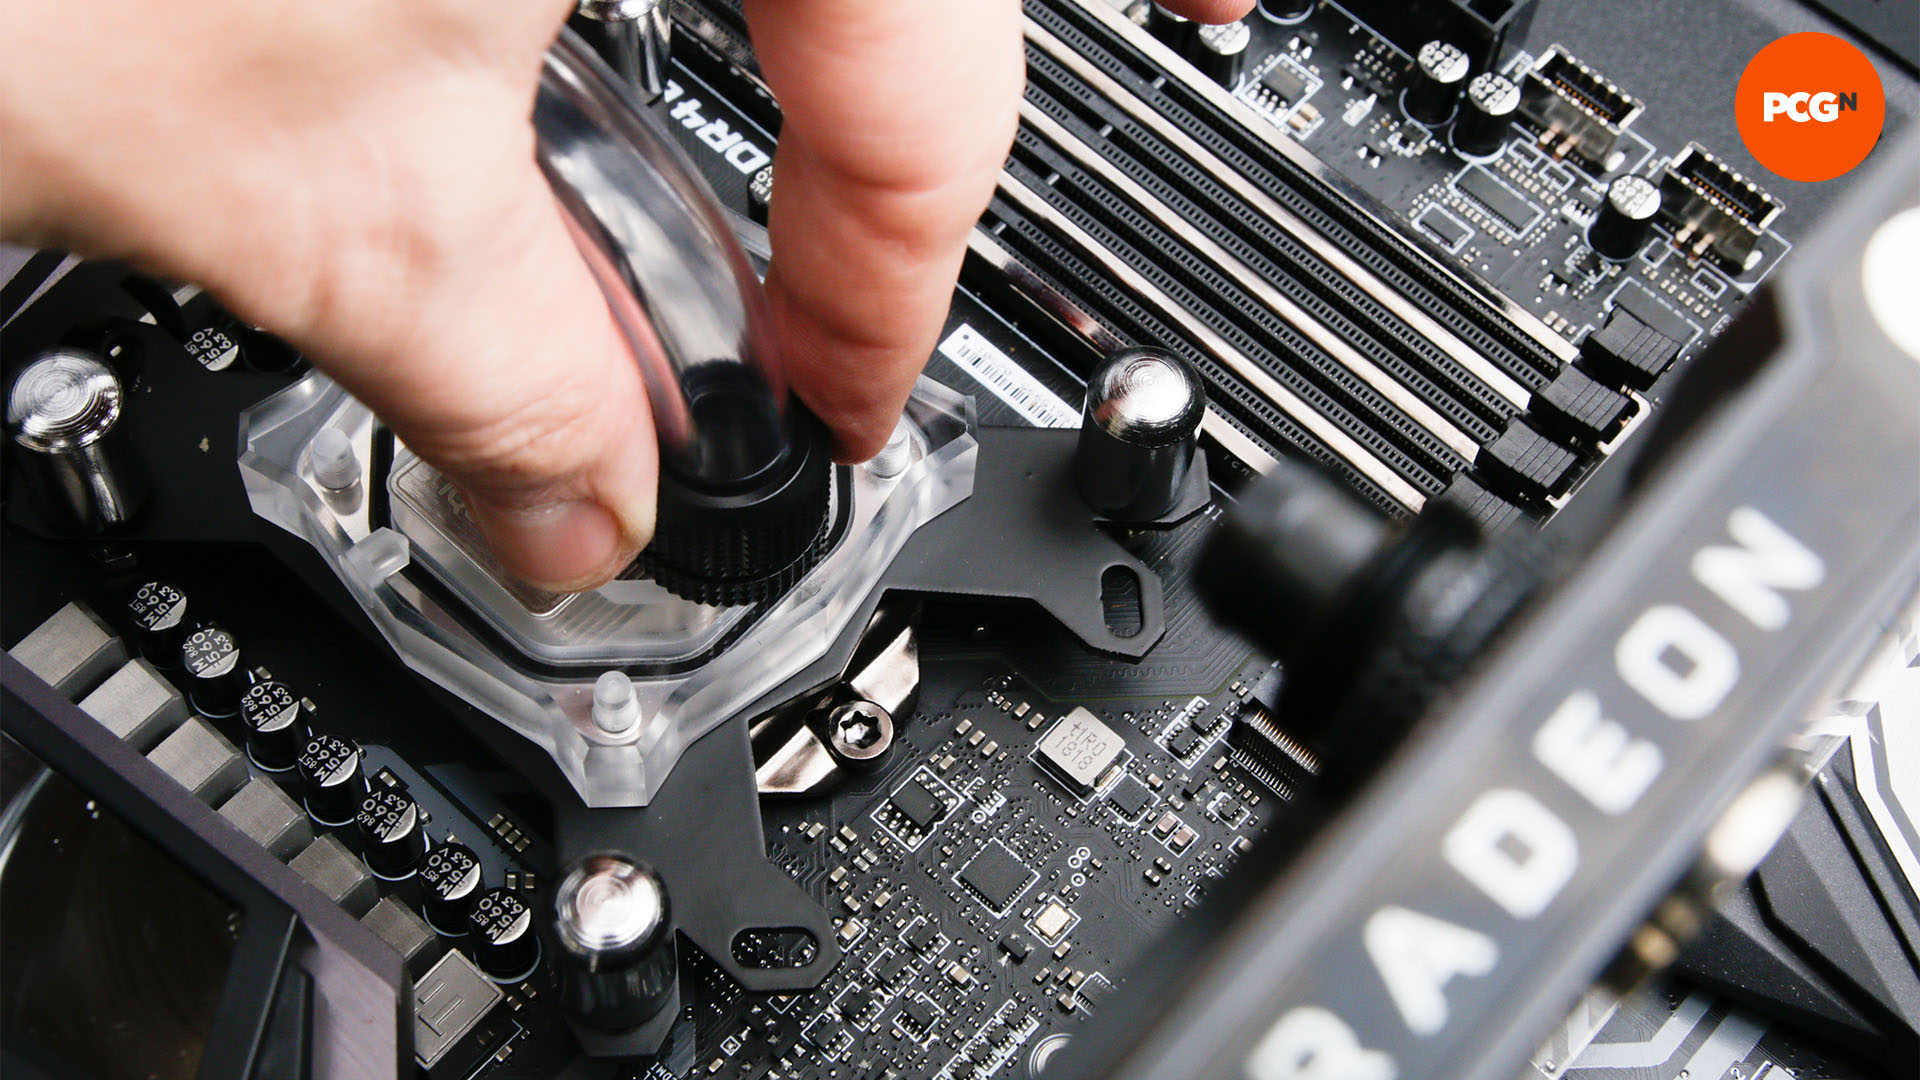
You can cut tubing with a width of under 15mm with a pair of sturdy scissors, but it’s best to deal with larger tubing using a tube cutter, which will ensure a straight cut in order to sit on the barb correctly.
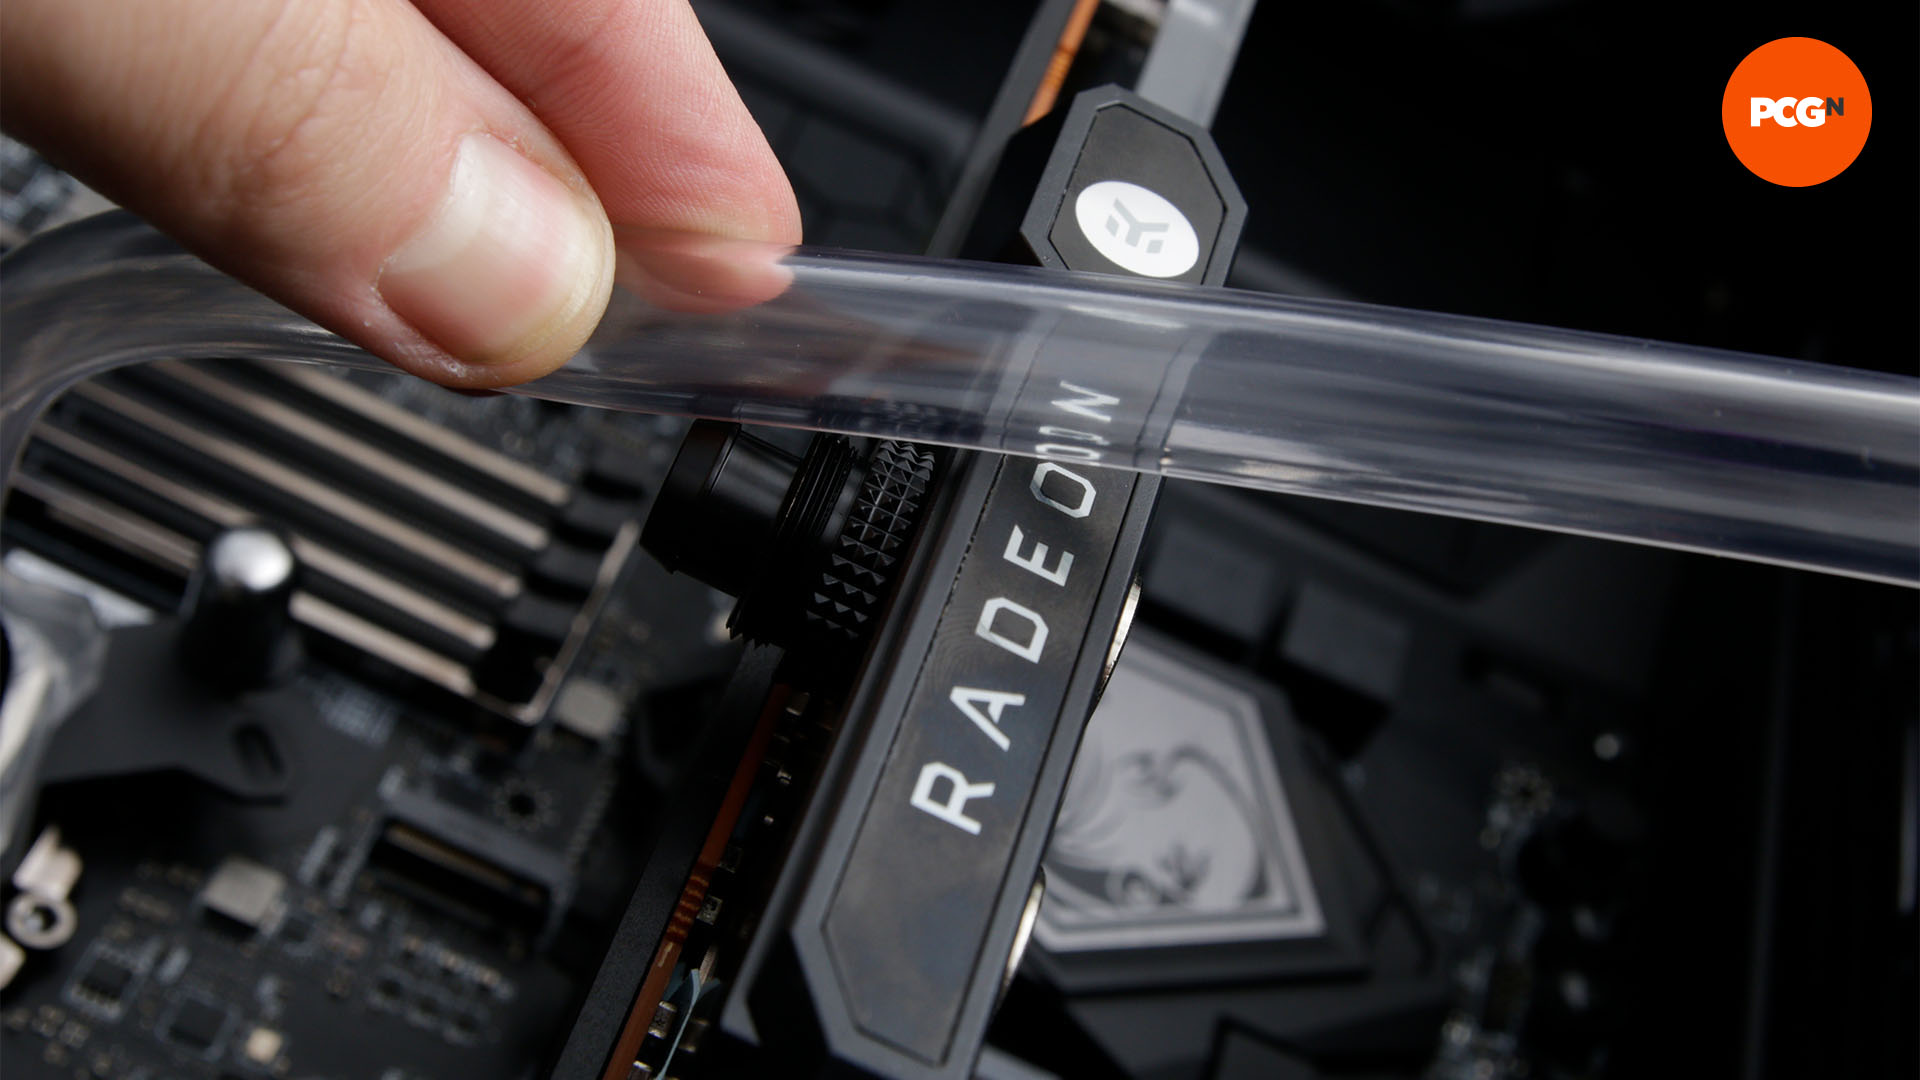
Run the tube from the CPU waterblock to the GPU and add an extra 10mm or so, gradually trimming the tube until it sits on the barb without pressing on or lifting the GPU with a gentle curve. You can then thread the locking ring onto the tube and screw it into the fitting on the GPU block.
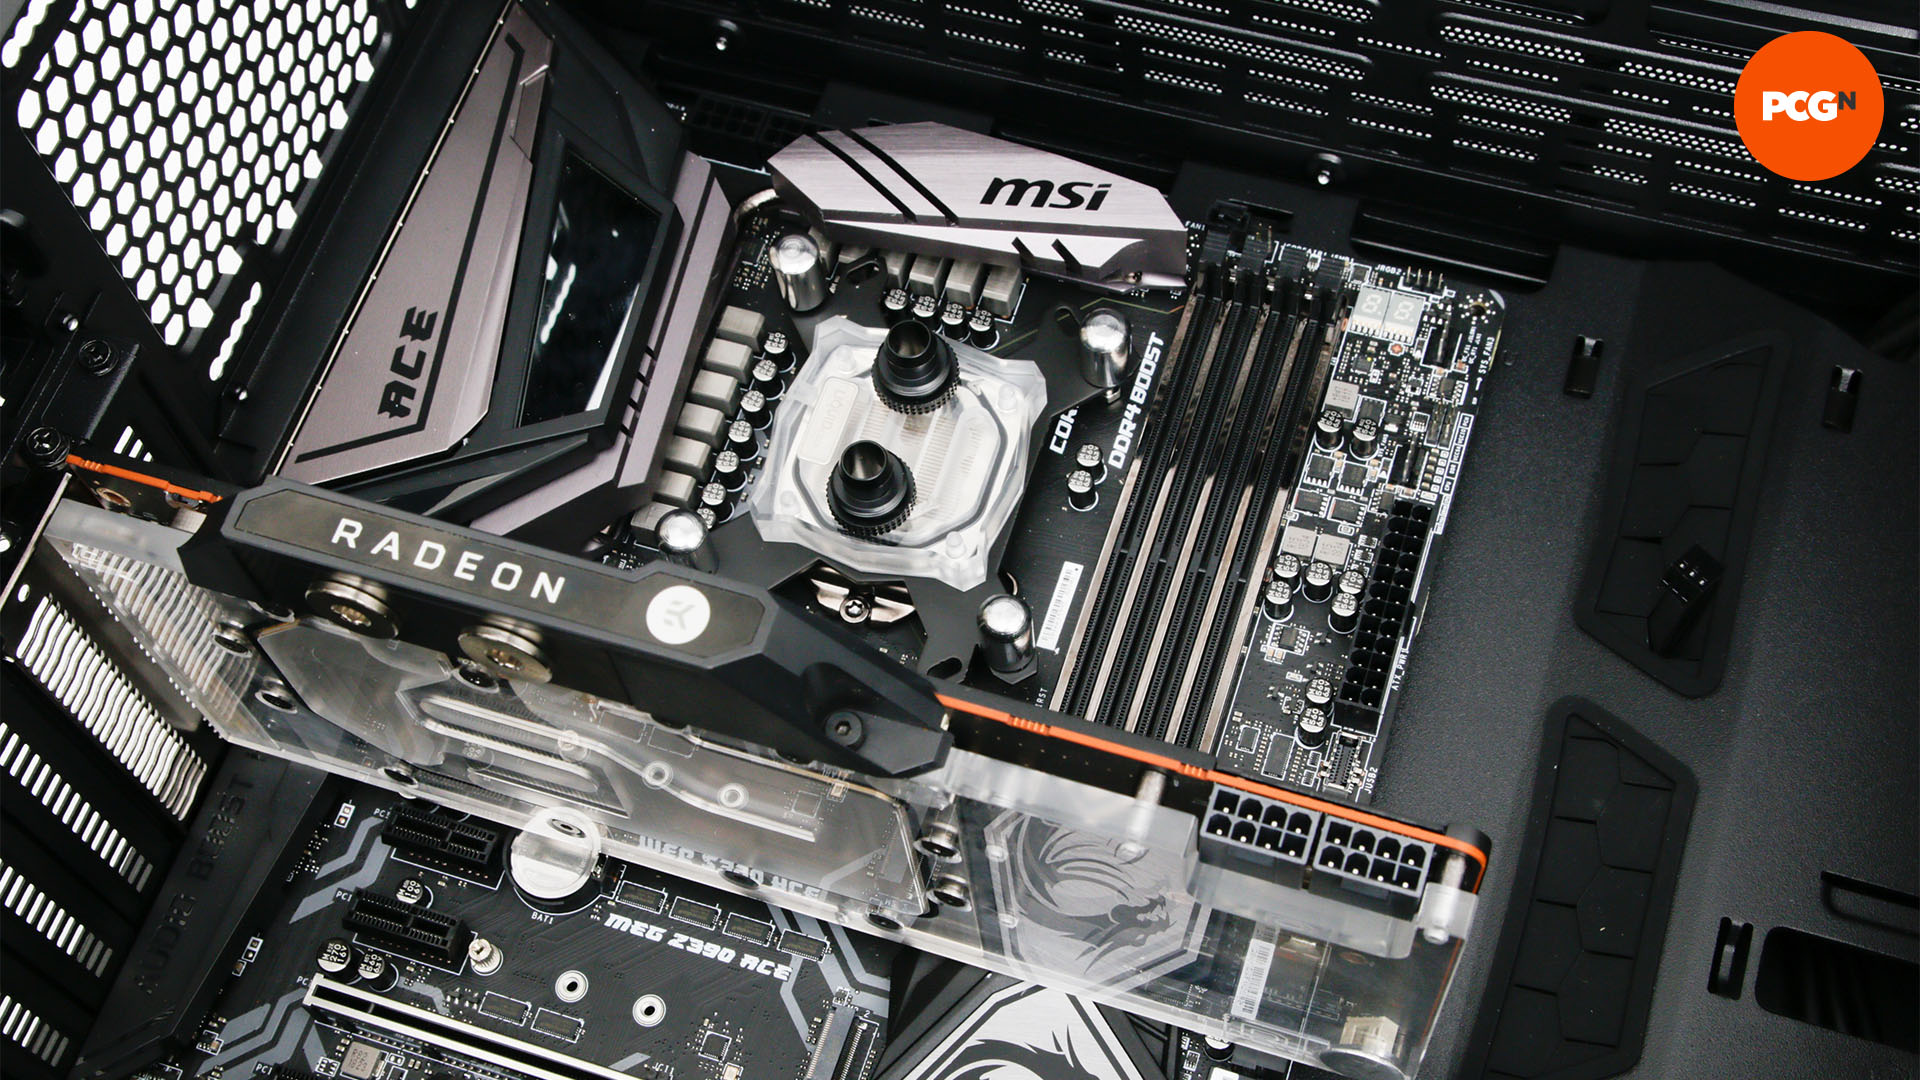
Next, flush the radiator with deionized water. This process will remove any particles left over from manufacturing. Now install your fans on the radiator, positioned so they’re blowing air through it (with the backs facing the radiator), and so that the power cables are all on one side.
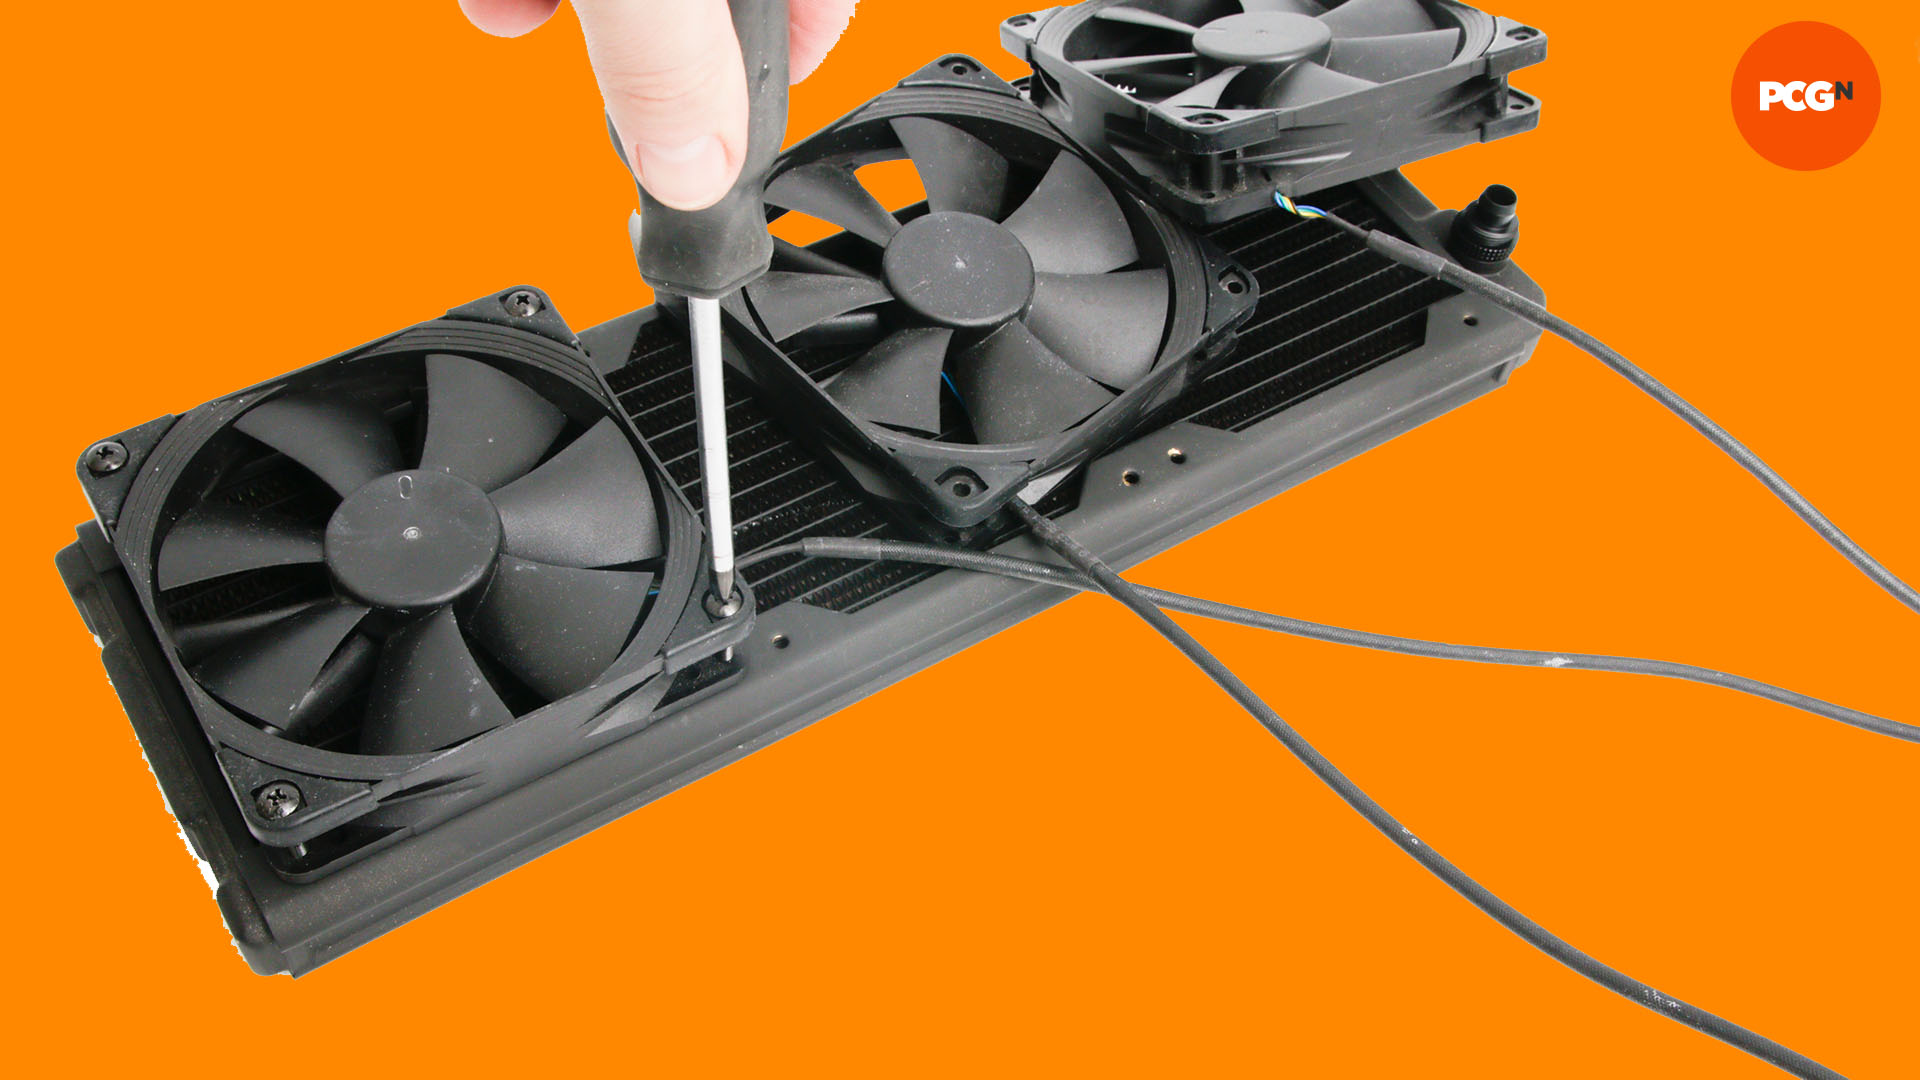
The radiator will come with screws for mounting fans, as well as smaller screws to secure the radiator directly to the case. If your case has a removable roof or grille, detach this section now, as it will make your life much easier.
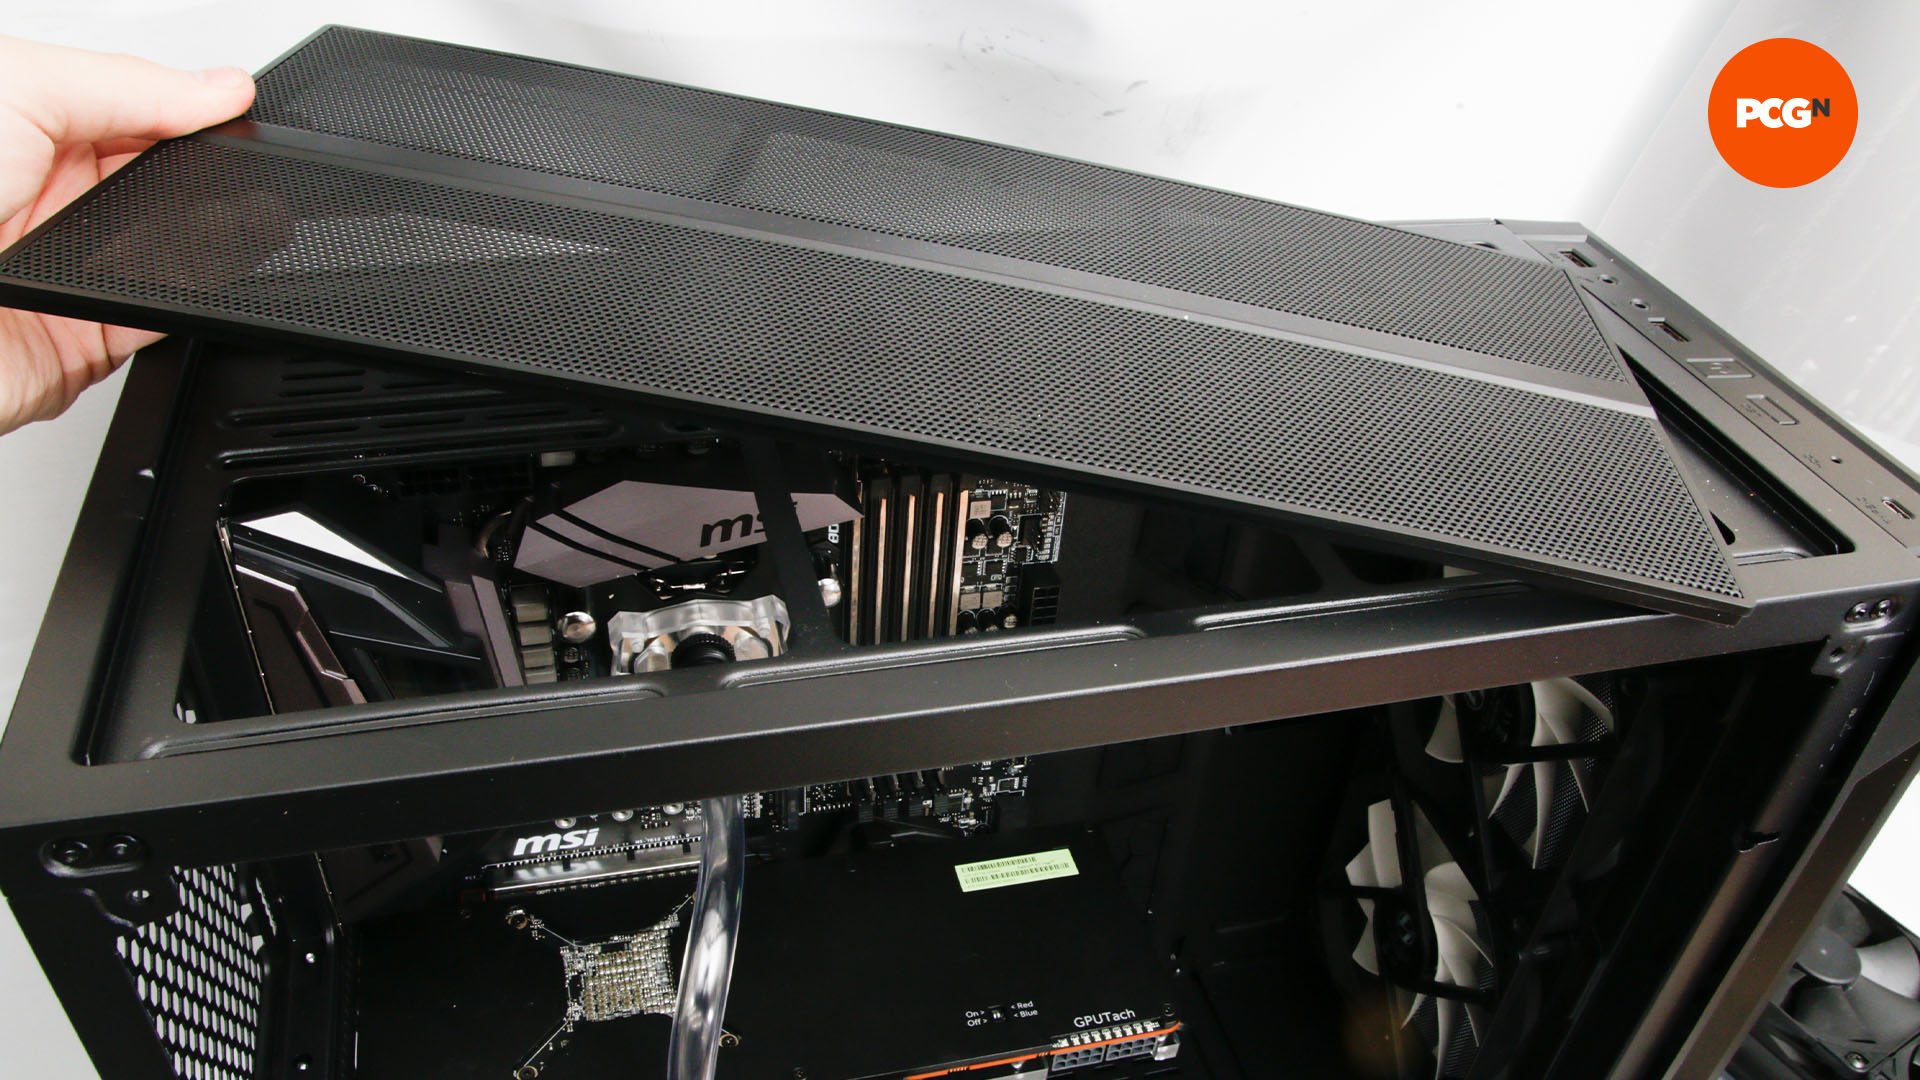
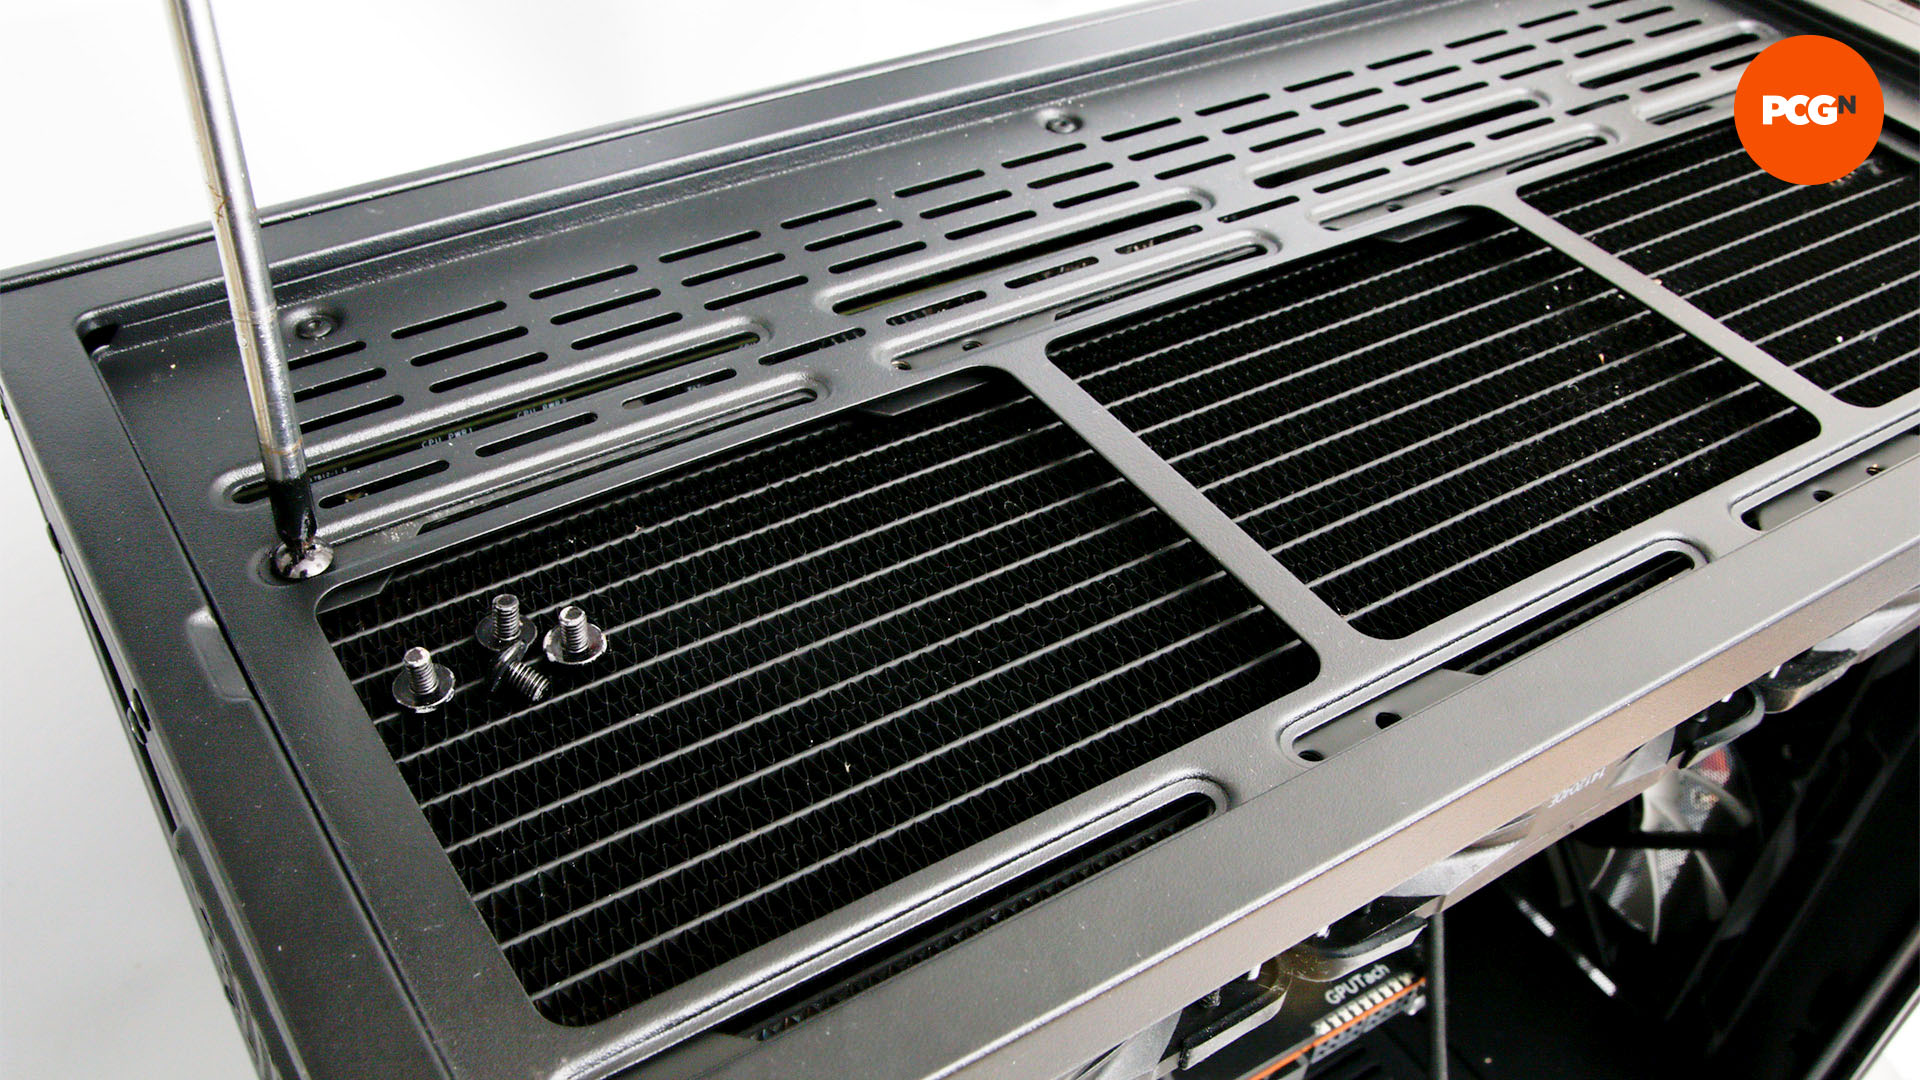
Offer up the radiator to your case’s fan mounts and screw it in place. You may need to remove other components in your case, such as drive bays or fans, to install the radiator or, in our case, to allow the tube to be fed down to other components. Fans can be relocated into other fan mounts. Next, route a length of tube from the radiator to the CPU waterblock.
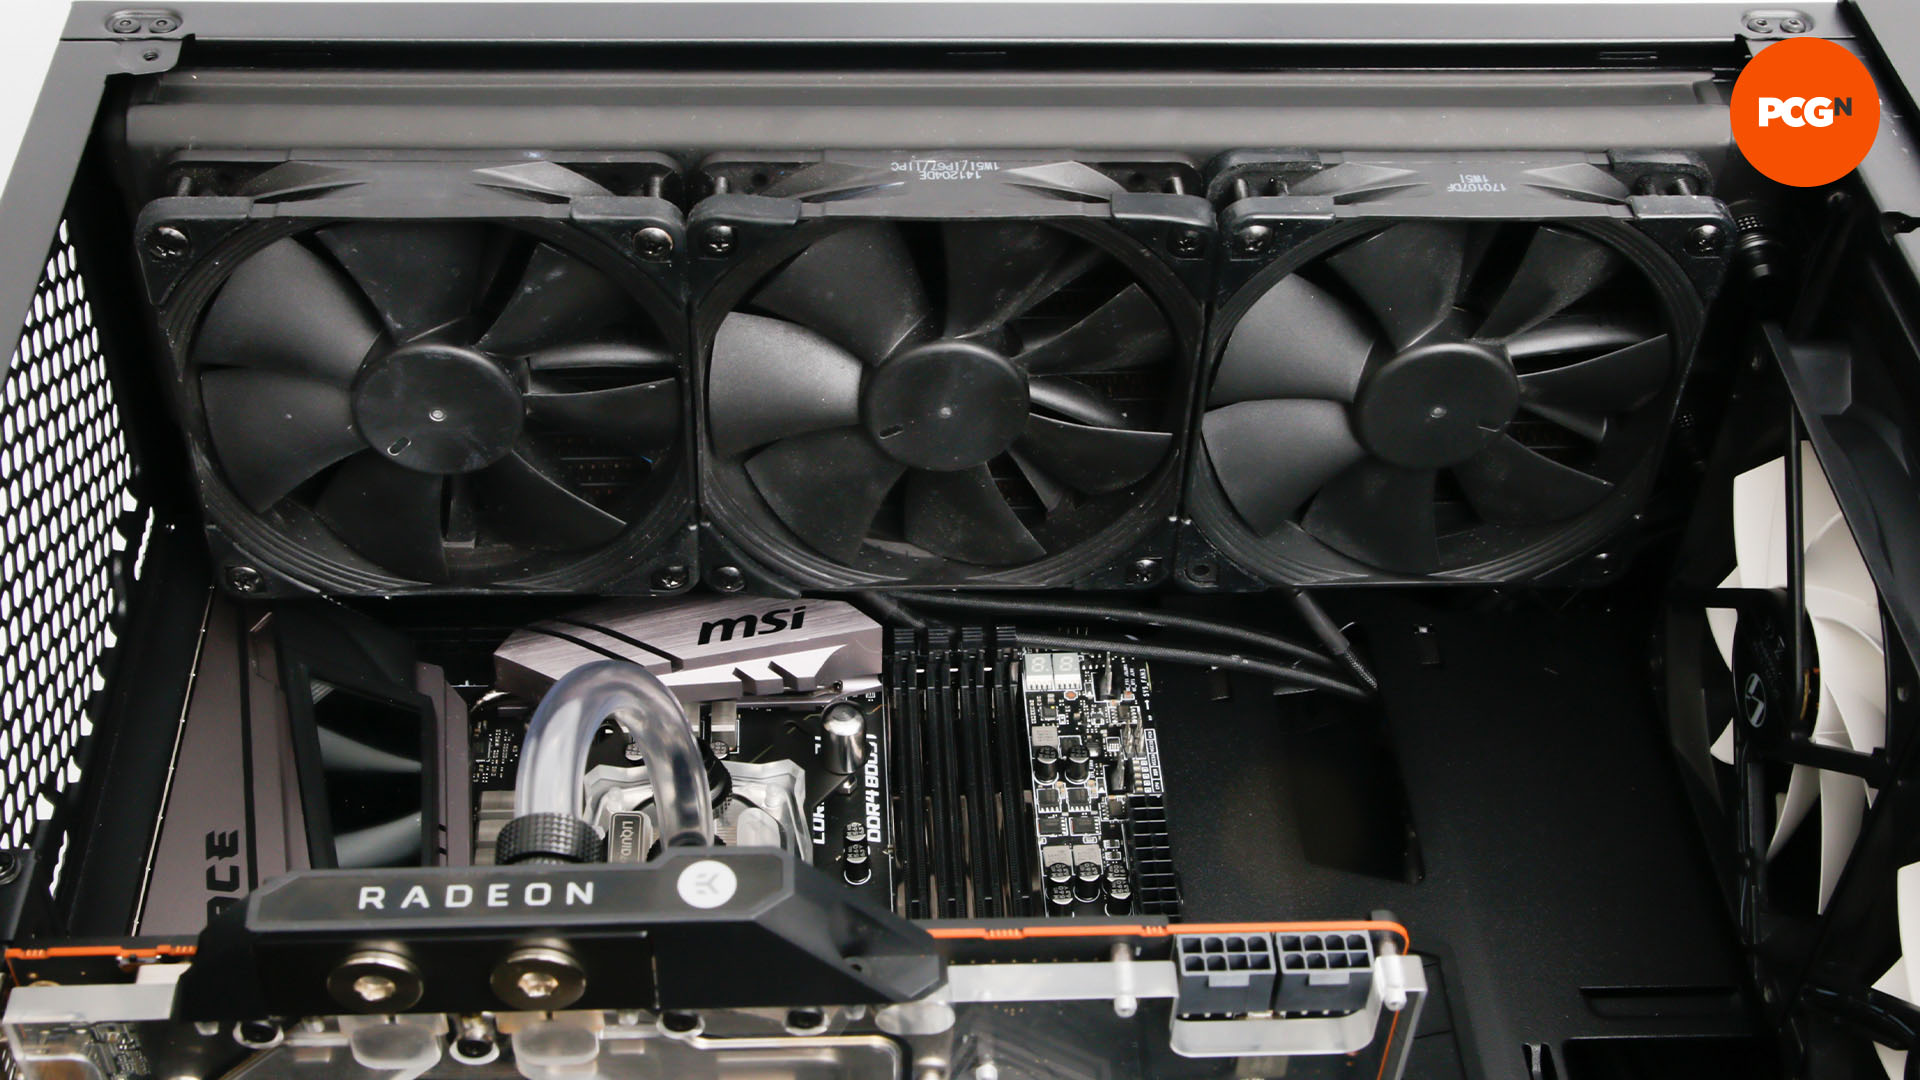
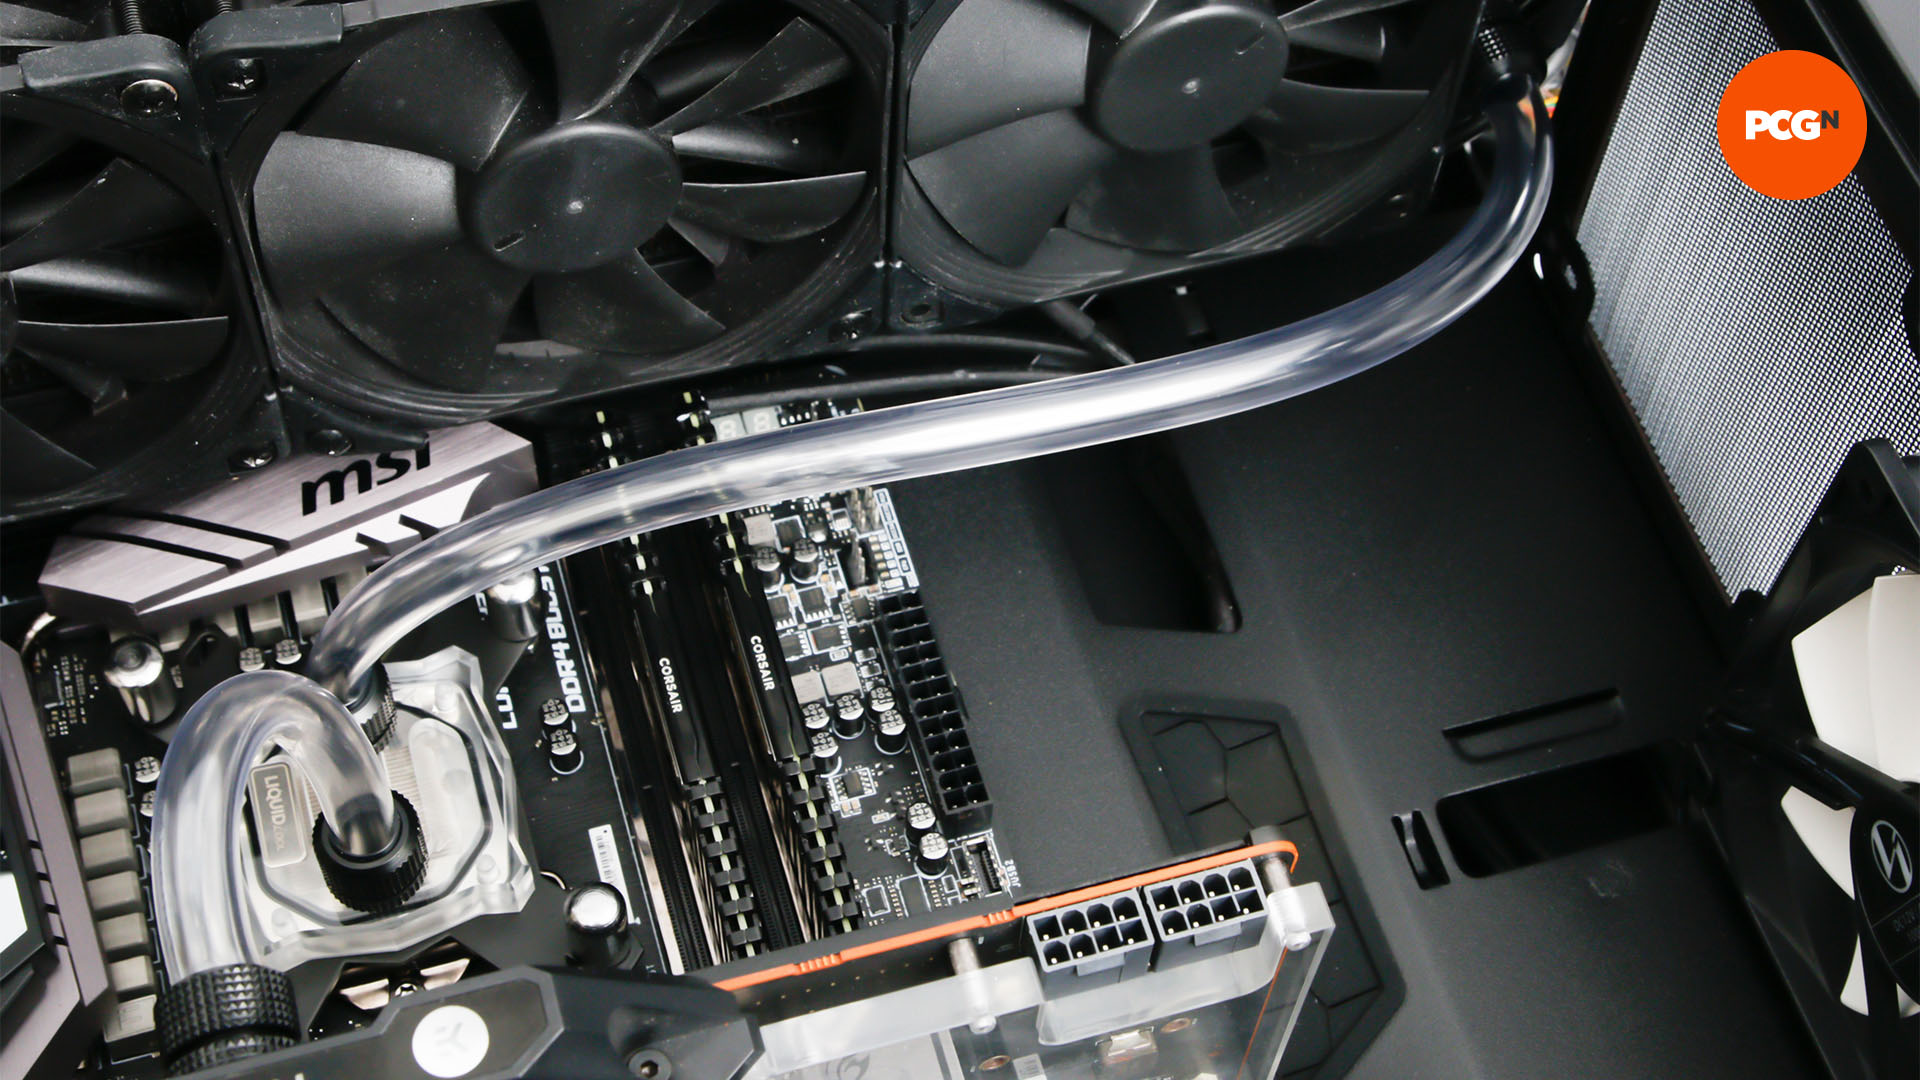
Now install the pump. We’ve mounted our one using a large adhesive foam pad. Apply the pad to the base of the pump and test-fit it to make sure it clears other components and lines up with other water-cooling components to which you need to connect it.
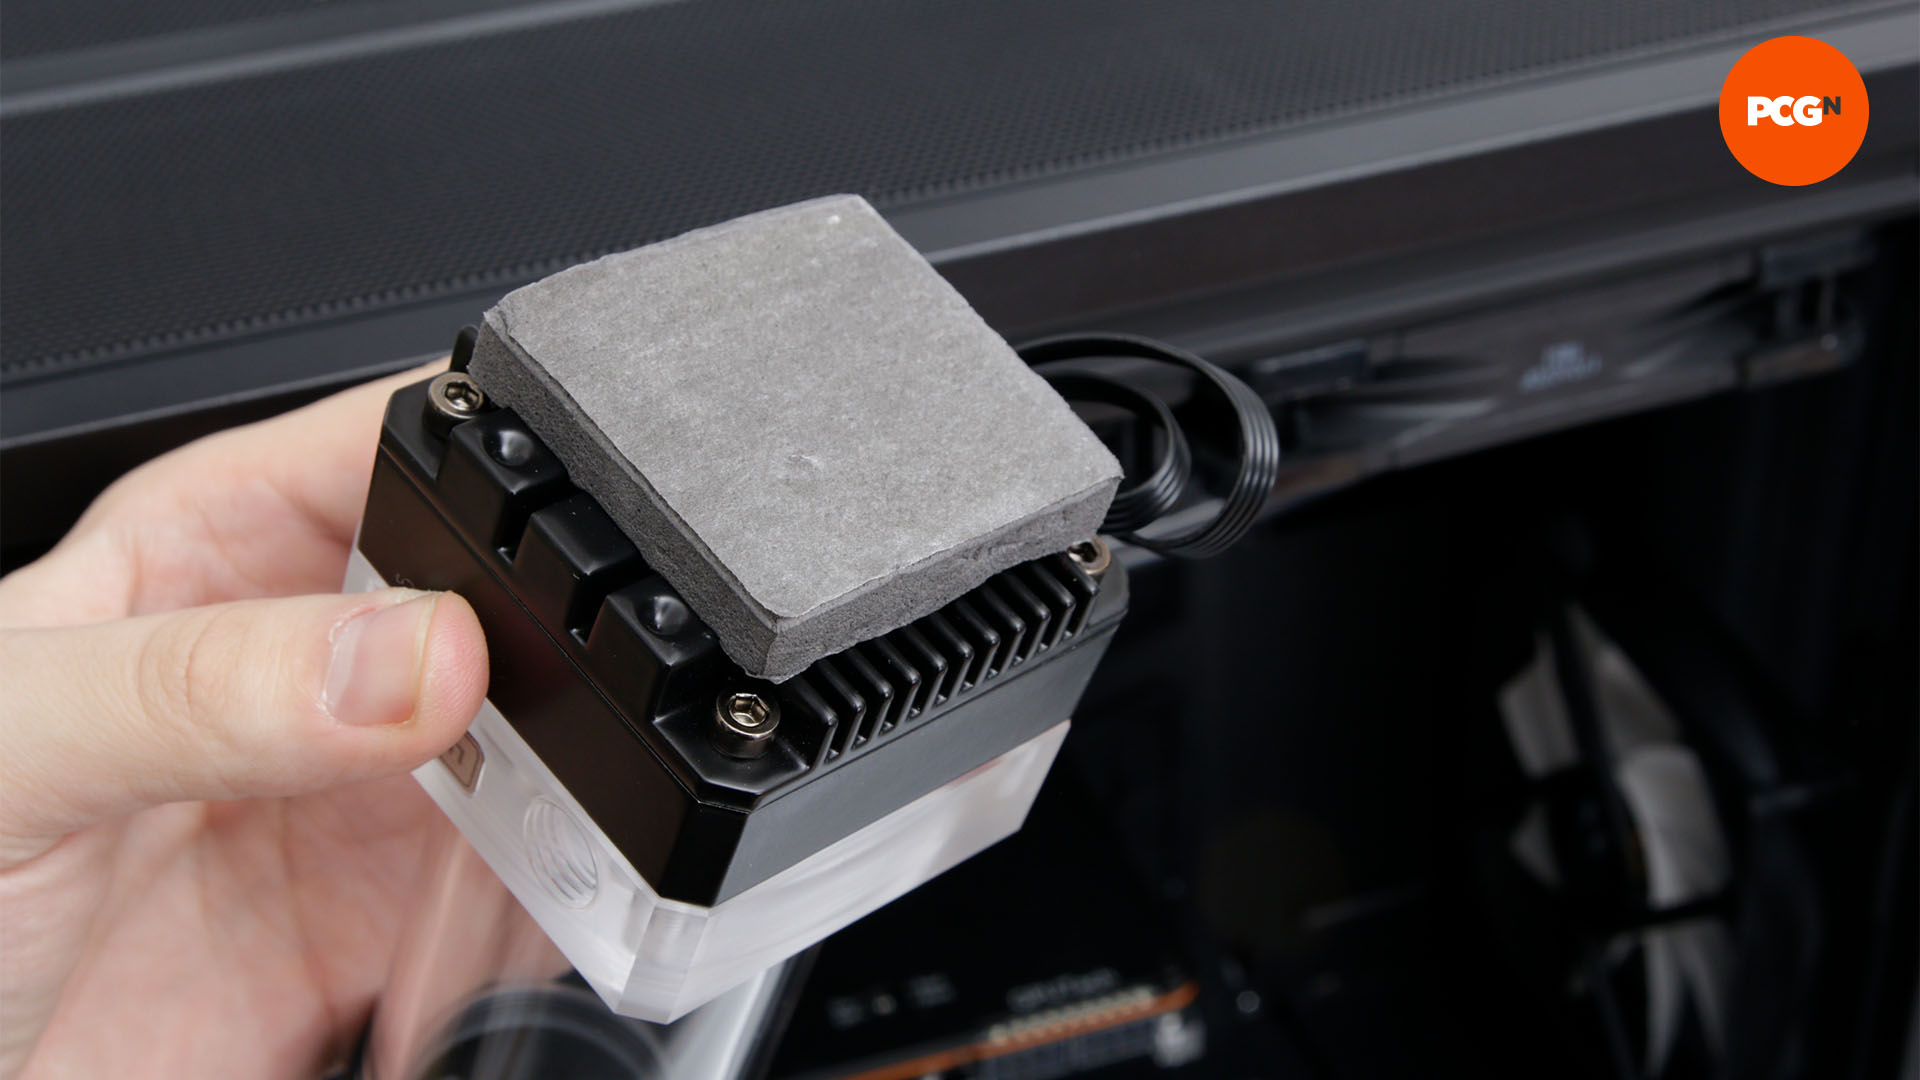
The pump will have specific inlets and outlets, so make sure they can be connected to the right components. In our loop, coolant comes from the radiator and enters the reservoir from the top, with the outlet on the side of the clear base.
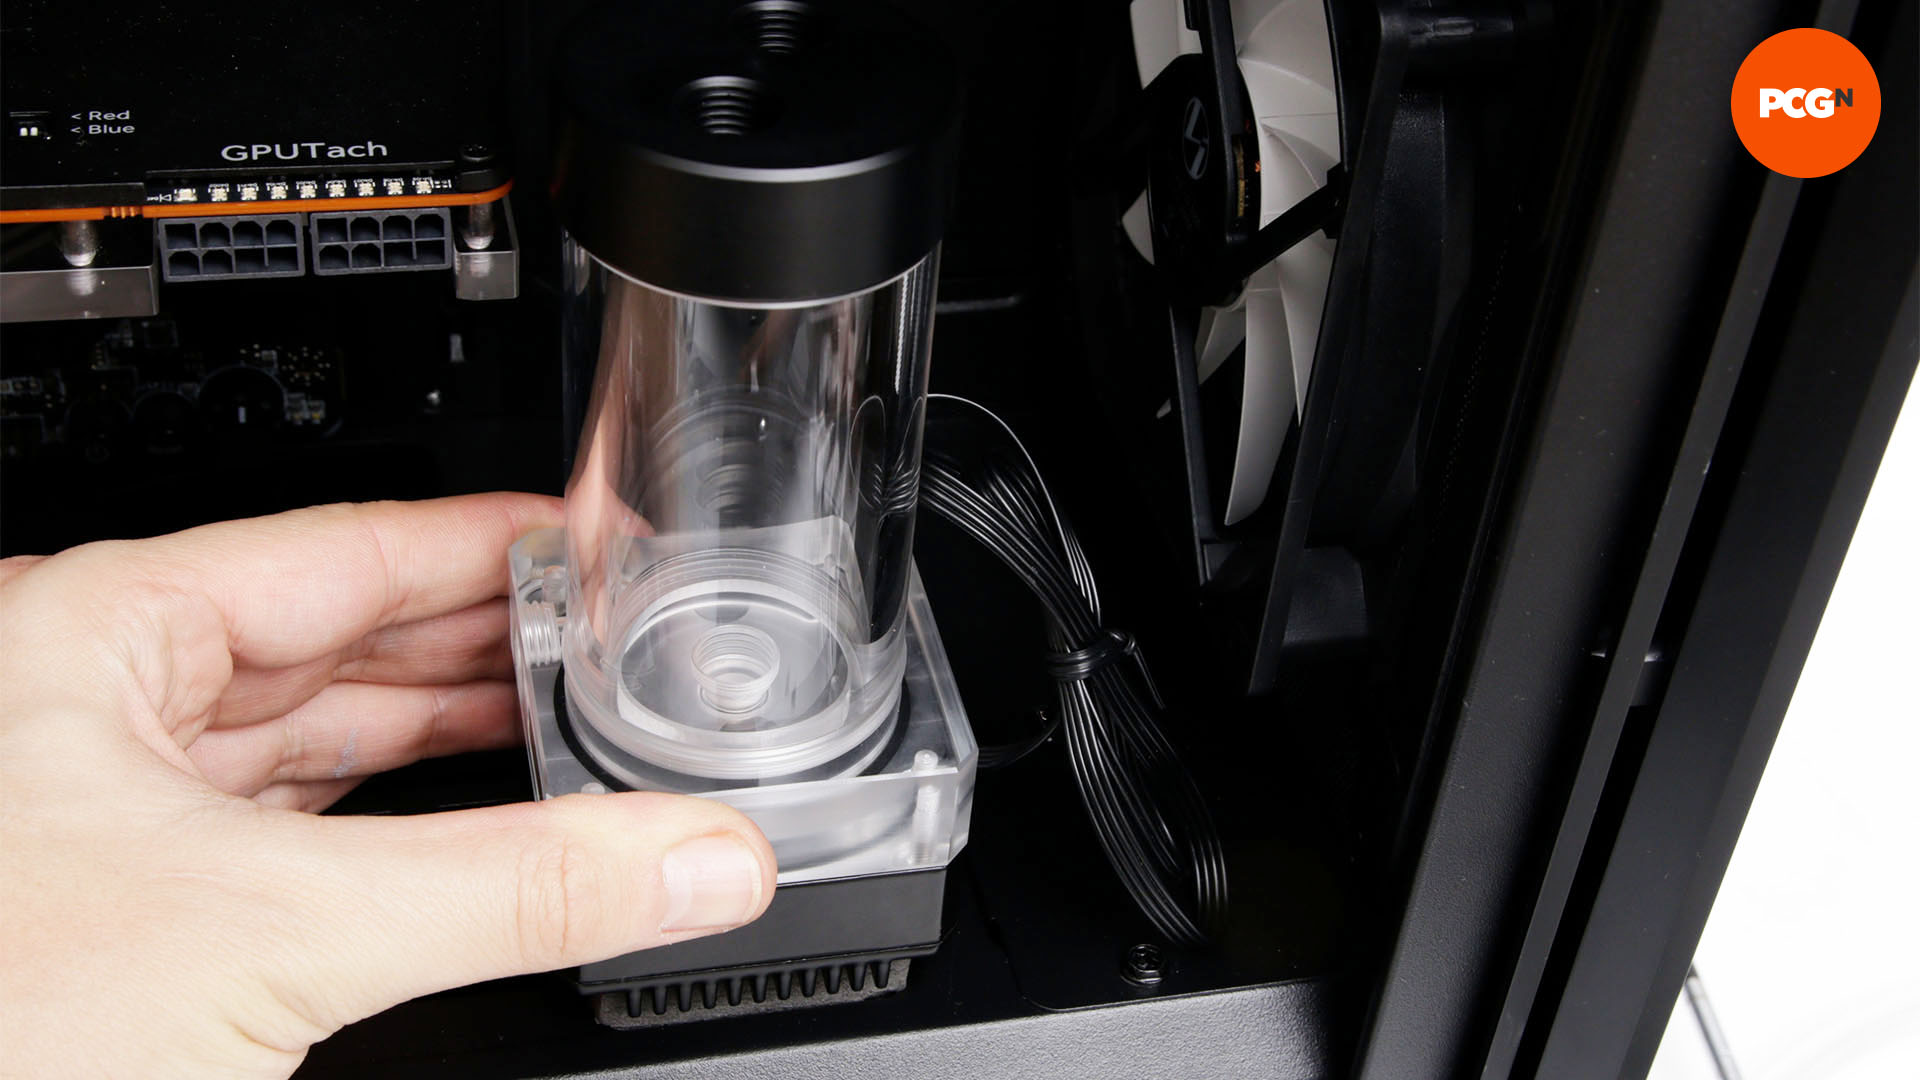
Once you’ve completed your loop, fix the pump in place with the adhesive pad. For pumps that are screwed in place, route the tubing to them once they’re fixed in position.
Install the blanking plugs into unused ports on your graphics card and tighten them fully, using a hex tool if necessary. The underside of the graphics card is then the perfect place to use an angled rotatable fitting, which we’ve done here to point the tubing towards the pump, and avoid it trailing along the bottom of the case. There are also ways to fit a pump/res unit directly to your case.
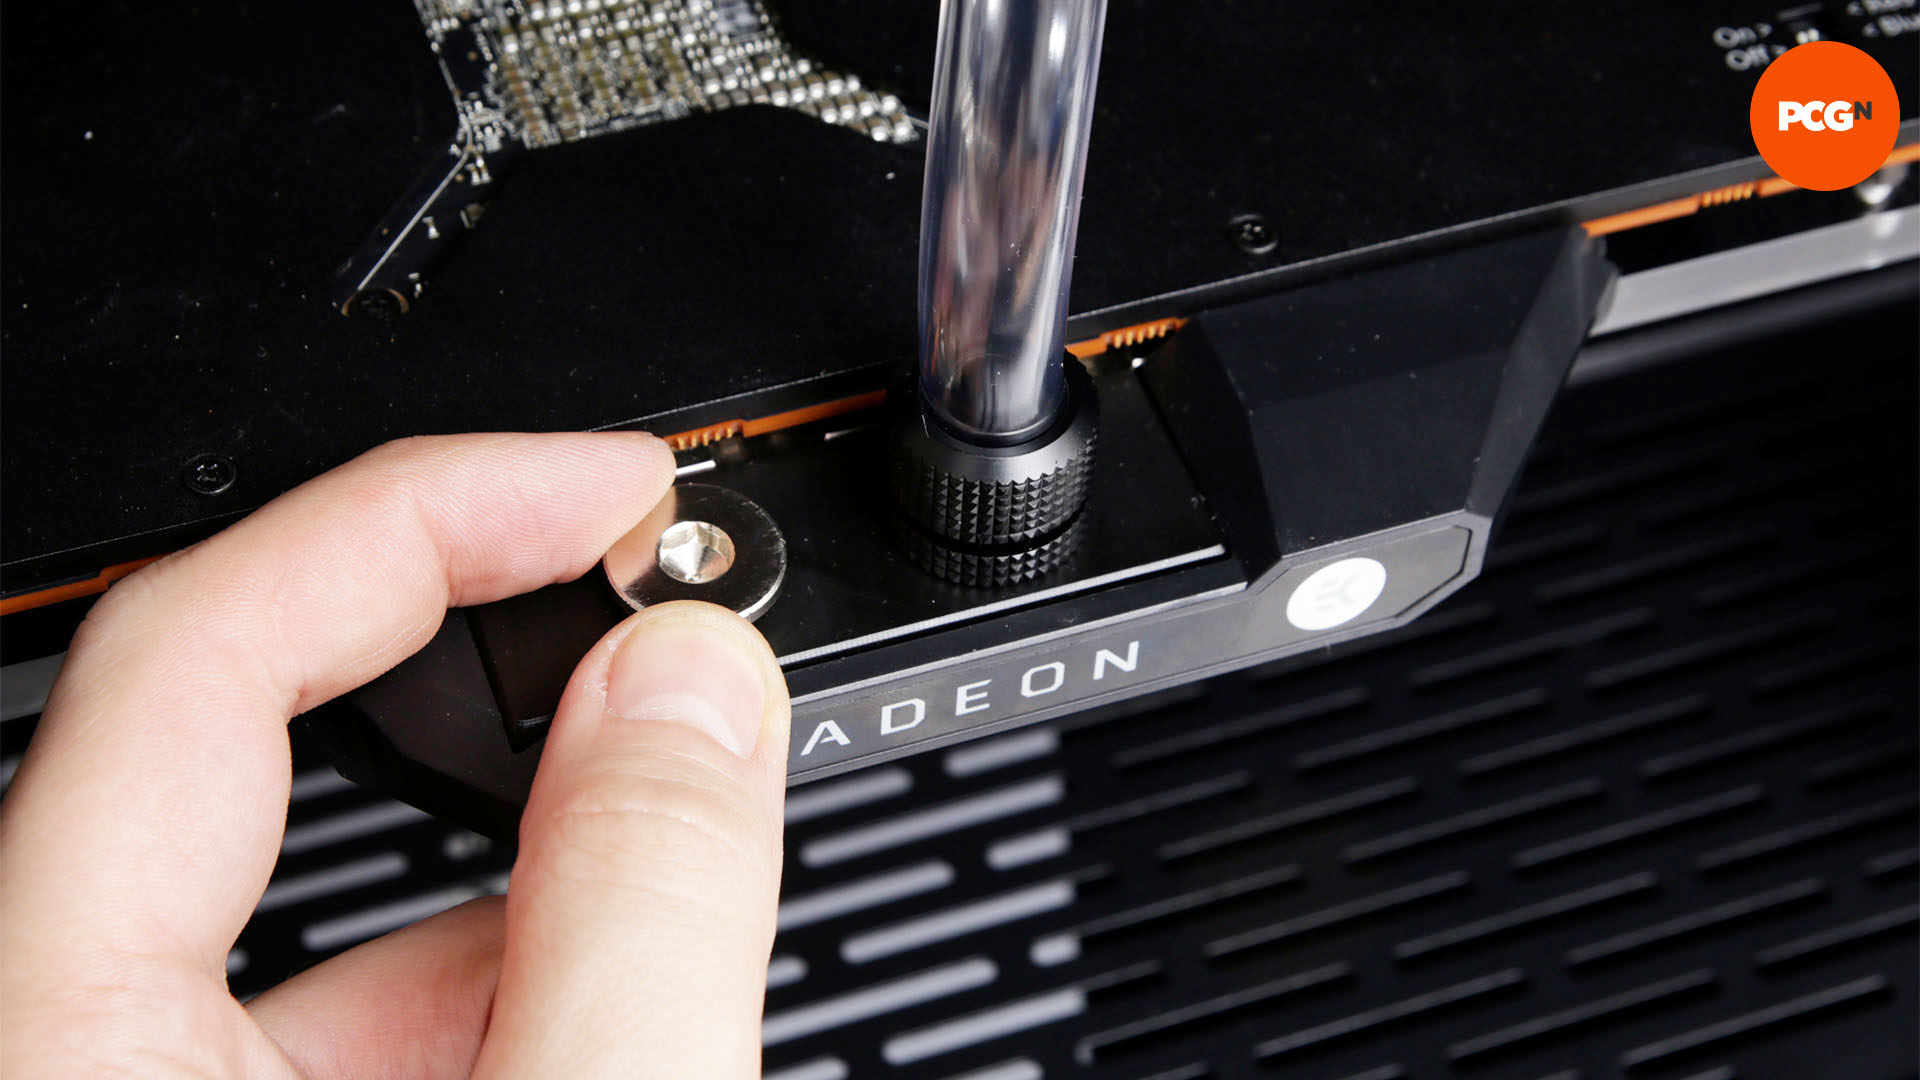
Connect the final tube from the reservoir to the GPU waterblock, and it’s all finished. Give your loop a once over and tighten all the fittings, adding the port plug to the reservoir so the loop is sealed.
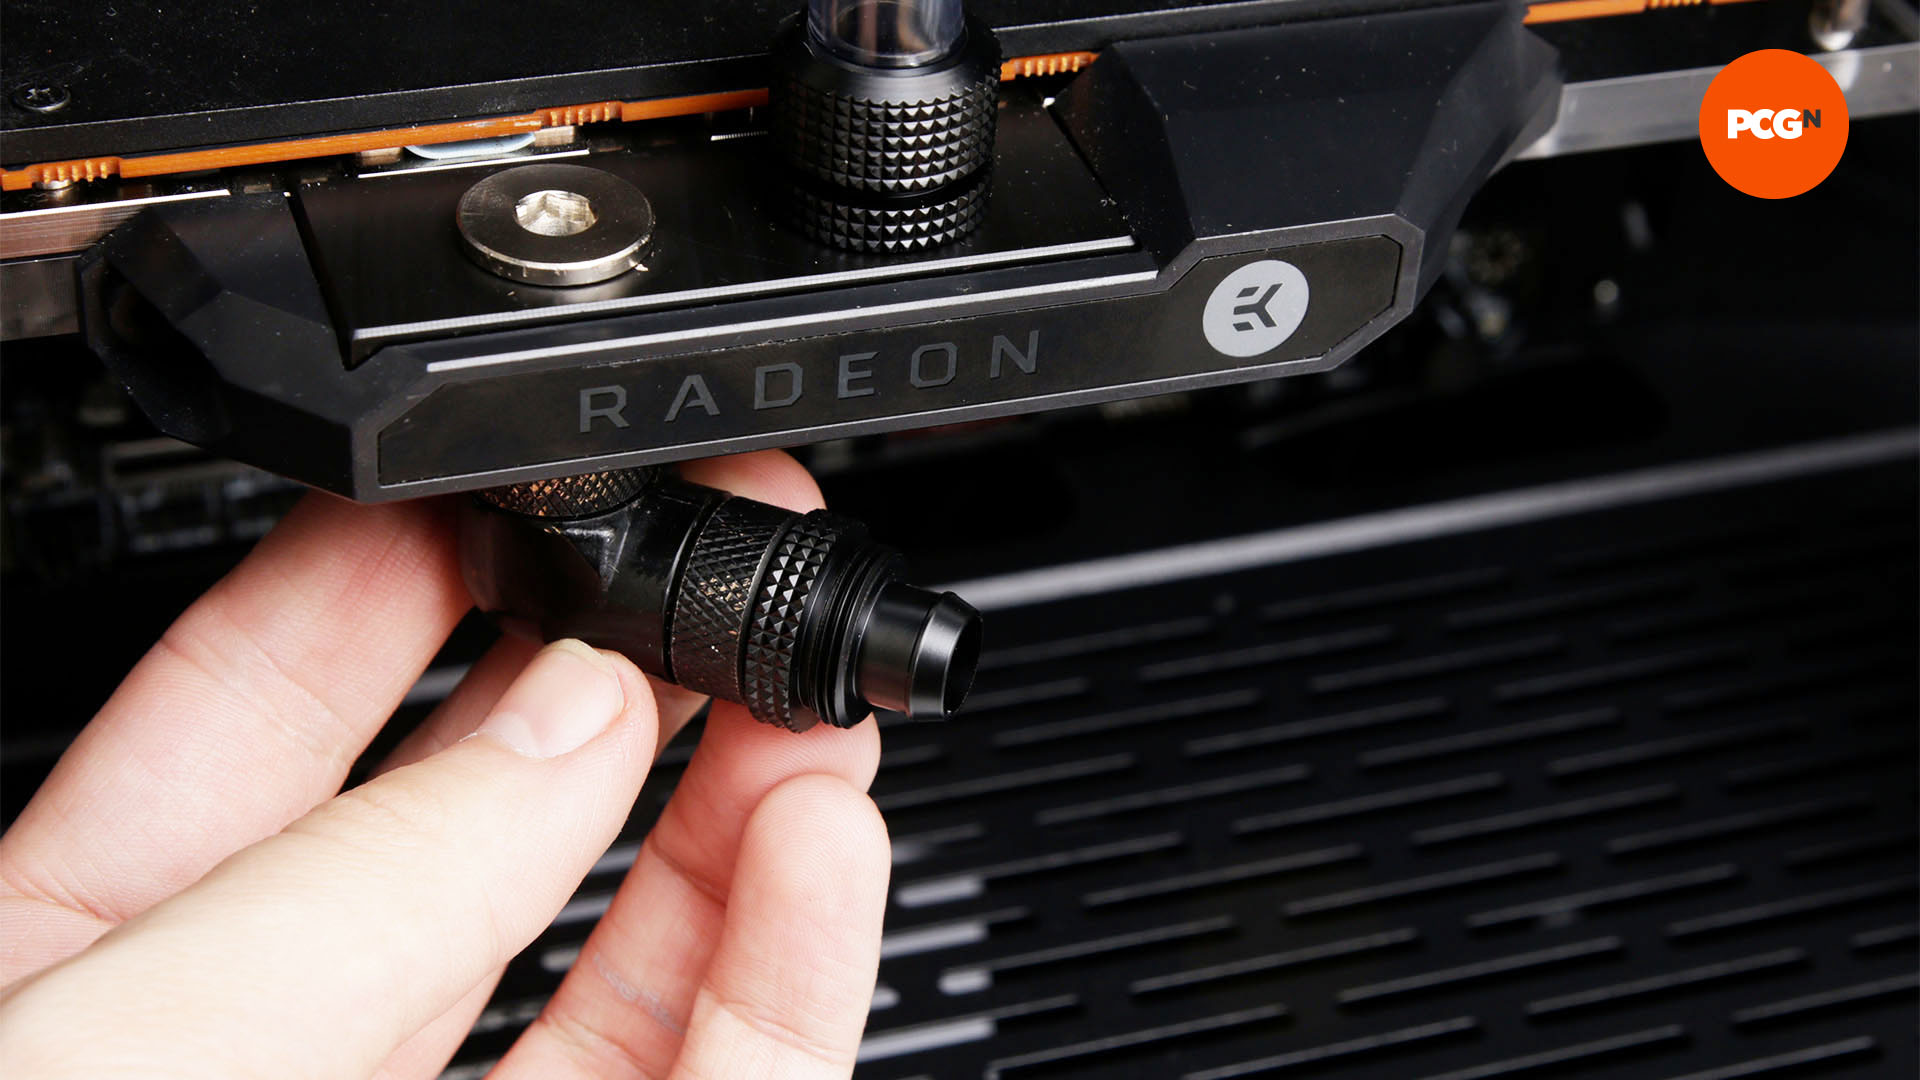
Leak testing
Your next job is to test your loop to make sure it’s secure. A pressure tester such as a Dr Drop, or a similar device from EK or Barrow, is fantastic for this job. With no coolant added, you can attach the tester to a spare port on a component and use the included pump to apply pressure. Aim for 3psi and watch the gauge. If the pressure drops, tighten all the fittings again, including the ones on the tester.
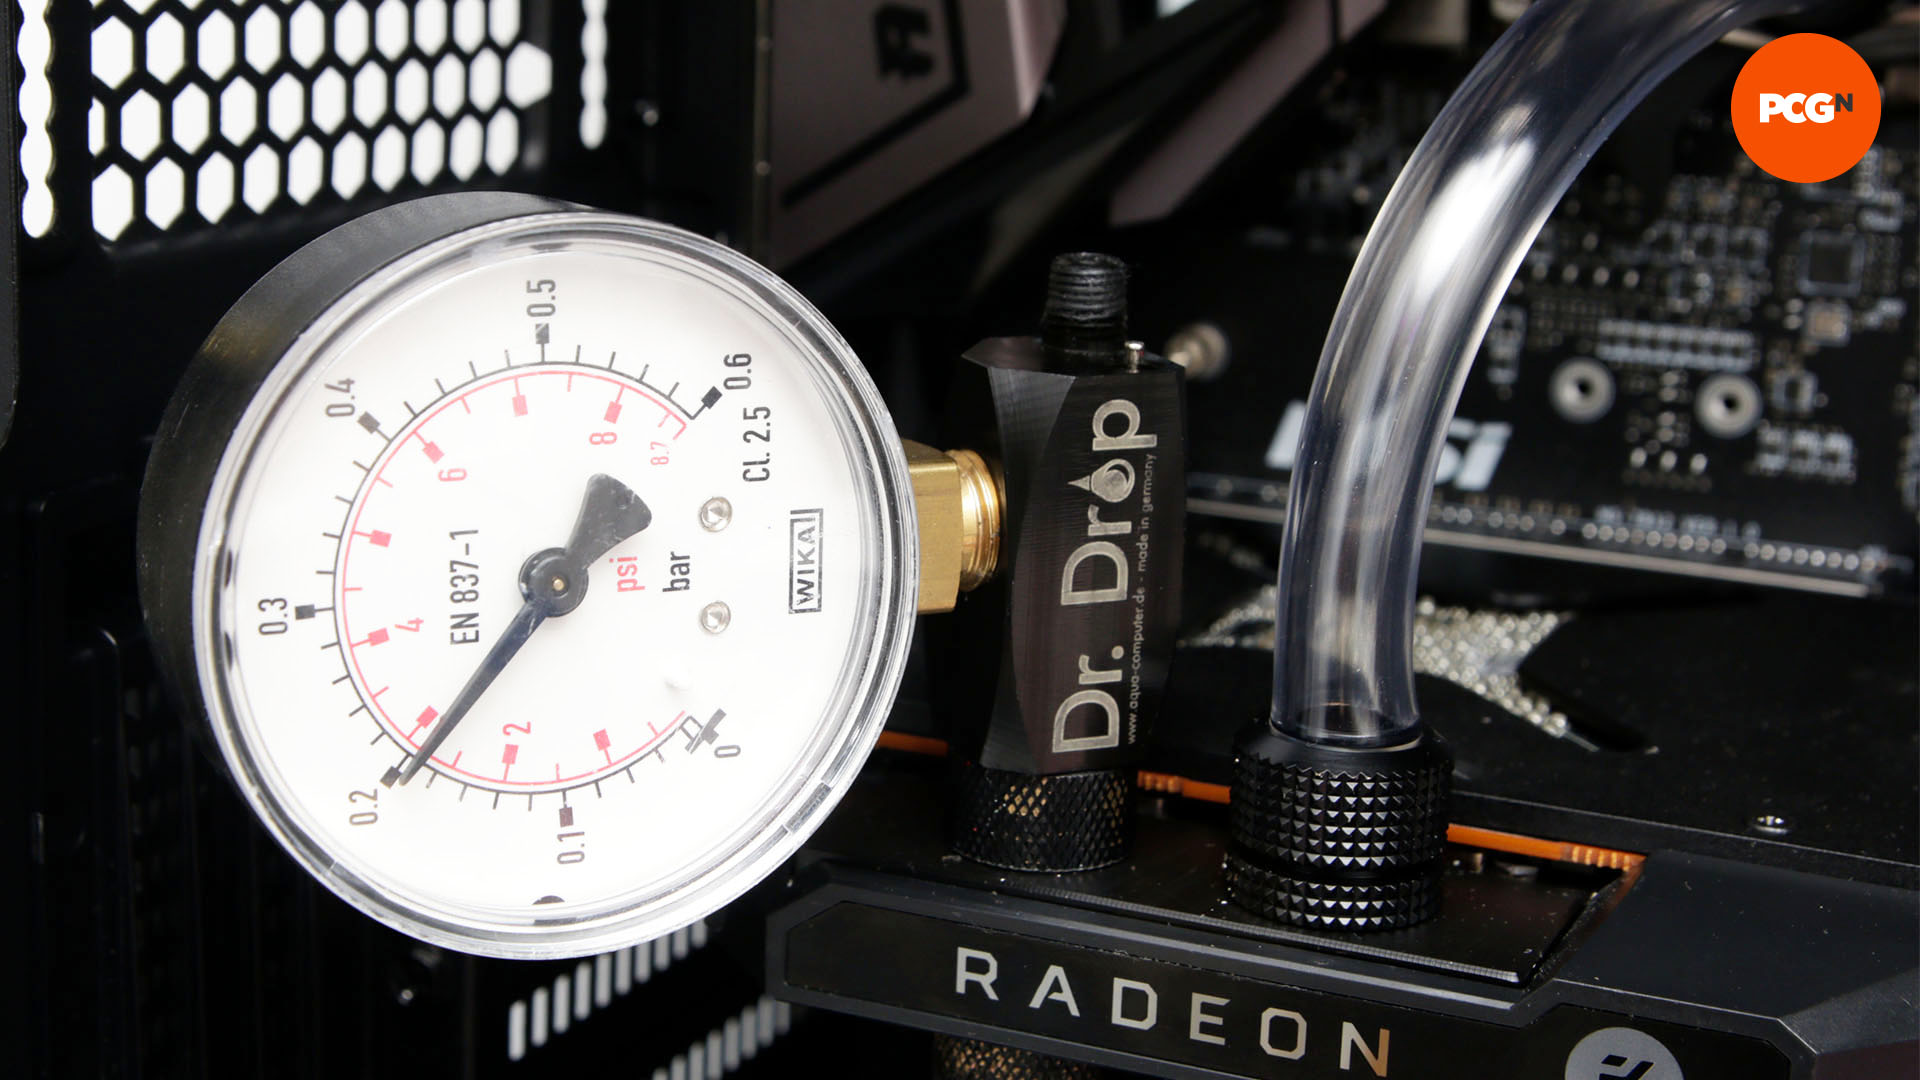
Eventually, the loop will hold pressure and you’re ready to fill it. Another useful tool here is an ATX jumper. We haven’t connected any power cables yet, and for good reason; the jumper allows you to power on your PSU, but only power the pump, so you can perform a live leak test without risking damage to rest of your hardware. Just fit it to the 24-pin ATX connector on your power supply.
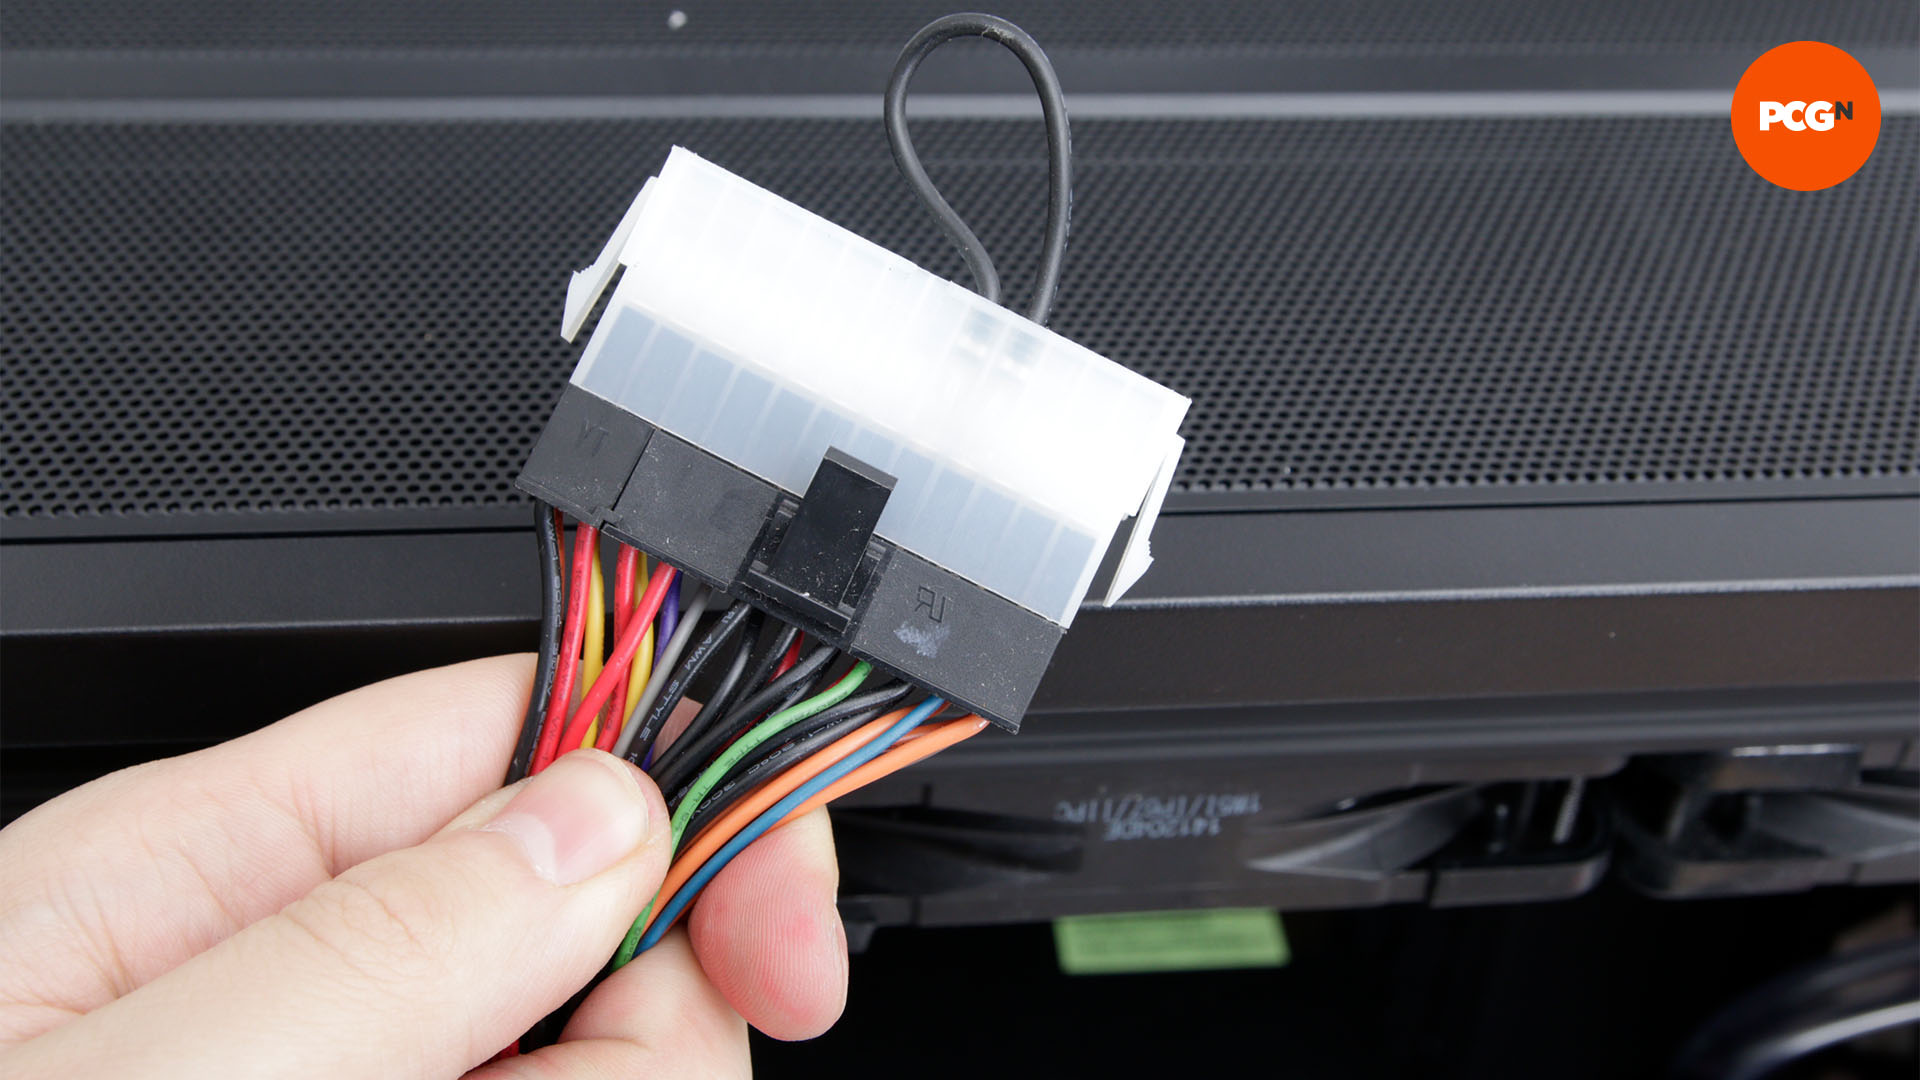
Now connect the pump to your PC’s PSU, fill the reservoir with coolant, and power it on. You can fill the loop either by decanting the coolant into a water bottle and simply using a pouring spout, or you can purchase a funnel or filling bottle from most water-cooling hardware retailers.
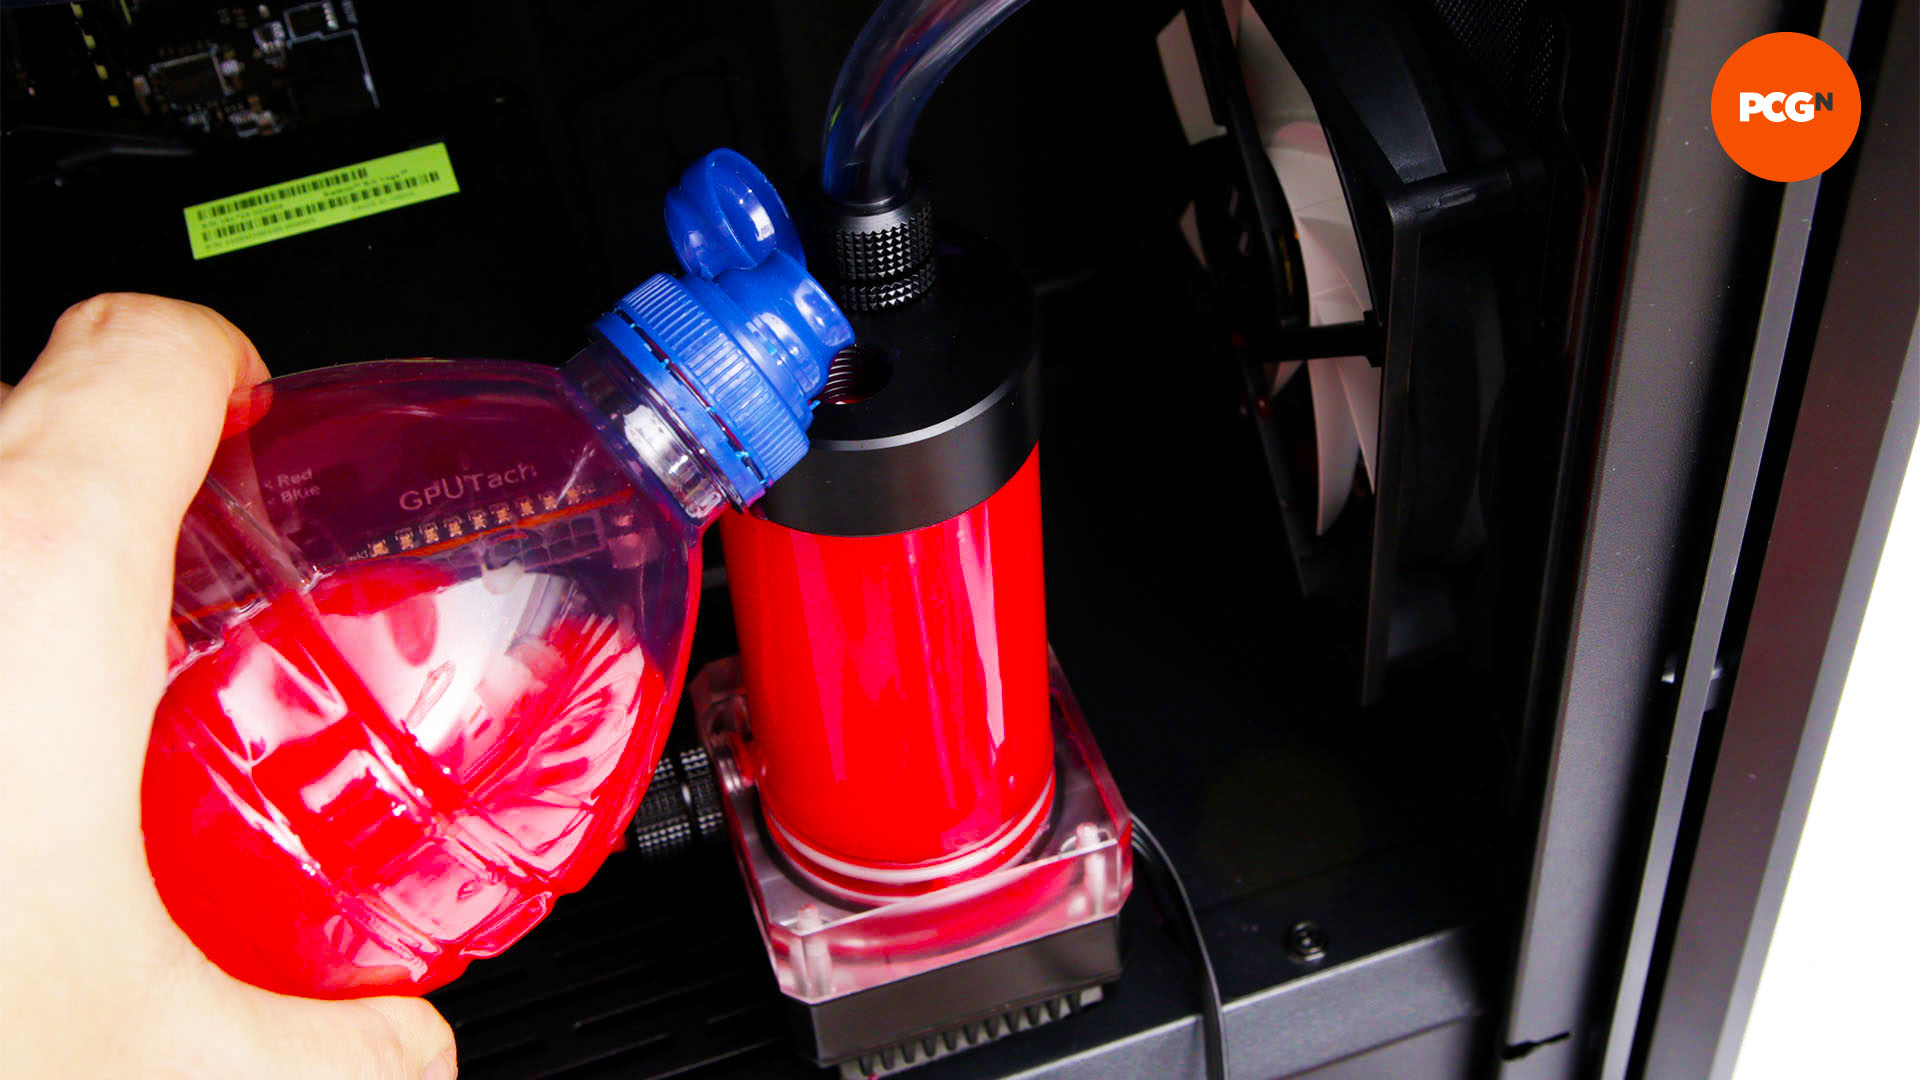
The coolant will quickly be drawn into the loop. When the reservoir runs low, stop the pump and fill the reservoir again. Avoid running the pump dry, and continually top up the reservoir. This process will only take a few minutes, and eventually you’ll hear lots of gurgling as the pump engages and coolant makes it all the way around the loop.
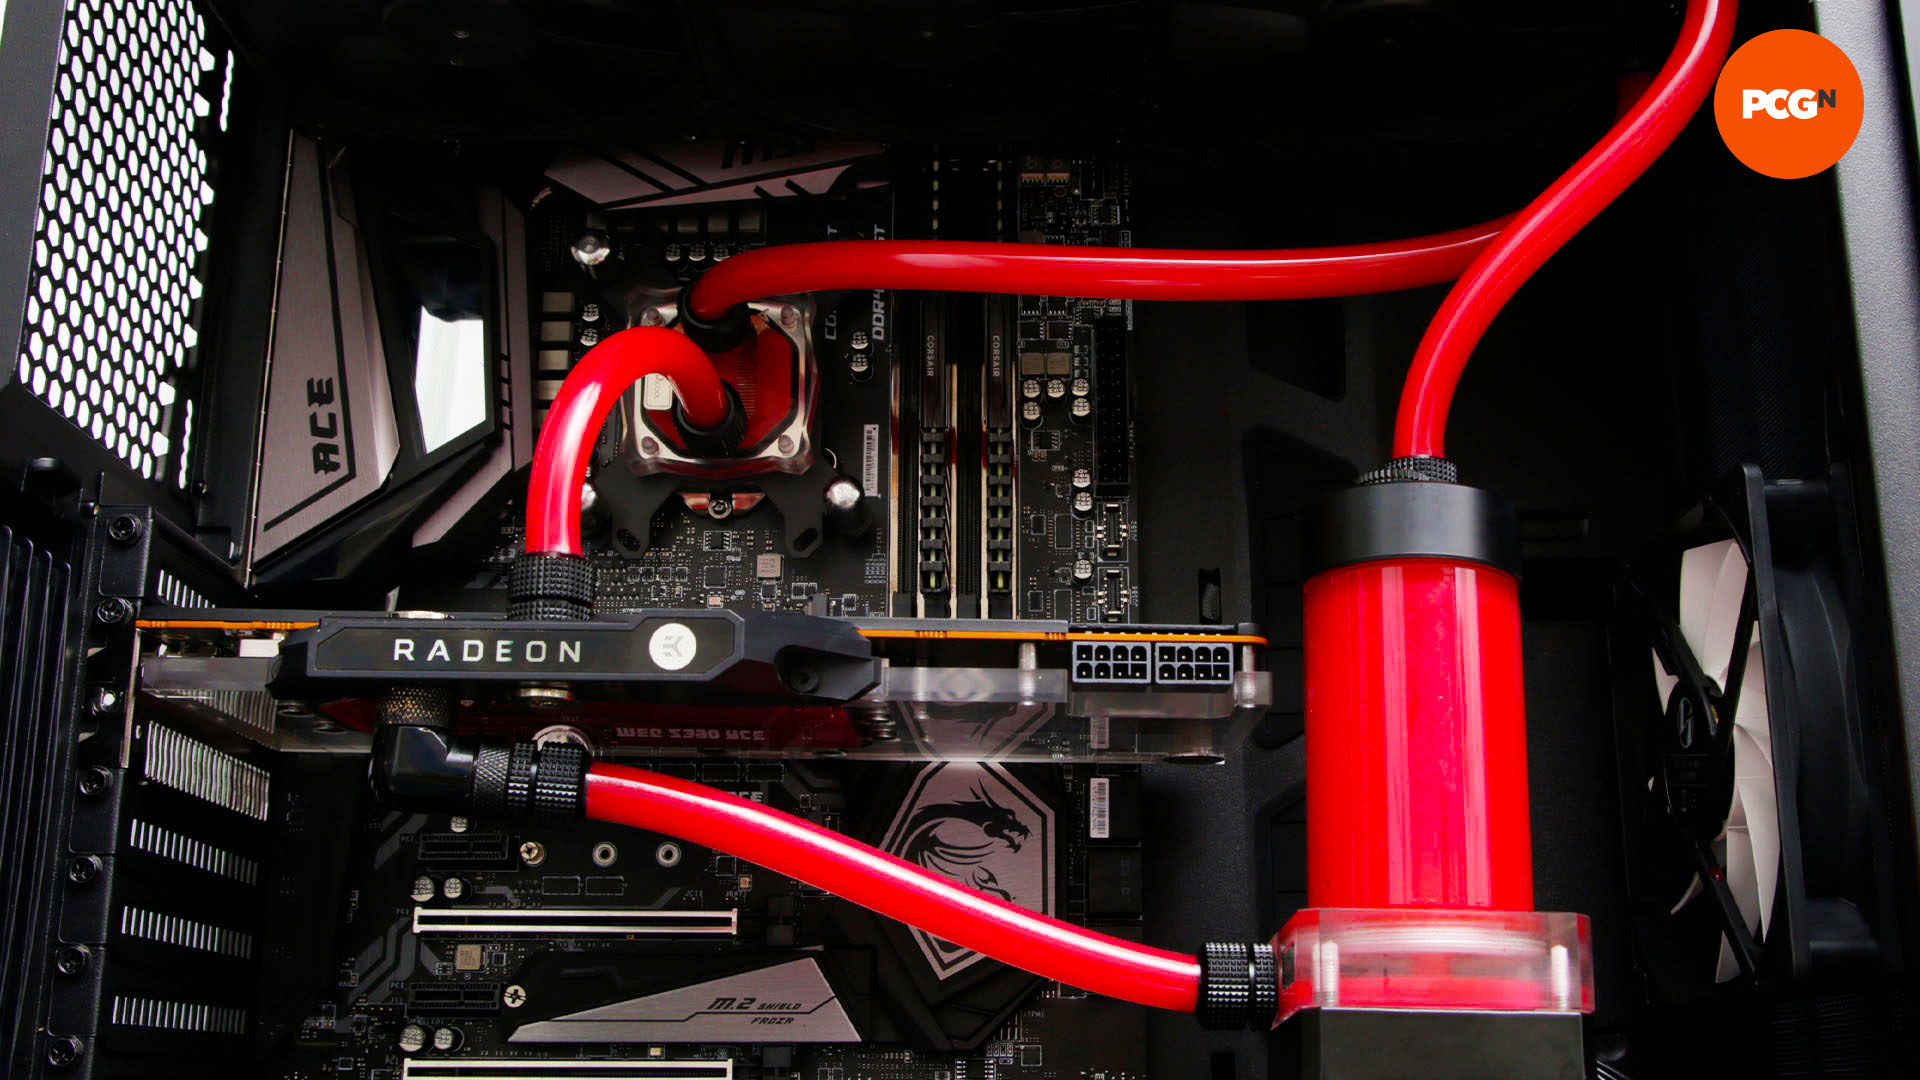
If you’ve obtained a pressure tester, there’s generally no need for a final leak test, but if you don’t have one, then leave the pump running for six hours and attach white tissue to every join in the loop. If there are slow leaks, you’ll spot them using colored coolant, which will be left behind on the tissue, identifying joins that need to be tightened.
It’s worth leaving these bits of tissue attached after you’ve connected your power cables and used your PC for a few days. As components warm up, on very rare occasions they can develop slow leaks. It’s extremely unlikely, but it’s worth taking every precaution. As the coolant warms, also watch for tube kinks. If the tube is under pressure in bends, kinks can form as it warms, blocking the coolant. You may need to adjust the tube length at that point, or fit anti-kink springs.
Your last job is to bleed the system of air and set your pump and fan speeds. The latter can be controlled using your motherboard, and it’s best to connect your fans to your CPU fan headers, or to system fan headers that are programmed to respond to CPU temperature. If your pump has a PWM cable, it can be controlled in the same way, while others such as the Laing D5 Vario have a speed adjuster built in.
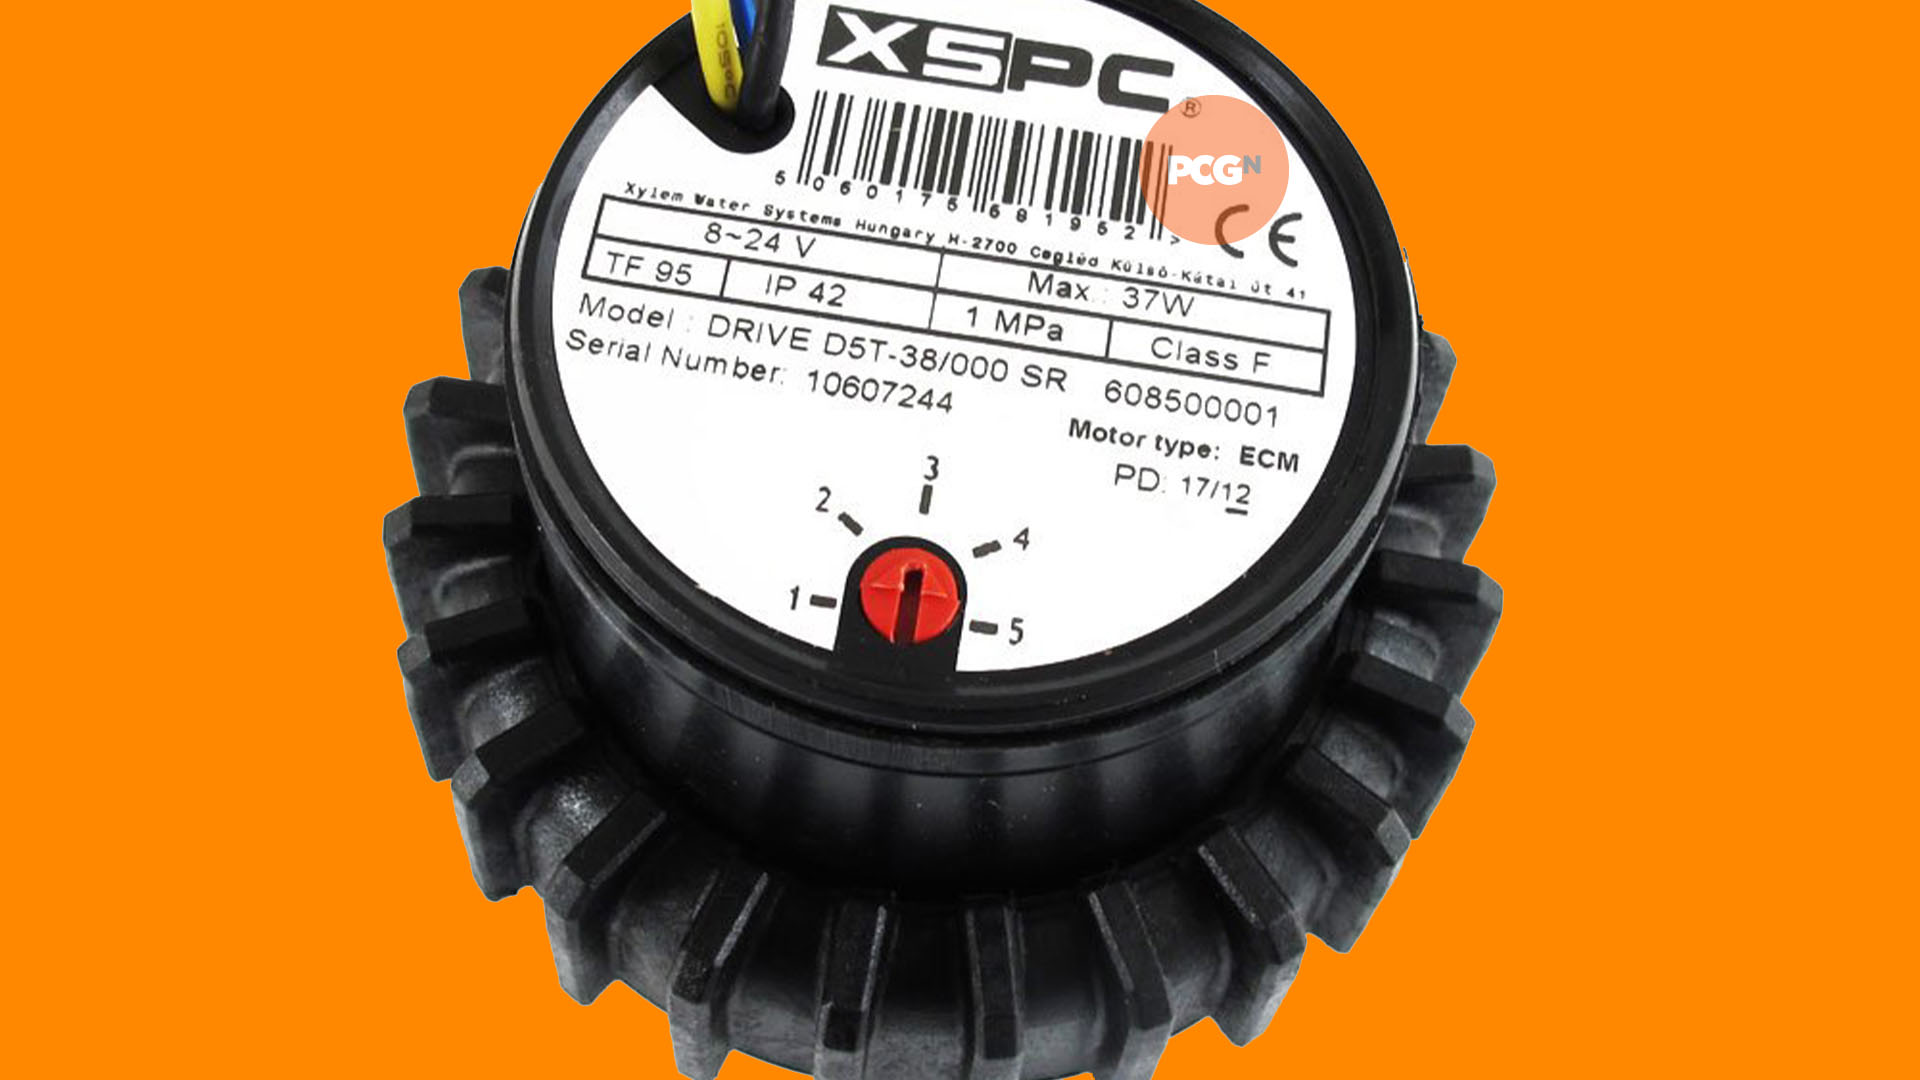
To start, run the pump at full speed to push air around the loop, so that it gets trapped in the reservoir. You may need to tilt the PC to get the air out of difficult areas, such as the tops of radiators. The pump will be noisy at this point, due to the air in the loop, but eventually the reservoir will do its job and bleed out the air.
At this point, you can fine-tune the pump to lower noise levels. It’s possible to drastically cut noise and vibration without impacting cooling performance, but always check your hardware temperatures to make sure.
How to drain water cooling coolant
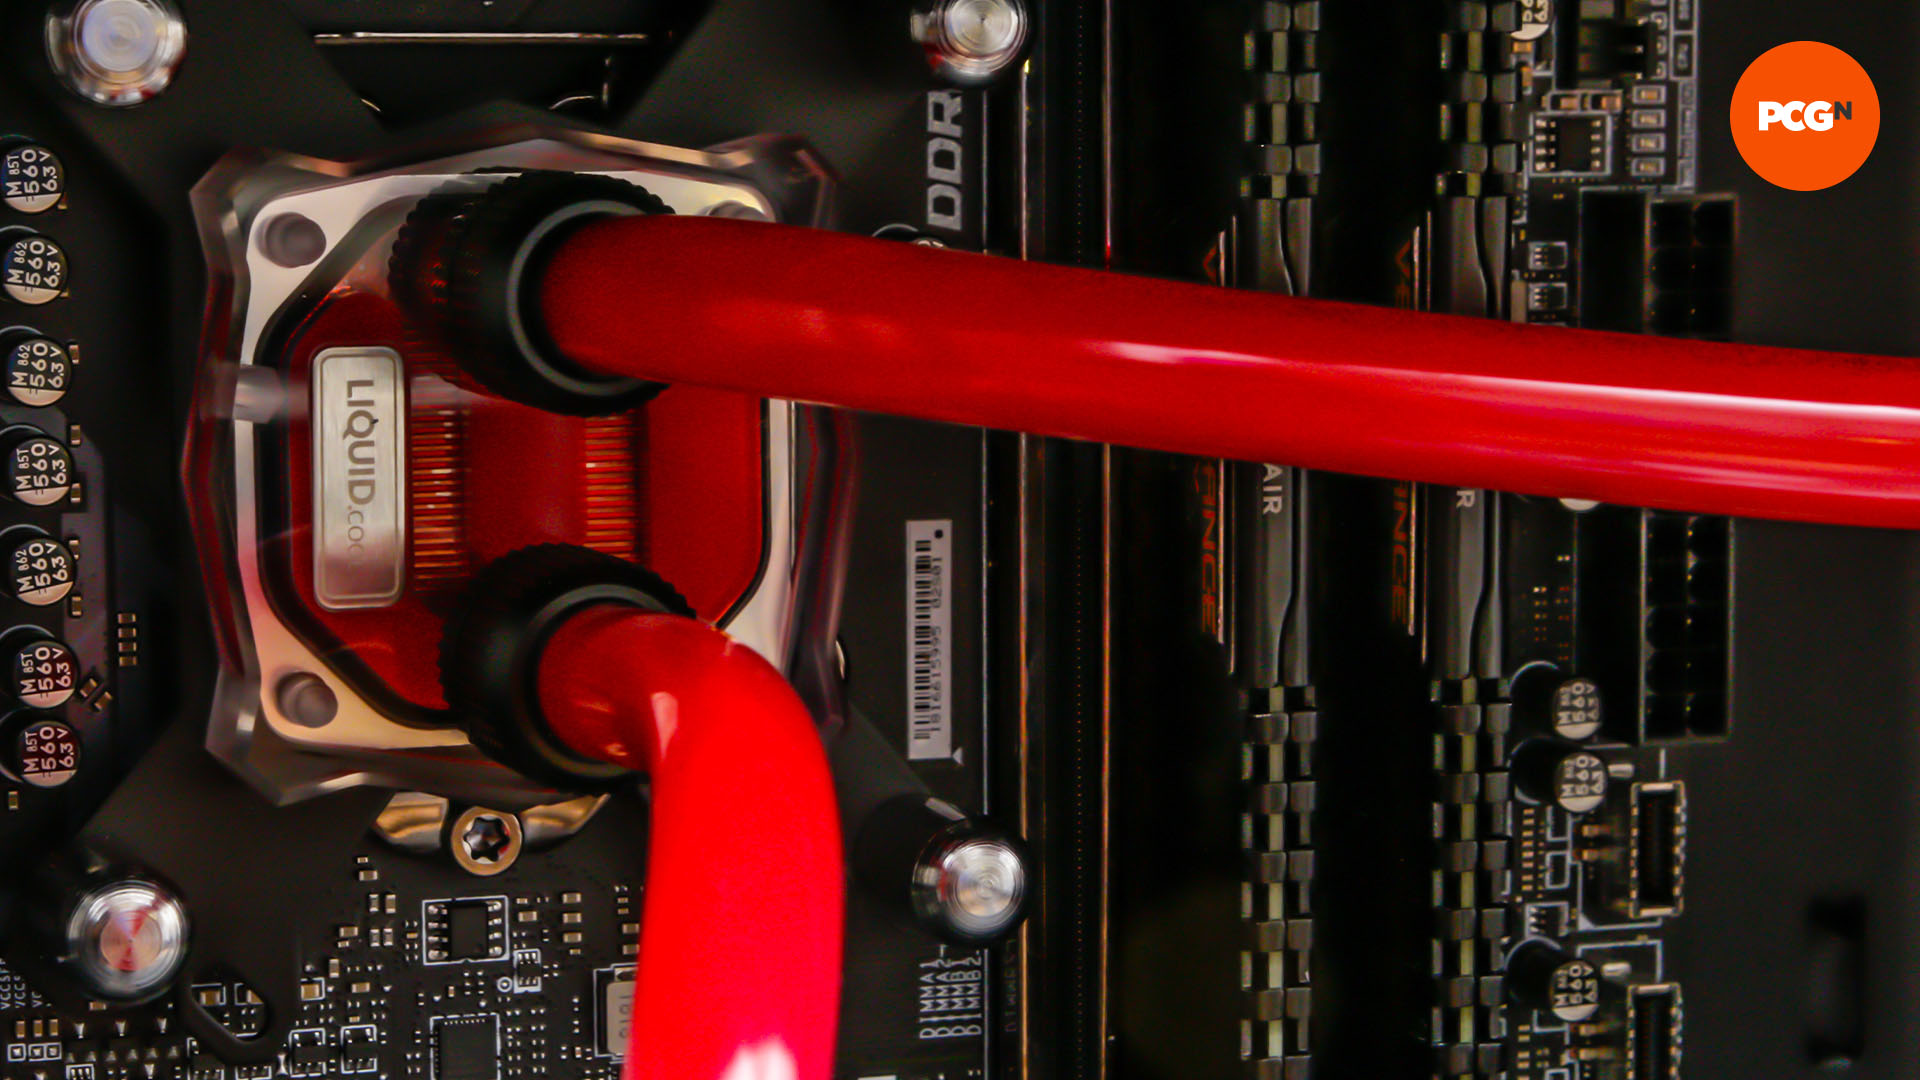
Whether you’re refreshing your coolant, adding components, cleaning your loop, or changing your coolant color, you’ll eventually need to drain the coolant from your system. Drain ports allow coolant to flow out of certain sections of the loop, but they rarely drain more than a third of the coolant. A lot of it will be stuck in tubes, waterblocks, and radiators.
As a result, you nearly always need to disconnect some sections of the loop in order to remove all the old coolant. It’s usually easiest to just use a container to collect the coolant and allow it to flow out of the loop by disconnecting fittings that are well away from your hardware, such as those on the pump, reservoir, or radiator.
You can then disconnect each component, drain it, and flush old coolant through the loop using deionized water, before reassembling your loop and filling it with new coolant. It’s also well worth considering using a fill port.
Water cooling myths
Low flow is worse than high flow
Surprisingly, in terms of cooling performance, there’s actually very little difference between high and low flow rates when you’re dealing with modern high-performance DIY water-cooling hardware. High flow rates mean that coolant will circulate faster to a radiator, but also that it will spend less time inside it to transfer heat. Meanwhile, low flow means the coolant remains in the radiator longer, but circulates more slowly around the loop.
Above a few hundred liters an hour, though, which is the maximum capability of most pumps, the waterblocks simply don’t benefit from the extra flow. That’s not to say there isn’t a drop-off point, because the kind of flow rates you get from the pumps in all-in-one liquid coolers would fail miserably in DIY systems, as waterblocks are designed with a higher flow in mind. Even the least powerful DIY pumps on the market are capable of meeting this flow rate, though.
The radiator should come before your waterblock
You might think you should put your radiator before your waterblocks, or have one n either side of two waterblocks, to keep your coolant cool. However, once your water-cooling system is up to temperature, the coolant temperature levels out around the loop.
The high flow rates in modern systems mean the coolant circulates so quickly that there’s hardly any difference in coolant temperature between the inlets and outlets of waterblocks and radiators. Heat is still being transferred, but in very small quantities and at high speed, rather than in high quantities at low speed.
As a result, it won’t make any difference if you mount a radiator before a waterblock or after it – your component temperature will be the same. Similarly, you don’t need to avoid having waterblocks next to each other in the loop. In fact, we encourage it, as it’s often the best way to route the tubing, and will have a negligible impact on temperatures.
Mixing metals is bad
Water-cooling components can feature various different metals, including, copper, brass and nickel, and the general rule is that you need to make sure the components in your loop need are made from the same metal.
The logic is based on the metals’ nobility, or how far away they sit from each other in the galvanic series. The issue is galvanic corrosion, specifically when a less noble metal becomes anodic and will, in the presence of water, corrode. The further away two metals sit on the galvanic series, the quicker this will occur.
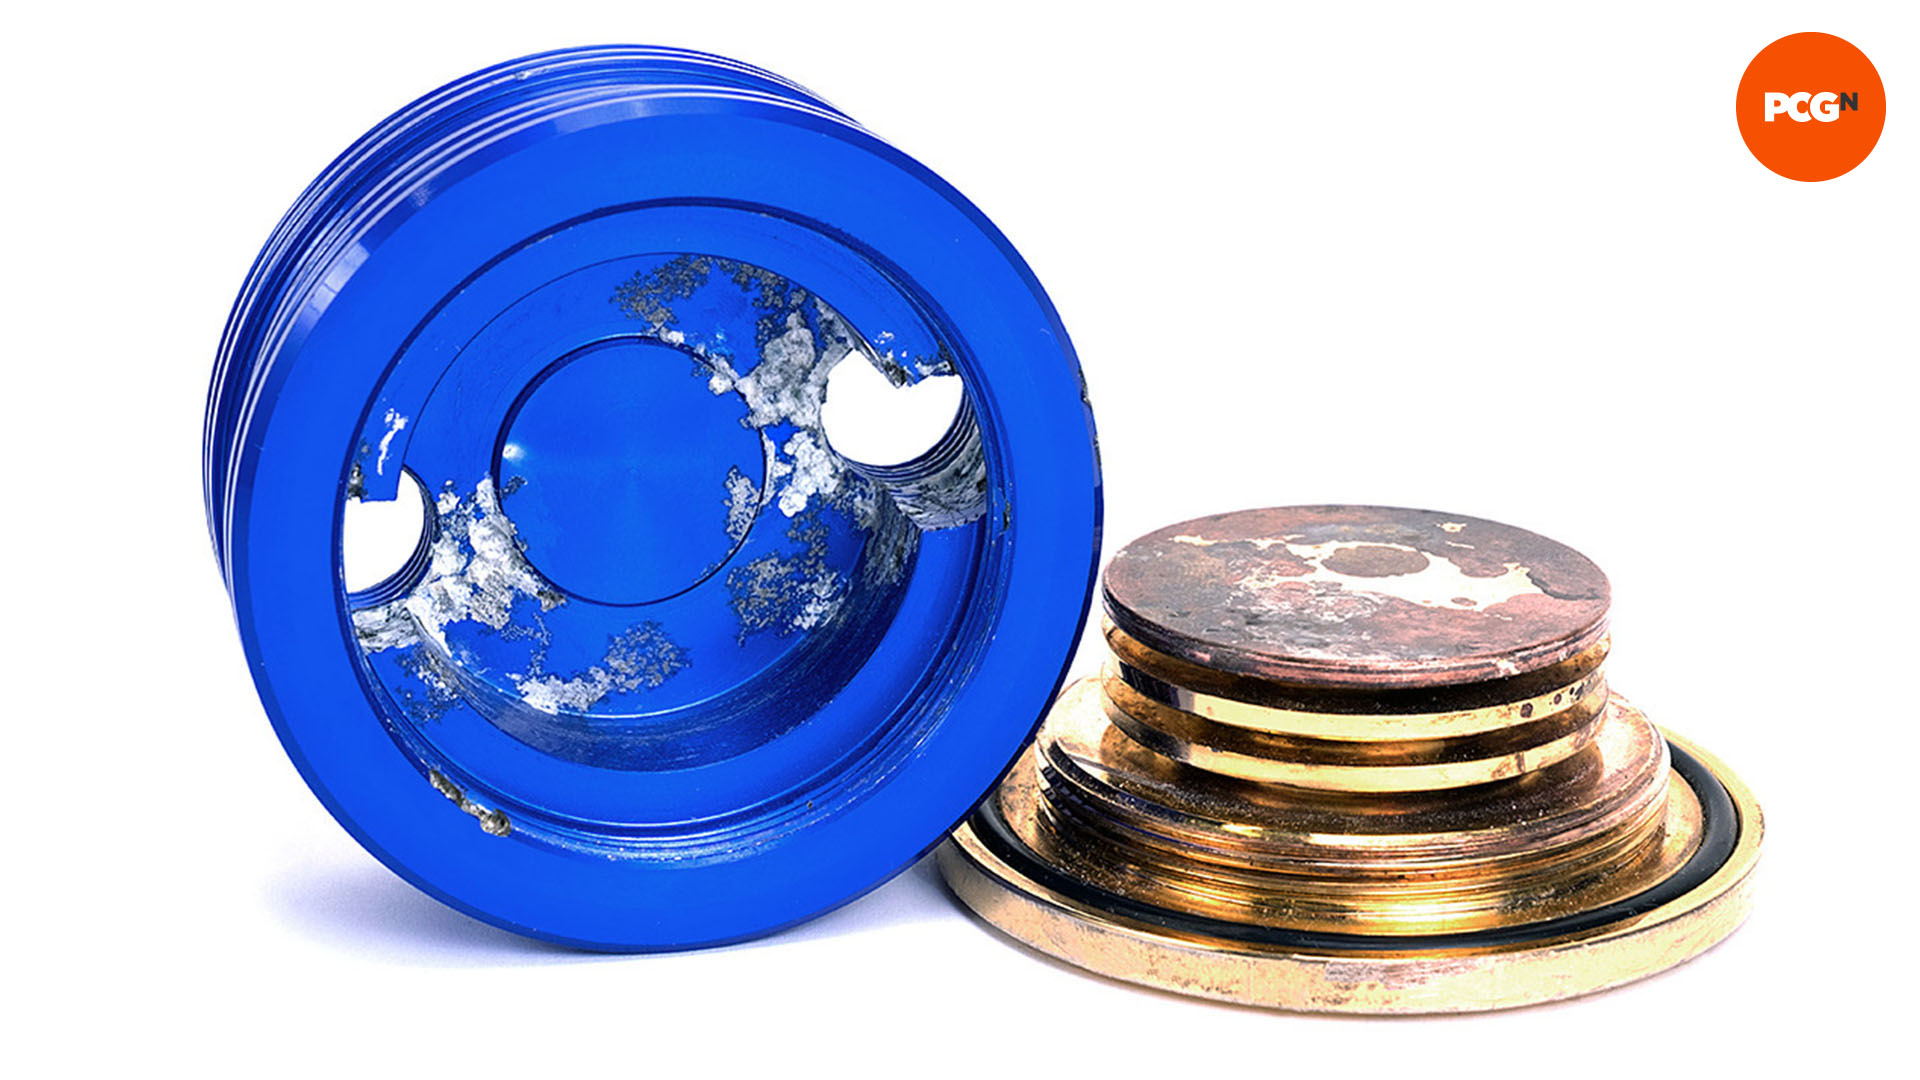
Mixing copper and brass or copper and nickel will generally not be an issue for the lifespan of a water-cooling system, though, so these combinations are fine. That said, in as little as a few months, mixing copper and aluminum will result in aluminum corroding. Even using corrosion inhibitors will only delay the inevitable. In short, never use aluminum components in your loop.
That’s all wrapped up for our crash course in PC water-cooling. You now know the theory, what gear you need, and how to hook it all up – how you do it is now entirely up to you. For more PC customization ideas, check out our how to paint your case guide.
