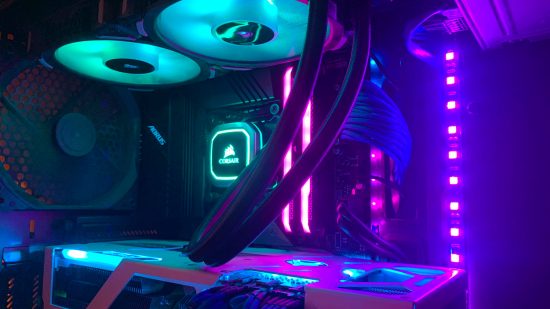
In this guide, we’ll show you how to install RGB lighting in your PC. These lighting systems are made up of LEDs that can display red, green, and blue colors, mixing up a bit of school science to create other colors. These LEDs can display an almost unlimited number of colors, while older LEDs – or other forms of PC lighting such as cold cathode fluorescent tubes – can only display a single fixed color.
This flexibility isn’t just for creating pretty rainbow effects, though. You can also ensure your lighting matches the rest of your room or gaming PC setup’s color scheme, ensuring the color is an exact match instead of having to use a generic red or green. If you’re planning to build a gaming PC, and you’ve picked one of the best PC case models with a window on the side, then some lighting will really help you show off your hardware, and look good too.
Moreover, RGB lighting can even used for practical applications, such as having your PC’s lighting change color in accordance with system load, CPU or GPU temperatures, or even switch to a different scheme depending on the app or game you’re running. Lighting isn’t limited to standard lighting strips either, as motherboards, graphics cards, cases, and all manner of third-party accessories offer ways to illuminate your PC.
The sheer number of connectors, standards, and control systems can make RGB lighting a highly confusing field, though, especially if you want to coordinate lighting across components made by several manufacturers. As a result, in this guide we’ll take you through the various connectors, ecosystems, and accessories, to give you the knowledge you need to build a dazzling RGB PC.
RGB lighting connectors
There are several issues with RGB lighting that can make it confusing in terms of connecting various components together, and synchronizing colors or lighting effects. The first comes from the different standard connector types. There are two key types of RGB connectors catering for the two standards, and both are now common on most motherboards.
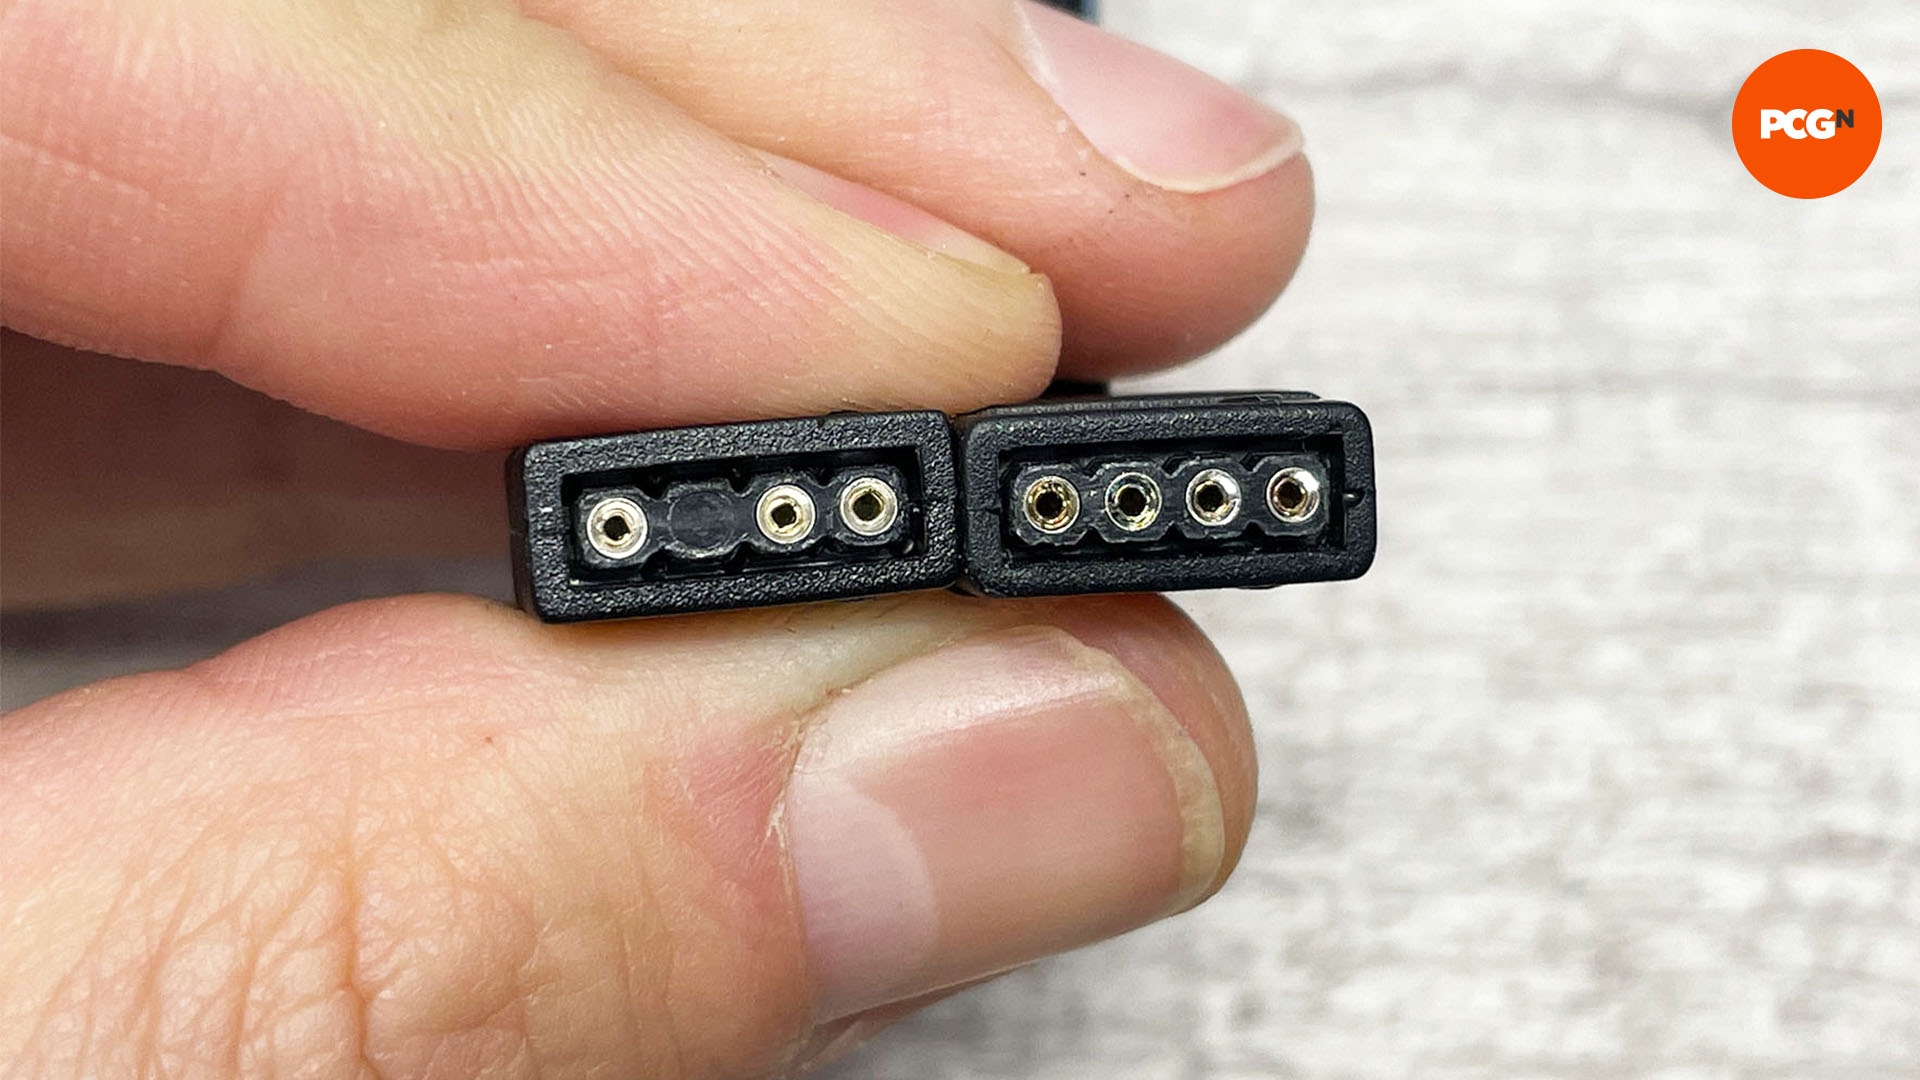
The original 12V connector has four pins, while the newer and more capable 5V connector has three pins. A 12V 4-pin RGB accessory can only display a single color at any one time. For example, a 12V 4-pin LED strip can tap into the entire RGB color spectrum but will need to show that color across all its LEDs at the same time. This means it’s unable to offer fancy rainbow lighting effects or allow you to control individual LEDs.
The 5V 3-pin connectors, also known as digital or ARGB, indicate devices that allow you to control individual LEDs. This could be on an LED strip, memory module, or fan and can be used to create moving strobe or rainbow effects or have a purple color blend into blue or green across the rest of the LEDs. These ARGB devices are usually the ones to buy, as you get the best of both worlds. You have the ability to set all LEDs to a specific color, but also to apply all manner of lighting effects and control individual LEDs if you want.
That sounds simple enough – just two connectors with one offering more control – but it’s not quite that simple. For starters, there are two types of ARGB connectors and they’re not compatible with each other physically. Gigabyte has often used a 3-pin ARGB connector, but while standard ARGB connectors also have 3-pins, they look like the older 12V connectors, except with one pin removed in the center.
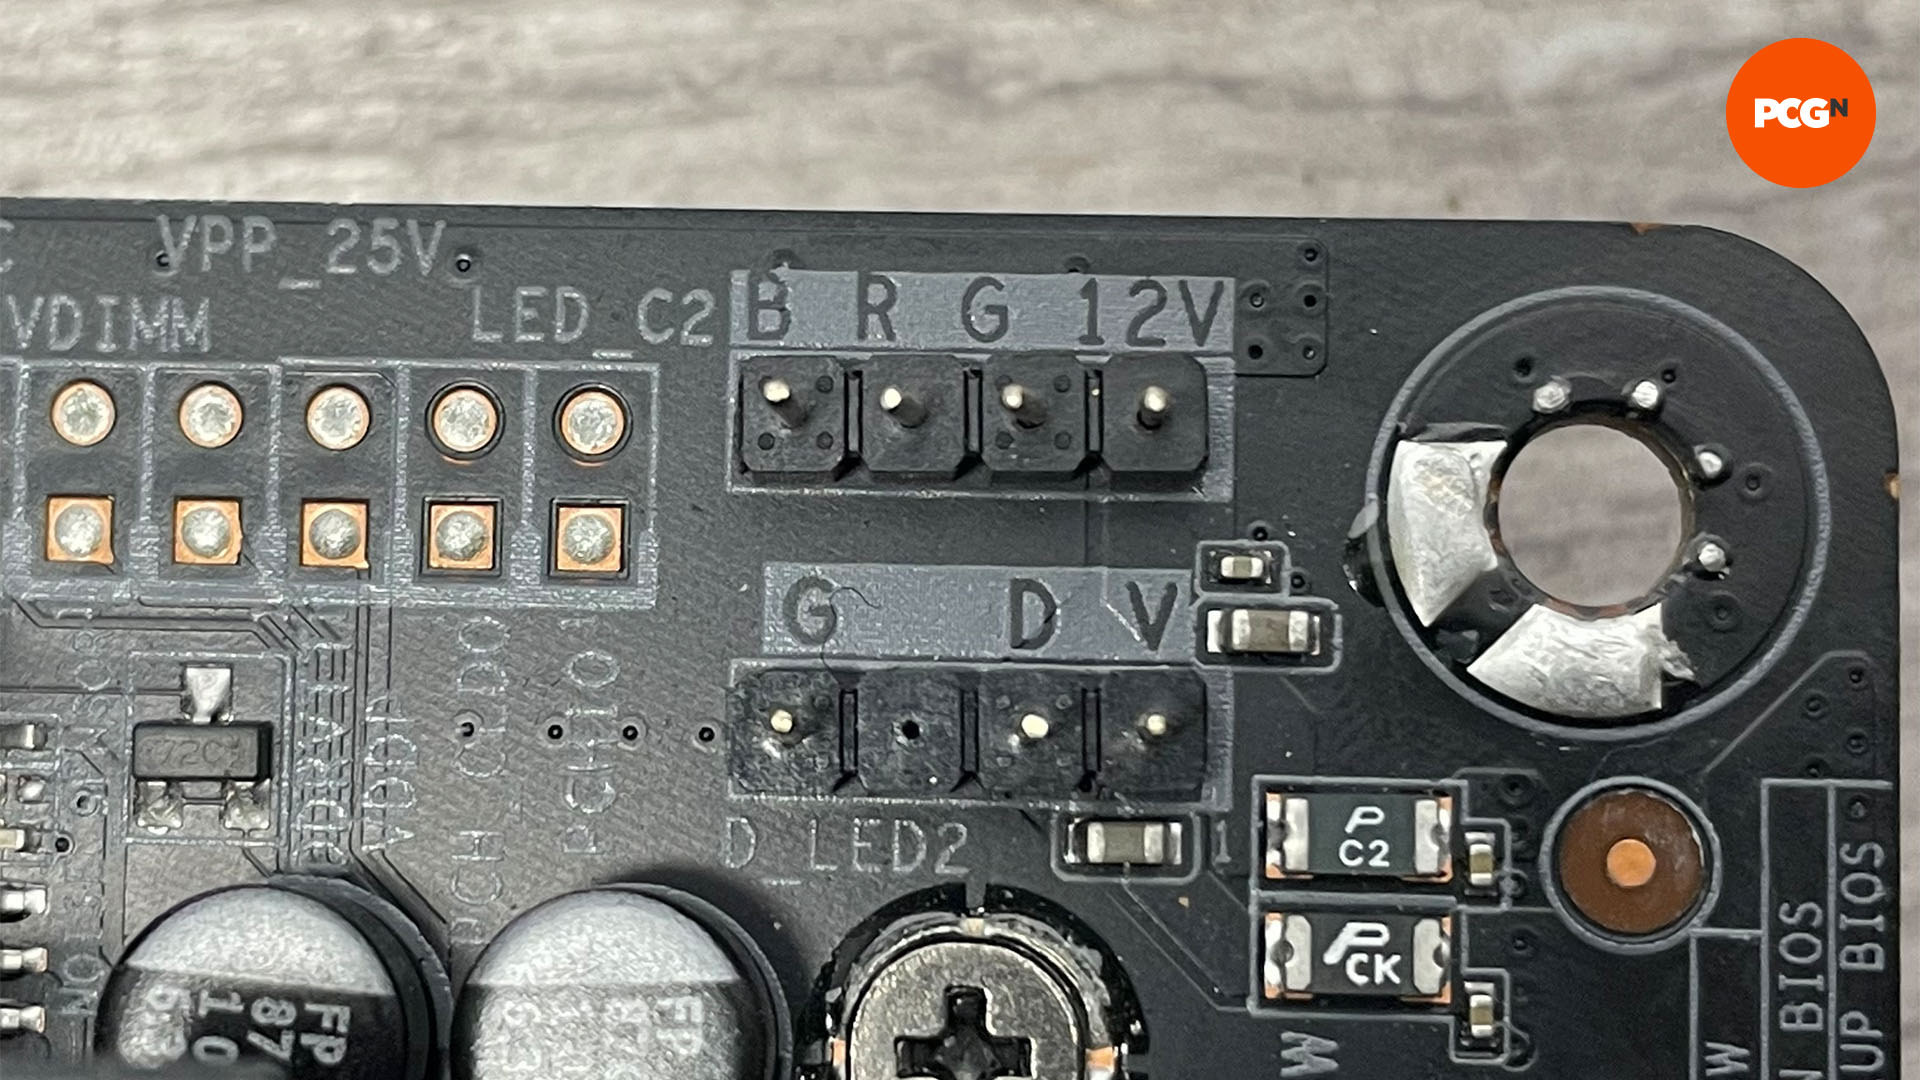
Gigabyte, though, has the three pins sit next to each other, so you can’t plug normal ARGB devices into Gigabyte motherboards without an adaptor. Thankfully, these are often included, and modern Gigabyte motherboards either include both types of ARGB headers or only the more common type. Adaptors converting one to the other are also available, while many third-party lighting accessories include them too.
The situation is made worse, however, thanks to RGB lighting accessory manufacturers using their own connectors. The likes of Corsair, NZXT, Phanteks, and Thermaltake often have their own ecosystems and proprietary connectors, which only work with their own hardware and lighting controllers. This can help if you make your setup simple – for example, with Corsair’s iCUE software, plugging in Corsair components means the software has been tested with all of them.

However, it also means that simple devices such as LED strips with standard 4-pin 12V or 3-pin 5V connectors can’t be used with these controllers out of the box, and they’re not compatible with other ecosystems either. Want to use that Phanteks Halos RGB fan frame with a Corsair lighting controller? Well, sadly you’re out of luck.
There are ways around this in some instances, though, such as using adaptors to convert these proprietary connectors to standard 3-pin or 4-pin RGB connectors. After all, the underlying technology is the same (as long as you’re using the right voltage), and if you chop off the connectors and hard-wire two 3-pin devices together, for example, they will work fine, so long as you get the cables the right way round. These adaptors can often be found on eBay or Amazon and don’t cost much.
The key thing to note overall is to always read the instructions. We say this because, in some situations, it’s possible to hook up an RGB device to the wrong port and put 12V through a 5V device, which will usually fry it.
This is rare, but we’ve seen plenty of devices that either require specific adaptors or, more worryingly, have a full 4-pin connector with four working pin holes, when actually it’s a 3-pin device and connecting it to a 4-pin RGB header will result in disaster. Usually, 3-pin connectors will have the unused port blocked off so it’s impossible to connect it to the wrong header.

RGB lighting ecosystems
Modern RGB devices are complicated, with some components, such as memory modules, communicating over the system management bus rather than using cables. Corsair’s iCUE software works flawlessly with its memory modules, as well as its other unique devices, such as keyboards, mice, and headsets, and to some extent that’s because it’s part of a closed ecosystem.
That said, it has begun to open up to other component makers. Some of its lighting controllers offer standard 3-pin headers, even though Corsair’s own RGB lighting strips still use its proprietary 3-pin ones.
This at least allows you to connect third-party fans or LED strips to its components and control them using its software, and to synchronize lighting effects across components too. Corsair also allows for control over certain motherboard RGB headers and onboard lighting, such as those from Asus, although it’s a little haphazard.
The downside, of course, is that some components either require additional adaptors to work or, where they’re not available, you’ll have no option except to run devices in isolation without the ability to synchronize lighting effects.
Thermaltake’s components are often prime examples. Its new Toughfan 12 RGB fan kit, for example, has proprietary connectors for its fans, which combine PWM signals and lighting control, and there are no adaptors available for them to hook them up to standard connectors, nor to connect other devices to the included controller. Its software allows for some other devices to be connected, from the likes of MSI or Razer, but that’s about it.
In short, you need to research your potential purchases very carefully. There’s nothing wrong with a closed RGB ecosystem, but be aware of its limitations when it comes to adding other hardware if you want to avoid disappointment.
RGB lighting adapters
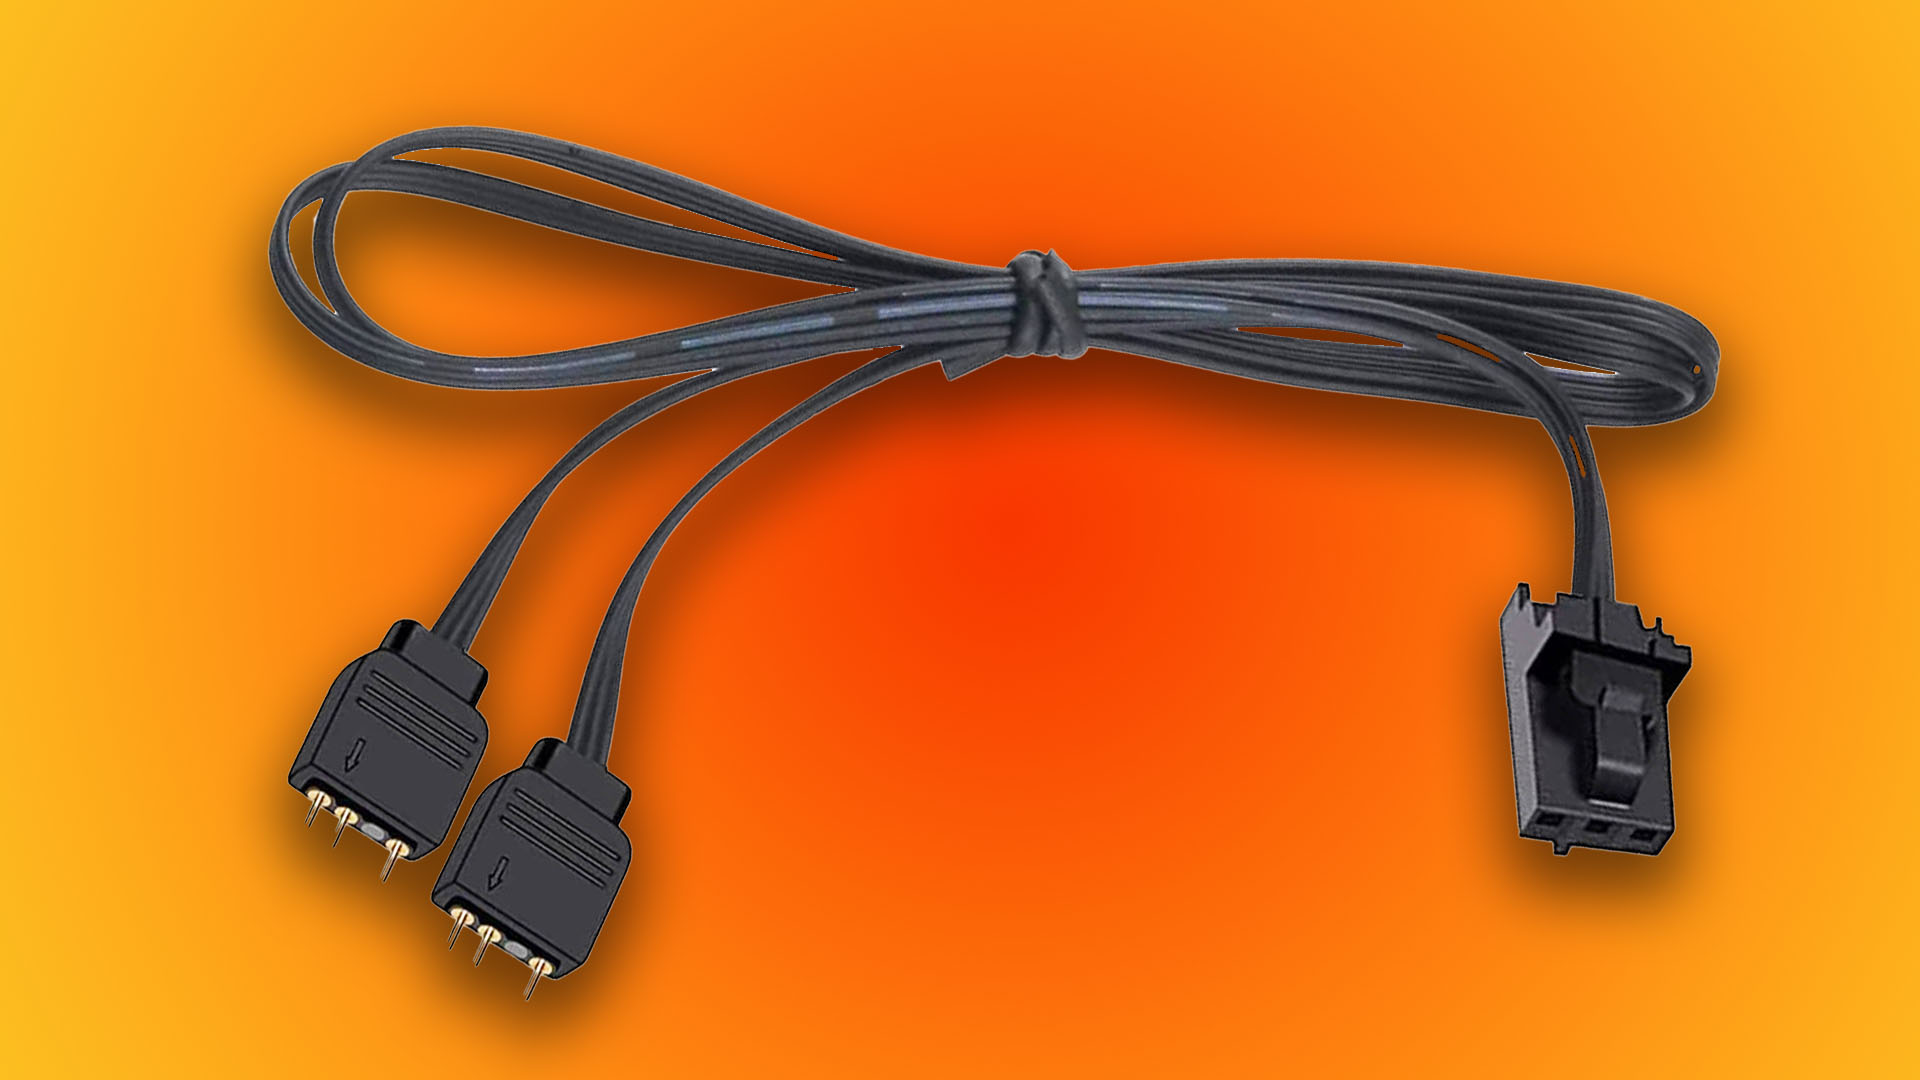
Ecosystems are all very well, but their primary purpose is to force you to use a manufacturer’s own hardware, often at inflated prices compared to standard RGB lighting strips or other accessories. However, there are ways around these limits. As the voltages and pinouts for RGB devices, especially 12V 4-pin and 5V 3-pin ones, are the same, it’s a simple matter of sticking a proprietary connector on one end and a standard connector on the other end and you have an adapter.
These will allow you to connect standard devices to otherwise-closed ecosystems, and the adaptors are available for the likes of Corsair, NZXT, and Phanteks devices too. They’re available for a few pounds and some manufacturers, such as Phanteks, actually offer adaptors themselves.
RGB lighting controllers
You need two components for RGB lighting – a controller and the actual lighting components. The controller can be your motherboard, with most models offering RGB lighting control through 12V 4-pin or 5V 3-pin connectors, along with the manufacturer’s own software. If you buy an RGB LED strip that’s either 3-pin or 4-pin, it should work with your motherboard with no other hardware required.
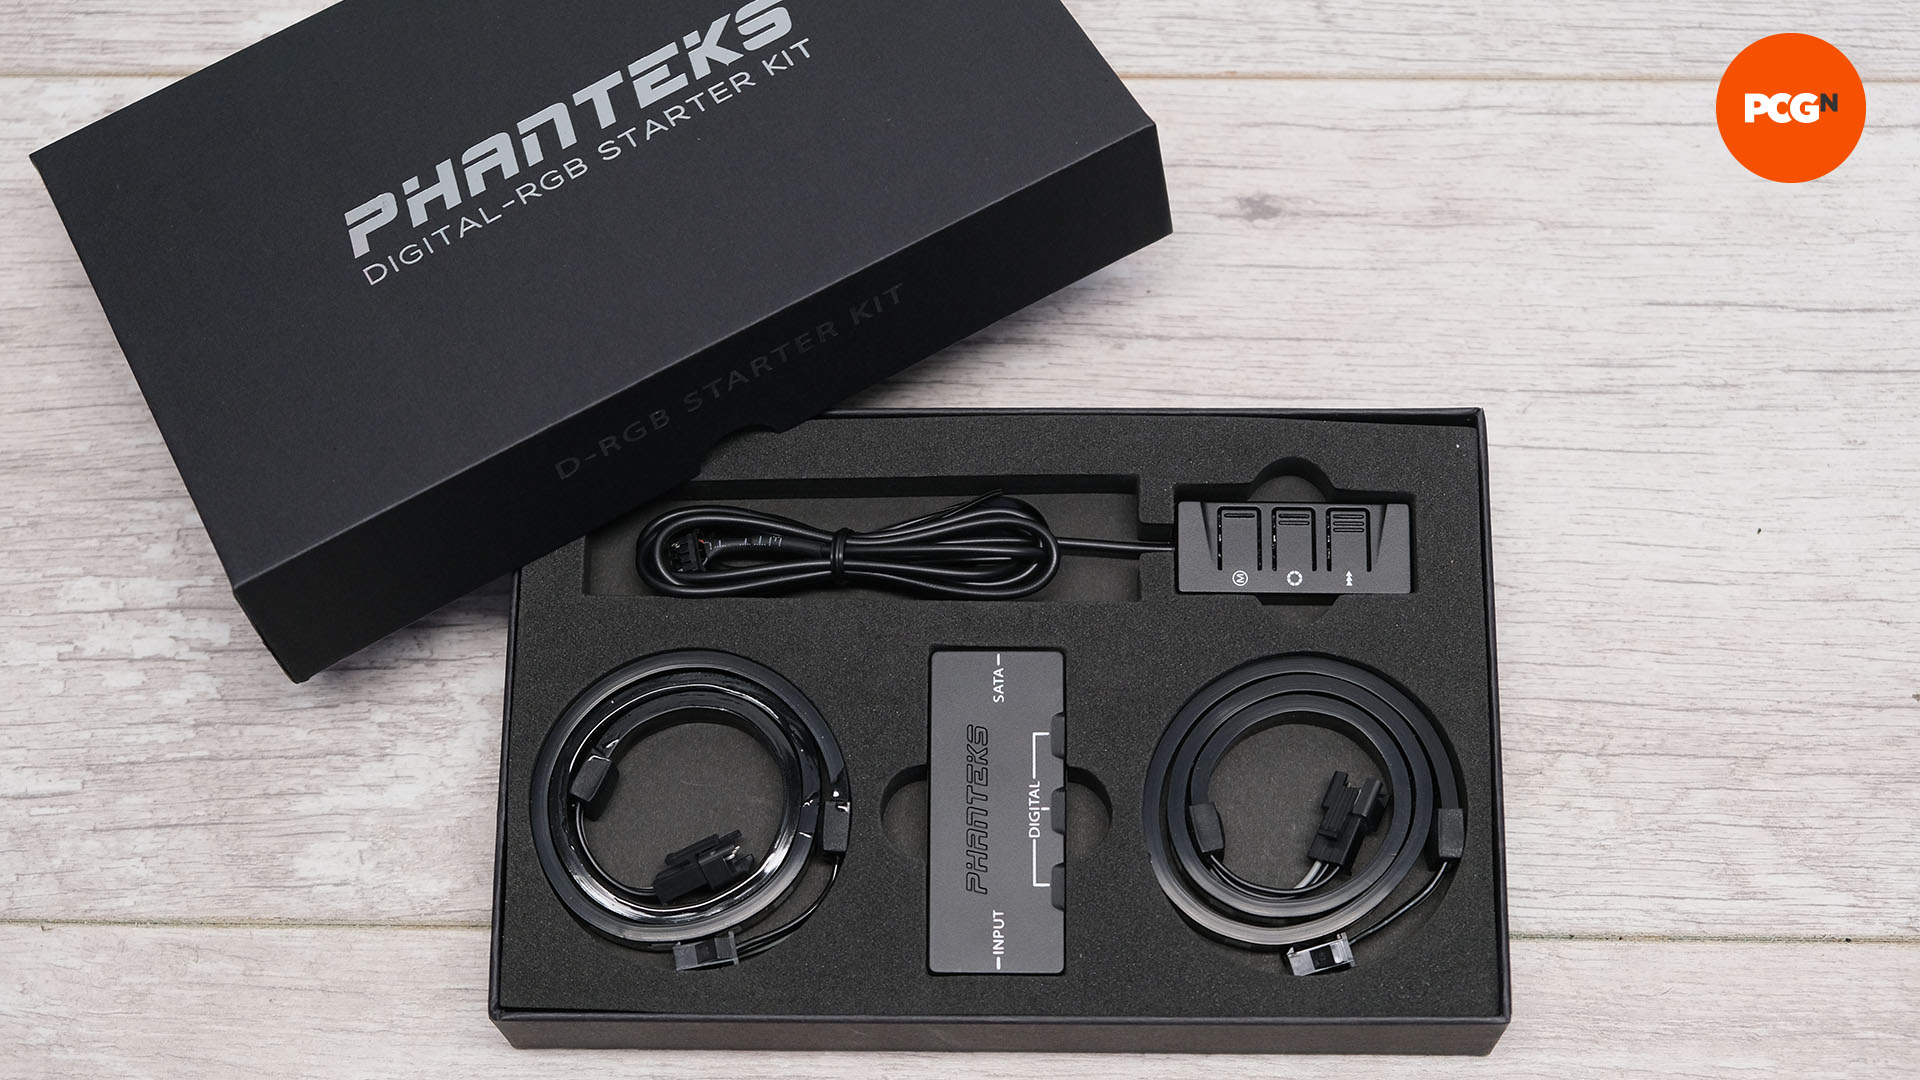
The next step up is to buy a separate controller, and a model such as Phanteks’ Digital-RGB Starter Kit is ideal, as it includes all the gear you need, as well as adaptor cables to control the included LED strips from a standard 5V 3-pin header instead of the included controller, which is fairly basic. However, the kit has the potential to control an entire PC’s worth of lighting.
Types of RGB lighting
You might think RGB lighting is all about LED strips, and to some extent that’s true. Strips offer the easiest and most effective way to illuminate your PC, but PC lighting has moved on quickly, with even more elaborate products now available. RGB lighting on fans doesn’t just stick to the center hub, for example, but can include the rear of the fan or even the frame itself.
If you prefer the look of diffuse light strips to glaring LEDs, then Phanteks’ Neon Combo set includes lengths of digital RGB strips, with opaque covers that provide solid-looking lengths of color you can bend around your case or components.
Meanwhile, the Corsair iCUE LC100 mimics popular traits on social media for patterned shapes of RGB lighting, except here they’re miniaturized into triangles that can fit onto flat surfaces or around edges.
Graphics cards have sported RGB lighting for a while, and the latest models have even made it their party piece, such as the flamboyant GameRock models from Palit. Unbelievably, there are even ways to illuminate your power cables too, designed to sit between the end of your PSU’s cables and your components, courtesy of Lian Li’s Strimer kits.
Daisy chaining is your friend
One of the biggest issues with RGB lighting is the number of cables it can necessitate. This can result in hideous amounts of cable spaghetti in your case, which can be a nightmare to route and tidy away. However, manufacturers are aware of this issue, and many components can be daisy-chained together to reduce cable clutter.
Taking this one step further, Lian Li’s Uni Fan kits do away with cables nearly altogether, with its fans sporting clip-together designs that allow contact pads to press together, sending fan speed and RGB signals between them. You can connect several fans in series, but use a single RGB cable to control all of them. This also makes installing the fans much easier than usual, as you have a single object to secure, rather than several.

Where to put your lights
Securing RGB lighting components is usually straightforward, as the components often have adhesive pads, Velcro, or securing mechanisms to fix them in place – some are also magnetic, which is ideal if you have a steel case. The location of your RGB components is critical if you’re to achieve the desired effect, whether it’s to color-match the lighting to your case and components, or simply to illuminate it.
Fans generally don’t do that well at illuminating large spaces, so it’s pointless installing RGB fans behind a closed front panel if there’s no mesh in the front through which they can shine – they won’t illuminate the interior behind them. Having an RGB fan in the rear fan mount, though, is often the first location people opt for, as it’s clearly visible through a windowed side panel.
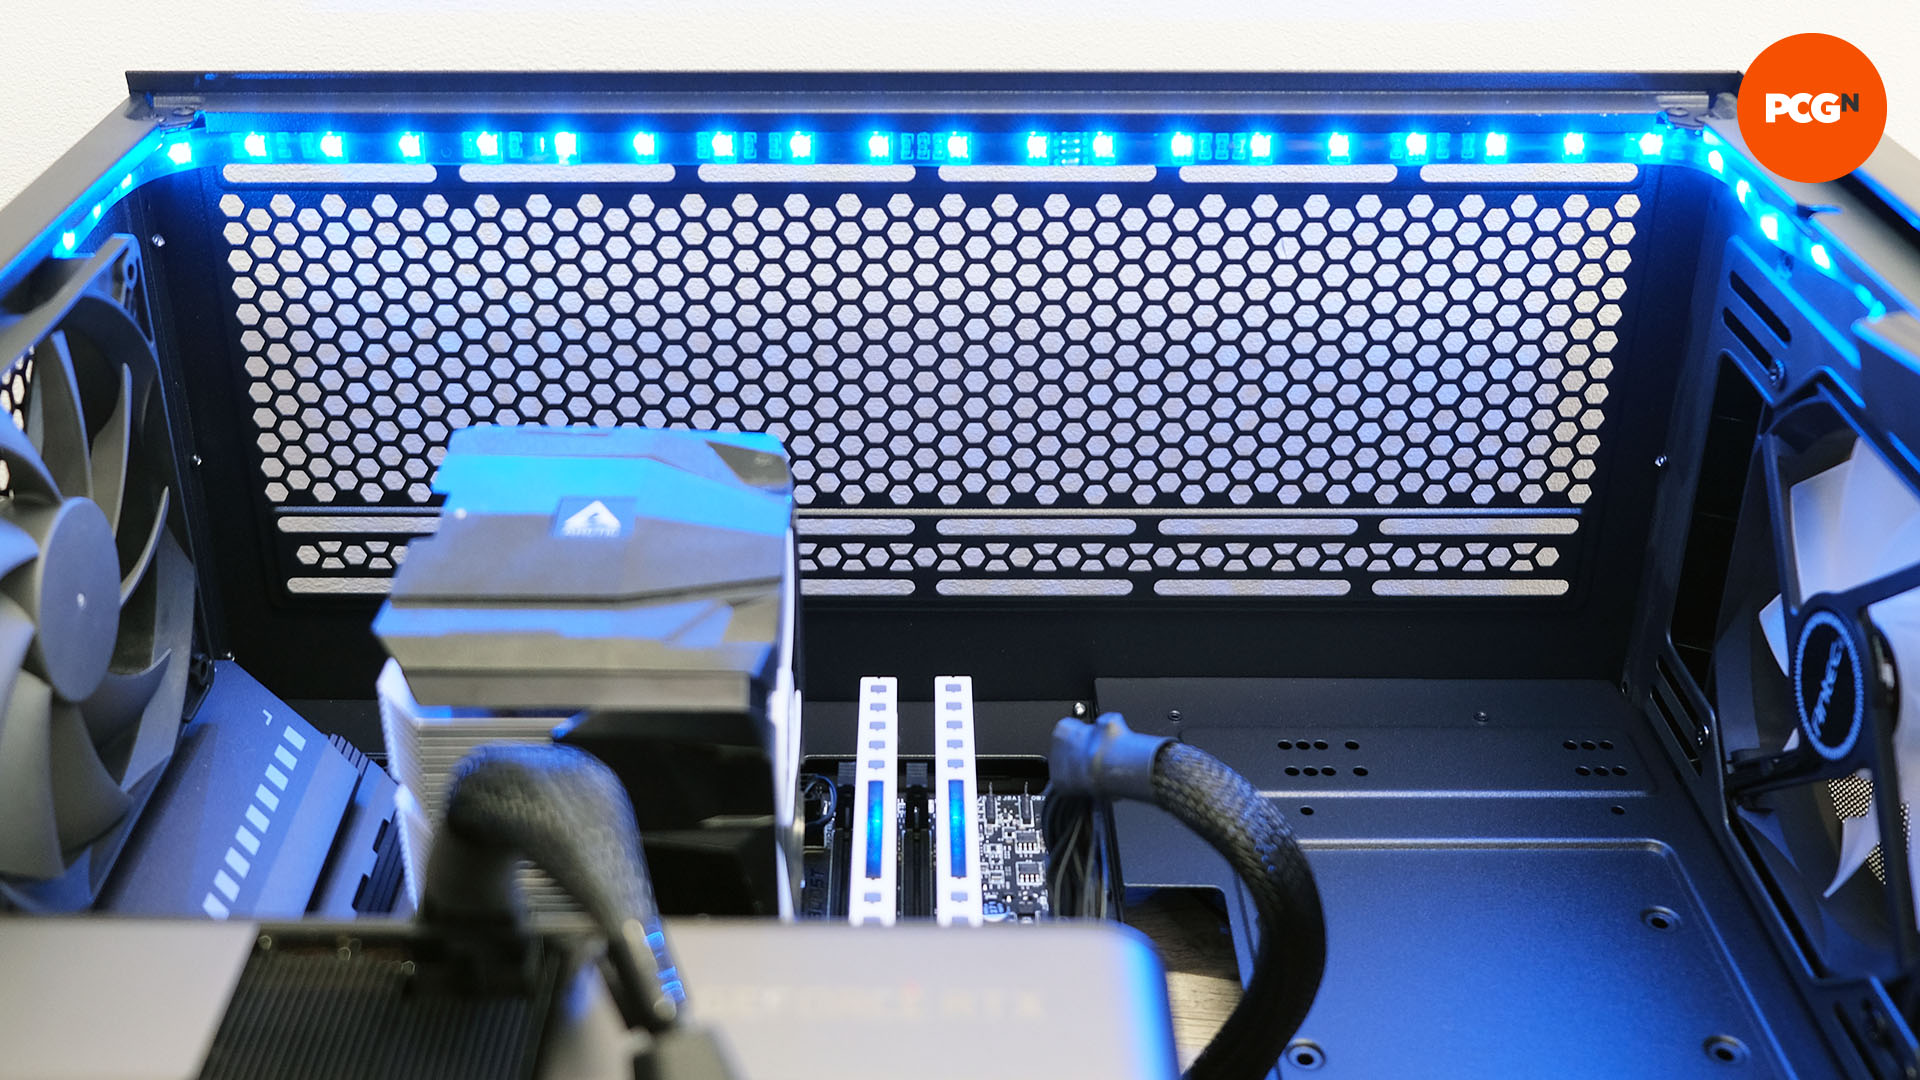
Typical LED strips can be placed anywhere, but to avoid them glaring at you constantly, it’s best to place them in the roof of the case, or in the front, so they illuminate your case without being directly visible. Placing diffuse strips at the rear of the case can look great, though, as they’ll shine forward to face you.
Ultimately, RGB lighting is about expression, so you don’t be afraid to test-fit your lighting in different locations to see what looks best to you.
We hope you enjoy looking at your light-up PC interior after fitting your RGB strips, fans, and accessories, and getting them all coordinated.
