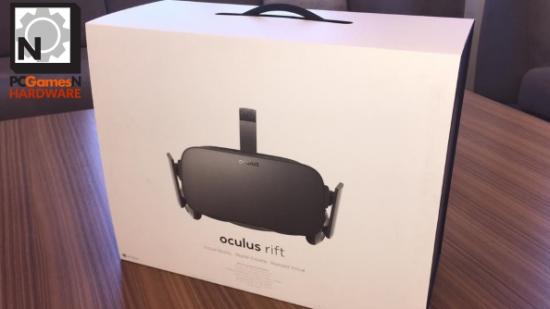
You’ve saved up your pennies, staked your claim on an Oculus Rift, and after months of excited hand-rubbing, it arrives at your door. But what’s this? What do all these cables do, and where do they go? What kind of software does it need, and where is it obtained? And for pity’s sake, why won’t it work?
Already up and running, but in search of a decent title? Try our best VR games, where the platform’s elite hang out.
As anyone with a Developer Kit model of the Oculus Rift will tell you, it’s a great many things, but user-friendly ain’t one. There’s no shame in getting a little helping hand to get everything in your box up and running on your PC – we won’t tell anyone.
Note: this guide explains how to install an Oculus Rift DK2 on a Windows PC. We’ll update it once we have our consumer Rift with any changes to the process. We go into a deep step-by-step guide below, but if you’re in a hurry and want the basics, here’s what you need to know.
How to set up Oculus Rift
- Start by instaling the PC runtime and SDK from the Oculus developer site
- Connect the HDMI and USB cables to your PC
- Run the sync and mini USB cables between your camera and PC
- Adjust the Rift to fit using the screws on each side, which can be turned by a penny. Swap out the eyepieces if needed
- Open Oculus Configuration Utility to check everything’s connected, then run the test demo
Now, let’s go into a bit more depth. Use this guide if you have more time to set up your Rift, or you got stuck going through the steps above.
Step 1 – install this software from the Oculus developer site

Before you tackle the morass of wires in the Rift’s box, first go to developer.oculus.com and register for an account. Once you’re logged in, you’re looking for two files – the Oculus runtime for Windows, and the SDK.
At the time of writing, the latest version of the runtime is 0.8. You can find quick links to both downloads on the main page (pictured above). It doesn’t matter where you install these files, but for the sake of convenience it’s a good idea to create an ‘Oculus’ folder in your Program Files or Program Files(x86) directory, just so you can dip back in there later on without having to hunt around too much. The runtime installer will install to [root]:/Program Files(x86)/Oculus by default.
Once the runtime is installed and the SDK’s files are copied over to the same directory, the installer will prompt a restart. Do so now – it’ll give you time to begin the physical installation process.
Step 2 – connect all the Oculus Rift’s cables to your PC
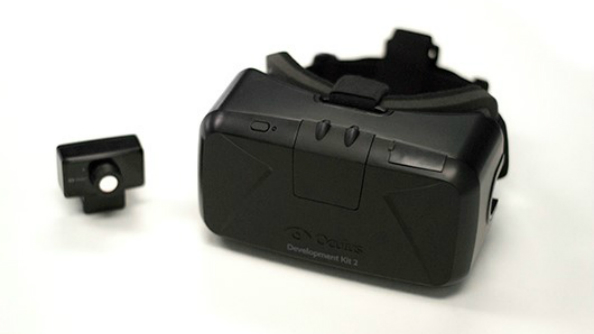
Inside the box, you’ll find the Rift headset itself, a HDMI to DVI adapter, a pair of eyepieces, a slightly worrying volume of cables, a camera, and a power adapter. Initally, focus your attention only on the headset itself. Notice that cord coming out of the back of it? That ends in a connector box into which the HDMI and USB from the headset feed through. It also has connection points for the AC adapter, and the sync cable which connects the camera.
Let’s start with the HDMI and USB connectors from the headset itself. Hook the former up to your discrete graphics card (not your onboard graphics) and the latter up to any USB slot you like. If you prefer to connect via DVI (or your graphics card doesn’t have an HDMI input) now’s the time to attach that HDMI to DVI adapter.
Now attach the AC adapter cable to the connector box, then plug the other end into a power point. You’ll only need the additional power should you choose to use the extra USB connector on the headset itself, but for the sake of completionism let’s hook it up anyway.
Finally, the camera. Attach the sync cable (the one that looks a bit like a 3.5mm audio jack) to the camera and connector box, and do the same with that additional USB cable (it’s USB to USB mini).
That’s the lot. Quite the array of cables, isn’t it? Feel free to cable tie the excess length up in the name of neatness, depending on how far from your PC you intend to use the Rift.
Step 3 – adjust the Oculus Rift to fit
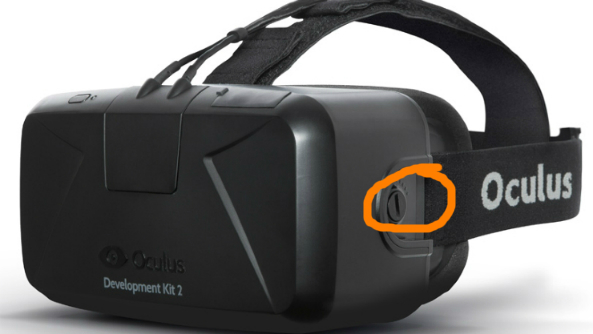
This part’s a bit less complicated. There are three means of adjustment on the Rift DK2: the eyepieces, the elasticated strap, and finally the screen proximity.
The eyepieces that you’ll find already installed on the Rift are best to use if your vision is fine, or you’re slightly near-sighted. If you’re very near-sighted however, it’s best to replace the pre-installed eyepieces with those additional ones in your box. They can be removed without tools – just twist them to the left to loosen, and twist the new ones to the right to affix them.
Next to adjust are the straps, which go over your head and then around its circumference. These are adjusted using two buckles for the circumference, and a velcro strap for the lengthways measurement. Easy.
Finally, you can adjust how close the screen is to your eyes using those little notches at the sides (pictured above in an alluring orange circle). You can use either a flat head screwdriver or a small coin to do so – the objective is to make sure your eyes can focus on the image in front of you. With that in mind, you’ll want to make final adjustments to this once you get a video feed through to your Rift.
If you haven’t already, place the camera above your monitor. Essentially it needs to be positioned somewhere where it can keep tabs on your head’s position and track it accordingly, and perching it on top of your screen is a great place for it to do that.
Step 4 – make the final touches in Oculus Configuration Utility
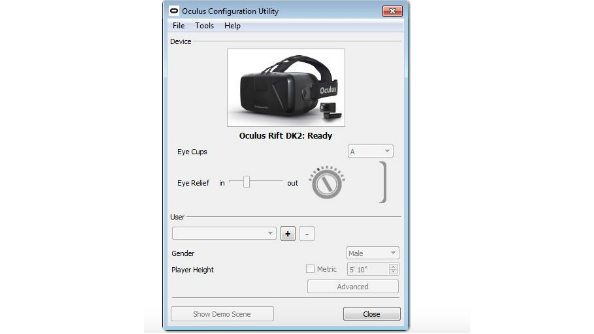
In the folder you installed the Oculus runtime inside, find a file called ‘OculusConfigUtil’ and open it up. You should see something like the image above. If the picture of the headset is greyed out, or there’s a red error message over it, something isn’t connected properly. Check all your physical connections, and then look at your headset to see if there’s a light next to the power button.
If not – press it. It should be orange. If it’s orange and you’re still getting an error message from the config utility, your problem is more specific to your particular hardware configuration, and you’ll need to go to the Oculus Support site (or hunt around on Reddit) for a solution.
Assuming your congif utility does look something like the above, add a user by hitting the ‘+’ buton next to ‘user’ and write a name. Now fill in your height and gender details.
Now, hit the ‘show demo scene’ button, and put on the Rift headset. The light by the power button should now be blue, and you should now see a scene through the goggles. In the demo scene, move around to check that headtracking is working properly, and that you’re able to focus your eyes on the lenses comfortably.
If you don’t see a demo scene, go right back to the Oculus support site, or to the Oculus subreddit. The community there is really helpful and knowledgeable, and has worked past all manner of teething problems through Oculus’s DK1 and DK2 days.
If you can see the demo scene and your headtracking works, you just completed your Oculus Rift setup. You lucky future tech user.
Do you have a pro tip about setting up a rift that we didn’t mention? Leave it in the comments below.
