People often nostalgically reminisce about archaic technology, laughing about the frustrations and limitations of cassette tapes or floppy disks, before adding ‘but they were amazing at the time!’ However, you simply can’t hide the horror of CGA graphics – the PC’s first color graphics adaptor – behind such rose-tinted glasses (although orange-tinted glasses might help – more on that later). Nobody, absolutely nobody, thought CGA was amazing at the time.
It’s hard to imagine this now, when the best graphics cards of today are so far ahead of the hardware in current game consoles, but PC game graphics really were abysmal in those early days, when Nvidia was just a glint in Jensen’s eye. I had a CGA PC in the 1980s, and even then you felt disappointed when you fired up a PC game to be greeted by a mess of purple and black on the screen.
At the time, we joked that CGA stood for ‘crap graphics adaptor’. Nobody thought of IBM computers as games machines then, of course – CGA was the product of IBM trying to make a graphics standard that could display bar charts properly. It wasn’t meant to compete with the Commodore 64.
Better graphics came to the PC later, of course, but CGA was supported for a long time. The later EGA (enhanced graphics adaptor) and VGA (video graphics array) cards were very expensive at first, so CGA still had a home in cheap IBM PC-compatible machines, such as Amstrad’s PC1512. CGA first appeared in 1981, but new software was still supporting it well into the early 1990s – you can even run Windows 3.0 on it.
CGA text mode
At its basic level, a standard 16KB (yes, KB) CGA card can access a palette of 16 colors, or rather eight colors at two intensities. It’s basically 4-bit color, with three bits allocated to red, green and blue (RGB), and the fourth bit enabling you to change the ‘intensity’ of the color (RGBI).
At the first level of intensity, you get black, blue, green, cyan, red, magenta, brown and light grey. The second level of intensity basically gives you the same colors but with an extra level of intensity, which turns the brown into a yellow, the light grey into a white and the black into a dark grey, while creating light versions of the other colors.
Now, you might think 16 colors sounds okay for 1981, but you can only display all these 16 colors on the screen at once in text mode – the mode you used to see on BIOS screens before we had fancy EFI systems. On a CGA card, the text display has an effective resolution of 640 x 200, but it can only display text characters on it, with 80 characters on the X axis, and 25 on the Y axis.
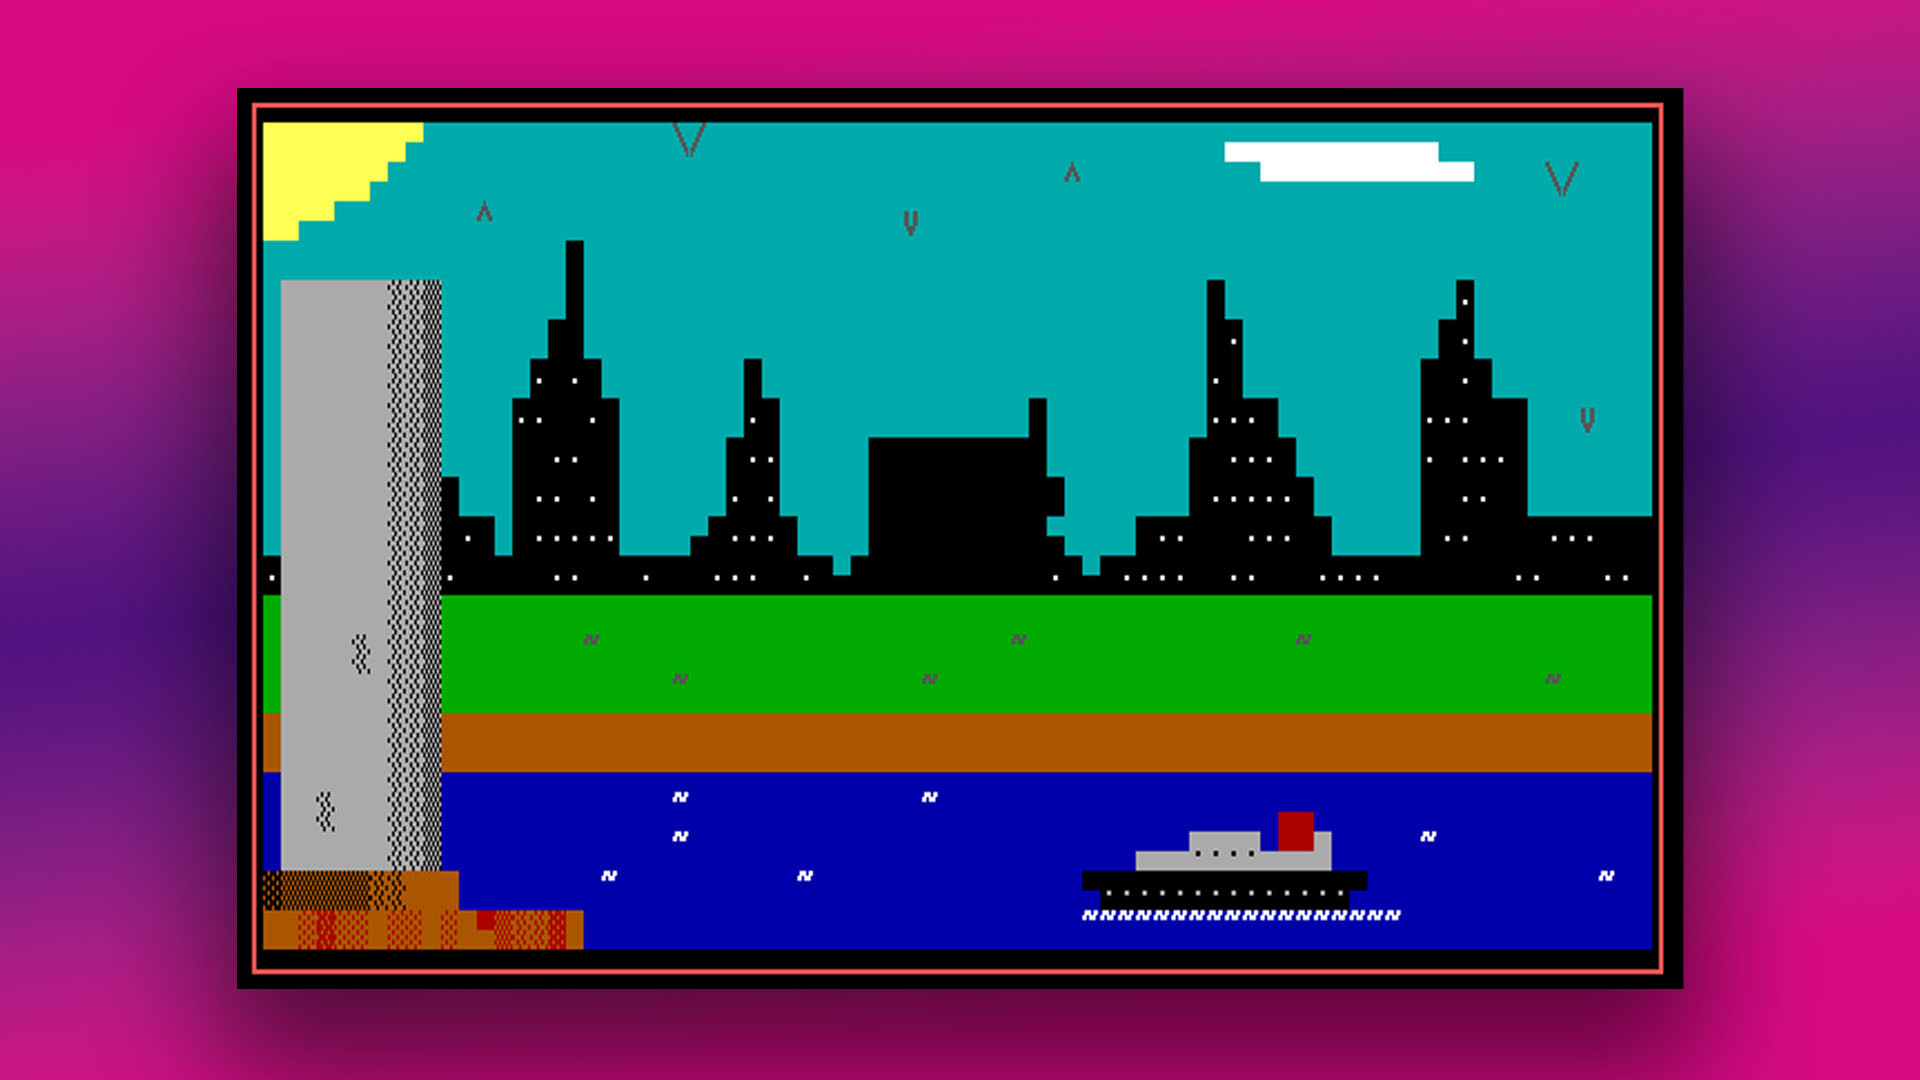
As a kid, I used to play around with this mode quite a lot, as it was the only way to get a lot of colors on the screen. If you knew your ASCII codes, you could display various lines and blocks as text characters and make a picture. You effectively have to ‘type’ a picture, rather than drawing it – I used to spend hours doing it. I’ve included an example in the image above.
To type ASCII codes, you hold down Alt and type a three-digit number – 176, 177, 178, and 256 give you three blocks of variable shading and a solid block, for example – it still works in Windows. In this text mode, you could assign each character a foreground and a background color.
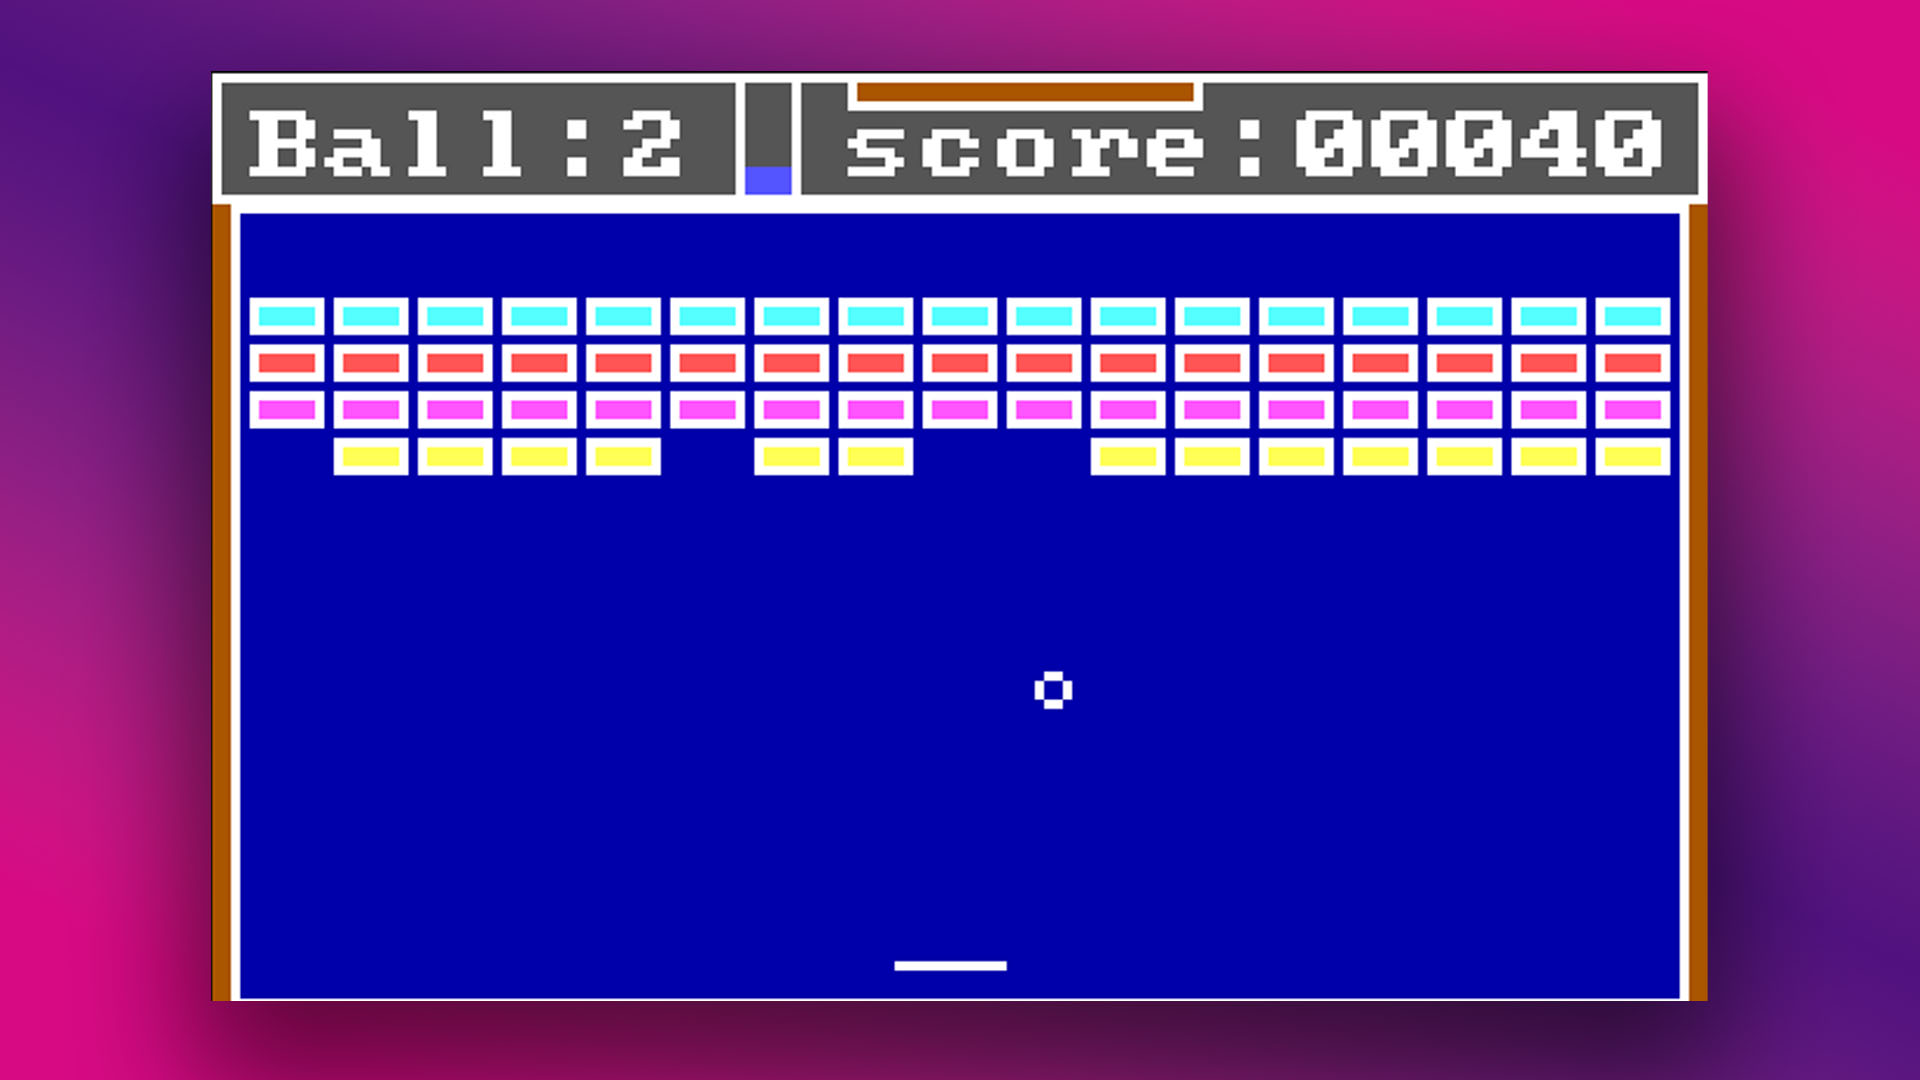
Game developers used this mode too – I had a clone of Ms Pac-Man that used to run in text mode rather than graphics mode, as well as a clone of Breakout called Bricks (pictured below). On a standard CGA card, it was the only way to get access to lots of colors.
There was a trick to enable you to display all 16 colors at an effective graphical resolution of 160 x 100, by changing the number of lines of each text character to display. However, it was rarely used. If you wanted graphics rather than text, you usually either had four colors on the screen at 320 x 200, or one color at 640 x 200.
CGA color graphics
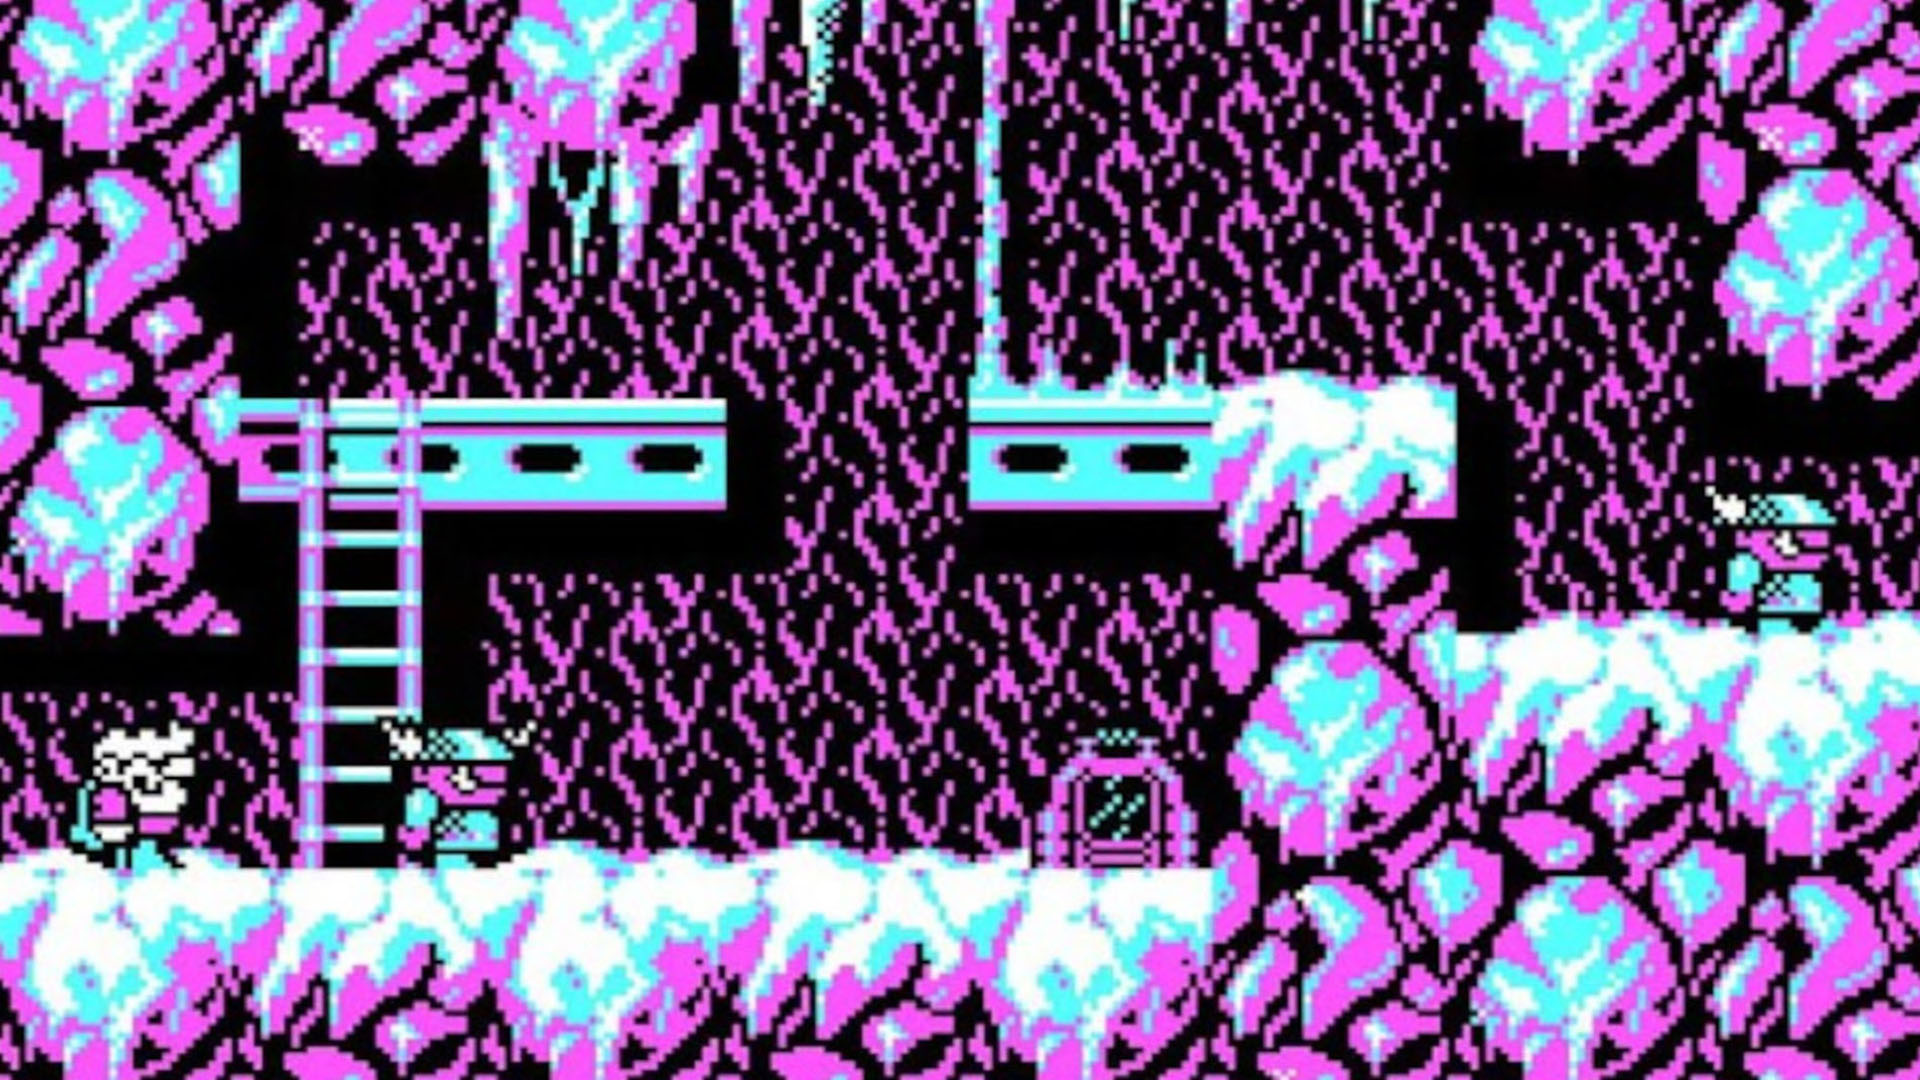
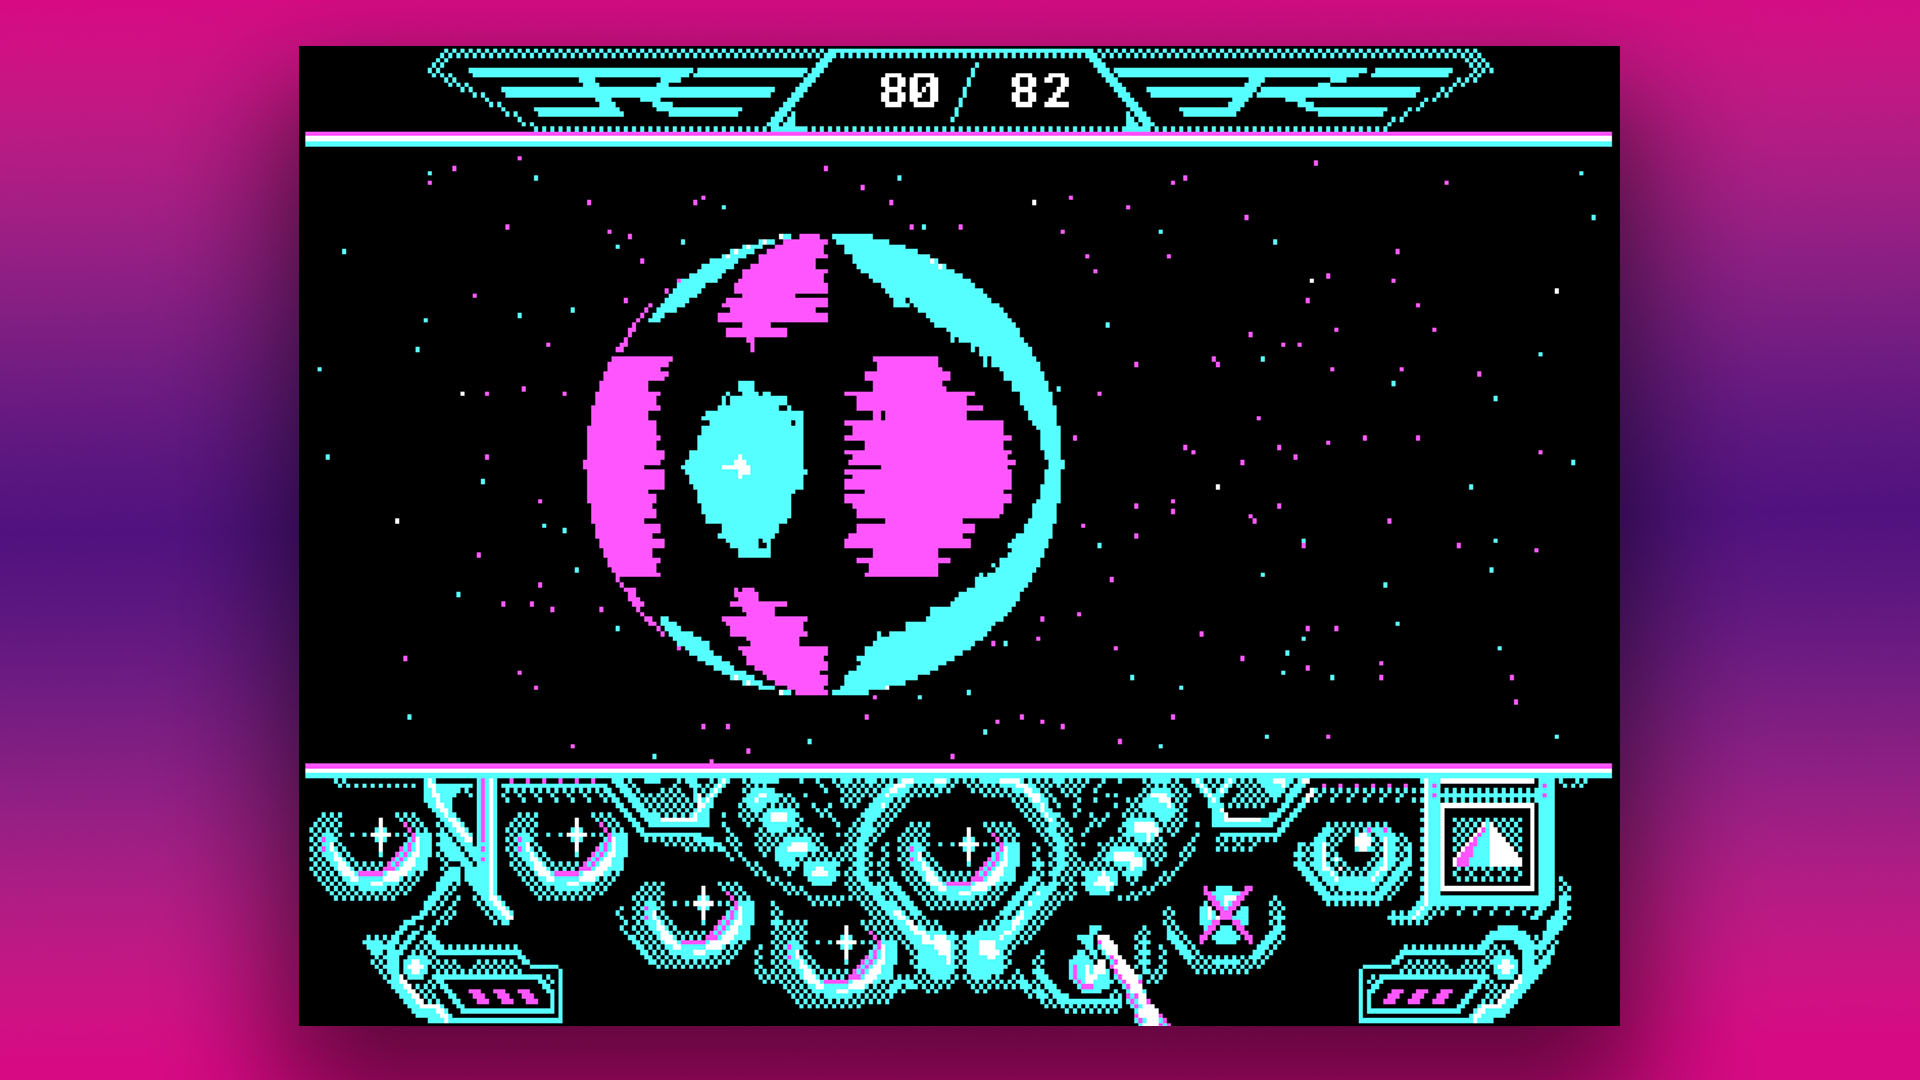
Let’s start with the former, as that was the one that enabled you to get actual color graphics on your PC. Generally, black was the background color, and you then had three other colors. As standard, most games used CGA in BIOS mode 4 (the default BIOS mode for graphics), with the high-intensity version of palette 1, which gave you black, white, light cyan light, and magenta.
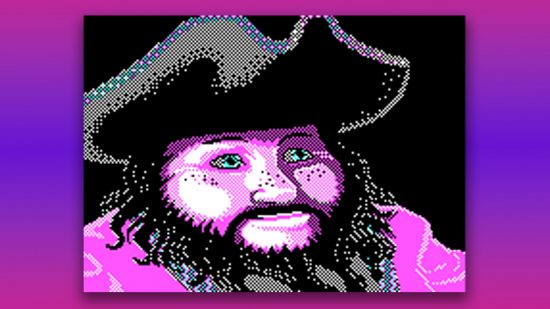
It enabled you to make clearly defined shapes with black on white, giving you cyan for skies and water and then everything else would have to be filled in with magenta. It generally looked hideous, although it was sometimes better for space games – Captain Blood looked surprisingly good in this mode, as you can see in the image below.
You could get other palettes too. Palette 0 was also available in BIOS mode 4, and gave you red, green, black and brown as standard, or light red, light green, black and yellow in high-intensity mode.
The latter mode generally looked better in games to me. It meant you couldn’t get blue for skies, but you could do pretty sunsets and dark dungeons well. One of my favorite games to use this palette was a fantasy barbarian game called Targhan, which genuinely did look amazing considering the technology it was using.
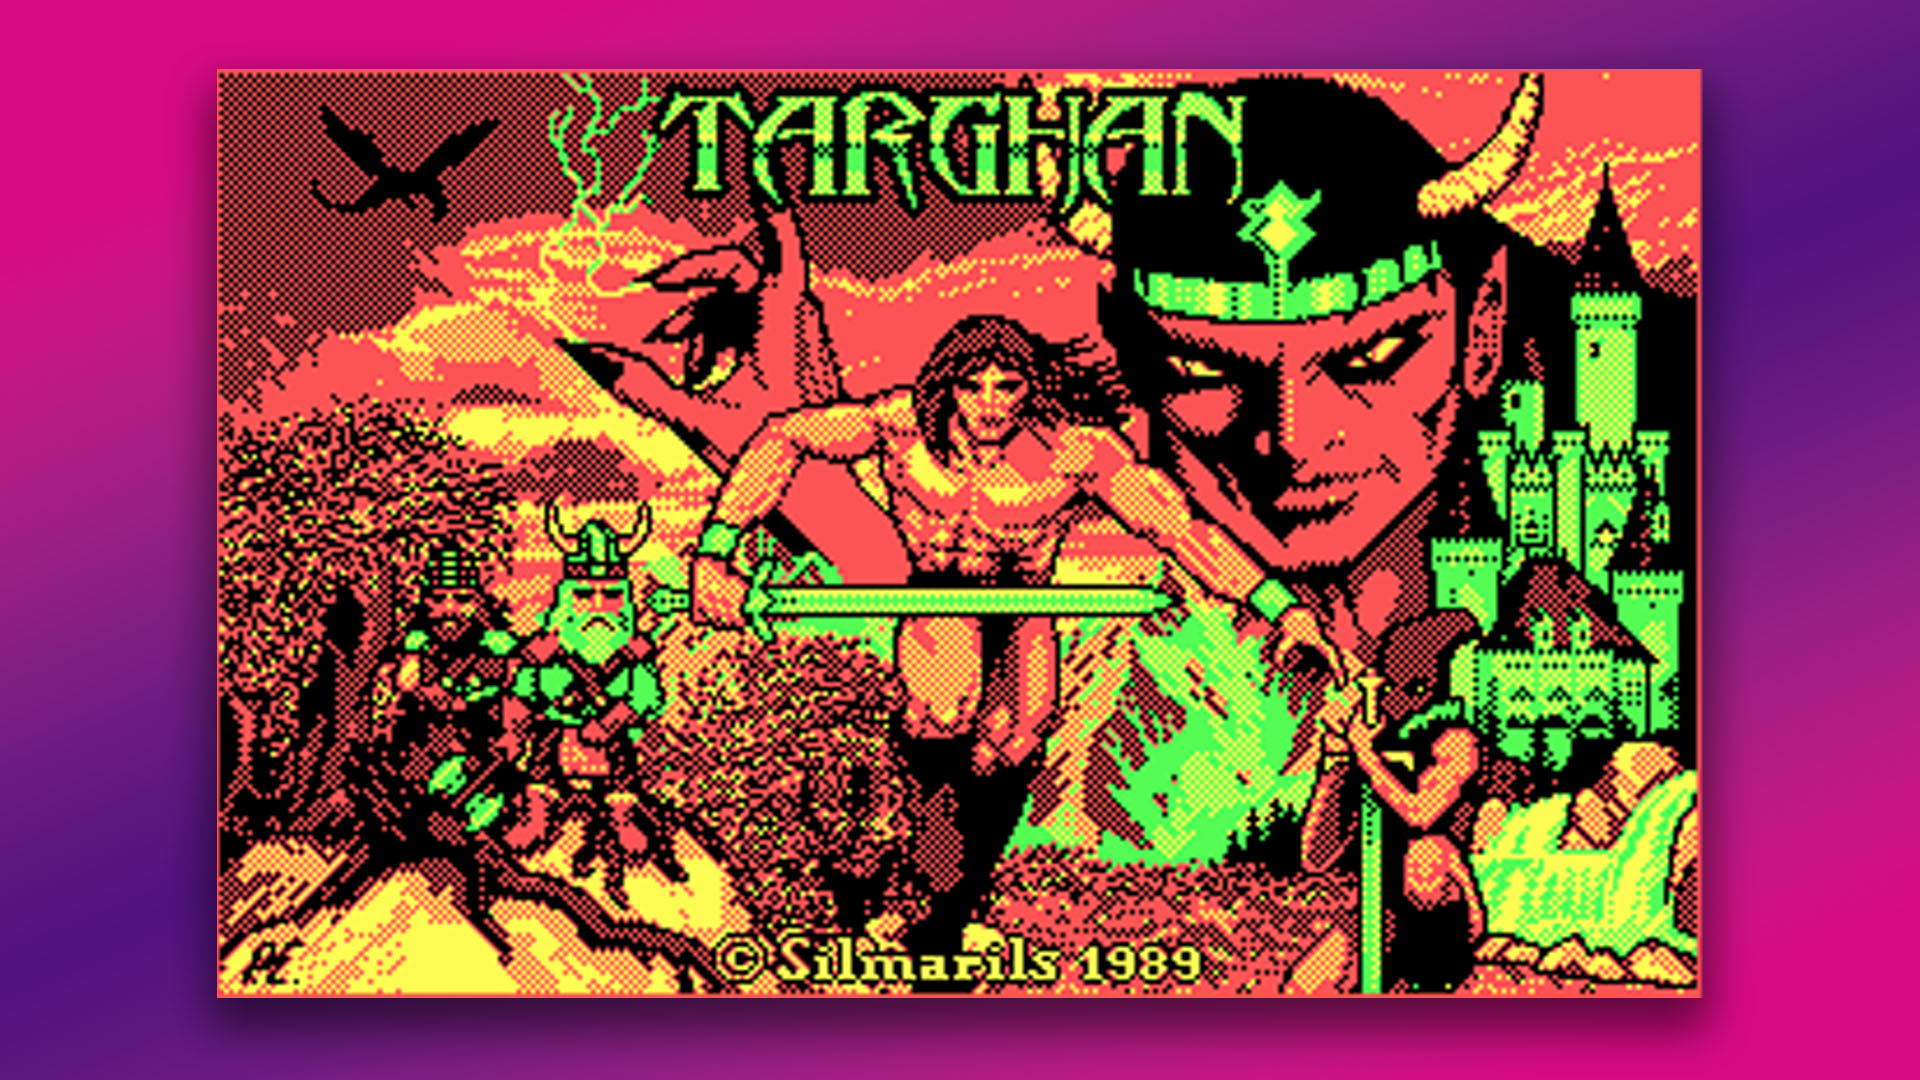
As a kid, I also discovered a trick while playing with the night vision filters for my Dad’s binoculars. If you look at the cyan, magenta, black and white palette through an orange filter, it becomes the light yellow, light red, light green and black palette. I bought some orange acetate from the local art shop and stapled it to a cardboard frame with Blu-Tack in each corner – I could then swap between palettes at will!
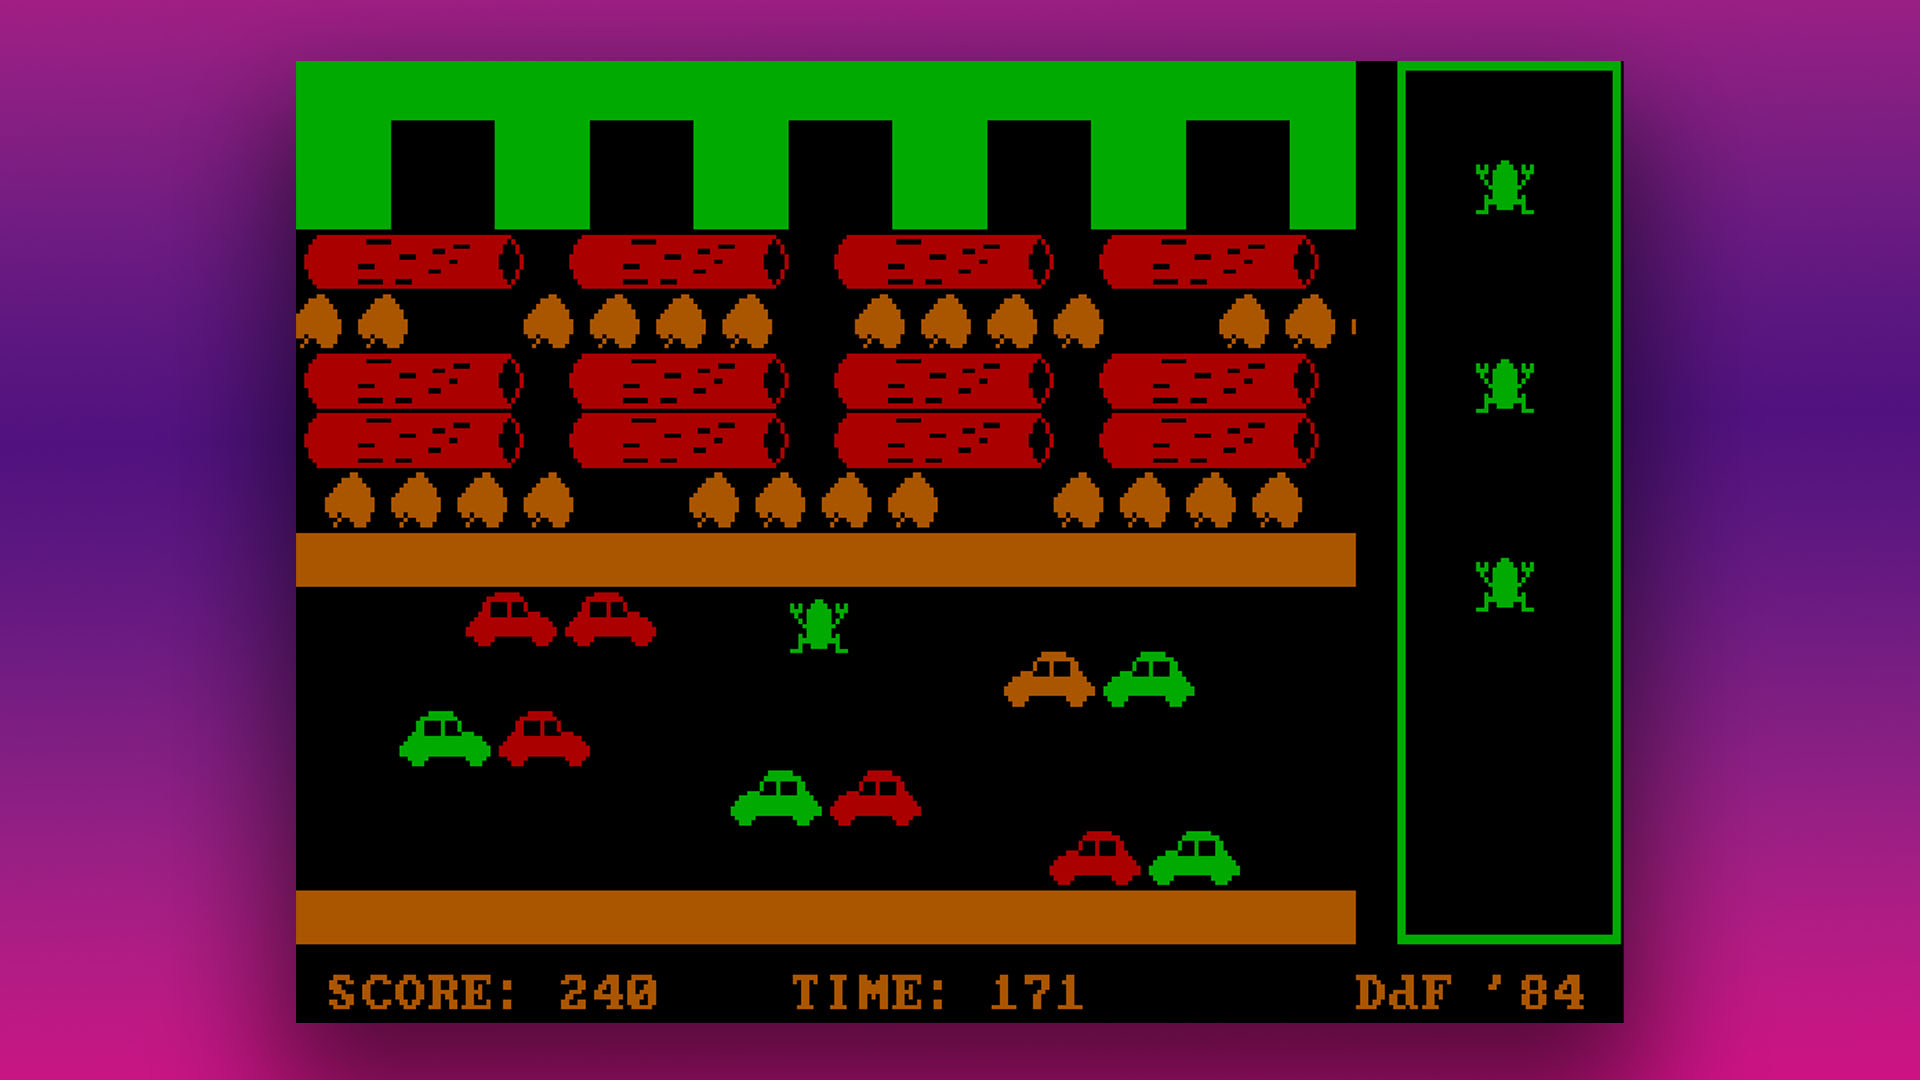
The low-intensity version of this palette was also used in games occasionally. One example is Pharaoh’s Tomb, an early work by George Broussard at Apogee, who later went on to work on the Duke Nukem games. You can also see it in the screenshot of the Frogger clone Ribit below.
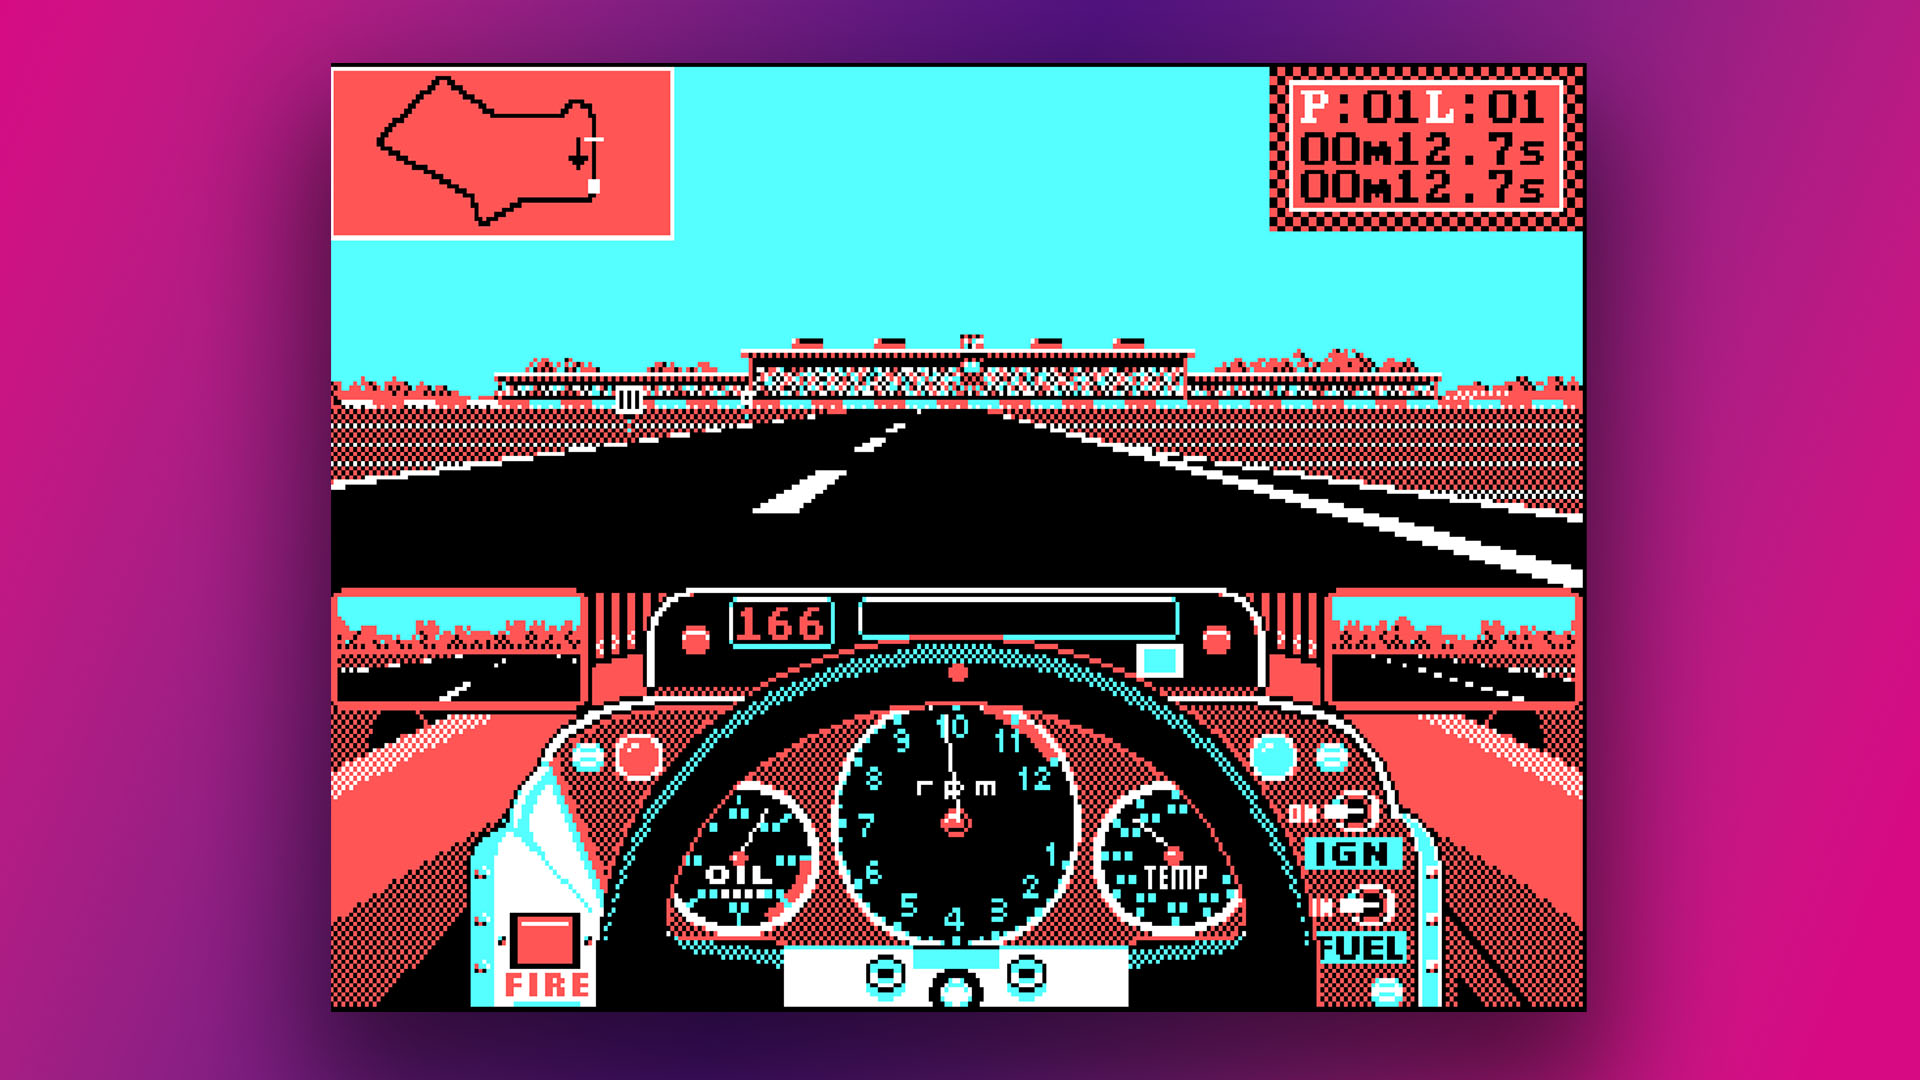
Another trick often used by game developers was to switch the CGA card to BIOS mode 5, which in high-intensity mode gave you access to a black, white, light red, and light cyan palette. It had the same limitations as the default cyan, magenta, black, and white palette, but to my eyes, the red looked less garish than magenta. You can see it in the screenshot of Accolade Formula 1 Grand Prix Circuit below.
A few games also ventured outside these palettes with some tricks, which usually involve replacing black as the background color.
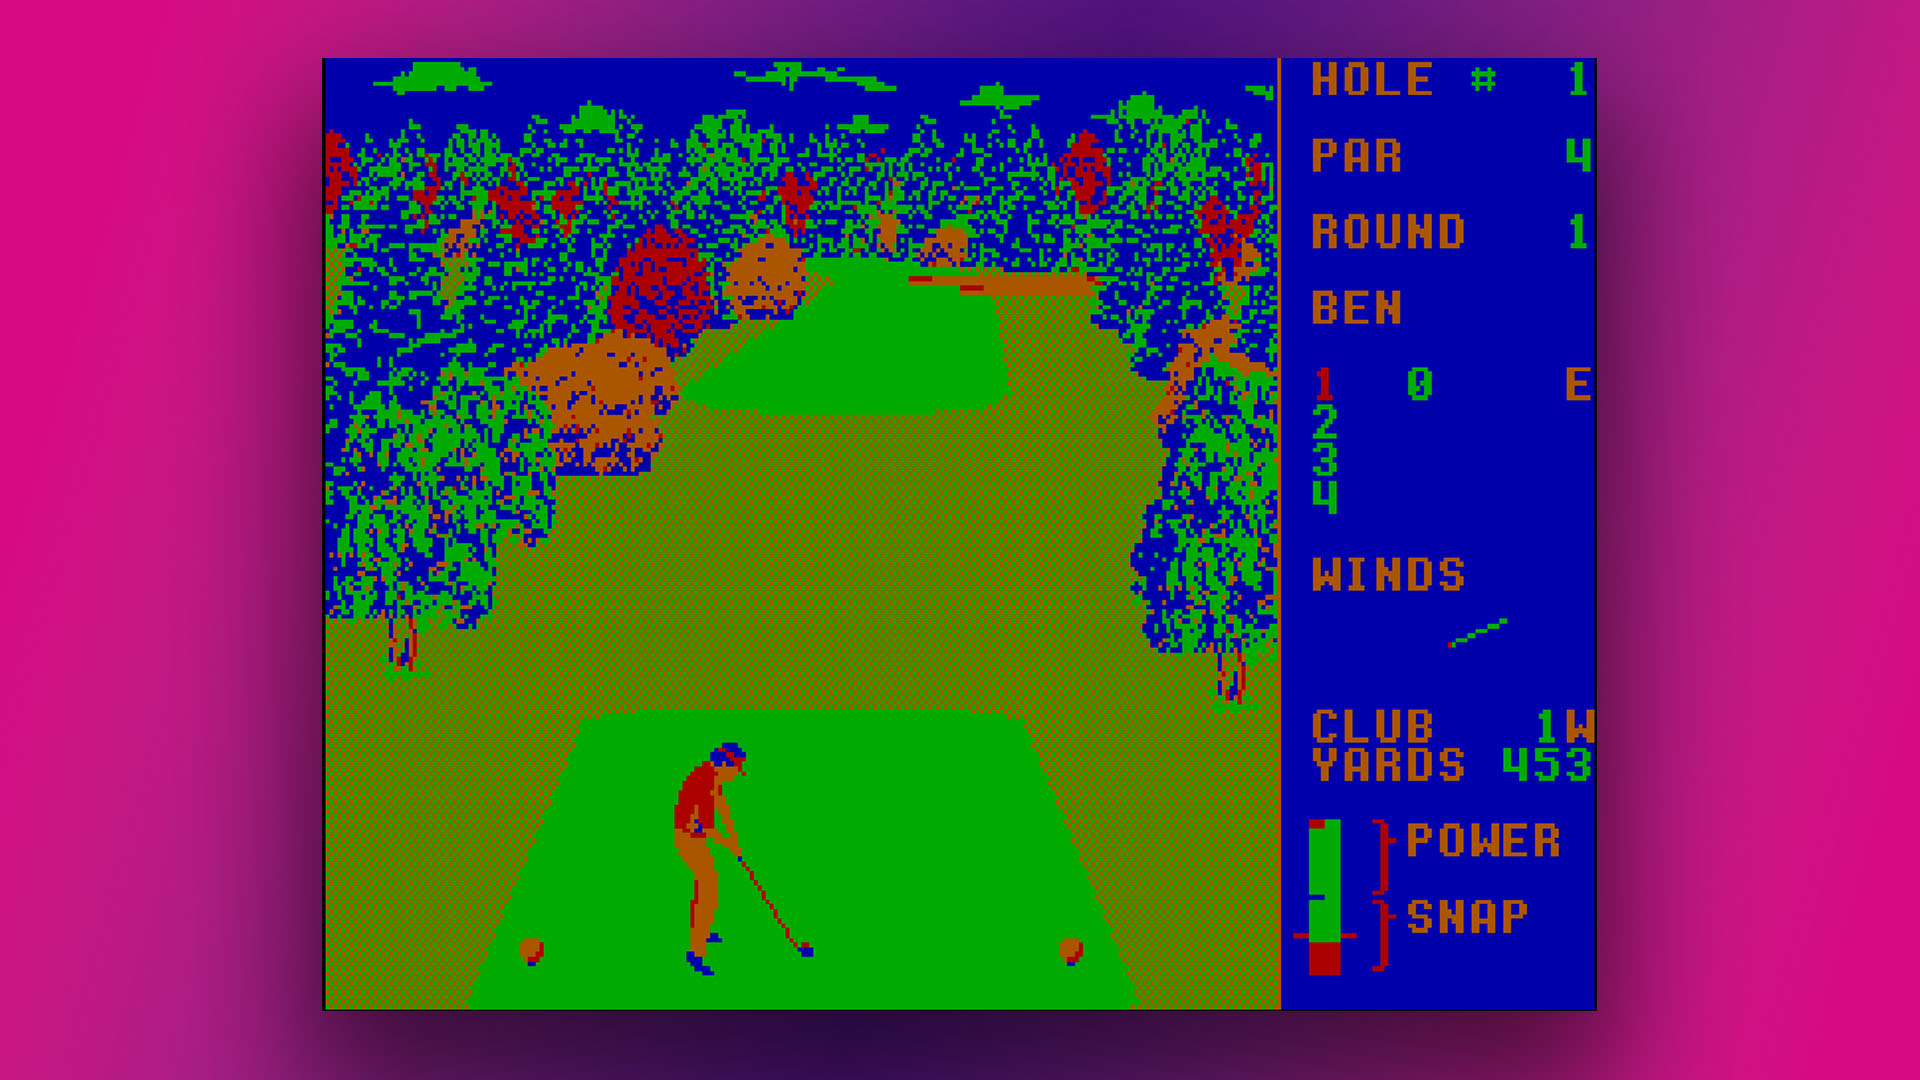
Sierra’s Leisure Suit Larry in the Land of the Lounge Lizards, for example, used palette 0 at low intensity, but replaced the black background color with blue (it looks hideous). This palette worked well in golf game World Class Leaderboard, though, with green and brown trees, red leaves, green grass and blue skies and water – colors you should be able to take for granted.
Sierra used the same trick in King’s Quest IV: The Perils of Rosella, but using the BIOS mode 5 palette, again replacing the black with blue. The result was a blue, cyan, red and white palette, which worked well with blue sea against cyan sky, but meant the grass and trees looked very odd.
CGA mono graphics
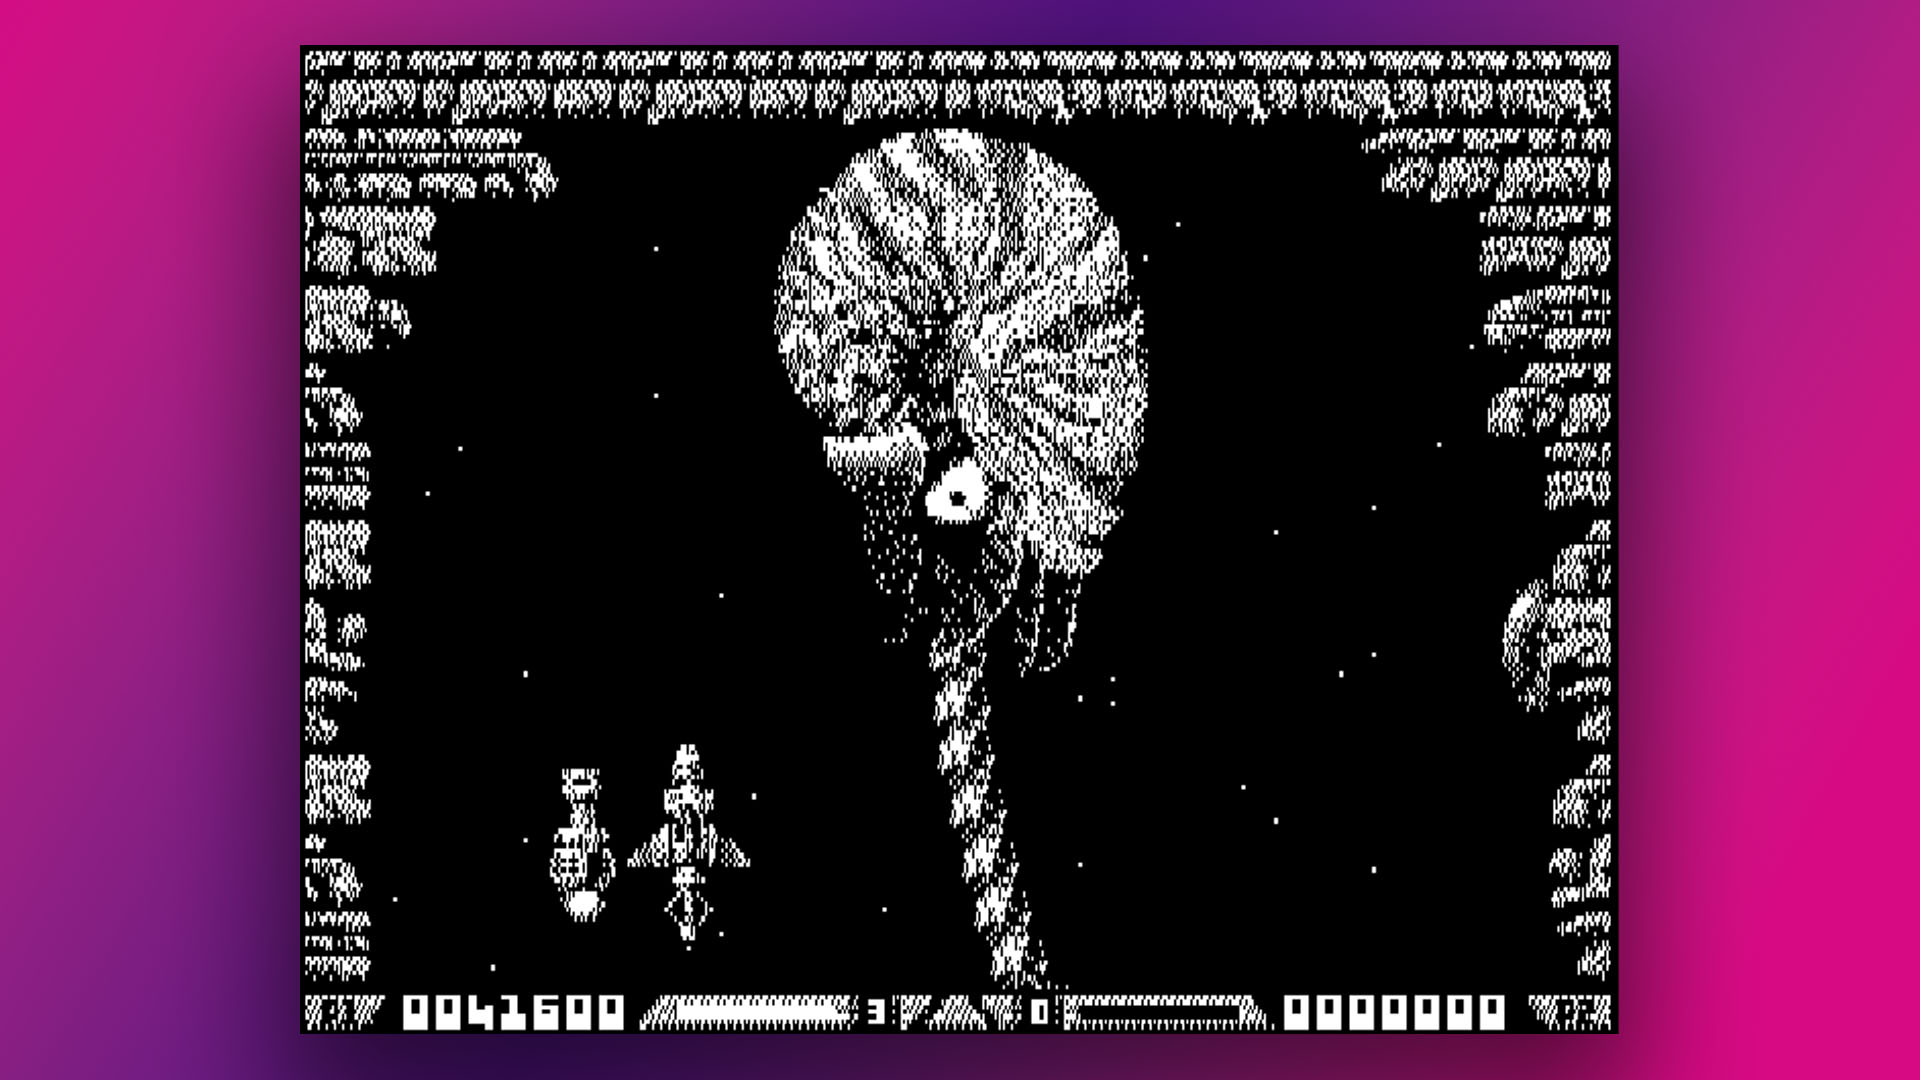
The other main graphical option available to standard CGA cards was the ‘high-resolution’ 640 x 200 monochrome mode. It was used in games that had a fair amount of detail in the graphics, such as Sim City, Death Track, and Xenon II: Megablast, among others. It was also used for early GUI operating systems, such as Gem and Windows 3.0.
However, only the horizontal resolution was higher than the color graphics resolution – the vertical resolution was the same. The result was double-height, rectangular pixels, rather than square ones. This mode also produced a hideous moiré effect on lots of CGA monitors, making it difficult to look at the screen.
CGA composite mode
There was one more trick to getting a standard CGA card to display more characters, and it involved cleverly using the composite output, rather than the 9-pin RGB monitor output. Most PAL TVs in the UK weren’t able to handle this mode, as it’s dependent on the NTSC chroma decoder mistakenly seeing some luminance signals as color.
As a result, you could effectively make new colors by lining up pixels in certain patterns on an NTSC display, and again by using different intensities. By placing one color pixel next to another one, you could make an entirely new color, and it looked solid rather than a messy mix of pixels. The result is astonishing, enabling you to create a much wider color palette.
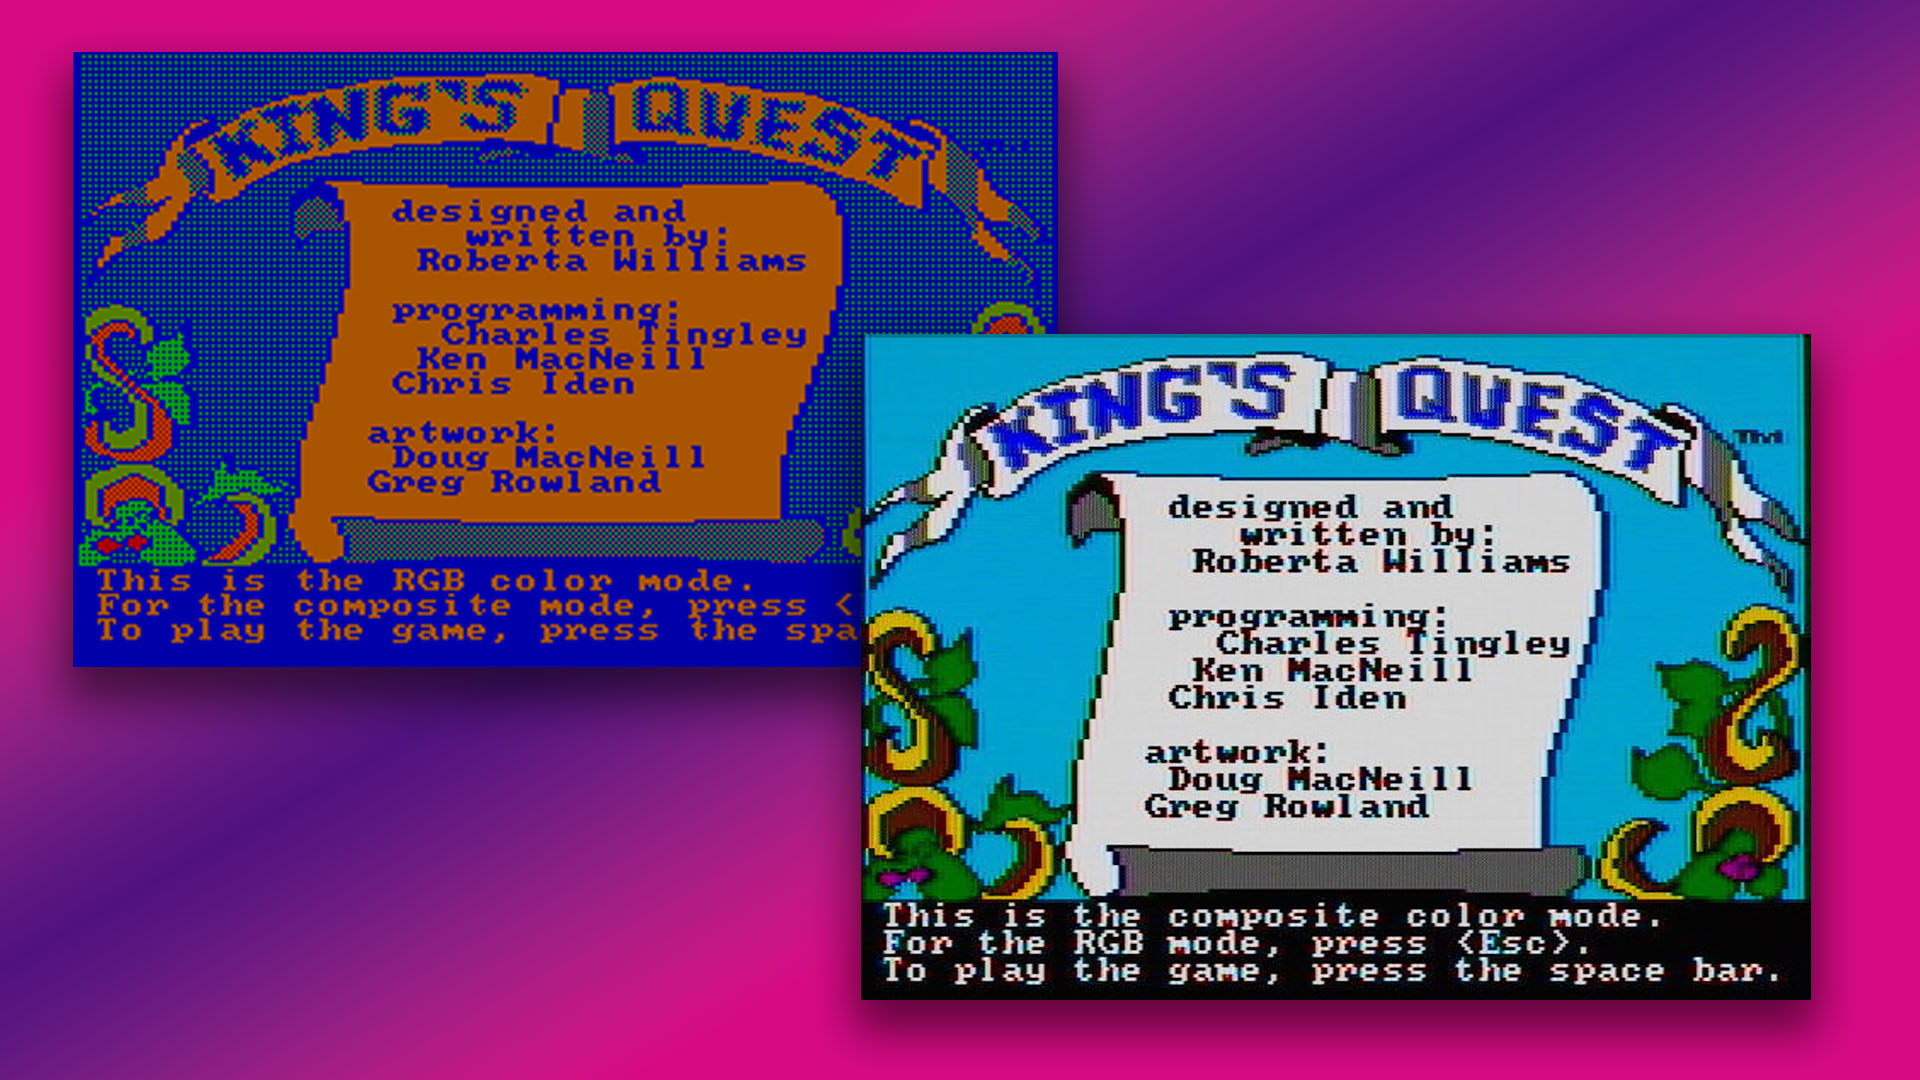
The disadvantage, of course, is that the effect can only be achieved by placing pixels next to each other, which effectively reduces the horizontal resolution from 320 to 160. Some games supported this mode, though, including Sierra’s original King’s Quest game. You can see the massive difference it makes in the screenshot below, where the image on the left uses standard RGB, and the image on the right uses the composite mode.
Try CGA for yourself
In the unlikely event that you want to try out the shocking disgrace that is CGA graphics for yourself, you can do it in DOSBox. This handy software creates a virtual machine designed to recreate a high-spec PC from the 1990s. It loads a sound card and MIDI drivers automatically, and gets you set up with a mouse too. It’s great if you want to play a round of Doom or X-Wing.
However, later VGA cards didn’t support CGA palette-switching as standard. They could run CGA software, but usually in the default black, white, magenta, and cyan palette, even if they used a different palette on a CGA machine. DOSBox runs in VGA mode by default, which results in the same problem.
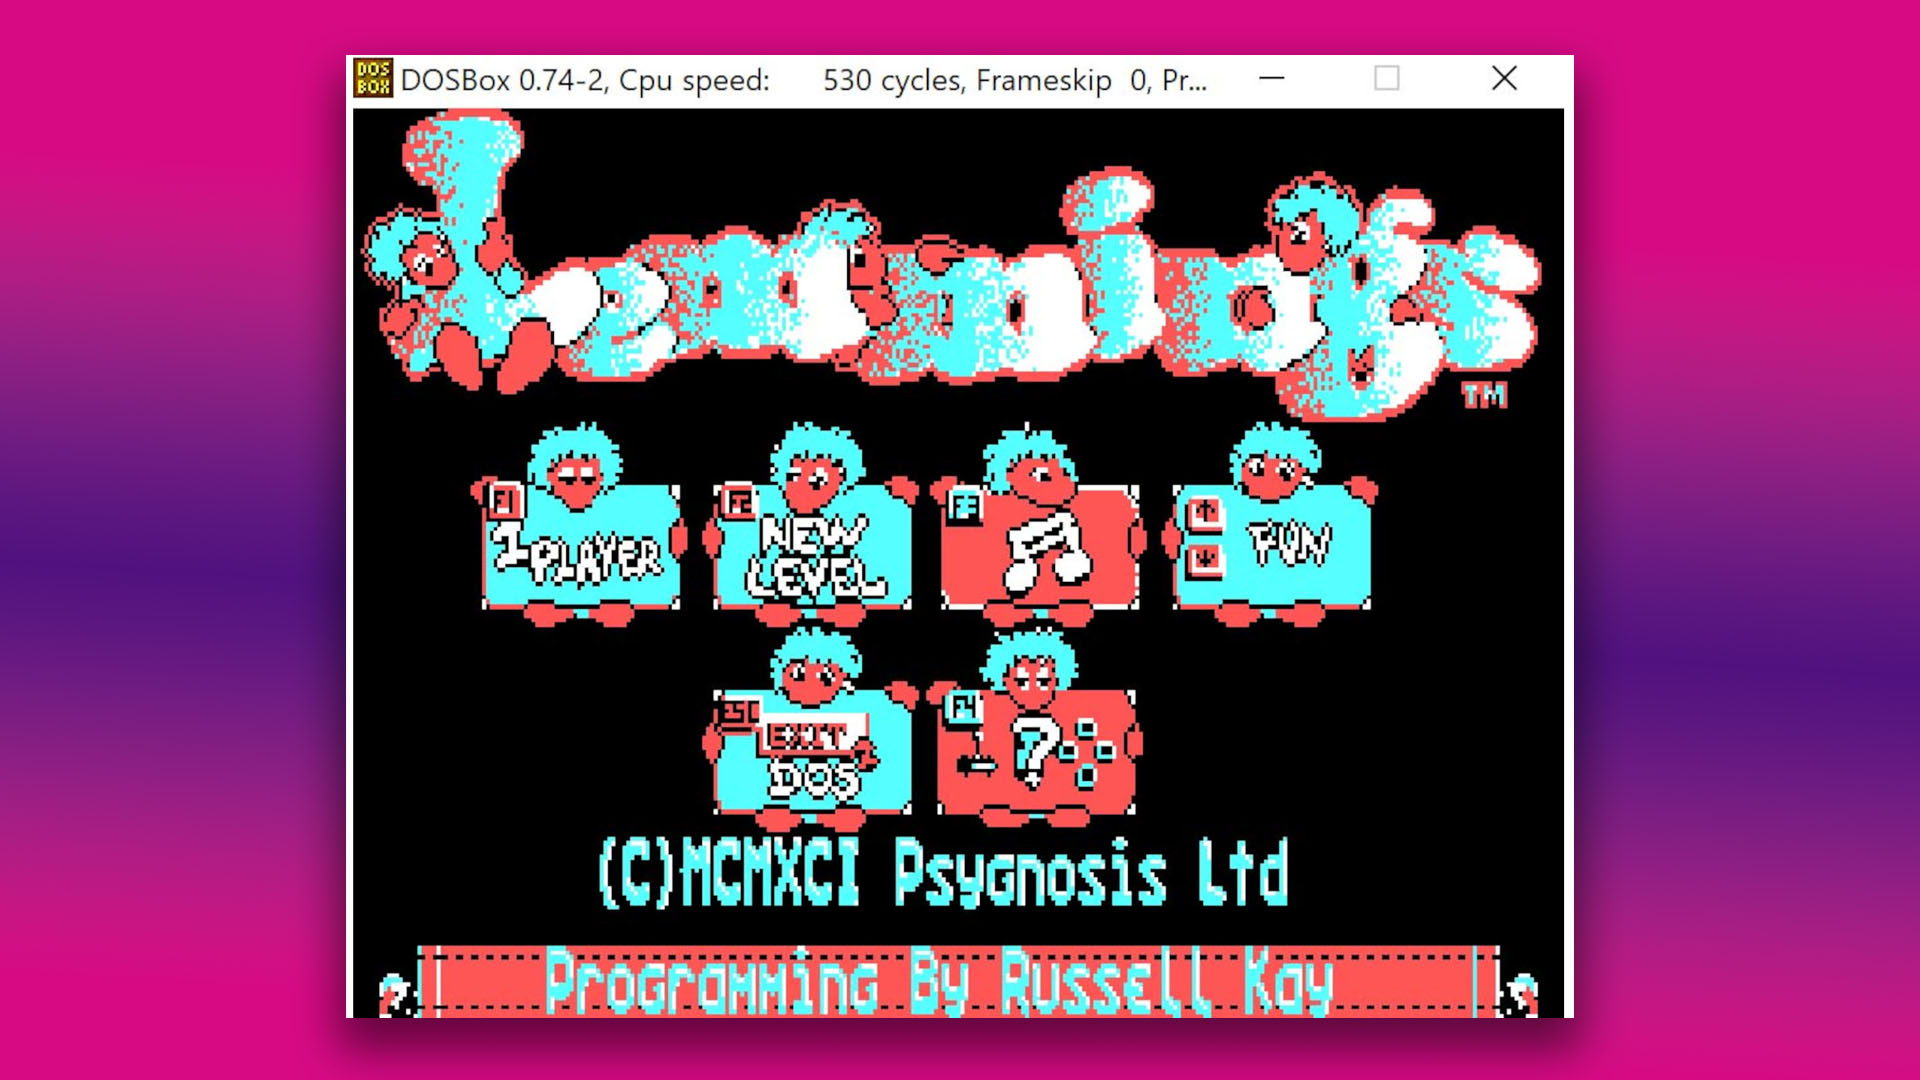
To get around it, you’ll need to open Options in your Start menu’s DOSBox folder, which takes you into the config file. Scroll down to the ‘[dosbox]’ section, and type ‘cga’ after ‘machine=’. After that, scroll down to the ‘[render]’ section, and type ‘true’ after ‘aspect=’.
On some monitors, you may find that you still don’t get the correct 4:3 aspect ratio, even after changing the aspect setting to true. If that happens, we found that setting ‘fullresolution=’ to ‘1366×768’ fixed it on our 4K monitor.
If you want to run a really old game, it may also be optimized for early CPUs, and will run too fast on DOSBox’s standard settings. If you want to emulate an Intel 8086 PC, scroll down to [cpu] and type ‘simple’ after ‘core=’ and change the number of cycles to 530 (this isn’t exact, but it was near enough in our tests).
If you’re looking for more retro content, check out our PC retro tech page. If you’re looking to build a new PC (with much better graphics, naturally!), then you’ll also want to read our full feature on how to build a gaming PC, which takes you through every step of the process.
