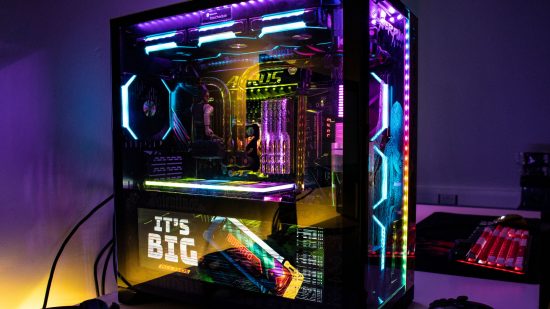
This stunning Cyberpunk 2077 rig is filled with glowing goodies – it looks like it came straight off the street in Night City. Dystopian fiction fan Richi Bowzer spent a year creating this gaming PC, which can boot into two PCs for two-player gaming, and has an incredible amount of custom paintwork, as well as a nifty screen on the PSU shroud.
Thanks to our rapidly growing PC building Facebook page, we’ve seen many custom gaming PCs, from mods based on existing case designs to scratch builds. Here we talk to the creator Richi about how he built this Cyberpunk 2077 theme dual gaming PC.
PCGamesN: What inspired you to build this Cyberpunk 2077 PC?
Richi: I’ve been a fan of the whole dystopian theme for a long time – I even enjoyed the updated Blade Runner film! I read the Bruce Bethke books when I was younger, and for me he is the founder of the whole dystopian future idea. I also have a huge collection of cyberpunk and dystopian future wallpapers, so when the game was announced, a mod on this theme was always in the works.
I wanted to include a screen as well, but too many modders are rocking the 7″ ones now, so I went on aliexpress.com and found a 14″ 1,280 x 390 mini ultrawide screen, and decided to go down that route. As soon as I found it, I thought it would make a good custom rain meter or monitoring screen, then the game came out with ultrawide adverts, so I chose to display them on the screen instead.
My design cues were quite simple – I wanted to make it look dystopian, and not follow the yellow and blue theme inside the case, as it was already on the outside. I just wanted to create a dystopian/cyberpunk look inside. I pictured it in my head and it came out almost 90% how I imagined it. I also wanted to get a whole external lighting right around the setup, using a Philips Hue setup around the monitors and desk.
That’s an amazing paint job. Take us through your painting process.
I get a bit silly when it comes to painting. Firstly, I measured the panels, which of course meant stripping off the panels off including the front one – that was luckily a simple task with the Lian Li Dynamic 011XL, as it has screws holding it in place rather than rivets. I then wet-sanded all the panels with 800-grit sandpaper, so the etching primer could bite into it.
For the back panel, I made a stencil (I make all my stencils with a Silhouette Cameo 3D printer – one of the best investments I’ve ever made), to mask the design. The panel was then coated with two coats of Createx Pearl Silver, Pearl White and then Pearl Red.
After the paint hardened, I sanded the panel with 1,400-grit sandpaper to scuff the image and give it a worn look and feel – I even sanded a bit of the anodized aluminum around the paint to add to that effect. The other panels were first coated in yellow with a hint of lime 2K paint, then two coats of lacquer to protect it.
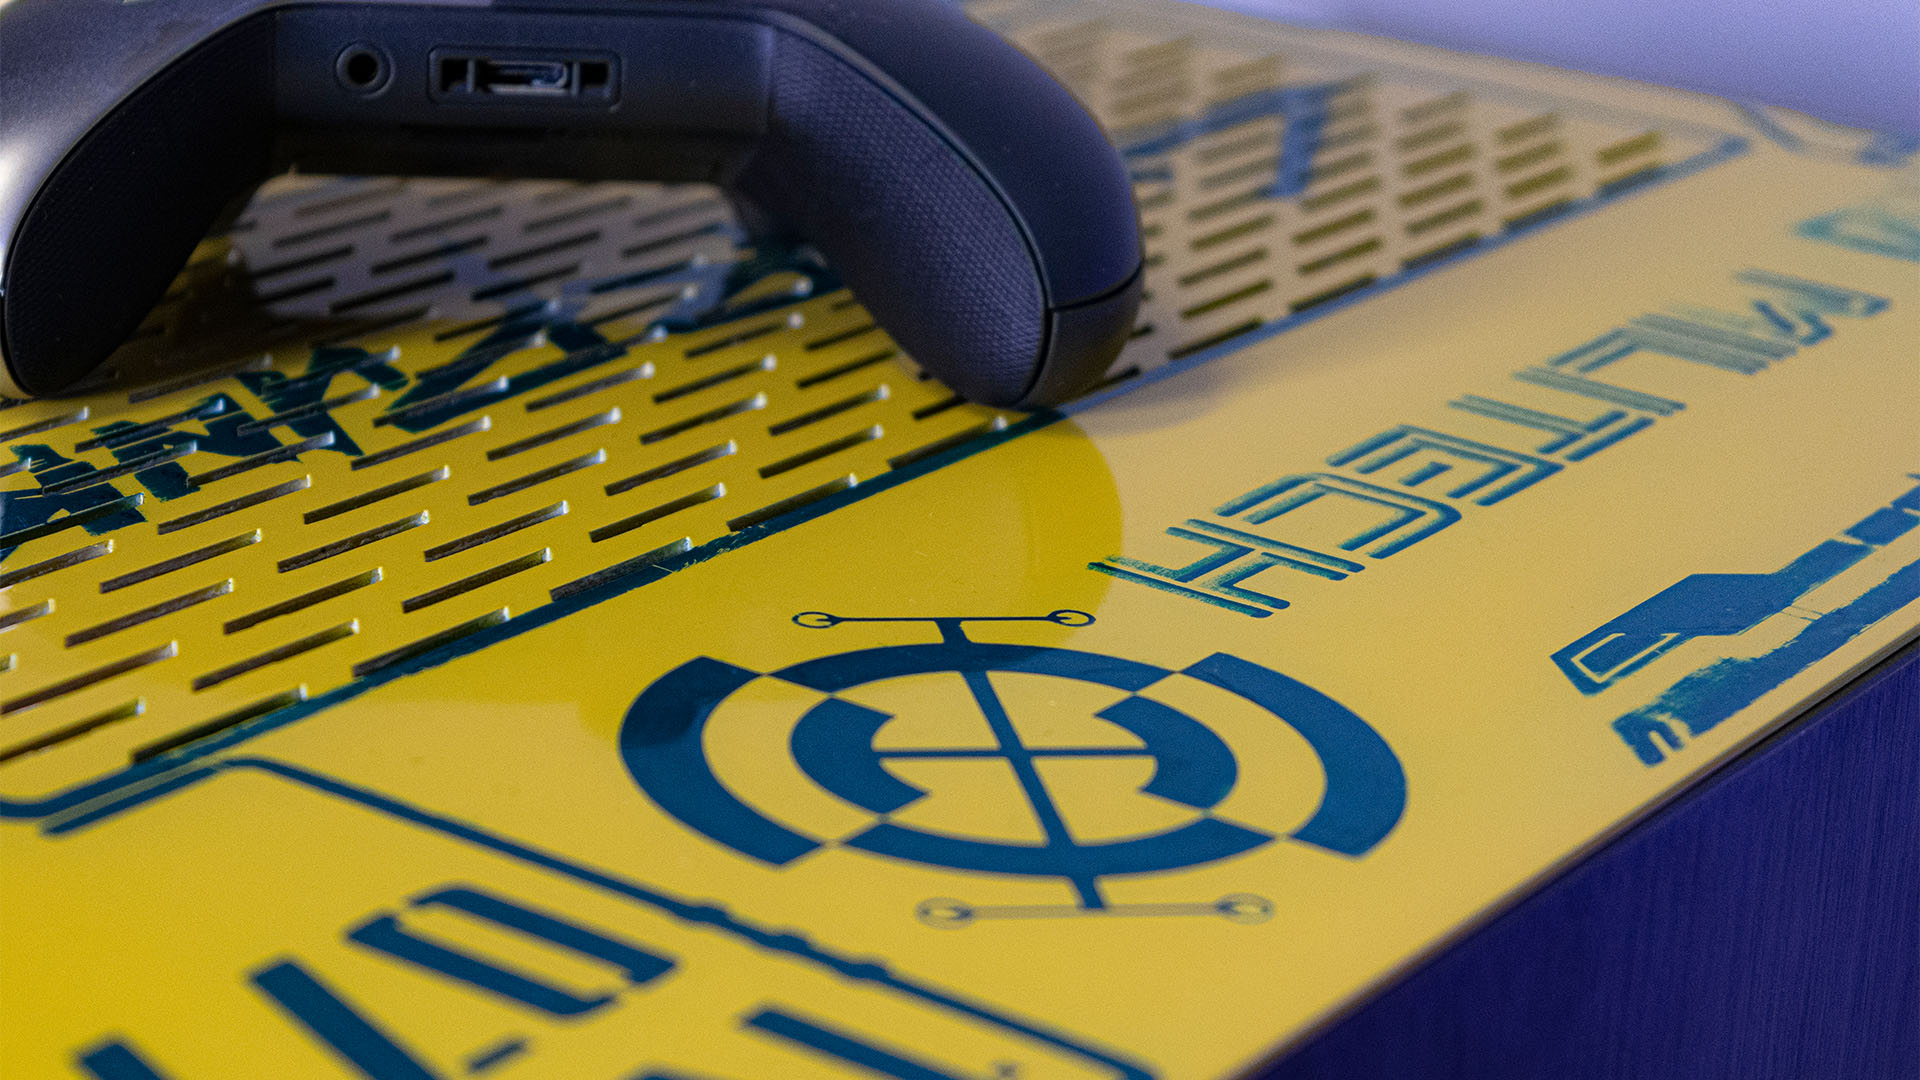
I custom-designed the stencils in my very old copy of Photoshop, then used my Cameo to plot them out. I laid out the stencils, and then put down my own mix of Createx Pearl Green, Pearl White, and Pearl Blue, again then sanding them down with 1,400-grit sandpaper to make them look worn – I sanded away edges and complete lines of paint. After this, I used 3,000-grit paper with water to flatten it down, and then used some 400-grit paper to sand the edges of the top panel back to silver.
One of the hardest parts was jamming a small screwdriver into the edges of the front I/O ports, as I wanted though to chip off the paint around the ports to give them the whole worn vibe. This was then all finished off with four coats of 2K lacquer and compound rubbing (by hand), and then polished.
It was a lot of work, and it’s hard to see it all, but I know I’ve done it, and that sits right with me. The panel paint in studio light and standard lighting just shows up a green sort of color, but it changes to blue under really bright light, with a sparkle to it. The main painting advice I would give is to prepare well, and then put loads of sweat and elbow grease into the color sanding, as well as the compound rubbing-down of the finished lacquered product.
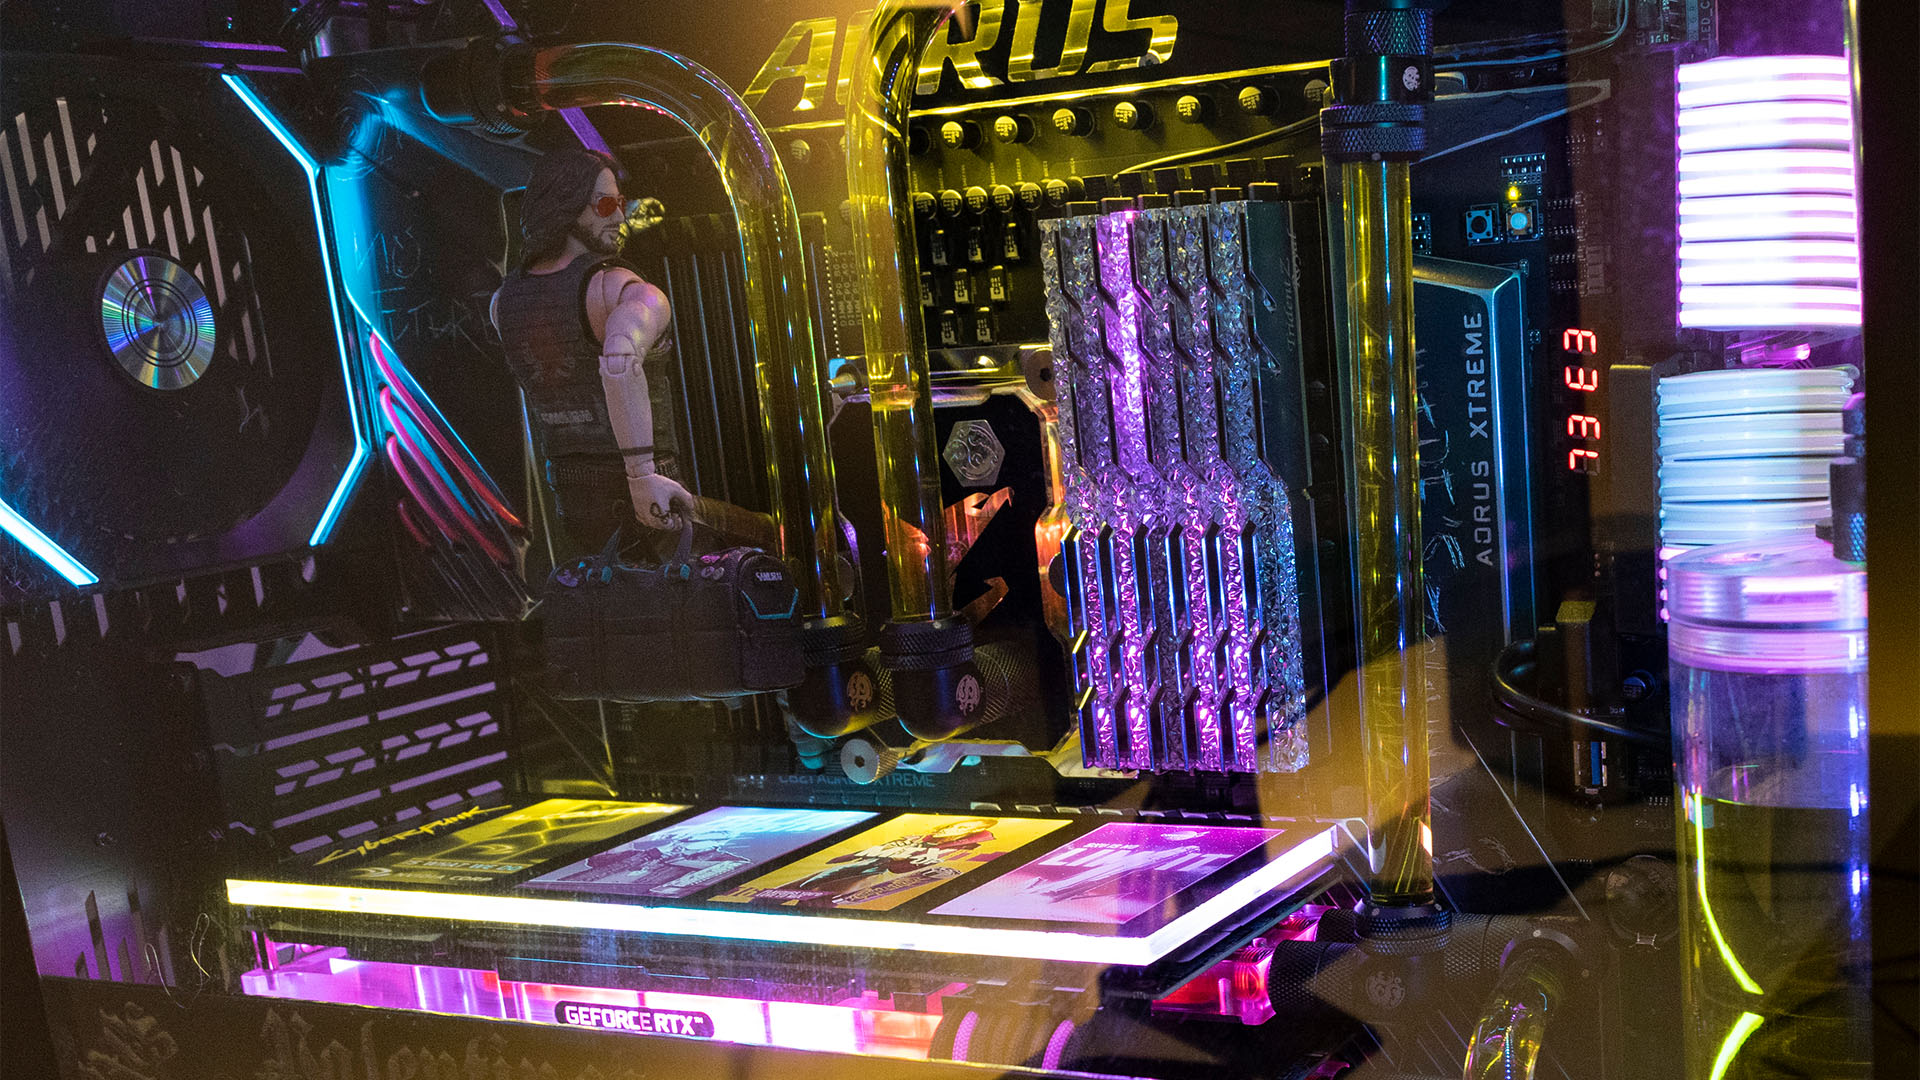
How did you go about making the glowing adverts on the GPU backplate?
The plate was made up for me by Ricardo at ColdZero on his UV printer, which allows semi-transparent prints.
The design is my own, although I took some adverts from the game and made another to representing the fact that the GPUs are made by Nvidia – I designed an advert around that and adapted it to fit the futuristic theme.
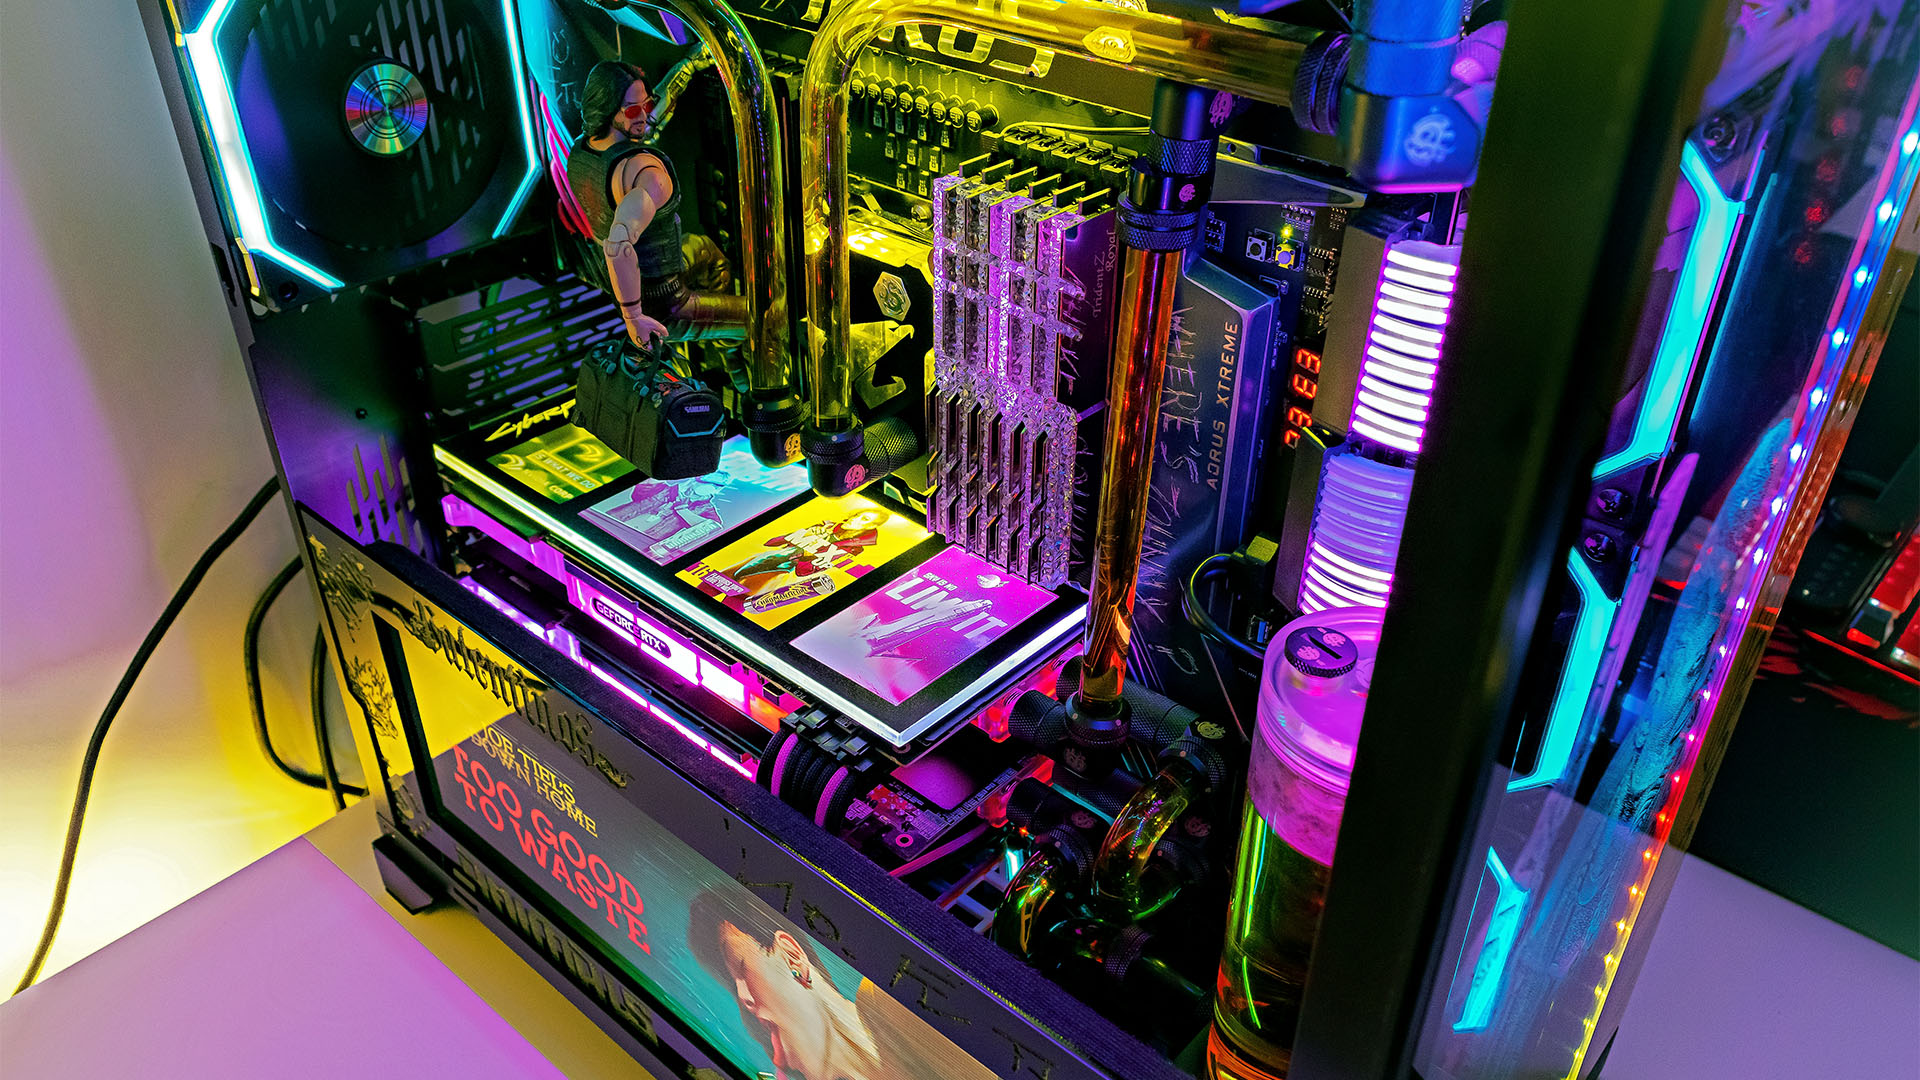
How does the screen on the PSU shroud work?
I love this screen – it’s hooked up to a Gigabyte GeForce GTX 1650 Super card behind the motherboard tray, as well as one of the main GeForce RTX 2080 Ti GPUs. It plays a video of advertisements from the actual game – I had to drive around the game and screenshot all the ultrawide adverts, then mix them up with some video adverts from the game (the videos were ripped from game files). I think I overdid it, though, as the total length of the advert loop is seven minutes.
It serves a dual purpose too, as it’s also connected to an UnRAID boot drive. The machine has two different setups to boot – one regular one using all the hardware, and the second via UnRAID has two virtual machines (each one is separated into ten cores, 16GB of memory and a GeForce RTX 2080 Ti each). It’s quite complex, and there was quite a bit of trial and error involved in getting it to work this way. However, it means I can boot up a separate mode that allows two gamers to play on the one rig.
Where did you get the Keanu Reeves model?
This was probably the cheapest product in the whole setup – it was £22 on Amazon – a bargain if you ask me.
There are some substantial curves in the tubing down the bottom. What tubing did you use, and how did you cut and bend it?
It’s 14mm Bitspower Crystal Link Tube, and I’m probably going to upset a few people now, but my bending tools just involve a hacksaw, a tube insert, a reamer, some sandpaper, a heat gun and some Mayhems silicon cord bending spray – no mandrels are needed.
With acrylic, I like to heat a substantial amount of the tube, then I bend it, lay it flat on a clean surface and do any minor adjustment while it cools. I work by sight with my bends and don’t measure, say, the curves at the bottom. I start with a bigger piece than I need, get the bend as tight as possible, then cut it down before finishing it off with a reamer and sandpaper. Good-quality tubing is the key to getting good curves.
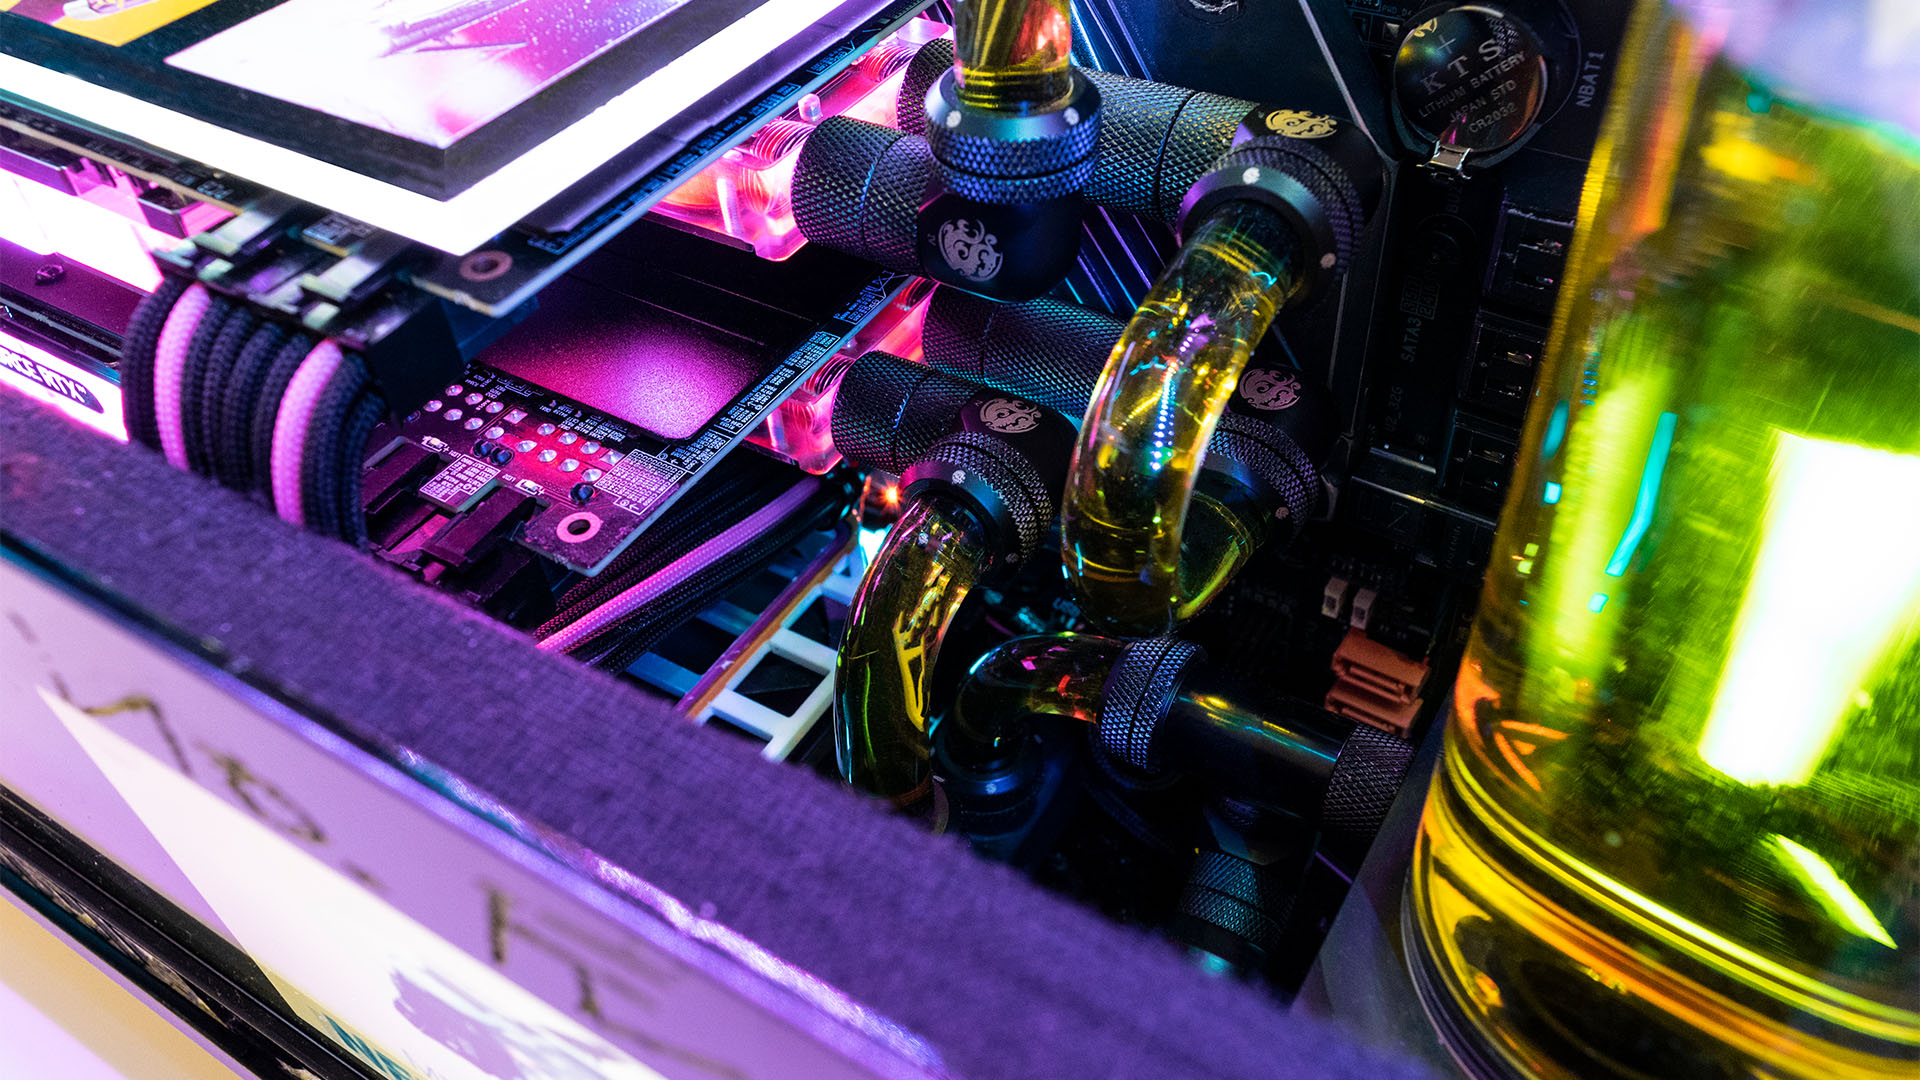
The magenta and cyan lighting really helps this machine to stand out. How did you plan the lighting setup in the PC?
I just wanted a whole dystopian feel inside the rig, and blues, reds and magenta are at the forefront of that style, so it was a natural choice. The GPU waterblock’s lights, as well as the upper and case lights, are all connected to the motherboard via a Bitspower DRGB hub.
The GPU backplate, CPU block, MOSFET block and two front window lights are connected to a Razer Chroma ARGB controller, which of course allows individual LED color choices. This helps with the GPU backplate, as it allows me to select the LEDs under the panel to match the color of the actual images with which they line up, enabling them to pop a bit more.
What specs did you use, and can the PC actually run Cyberpunk 2077 at decent settings?
There’s a 28-core Xeon with two GeForce RTX 2080 Ti cards and a GeForce GTX 1650 Super. And yes, it plays great with ray tracing at decent settings. The settings are toned down slightly for the dual-system mode, but it still runs great.
Did you come across any difficulties?
Setting up an UnRAID system to run two virtual gaming machines was pretty tough, as I was a noob to it all. I tried the GPU pass-through route and got it working, but the VM using the pass-through kept stuttering and crashing.
Setting it up as a dual-boot system was a pain as well – I ended up with two drives for UnRAID and virtual machines, and then two drives for the single Windows cold boot and a lot of partition drives. I’m sick to death of creating RAID arrays, then deleting them to get the right balance!
How long did it take you to complete this build?
I wouldn’t like to guess the number of hours, but I did start planning it properly over a year ago – the pandemic had a big effect on the time, though, as it’s not easy to mod (even with a shed in the garden) with a four-year-old (now five) at home.
Are you completely happy with the end result?
I love the end result. The only part I would change if it was possible would be a bigger case. The motherboard fills all but maybe 2in or so to the right of the inside of the case if you look at it from the side – it was tough getting all the gear into the case with three radiators and fans on them, but then that’s the fun of modding I suppose.
Cyberpunk 2077 PC build specs
Here’s what Richi used to build this incredible PC:
| CPU | Intel Xeon W3275 |
| Case | Lian Li PC011 Dynamic XL with Razer Chroma, Gigabyte Fusion, and Philips Hue lighting |
| GPU | 2 x Gigabyte Gaming OC GeForce RTX 2080 Ti, 1 x Gigabyte Gaming GeForce GTX 1650 Super |
| Storage | 2 x 2TB Kioxia Excercia Plus NVMe SSD RAID array in U.2 enclosure, 2 x 960GB 2TB Kioxia Excercia SATA SSDs, 2 x 240GB Kioxia Excercia SATA SSDs in RAID array |
| Memory | 6 x 8GB (48GB total) G.Skill Trident Royal 3200MHz 14-14-14-34 |
| Motherboard | Gigabyte C621 Aorus Xtreme |
| PSU | 2 x Seasonic Prime Platinum Modular PSU |
| Cooling | Bitspower D5 pump with Crystal Clear Reservoir, Bitspower Summit LGA3647 CPU waterblock, Bitspower Gigabyte C621 Aorus Xtreme Mos Block, Bitspower Lateral VGA waterblock for Nvidia, 2 x Bitspower 360mm Slim Radiators, 1 x Bitspower 240mm Slim Radiator, Bitspower 14mm Carbon Black Fittings, Bitspower 14mm Crystal Link tube, 9 x 120mm Lian Li UNI fans |
This is truly incredible work, Richi. We particularly love the screen on the PSU shroud, and the graphics card backplate, but we’re also stunned by by your painting and etching work, as well as the water-cooling system. There’s so much going on, you don’t know where to look!
If you’ve built an extraordinary PC of any description yourself, then we’d love to see it! Send us your work via email or join our Facebook group full of custom PC builders to show off your rig. Oh and go check your PC against the Cyberpunk 2077 system requirements.
This post originally appeared over on our brand Custom PC.
