Looking for a Destiny 2 Deep Stone Crypt raid guide? We have a step-by-step walkthrough for each encounter. If you’re new to Destiny, the raids are the space game’s endgame activity. You’ll need to wrangle up five other players to attempt one and make sure your guns and armor are leveled up to the point that you won’t be blown away instantly.
Each raid in the free PC game poses various boss fights that have various mechanics for you to figure out, making each encounter almost puzzle-like. You’ll be finely rewarded for your efforts, too, as each Destiny 2 raid comes with high-level loot such as armor and weapons.
First encounter: Vault security
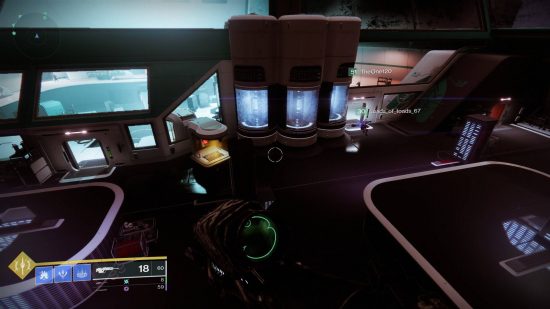
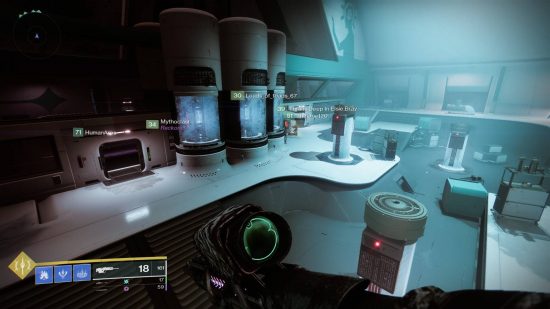
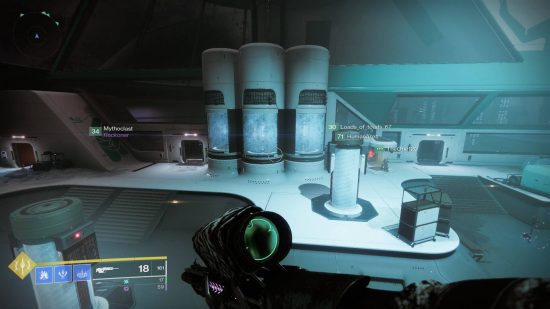
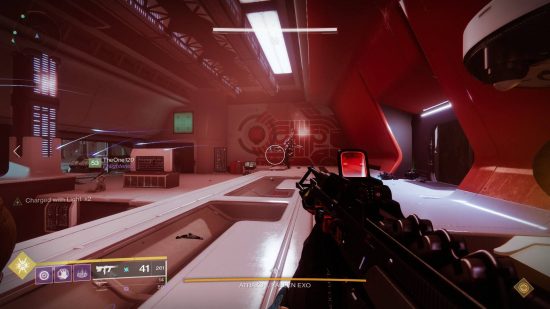
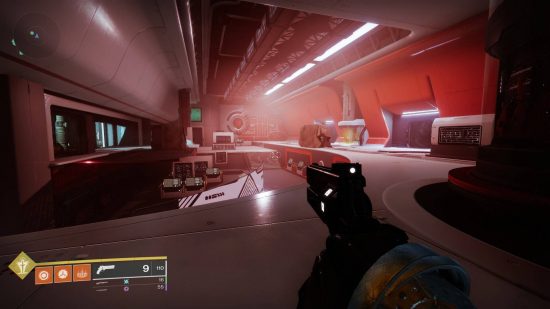
The top floor is two large rooms, one of which is better lit than the other, which is why we called it Light or White and the other room Dark or Black. A single basement level runs beneath these large rooms and can be accessed at the base of the map.
Both Light and Dark have three fuses on their inner wall – your ultimate goal is to destroy these – and four smaller, standalone cylinders spread across the main floor. These four cylinders extend below the floor to the basement, where a control panel is attached to each. The cylinder that’s furthest into the basement area from the entrance has a second panel on a wall nearby. That’s a total of ten control panels, split evenly between Light and Dark. Number them: L1 through 5, and D1 through 5. You can see through the glass floor around each cylinder to see the control panels in the basement below, and at the start of the encounter you can all go into the basement to look around, so take this time to agree which panels are which.
There are two buffs, the operator (which is red) and the scanner (which is yellow), and three augment machines where the buffs can be deposited and picked up – one in Light, one in Dark, and one in the basement. Only the operator can activate the control panels (by shooting or punching them). To trigger a damage phase, the operator has to shoot four of the ten panels in the basement. They’ll always need to shoot two on each side. Shooting the wrong panel triggers a cooker in the basement that kills the operator. The scanner buff enables you to identify which panels to shoot – they will be highlighted with a golden glow.
The fuses in the center wall – the ones you need to destroy – correspond with miniature versions on a display in the basement. The miniatures will be highlighted in the sequence you need to shoot them, just as the control panels are, except now it’s the operator who needs the scanner buff to be able to see the highlights and call them out to the teams in Light and Dark to shoot. So you need to trade the scanner buff down to them.
When the encounter begins, the doors between the basement, Light, and Dark will all be locked. The challenge is to trade the scanner buff between sides, so as to enable you to identify and call out the correct panels to shoot for the operator. To further complicate things, Sentinel Servitors will spawn which will prevent the augment trading machines from working.
The operator buff starts in the augment machines and taking it begins the encounter. The scanner buff is held by a vandal who always spawns in the dark room.
ENCOUNTER FLOW
Divide into a Light team of two people, a Dark team of three, and a designated operator. Light and Dark teams should have a designated scanner each.
- The operator starts the encounter by taking the operator buff from the Light room.
- The Dark scanner takes the scanner buff – by now the operator should be in the basement – and runs around the cylinders in Dark looking down into the basement. Call out the two panels down there that the operator needs to shoot.
- A Servitor will spawn around now – kill it asap, so Dark scanner can drop the scanner buff into the machine and Light scanner can pick it up.
- Light scanner repeats the process, calling out the panels to shoot so the operator can do so.
- When all four panels are shot, the operator puts the scanner buff into the machine and someone (doesn’t really matter who) needs to take it out, freeing space for Light scanner to put the scanner buff into the machine.
- The former operator now takes the scanner buff and is able to see which of the fuses are highlighted on their miniature version. They call this out (eg “Light side, right,” or “Dark side, middle”), and the players above must shoot the fuse until it’s destroyed.
- The doors between rooms are unlocked now, so you can move between them if necessary, but we advise against it for simplicity’s sake, especially as destroying fuses doesn’t take too much damage and shouldn’t be an issue. Destroying three fuses per phase should be your goal, but two is sufficient (you get three phases total).
- The damage phase ends when the shields close over the fuses. Now reset and repeat: the basement player puts the scanner buff into the machine, Light scanner picks it up (we found it goes easier starting the next phase in the Light room) and starts calling out, and whoever held on to the operator puts it in for the basement player to collect.
Complications
As long as your callouts and understanding of the flow is on point, Servitors are the element most likely to frustrate this encounter as you don’t have too long to trigger a damage phase: they must be killed as soon as they spawn. You’ve also got Dark Guard captains, exploding shanks, and Overload Captains, which can be a real pain.
Loadout recommendations
The operator’s equipment doesn’t really matter as long as they’re not going to miss shots on the panels. Both Light and Dark teams need Overload rounds, plus the ability to bring down Dark Guard captains and Servitors very quickly – we suggest swords. Given that, you also need to destroy the fuses quickly but precisely – it’s difficult but not impossible to get splash damage on the adjacent tubes, which will fail the encounter. A rapid-firing sniper is good for this, or a machine gun. Wells of Radiance can be a godsend for staying alive while you’re swarmed by exploding shanks and other annoying adds as well as buffing your damage on the fuses, but you probably won’t be able to position it so you can hit three fuses at once, so just aim for two. A Ward of Dawn is helpful, but less so. Otherwise, whichever Super helps you stay alive, kill adds, and kill fuses is good.
Second encounter: Atraks-1
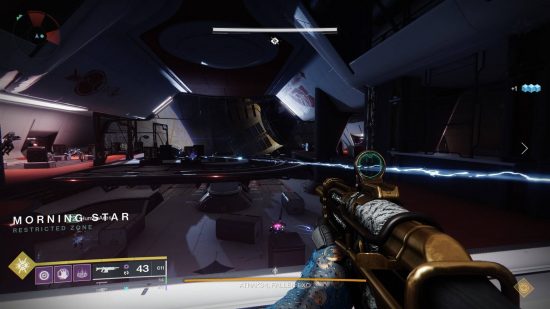
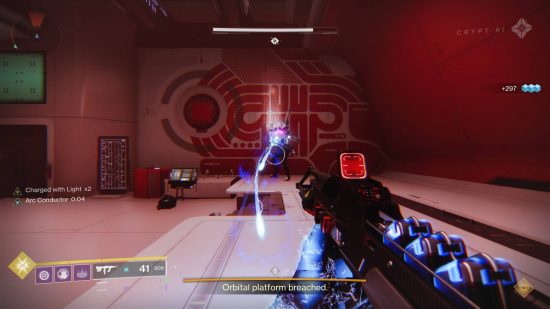
This is a major DPS check, or at least it was on Contest Mode. There are two rooms: one bunker on Europa which you enter (ground room), and a larger, more spread out room on a space station (space), which you can access via four rocket pods at the back of the ground room. Each room is split roughly into three lanes, and each lane has an augment swapping machine.
When the encounter begins, eight duplicates of Atraks-1 will appear – four in each room. Adds will spawn in waves, including a vandal with the operator buff in the ground room and a vandal with the scanner buff in space. Then it’s mostly Wretches and Tracer shanks, until you get a wave of six Servitors which will again shut down the machines. When all six Servitors are killed, the eight duplicates will start casting a wipe nuke. Once the wipe animation begins, the scanner will be able to see that one of these duplicates is glowing. You need to pile damage into this duplicate to interrupt the nuke, but this is also your chance to actually damage the boss. You need to deal enough damage to trigger Atraks’s ‘last stand’ phase (the delineated chunk on the left-hand end of the health bar) before it enrages and kills you all anyway.
As a further complication, whenever you kill one of the replicants, it’ll leave behind a glowing purple aura containing the ‘Atraks-1 Replication’ debuff, which a player can and should pick up. This has a timer of 45 seconds which you can only see when you’ve got the aura, but which is ticking down all the time anyway, and if it ever hits zero it’ll spawn another Atraks-1 who will finish wiping you all. If the operator shoots you when you’re carrying it, it’ll reset the timer and knock the aura loose onto the floor, at which point you simply pick it up again.
To get rid of these auras permanently you need to eject them into space. Four airlocks adjoin the space room, controlled by panels which, again, the operator must shoot to open. Once an airlock is opened you have a short time before it shuts and ejects its contents automatically, but this is still long enough for players carrying an aura to enter, the operator to shoot the aura loose, and players to return to the space room.
So the challenge is to trade the scanner buff between ground and space teams so as to detect the highlighted Atraks replicant, and deal enough damage to it every single time to get it to last stand, while managing and ultimately ejecting the Replication debuff. This encounter was widely agreed to be the hardest in the whole raid during contest mode because of the savage damage tuning, but it should be a lot easier now.
ENCOUNTER FLOW
- Divide into two teams of three – space and ground, with the space team having a designated operator. Both teams should have a designated scanner, but the ground team will need a secondary scanner if the first has to take the debuff up to space. Each person on each team should pick a lane: left, middle, or right. Everyone starts on the ground floor. Start the encounter by approaching the orb at the top of the middle lane on the ground floor.
- A vandal carrying the operator buff will spawn with the Servitor wave in either the left or right lanes of the ground floor. Operator grabs the buff and space team head up. Note that the space team will never need to go back down, but the ground team will need to head up – the operator should send the rocket pods back down.
- Similarly, a scanner vandal will appear somewhere in the space room. The first glowing duplicate will always be in space, therefore space team starts with the scanner buff. The vandal should be killed and the space scanner should grab the buff.
- Both teams manage adds and kill their Servitors.
- Atraks’s casting phase starts once all Servitors are destroyed, indicated by the message ‘Extinction Protocol activated’. The space scanner needs to spot the duplicate that’s glowing and call it out ASAP (refer to the lanes – center, right, left, etc).
- Everyone on space team needs to get to the correct duplicate and hit it as hard as possible. You can keep hitting it even after it disappears, like Four Kings in Dark Souls – don’t stop attacking until damage numbers stop popping up and the bar stops going down.
- When it’s done, space team sends the scanner buff down to ground, and one of them now has the Replication debuff to manage. Call out when it’s at 15 seconds and count down loudly from 10 if your operator lets you get to that point. They just need to shoot you to reset the timer, then you pick it back up.
- The bottom team grabs scanner and repeats this process. They send scanner back up and whoever has their debuff takes one of the rocket pods up to space to be managed by the operator.
- Because this takes them away from the ground team, now is a good time to eject the debuffs for good – agree on an airlock to use, have the operator open it, both debuffs get in, operator shoots them loose, and both players return to their teams.
- Repeat these steps for a total of four replicant kills – that’s one complete damage cycle. Now you’re back to clearing adds, with another damage cycle starting once the next wave of Servitors is killed. You get three damage cycles in total before Atraks enrages, so you need to get him to last stand before this. You should therefore be doing at least 33% of his non-last stand health bar per cycle.
- When you get Atraks to last stand, all of his replicants will start casting their wipe. The ground team must head to space for this phase. As before, the scanner must identify and call out the glowing replicant and all players must attack it until destroyed. Repeat for each new glowing replicant, in order, until the last of its health is gone.
Complications
The ground room is smaller but has more visual obstacles than space, which is bigger but has better visibility. Your loadouts for add clear and boss damage may vary accordingly. Ground scanner should consider picking a spot on the floor or mid-level of the center lane as you’ll give yourself your best chance to see every replicant from here, but beware exposing yourself to the deadly tracking bullets of the bosses.
Ground team should note that the trip to the space elevators will take at least 20 seconds, so there’s no time to hang about after picking up the debuff. Above all, stay alive. Apart from damaging the boss and managing the debuff, everything else can wait – there’s no huge rush to kill the Servitors, for example – so play it safe where you can. Hunters can use invisibility and Warlocks can use Devour.
Loadout recommendations
The biggest threat during add clearance is the Atraks copies themselves – their bullets do big damage and seek you out aggressively, with an extreme range. Arc resist is advised (as it is throughout the whole raid, really), and you might want to consider Riskrunner, which uses your Exotic slot but makes add clear pretty easy. Almost every attack you’ll face in this encounter is Arc charged. The Servitors are also pretty chunky – Riskrunner can do work when it’s charged (which won’t be a problem), but so can Falling Guillotine or The Lament as long as you can stay alive, or snipers if you’re struggling with that.
Actually dealing enough damage in the very narrow window you get to hit each replicant was by far the biggest challenge in this encounter. We can’t overemphasize how important it is that the entire space or ground teams should be damaging each replicant and that burst damage is favoured over sustained DPS: drop Nova Bombs and Celestial Nighthawk Golden Guns before switching to Falling Guillotine or, ideally, The Lament, and maybe even consider the additional burst damage of Fourth Horseman or Izanagi’s Burden if you’re not struggling with add clear.
Note that we’re speaking with Contest Mode still fresh in our minds, and that damage ought to be a lot easier now. We’ve seen some teams sitting in Wells of Radiance with Xenophage almost throughout the whole encounter. Space team might want to consider this if your orb generation is up to it (run multiple Warlocks with Phoenix Protocol), but it’ll be harder for ground team to see everything they need to.
Third encounter: Taniks, Reborn
This is one of the easier encounters in the raid, acting as an amuse-bouche for the final encounter by introducing some of its mechanics. Namely, it introduces the third suppressor buff, and the need to safely dispose of nuclear cores. It’s also your first run-in with Taniks (well, in Destiny 2, at least), but won’t be your last.
There are three roles in this encounter: operator, scanner, and suppressor. The suppressor will need to stun Taniks by shooting him while standing under the security drones (the white spheres) dotted around the arena – doing this three times will stun him and unlock some bins. This is important because you need to drop nuclear cores into these bins to get rid of them. Clearing nuclear cores may disable a random player’s augment, in which case they’ll need to put that augment into the augment machines for someone else to pick up, so you’ll need to have a secondary player for each role. You also need a core runner to ferry the nuclear cores, but note that this position is only able to move and jump, and all other abilities are disabled when carrying a core. It’s important that this role is protected.
The operator and core runner act as the players ferrying cores to the glowing bins. The scanner must identify for the operator and core runner which bin to deposit the core into. Finally, the suppressor must keep Taniks at bay, stunning him while the other players safely go about disposing of nuclear cores.
Encounter flow
- The three roles can be picked up from their vandals at the start of the encounter.
- The scanner checks which two of the four central deposit bins are glowing, communicating to the runners who will need to deposit the nuclear cores into them.
- The operator shoots a keypad next to either side of the core station, minimizing the number of nuclear cores that spawn to just two, making the process manageable.
- The suppressor must stand ready under one of the three security drones ready to shoot Taniks.
- Two players must pick up the nuclear cores to deposit them in the central room.
- Once all the cores are being carried, Taniks will appear and must be shot until he is stunned, allowing the carriers to deposit the cores into the glowing bins that the scanner is calling out.
- Each bin must receive only one core (you can keep tabs on the progress bar beneath the bins).
- You need to repeat this five times to unlock a hatch in the middle of the room and end the encounter.
- Beware that once the hatch opens, Taniks will start chasing you, so make sure you sprint to the end of the hall to clear the encounter.
Complications
Carrying a nuclear core gives the carrier a radiation debuff which stacks up to ten times, killing you at the end. You can manage this by communicating your radiation stacks to your team, as someone else may need to switch with you. It’s also worth noting that stacks of radiation decay after a while, so bear that in mind when picking up new nuclear cores.
As the player’s augment is disabled while carrying the nuclear cores, the affected player must drop their augment at an augmentation station to trade it with someone else. Also, if Taniks does catch you at the end of the encounter, it’s an instant kill and if someone doesn’t make it through the door alive, it’s back to square one.
Final encounter: Taniks, the Abomination
One side of the arena is an empty void. There are three distinct sections on the other side. One is where you spawn. Clockwise of this is ‘blue’, and clockwise of that is ‘orange’ – they are named for their lighting and coloring. Each of these three sections has an augment machine and a pair of white bins. As you look from the center towards the edges of the arena, name these bins for left and right: so, spawn left and spawn right, blue left and blue right, orange left and orange right. There are floating white spheres dotted all over the arena.
When the encounter starts you’ll clear adds. Vandals will appear at each section with each of the three buffs: operator appears at spawn, scanner at blue, and suppressor at orange.
At a certain point, Taniks will move from the center to one of the three sections and start casting a series of aerial strike attacks, with the impact zone marked by purple columns. Simply keep moving to avoid these – even walking will do it so you can move while you aim and shoot, just don’t stay still. The four thrusters on the sides of his hover-sled will be glowing orange. You all need to shoot them, but only two at a time: agree to shoot the front pair in the first phase and the rear pair in the next. Deal enough damage, and each thruster will drop a nuclear core.
Runners will need to take these cores and drop them in the bins. Two bins will be highlighted to whoever has the scanner buff – they need to call these out (e.g. “orange right and spawn left”), and runners should call out which they’re going for so they don’t go for the same bin. Putting a core in the wrong bin will kill you.
When carrying a core you’re slowed, can’t fight, and will gather stacks of the Radiation debuff. When it hits ten you die, so you need to be running with a buddy. They can protect you from adds and can take the core from you at any time. Runners can also get detained by a red holding sphere, at which point they’re even more vulnerable since they can’t move. Whoever holds the operator buff can release them by shooting the sphere – they need to be alert to this and runners should call it out, but it’s a pretty easy job.
However, the bins must be unlocked by the suppressor before the cores can be dunked. Three of the floating white spheres around the arena will glow during this phase – the suppressor needs to stand under each of these and shoot Taniks. Only when all three spheres have been used and Taniks staggered will the bins open and be available for dunking. You need to repeat this process twice, dunking all four cores, to trigger a damage phase.
During the damage phase, Taniks is in the center of the arena surrounded by a bubble, which you need to be inside in order to hurt him. Drop your Well of Radiance on the edge of the bubble or slightly inside of it so you can stand in it and hit him. Titans can drop a Ward of Dawn just slightly outside of Taniks’s bubble so you can pick up Weapons of Light and get to the Well – this is the best placement because Weapons lasts for 15 seconds, the damage phase lasts 30, and halfway through it Taniks will boop you out of his bubble with perfect timing for you to refresh Weapons of Light, reload your weapons, and jump back into the Well. We say ‘jump’ because Taniks is surrounded by a circle of flying debris that will kill you if it hits you, so just jump over it – it’s a stupid way to die.
ENCOUNTER FLOW
Because all three buffs can expire, and because you need to have two pairs of relay runners to be safe, you need to be comfortable doing multiple roles, calling them out accurately, and flexing between them. Assign primary carriers for each role and have them start at the sections where their buff spawns, assign two primary runners who will be first to grab cores from Taniks when they drop and assign them each a relay buddy. The scanner can be one of these, as they should have called out the bins by the time you’re all running to them. Start the encounter by approaching the mound of debris in the center of the arena.
- Kill adds until the vandals carrying your buffs spawn, and pick them all up asap.
- Taniks’s bombardment of purple columns will start very shortly after you’ve all got your buffs and may even overlap.
- Call out which section he’s going to and start shooting his first two thrusters.
- The bins will be highlighted for the scanner now – they should call them out asap and perhaps even type them in chat.
- Primary runners should call which of the two bins they’re going for.
- Taniks’s thrusters drop their cores. Primary runners grab them, secondary runners should be nearby at all times to protect them from adds.
- Runners call out when you’re at 6 or 7 stacks of Radiation so your relay buddy can get ready to take the core.
- Operator is keeping alert to shoot any red holding spheres.
- Suppressor is spotting the three glowing security drones and running between them, shooting at Taniks.
- Assuming the suppressor has done their job, the bins are unlocked by the time the runners reach them, or very shortly after. Orbs are dunked.
- Reset and repeat. A buff may have expired: all buff carriers should check and put their buffs in the machines for secondary carriers to pick up if necessary. Two new bins are highlighted to the scanner.
- Once the final two orbs are dunked, a damage phase begins. Drop a well inside Taniks’s bubble and stack up here with your best DPS weapons. Remember to jump over the ring of debris every time – don’t risk running through. Again, you get three damage phases before he enrages, so you want to knock off 33% of his larger health bar (above the last stand mark) at a minimum.
- Reset and repeat until you trigger the last stand. Here, he’ll teleport three times to different sections of the arena, dropping his purple column attacks, before finally casting a wipe. Try to save some burst damage from your final DPS phase (Nova Bombs, Golden Guns, etc) for this if at all possible, and use Divinity for an easy crit spot.
Complications
After two cores are dunked, a carrier of one of the three buffs may be hit with a notification saying ‘augment expired’. This lasts 40 seconds, and means they’re still carrying their buff but that they’re no longer enjoying its effects. They need to put their buff in the augment machine and someone else needs to pick it up, so assign a secondary carrier for each buff.
Loadout recommendations
You’ll get lots of nasty Dark Guard captains among the adds, which can really disrupt the efforts of runners to pick up and dunk orbs if they aren’t taken care of. Swords are best for this, but they are very much not the play for damage against the boss, so don’t run more than two or three. One sword-wielder should take a Divinity, whereas everyone else should probably use their Exotic slot for Anarchy if possible. Other boss damage options include slug shotguns or dual snipers (Adored is good, as is a god-rolled Ikelos sniper for its rapid-fire rate). Note this is our experience from Contest Mode – it’s likely to be more forgiving now, so, heck, try Xenophage. Obviously, you’ll want at least one Well and one Ward of Dawn, otherwise, your classes can be whatever you like for staying alive, controlling adds, and boss damage – Nova Bombs and Golden Guns are recommended.
Now that you know how to beat the Destiny 2 Beyond Light raid, it’s time to gear up for the latest and greatest threat, the Root of Nightmares. The Destiny 2 Lightfall raid release date is finally here, so you can play one of the last expansions before the next stage of Destiny 2 now.
