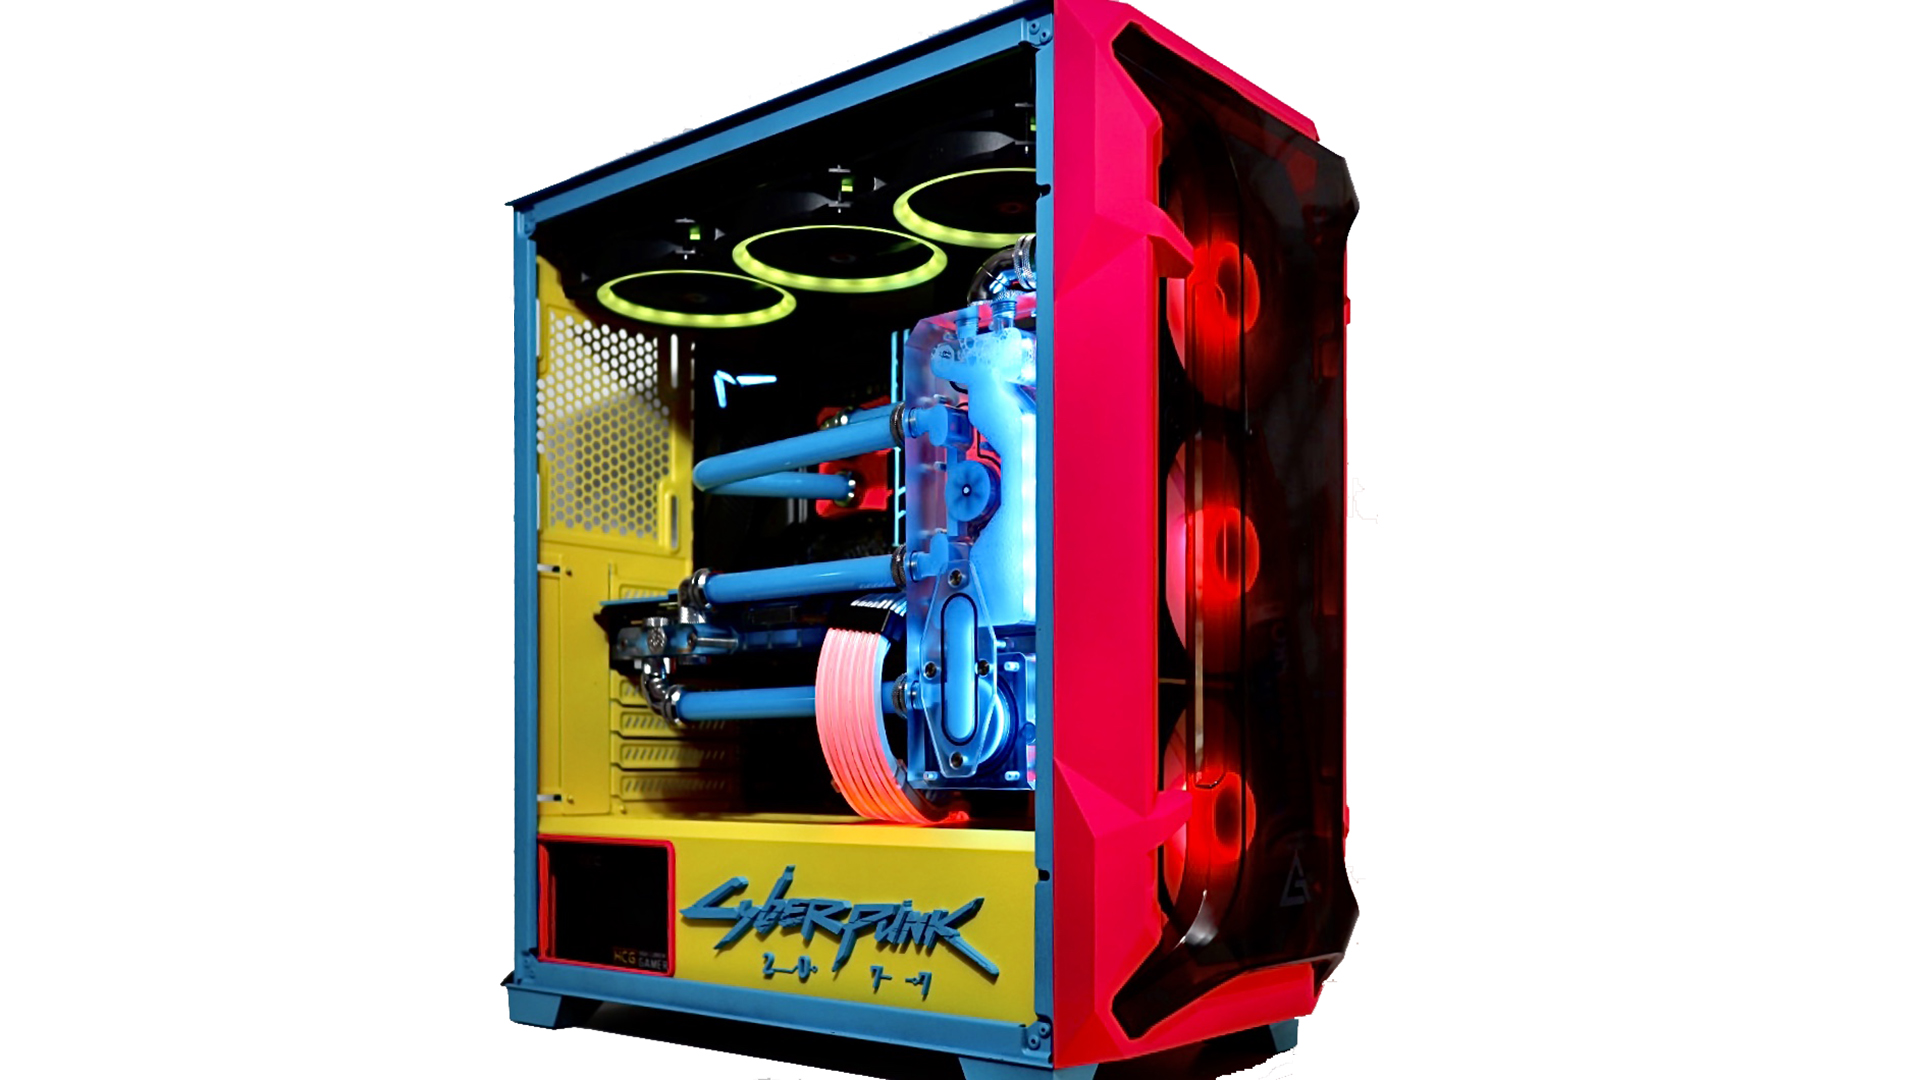
We love seeing a masterfully painted PC case at PCGamesN, and this brightly colored Cyberpunk 2077 gaming PC shows some clever use of spray paints by PC modder Richard Ord. Not only that, but it also features custom details made with a 3D printer and a great hard tube water-cooling system. Richard calls this build Cyberpunk 2077 Neon, and it’s based on an Antex DF600 Flux case.
Thanks to our rapidly growing PC building Facebook page, we’ve seen many custom gaming PCs, from mods based on existing case designs to scratch PC builds. You can even submit yours for consideration right here. Now let’s talk to Richard about how he made this stunning Cyberpunk 2077 build.
PCGamesN: What inspired you to build a PC based on Cyberpunk 2077?
Richard: This project all started when Antec reached out to me to do a build in the company’s new DF600 Flux case. When I received the case, I had just been binge-watching a lot of trailers for Cyberpunk 2077, and thought I could take some of those aspects I’d seen and incorporate them into the build.

Take us through the painting process.
I had to strip the full case right down in order to paint it all. I knew from watching the trailers that I wanted to use blue, yellow, and pink, although I wasn’t 100% sure if it would work in practice. I normally use spray cans whenever I do any painting, but this time I wanted to try Kobra paint, as it doesn’t require a lot of prep work – you just need to make sure the panel is clean.
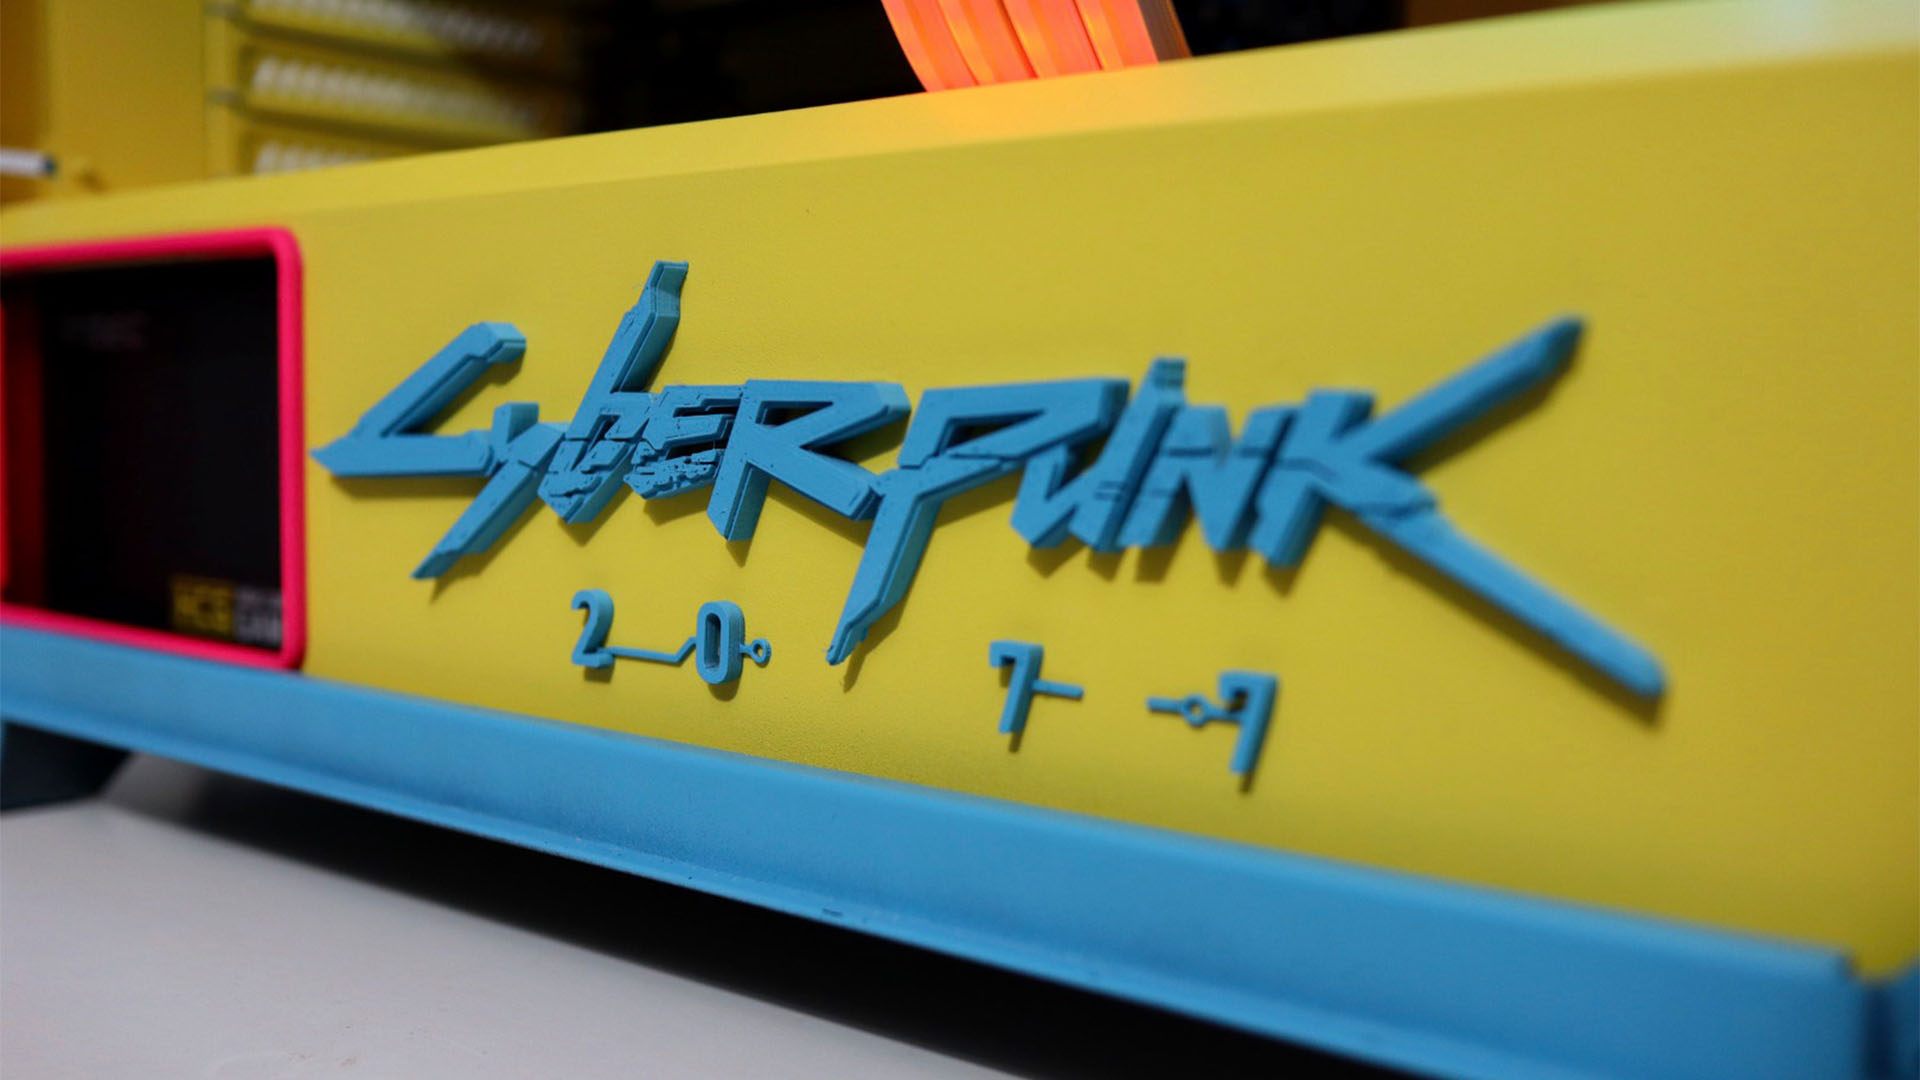
How did you make the 3D Cyberpunk 2077 logo on the PSU shroud?
I’m always looking at technology to find new ways to mod, and I invested in a Prusa i3 MK3S 3D printer at the start of the year – I’ve used it for a few builds now and it’s a great tool. For the logo, I had a look and found a logo that I liked. I then went into Fusion 360 and edited the file to fit the area I wanted, and then sliced the file to run on my 3D printer.
There’s a logo on the graphics card backplate too. How did you make that one?
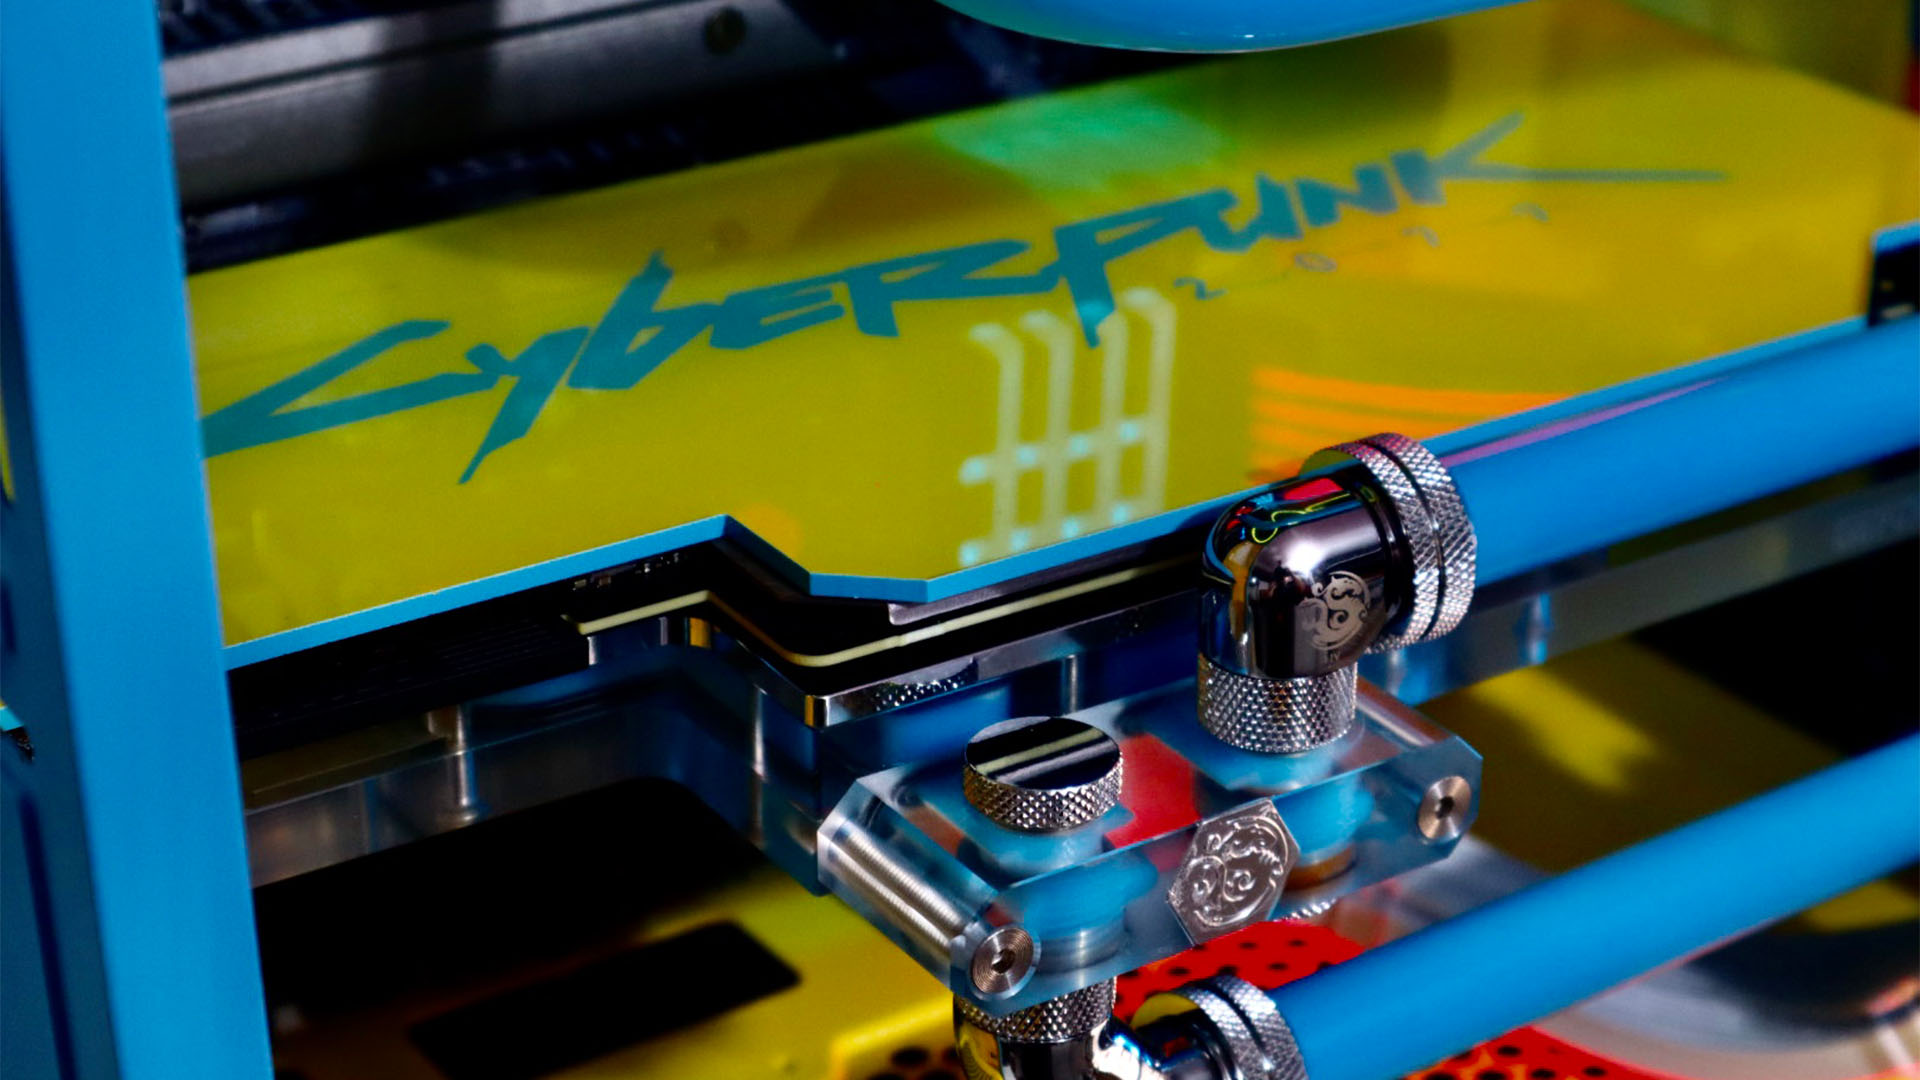
When I did the backplate for the graphics card, I went back into Fusion 360, and edited the file I used for the 3D printer to a DXF file, so I could cut out the design in vinyl on my plotter. Once I’d cut out the logo, I placed it on the backside of the graphics card backplate and stuck it down, making sure there were no air bubbles.
Once all the bubbles had been squeezed out – I applied the first layer of yellow spray paint, which I then repeated a few times to get an even coat. Once it was dry, I just peeled off the vinyl and repeated the process with the blue paint.

Who made the distribution plate at the front?
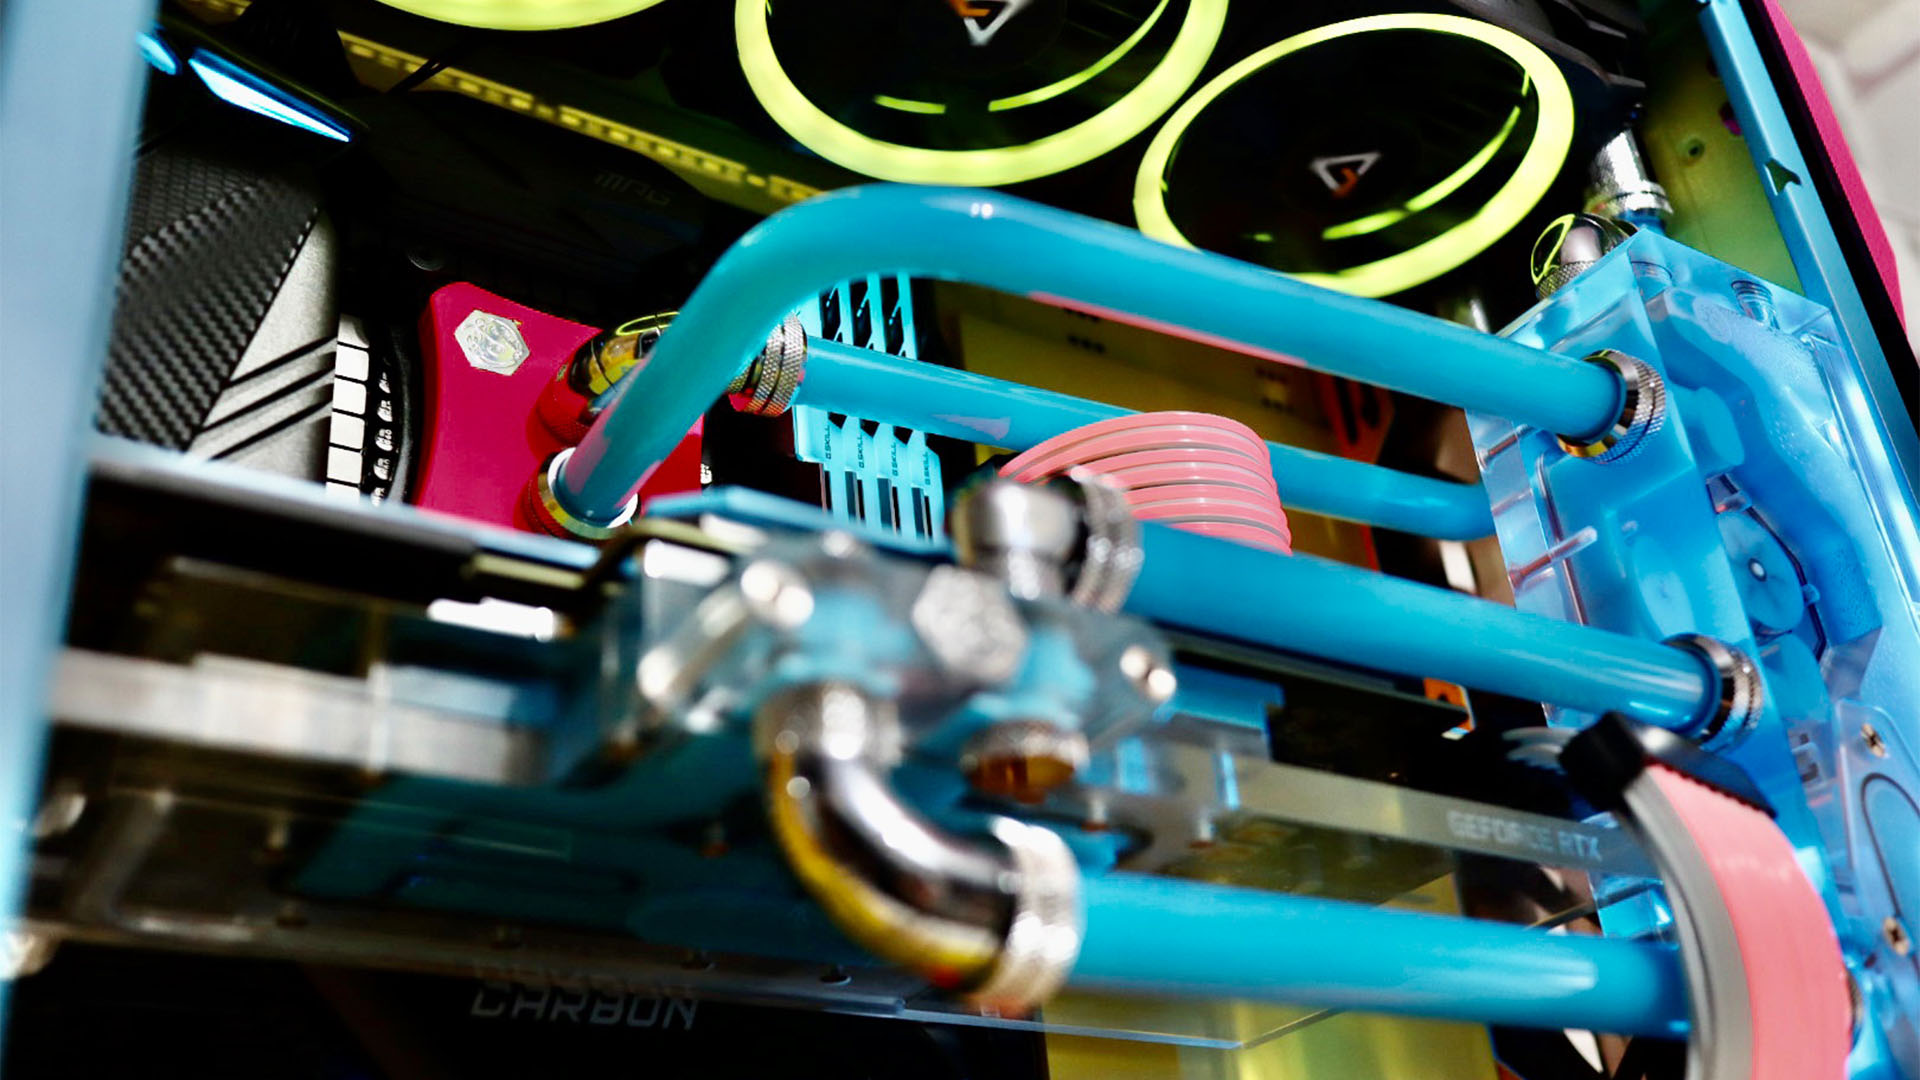
The distribution plate in this build was made by Bitspower, but I also make custom ones.
What type of hard tubing did you use?
I used EK’s 16mm PETG tubing, and there aren’t any wild bends in it – I kept it simple with 90-degree bends.
Is that a Lian Li Strimer set on the power cables?
Yes it is – I thought it would look good in this colorful build.
There’s barely a cable in sight. How did you plan the cable routing, and is it as tidy at the back?
It was very easy in this case – there’s lots of space at the back and it even had a built-in fan and RGB hub.
Is the cooling system geared more towards cooling power or quiet operation?
I’ve slowed down the fans, so it’s a very quiet system – I haven’t tried to overclock the CPU yet. To be honest, with this build, I was also surprised by how much airflow the case produced.

How did you plan the lighting coordination, and where are all the lights?
For this build, all the light comes from the case fans, motherboard, graphics card waterblock and distribution plate.
Did you have to perform any custom modifications to the case, other than the paint job?
To be honest, no – I wanted to keep the case as close to its stock configuration as possible.
Did you come across any difficulties with this build?
Once I’d fitted all the hardware in the case, I hit a few issues with the length of the MSI GeForce RTX 2080 Gaming X Trio graphics card. I knew I didn’t have a lot of space on the right of the case, and that’s when I realized I needed to use a distribution plate in that location.
It would give me the look I wanted to achieve, with the tubing running from right to left, and it would fit. Fitting the distribution plate wasn’t easy either – I had to make a few custom brackets and spacers – this is where having a 3D printer comes in very handy.
How long did it take you to complete this build, from start to finish?
I wanted to have a quick turnaround with this build, so it took around two weeks, with me doing a few bits each night around my family and my day job.
Have you got any tips for people who are interested in building a system with a custom paint job?
The best tip I can give you for doing custom paintwork is to make sure you prepare the area well for the type of paint you’re using.

Are you completely happy with the end result, or do you wish you’d done some of it differently in retrospect?
That’s a good question. When I first completed this build I was very happy with what I’d produced, and I also received a lot of very good feedback. However, anyone who knows me well will know that I always like to tinker with my builds, so I would be surprised if I don’t end up changing something about it later.
Finally, I’d also like to just say a big thank you to all of the sponsors for this build – Intel, Antec, MSI, Bitspower, and Seagate.
Cyberpunk 2077 Neon PC build specs
- CPU: Intel Core i9-10900KF
- Case: Antec DF600 Flux
- GPU: MSI RTX 2080 Gaming X Trio
- Storage: 1TB Seagate Firecuda M.2 SSD
- Memory: 32GB G.Skill Trident Z Neo
- Motherboard: MSI MPG Z490 Gaming Carbon WiFi
- PSU: Antec HCG 650W
- Cooling: Custom water-cooling loop with parts made by Bitspower
We love the colors on this build Richard, and the custom details on the GPU backplates and PSU shroud look brilliant – fantastic work! If this PC tickled your taste buds, then you’ll also want to take a look at this other Cyberpunk 2077 PC, which has some great etching work on the panels. If you’re new to the world of water-cooling and want to have go yourself, then make sure you also read our full guide on how to water-cool your PC.
If you want to see more outstanding custom PCs, check out our best PC builds feature, and if you’ve built an extraordinary PC of any description yourself, then we’d love to see it! Join our Facebook group if you’d like to submit your own work for consideration.
