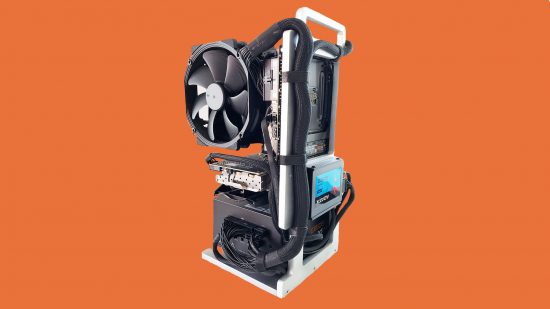
Why have a massive closed box on your desk, when you could have an elegantly minimal open air PC case such as this one? This mini-ITX frame case, made from laser-cut aluminium by Jerome Kelty, still enables you to use a full-size graphics card and ATX power supply.
Thanks to our rapidly growing PC building Facebook page, we’ve seen many custom gaming PCs, from mods based on existing case designs to scratch PC builds. You can even submit yours for consideration right here. Here we chat to Jerome about how he made this incredible open air PC.
PCGamesN: Let’s start at the beginning. What inspired you to build this PC?
Jerome: I’ve always thought of open-chassis designs as being really interesting. I just love the idea of all the parts being on display and the ease with which you can work on them. Since there aren’t any panels to cover anything up, the components play a much larger role in the overall appearance.
What were your requirements for this custom case?
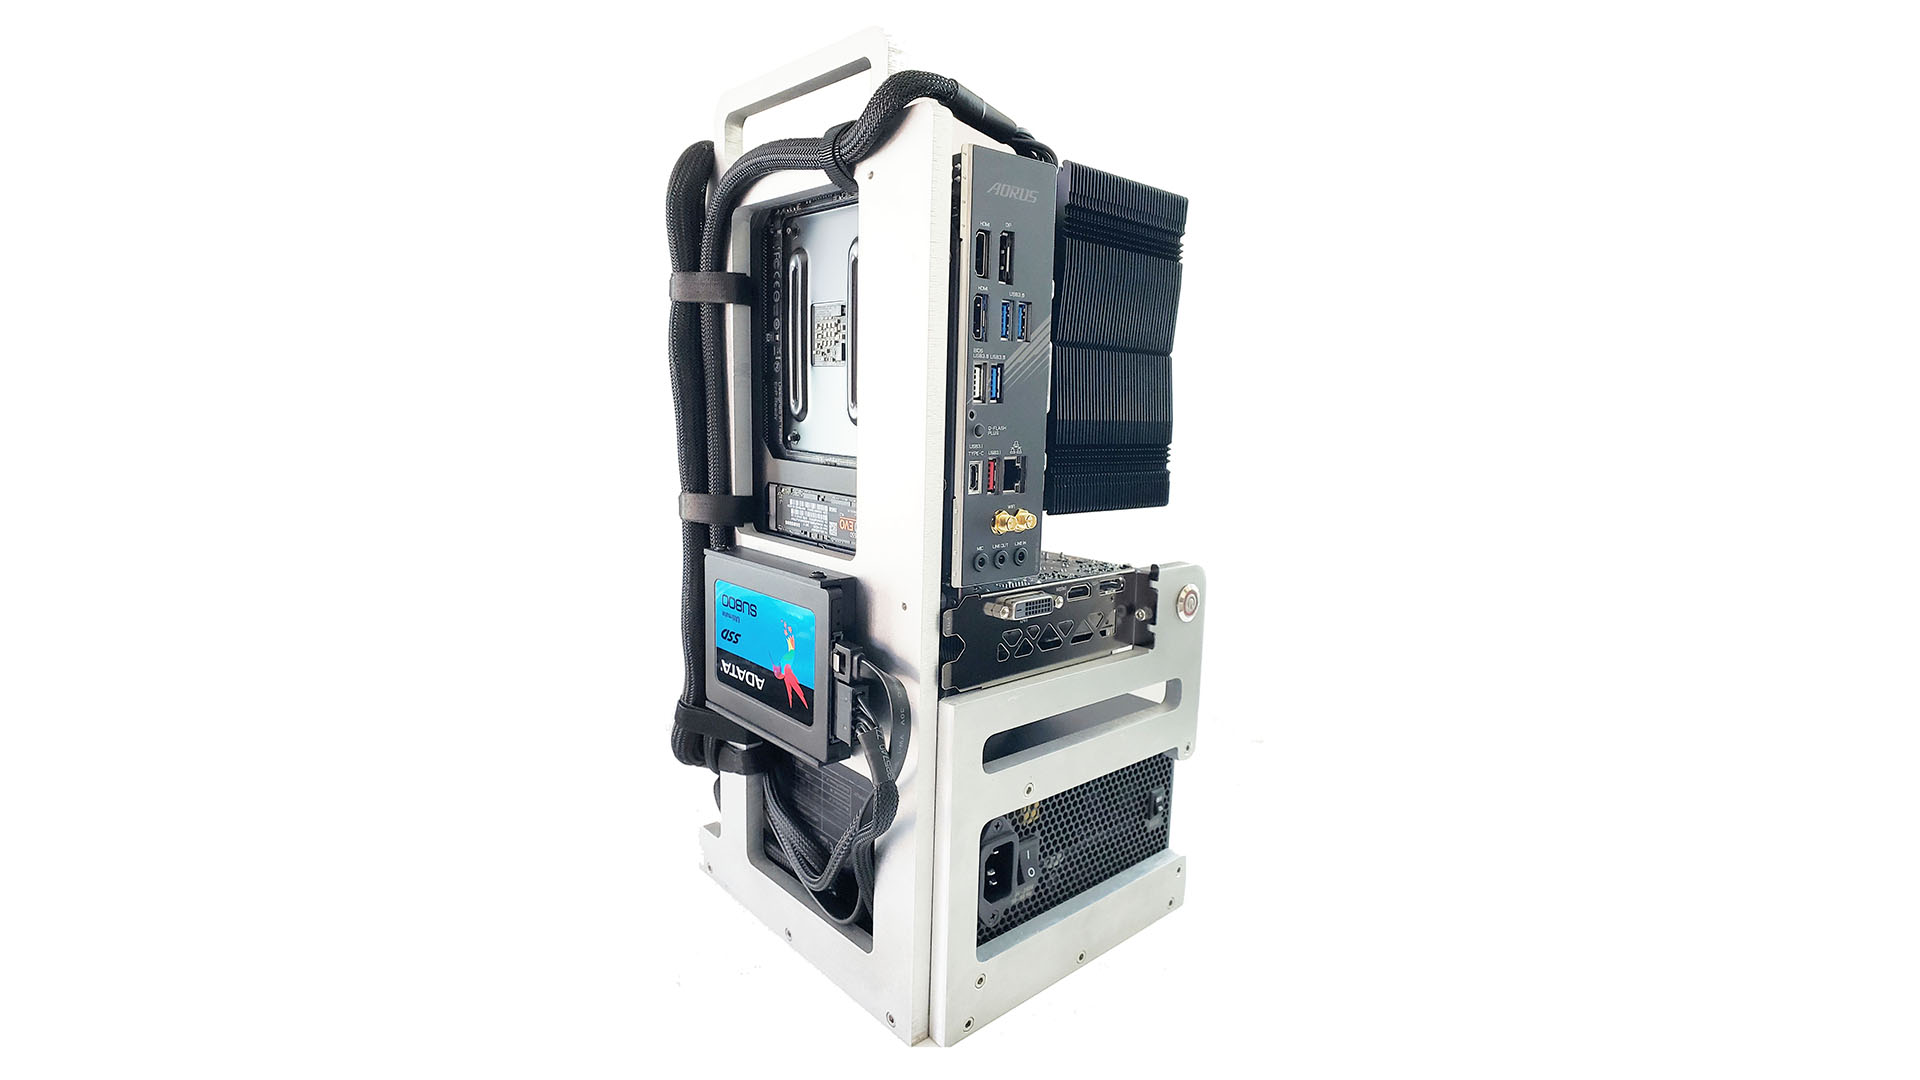
I wanted the build to be really compact and have a very small footprint. I also thought it would be neat if the chassis could be made from individual metal plates that could be bolted together, so it could be packaged flat should it ever be put into production. Making the chassis from individual plates would also allow for greater ease of customization without having to redesign the entire chassis.
I thought it should be able to accommodate a full-size ATX power supply and a full-height graphics card with sufficient clearance for airflow. I wanted to be able to use two M.2 drives, along with a 2.5″ drive, and have easy access to the M.2 drive on the back of the motherboard. Easy, clean cable routing was also a priority. I wanted the graphics card to fit directly into the PCIe slot and not have to use a riser cable.
I figured that adding a handle on top would be handy for moving it around, and I also added a bit of space underneath the graphics card so additional USB ports could be installed later.
How did you plan and design this build throughout its various stages?
I started by laying out the components on sheets of cardboard, in order to get an idea about how I wanted all the parts to sit, and get an idea of the overall form factor. Then I took measurements and did drawings of what would be the individual flat plates in Inkscape. The Inkscape drawings were then imported into Fusion360 as SVG files so I could create a 3D model of the chassis.
I downloaded individual component models from GrabCAD, and placed them in the Fusion360 chassis model to get an idea of the overall look of the design. Once I was happy with that I was good to go for fabrication.
How did you get the aluminum pieces cut to shape?
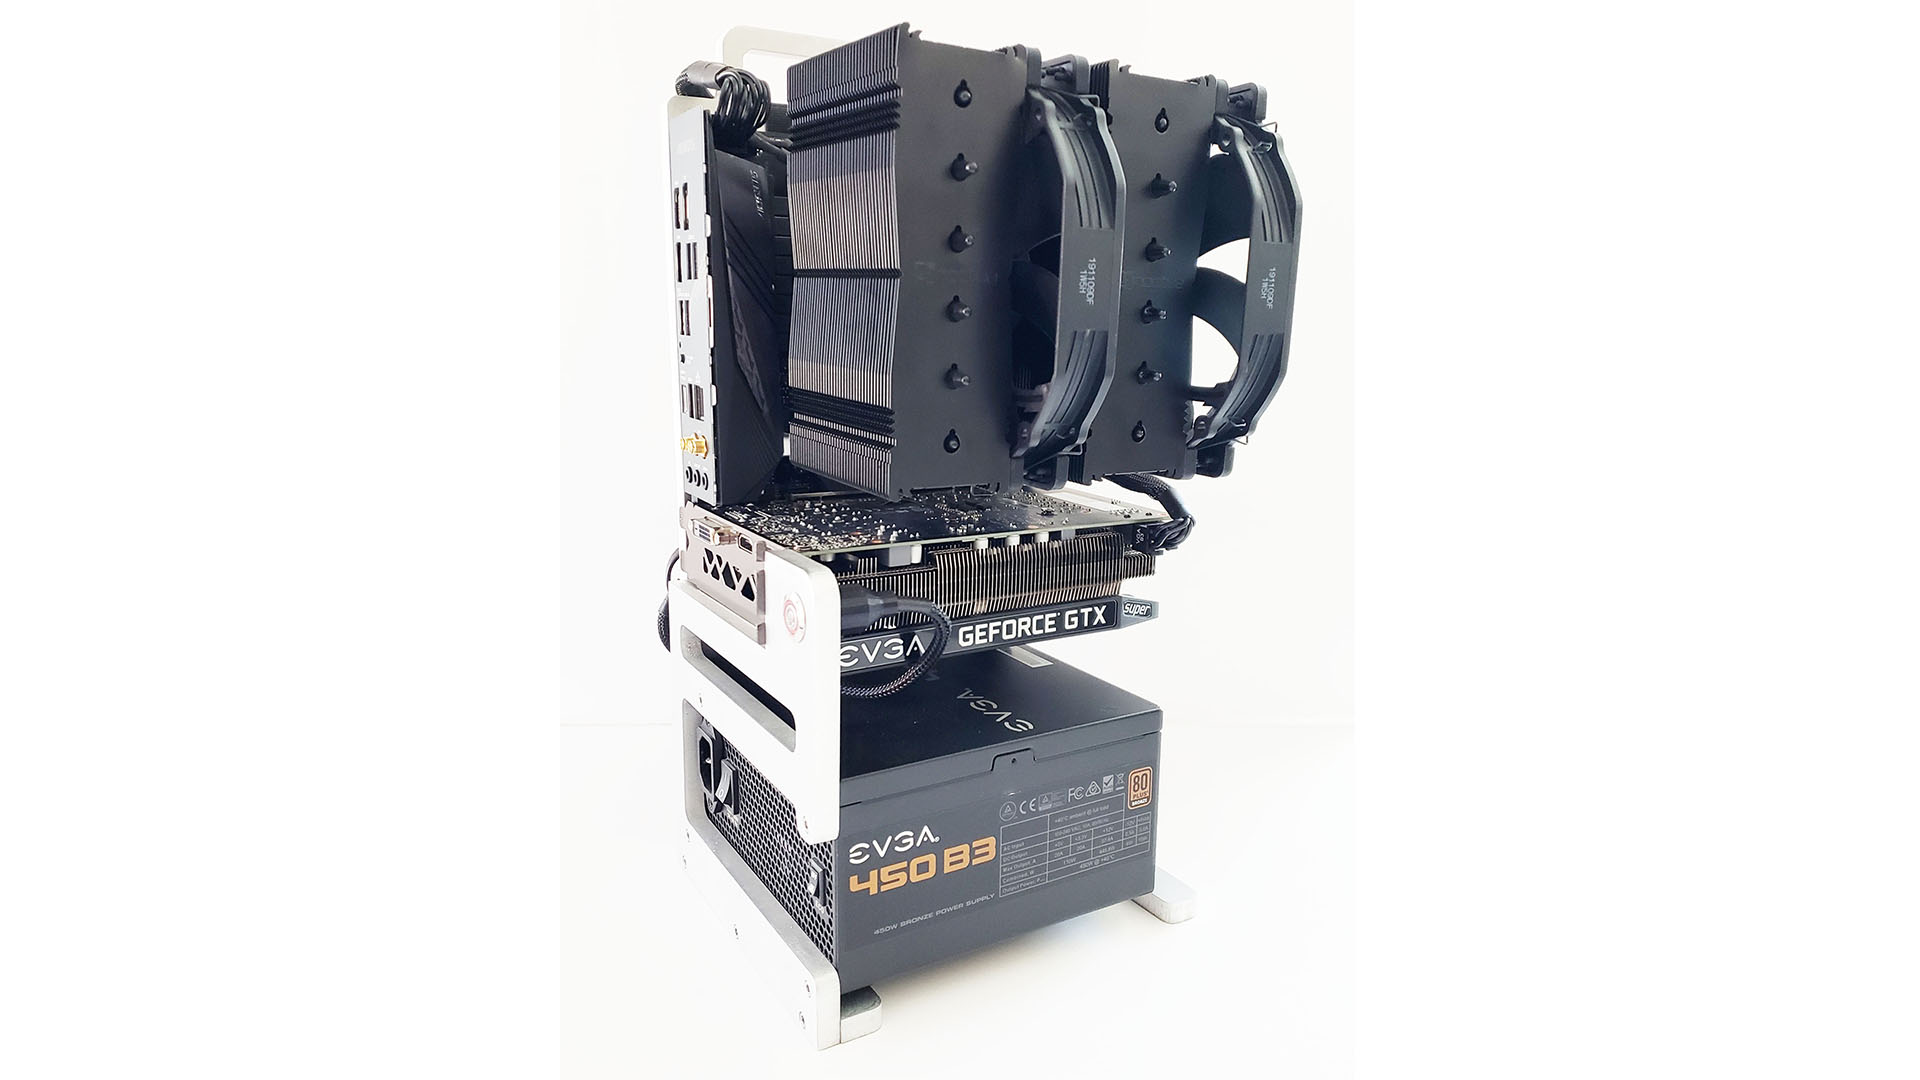
The three flat metal plates that make up the chassis are laser cut from 9.5mm-thick 5052 aluminum by SendCutSend, which is a fantastic laser-cutting service.
This was definitely the way to go for both cost and ease of manufacturing, as I don’t have a CNC router and cutting metal that thick by hand would have been an enormous amount of work. Laser-cutting thick material does leave a bit of a rough surface, but since I was starting with a sort of test build I wasn’t too concerned with getting pristine edges – I just cleaned up all the sharp edges with a file.
Were any of the parts 3D printed?
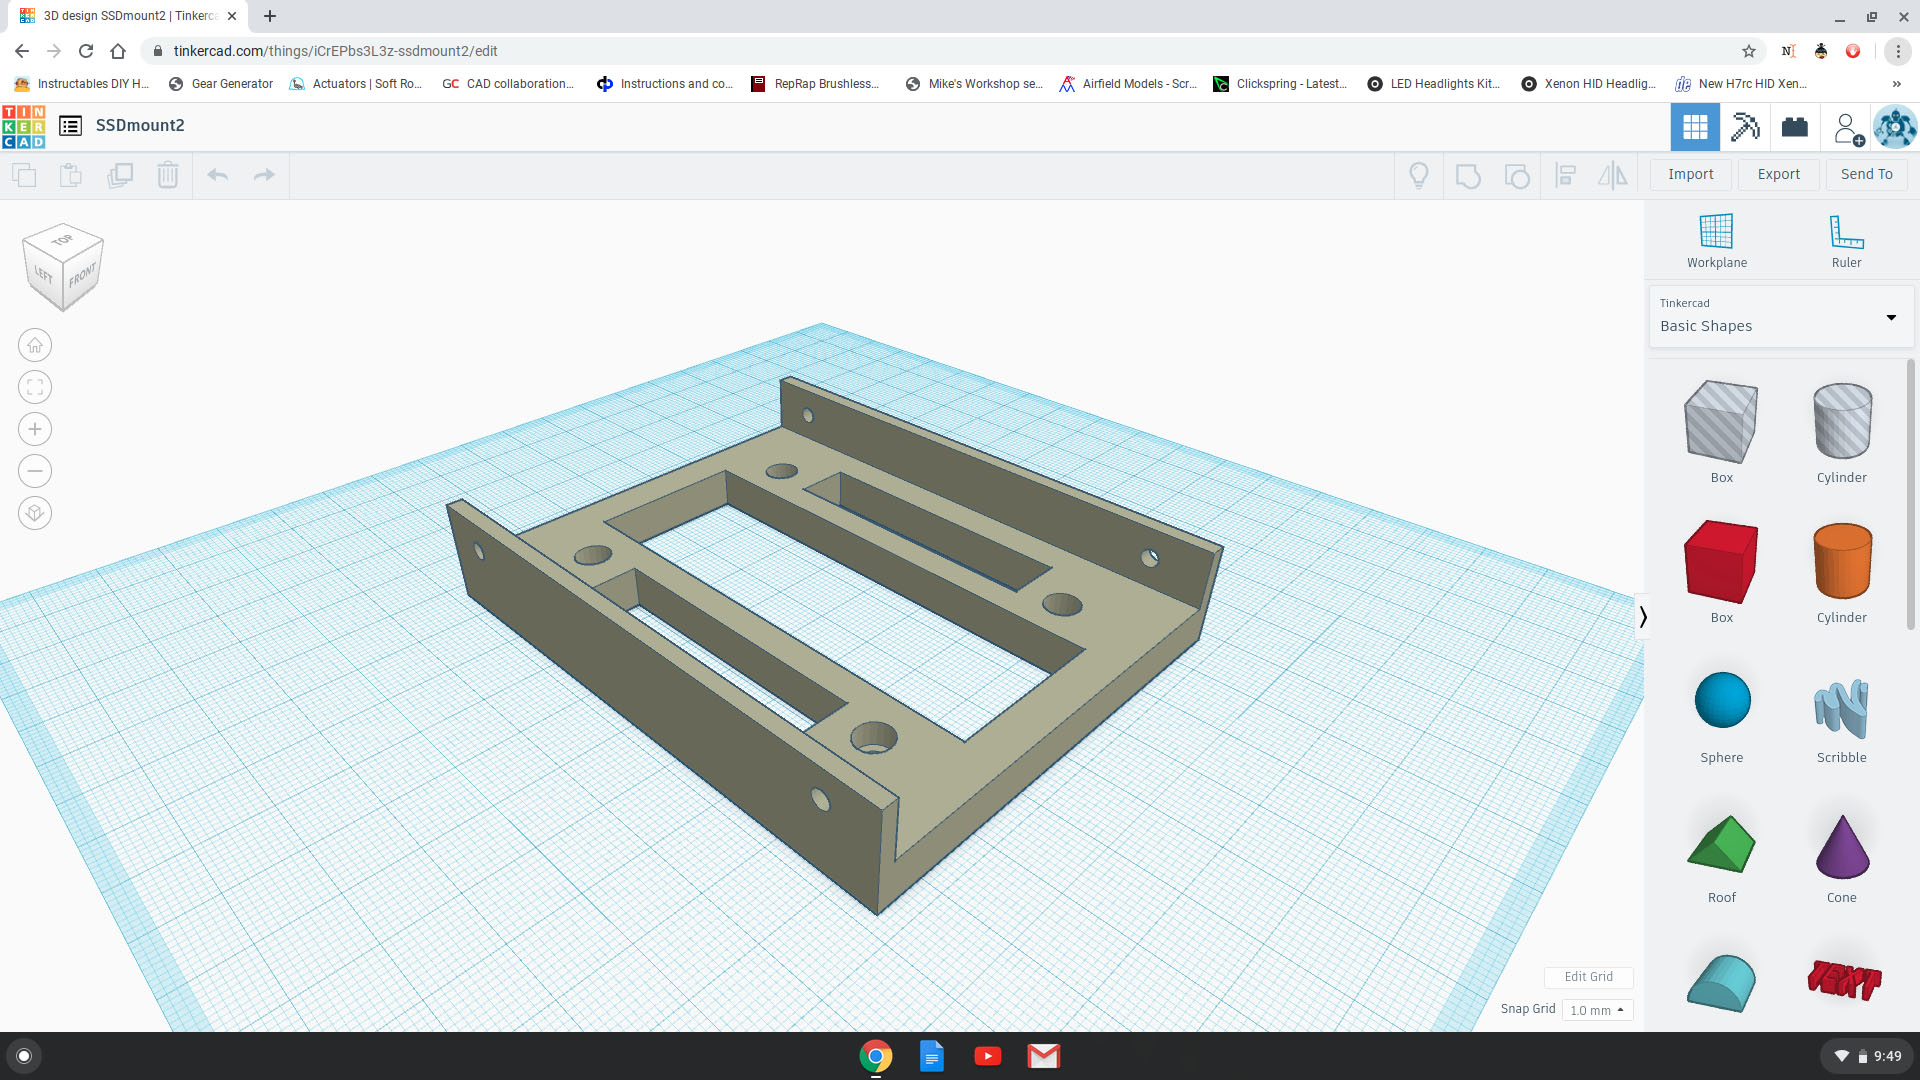
Yes. Printing these parts was the fastest/most economical way for me to do it given the tools I had to work with, so it was really just done that way out of necessity. I designed the parts in Tinkercad and printed them in PLA plastic on my old Printrbot Simple Metal printer.
How does the frame fit together, and how is your hardware mounted to it?
The frame is bolted together at the edges using socket-head cap screws, and the motherboard is held in place using short standoffs, just like a traditional PC build. The 2.5″ drive mount is held in place using socket head cap screws. It’s all very simple really – it’s super-fast to assemble and take apart.
Is it all made with precision machinery, or did you use any hand tools?
With laser cutting, whenever you have shapes or holes to be cut out in metal they need to be at least 50 percent of the material thickness. This meant I had to drill and tap all of the threaded holes by hand, so I printed out templates for both the power supply and motherboard mounting points. Drilling and tapping all the holes takes a fair bit of work, but it’s not too bad if you have access to a drill press.
How did you plan the cable routing?
The cable routing with this design is really straightforward. It was just a matter of placing a couple of cutouts in the chassis plates through which cables can pass, and leaving a bit of clearance for the cables to fit between the power supply and the motherboard mounting plate.
You’ve made the instructions for this chassis available for anyone to download and build themselves. What will they need in order to do this, and what was your motivation for wanting to share your design? How much would it cost?
I thought it would be really neat to share it and see how other people could take it and make it their own. It’s been really cool to see how other people have modified it to suit their purposes and manufacturing methods. One person has made it even smaller and 3D-printed the chassis, while someone else has made it from thin steel sheet. I think it’s great when people can take a design and then modify it to suit their own materials, tools and building techniques.
The beauty of this design is that it lends itself to being built from a wide variety of materials to suit almost any component configuration. Cost is relative to the material used – it cost around $150 for me to have all of the thick aluminum plates laser cut, but it could just as easily be made in acrylic or a suitable wood with just a few small changes. If you don’t have access to a laser cutting or CNC milling service, the design could be modified to be cut using a band saw, scroll saw or jigsaw.
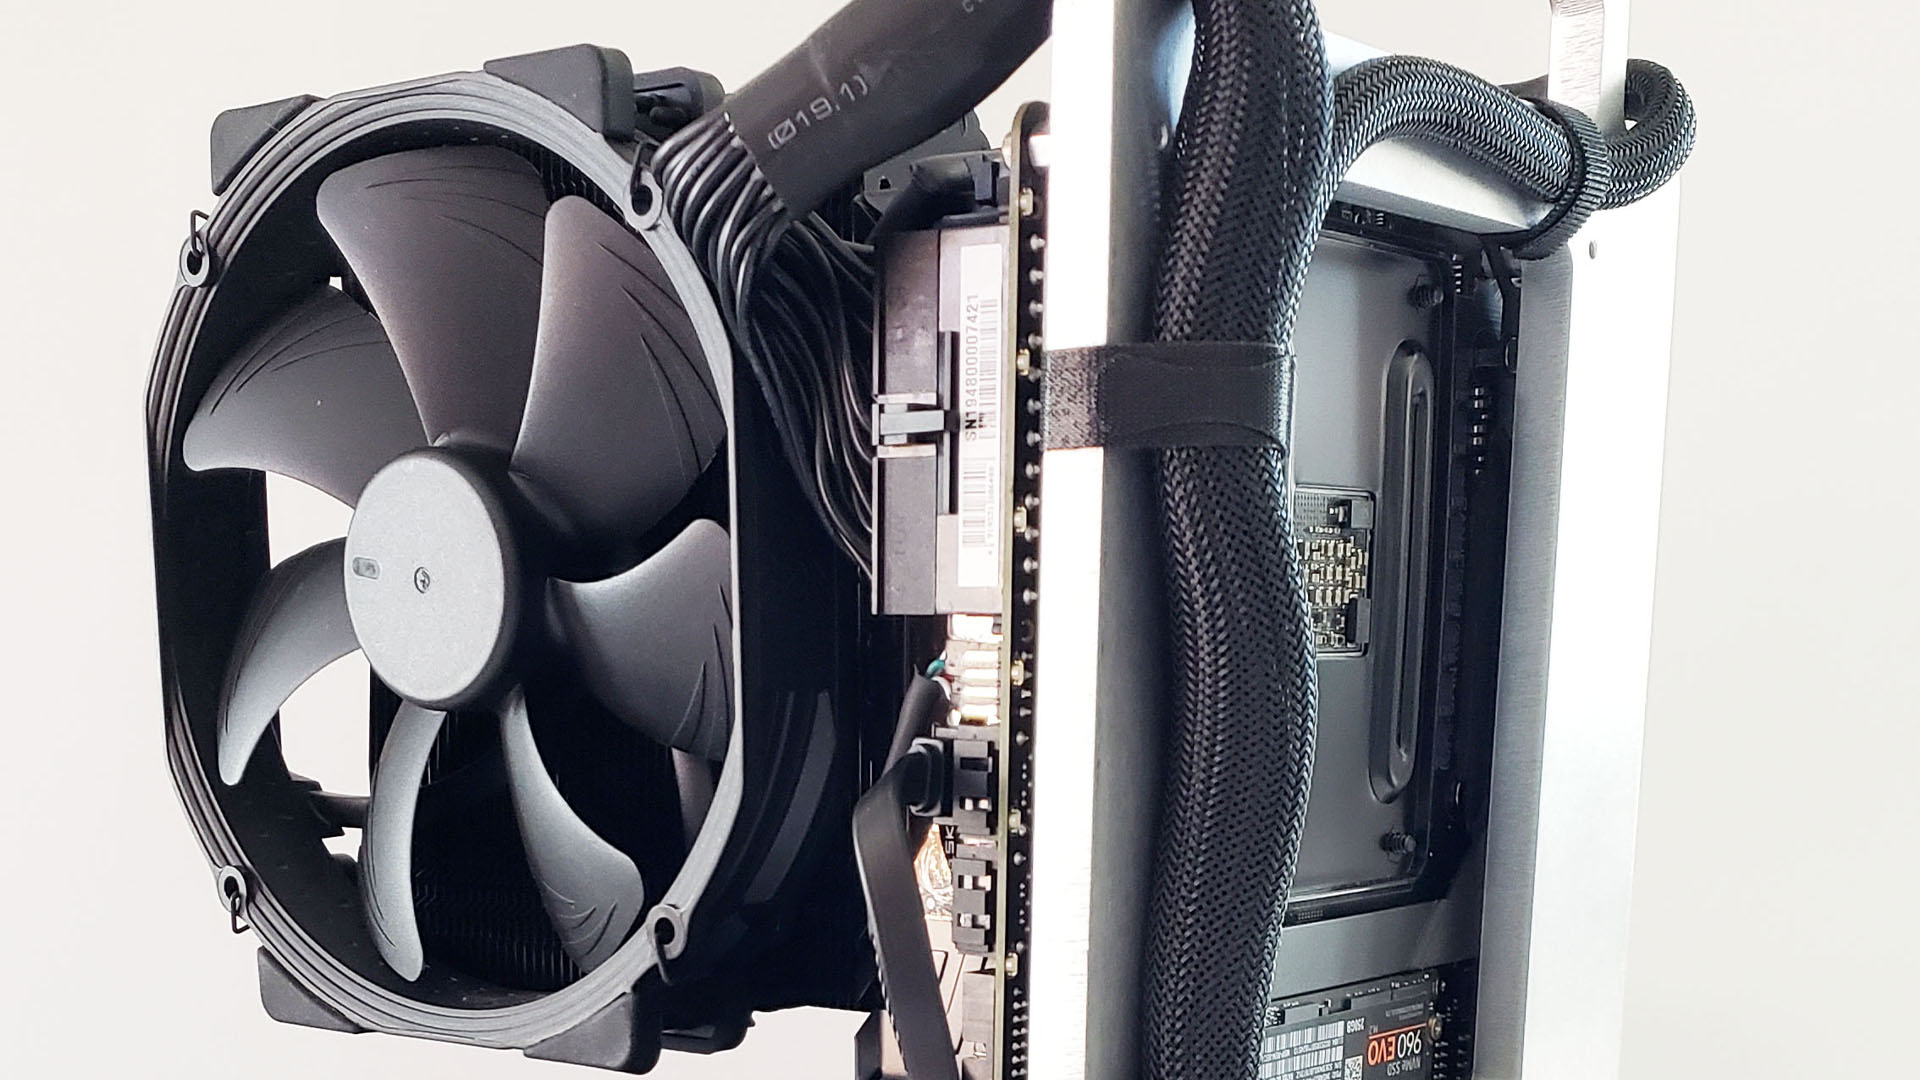
You currently have an air cooler fitted to the CPU, but could it be adjusted to accommodate a closed-loop liquid cooler?
It could easily accommodate a liquid cooling setup. It would just be a matter of making mounts to attach the radiator to the back side or edge of the motherboard plate.
What spec did you choose, and why?
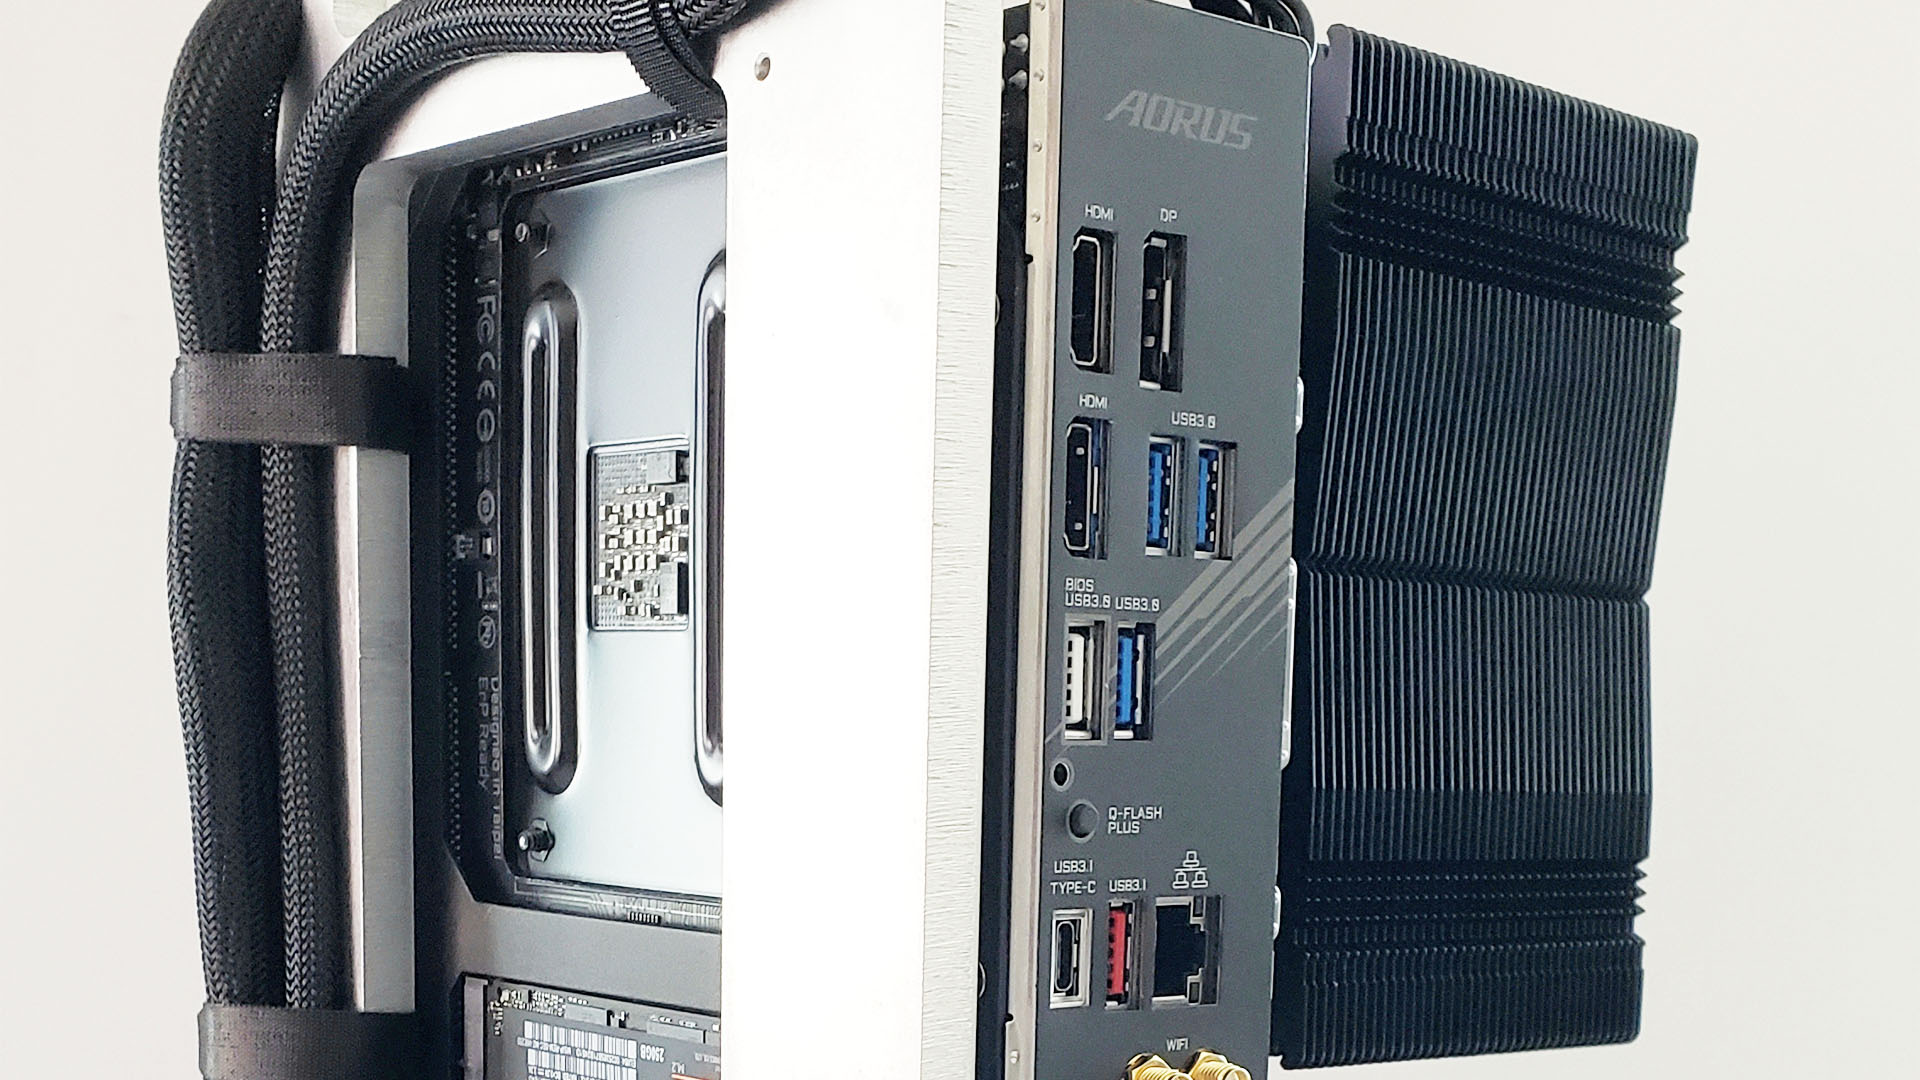
My hardware requirements were mostly based around doing 3D modeling and CAD work. I wanted a mini-ITX motherboard to keep it as small as possible, and the Gigabyte X570 Aorus Pro WiFi was a solid choice for the cost/features (dual M.2 slots and PCI-E 4 support) and it would give me a bit of room to grow. I found a Ryzen 7 2700 on sale at a fantastic price that was too good to pass up.
Graphics was a bit trickier as I wanted a good, small (under 200mm length) 1080p card, and the EVGA GTX 1660 Super really fit the bill in terms of performance for the price. Mini graphics cards were getting a bit hard to find at the time. I knew I wanted to keep my ATX power supply, as SFX power supplies were getting expensive at the time and I thought the size and weight of the ATX PSU balanced out the design better.
Finally, I just love the Noctua NH-D15 CPU cooler (I mean what’s not to love?) and thought it would look really cool having this large, all-black cooler that’s nearly as wide as the complete system. Having all of these similar-width, black components really gave the build a sort of monolithic look that I really liked.
Do you have any trouble with dust ingress?
No trouble at all and it’s super easy to clean. My work area is in my basement and I get very little dust down there.
Did you come across any difficulties?
The most difficult part of the build was drilling some of the holes in the edges of the aluminum plates. I solved this by doing some interesting fixturing with a vice in my drill press. Drilling the large hole for the power switch was a fair bit of work as well. I’ve since redesigned the power supply plate to remedy this, as well as make it easier to fit the graphics card.
How heavy is the final system, and is it easy to carry?
The bare chassis weight is about 3.5lbs (around 1.6kg), so the finished build has a similar weight to a traditional case build. It’s very solid feeling and super easy to carry using the handle.
How long did it take you to complete this build, from start to finish?
The total build time from start to finish was under two weeks.
Is there anything else you want to add about the build process?
Just that overall it’s a very straightforward build that’s easy to modify. A simple vector drawing program, such as Inkscape or Illustrator, is all you need to get parts laser cut. Also, instead of drilling and tapping holes in the edges of the plates, it would be much easier and faster to cut T-shaped slots to fit traditional threaded nuts – this would allow for construction using a much wider variety of materials as well.
Are you completely happy with the end result, or do you wish you’d done some of it differently in retrospect?
I’m pretty happy with how it turned out, but there are definitely some parts I’d do differently, such as sanding and smoothing all the edges and using custom cables to make the wiring look better. I’d also replace the 3D-printed parts with machined parts. I’ve already redesigned the power supply plate and changed how the power button is mounted.
I recently gave my GeForce GTX 1660 Super GPU and ATX power supply to my son to use in his system, and I replaced it with a Radeon Pro workstation card and an SFX power supply, so I think I’d like to revisit it and make it even more compact and cleaner. I’d also like to build a water-cooled version that’s more gaming oriented.
Open frame mini-ITX PC specs
- CPU: AMD Ryzen 7 2700
- GPU: EVGA GeForce GTX 1660 Super
- Storage: Samsung 960 Evo 250GB, Sabrent Rocket 512GB, ADATA 2.5in SU800 1TB
- Memory: Originally G.Skill Flare X 16GB CL16 DDR4 3200MHz, but I’ve now changed it to Crucial Ballistix 32GB CL16 DDR4 3200MHz
- Motherboard: Gigabyte X570 Aorus Pro WiFi
- PSU: EVGA B3 450W modular
- Cooling: Noctua NH-D15
This is a brilliant piece of minimal design Jerome – it just shows what sort of PC power you can get into a tiny footprint if you’re prepared to leave your computer open to the elements. We also love the fact that you’ve made the design files freely downloadable for anyone else to have a go.
This post originally appeared on Custom PC, which has been covering amazing setups for over 20 years and is now part of PCGamesN. Join our nearly 500k member Facebook group to discuss this build.
If you consider yourself to be an expert PC builder, you can submit your own custom PC build to us today for a chance of being featured on PCGamesN in the future.
