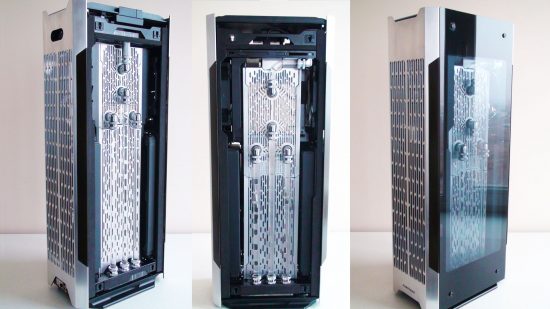
Achieving the symmetry in this incredible water-cooled mini-ITX PC required some serious work. Not only did Ukrainian PC modder Mr. Mass end up designing and creating some amazing custom waterblocks and distro plates for the GPU, CPU, motherboard, and more, but he even built his own CNC machine to do it – now that’s commitment.
Thanks to our rapidly growing PC building Facebook page, we’ve seen many custom gaming PCs, from mods based on existing case designs to scratch PC builds. You can even submit yours for consideration right here. Here we chat to Mr. Mass about how he built this symmetrical mini-ITX rig.
PCGamesN: What is the name of this project?
Mr. Mass: Symmetry Essence. This name was born at the very end of all the work, and I think it accurately reflects the main point of this project.
What inspired you to build this PC, and what look were you hoping to achieve?
I’ve just always enjoyed inventing and creating things. I’m especially inspired if, during the process, I realize that I’m creating a unique product. That’s what happened in this case. Initially, I was attracted to the Phanteks Evolv Shift X case because of its appearance. Its strict, minimalist design, aluminum panels, non-standard layout, and use of glass, all made it look really distinctive.
However, on closer examination, this layout disappointed me, and I asked several questions. Why does such a visually tall case only have room for one 240/280mm radiator? Why is there only one fan at the top? Why are there completely blank panels with air intake coming through thin slits? I wasn’t willing to put up with these aspects on my PC. Plus, I’d been wanting to build a custom water-cooled machine for a long time.
How did you plan out this build?
I usually start all my projects with a 3D model and then proceed to practical realization when the whole model has been created with the smallest details. However, with this case I decided to try a different method.
Firstly, I had to decide exactly how I could add a second radiator and a second fan to the case. This part was solved quite simply. I decided to replace the standard SFX power supply with a 1U-size server power supply. Since I wasn’t planning on using 2.5-inch drives in this project, it was possible to use their space for the second fan.
At this stage, I realized that the location of radiators and fans was strictly symmetrical in the case, and I wanted to support this symmetry throughout the build, including the location of the tubes. I decided to start with the graphics card, specifically with the PCB layout and the locations of the elements.
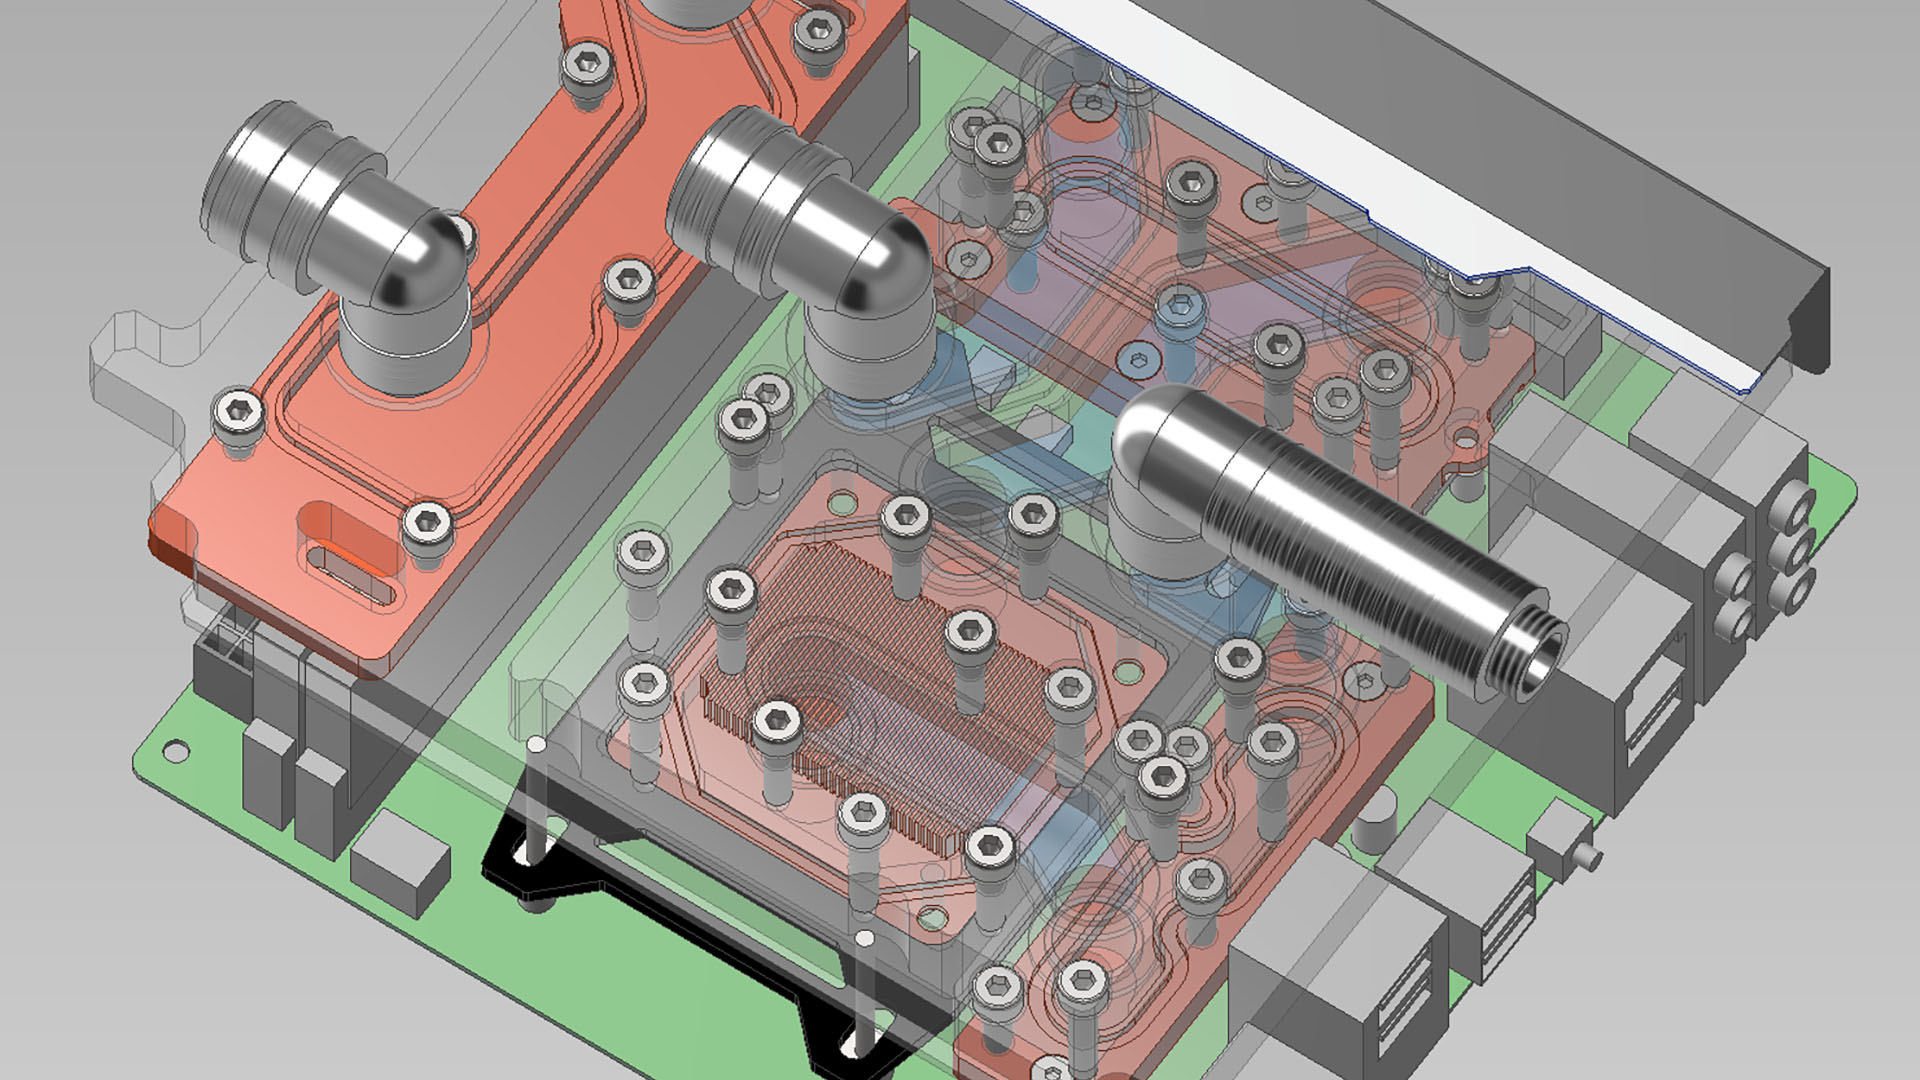
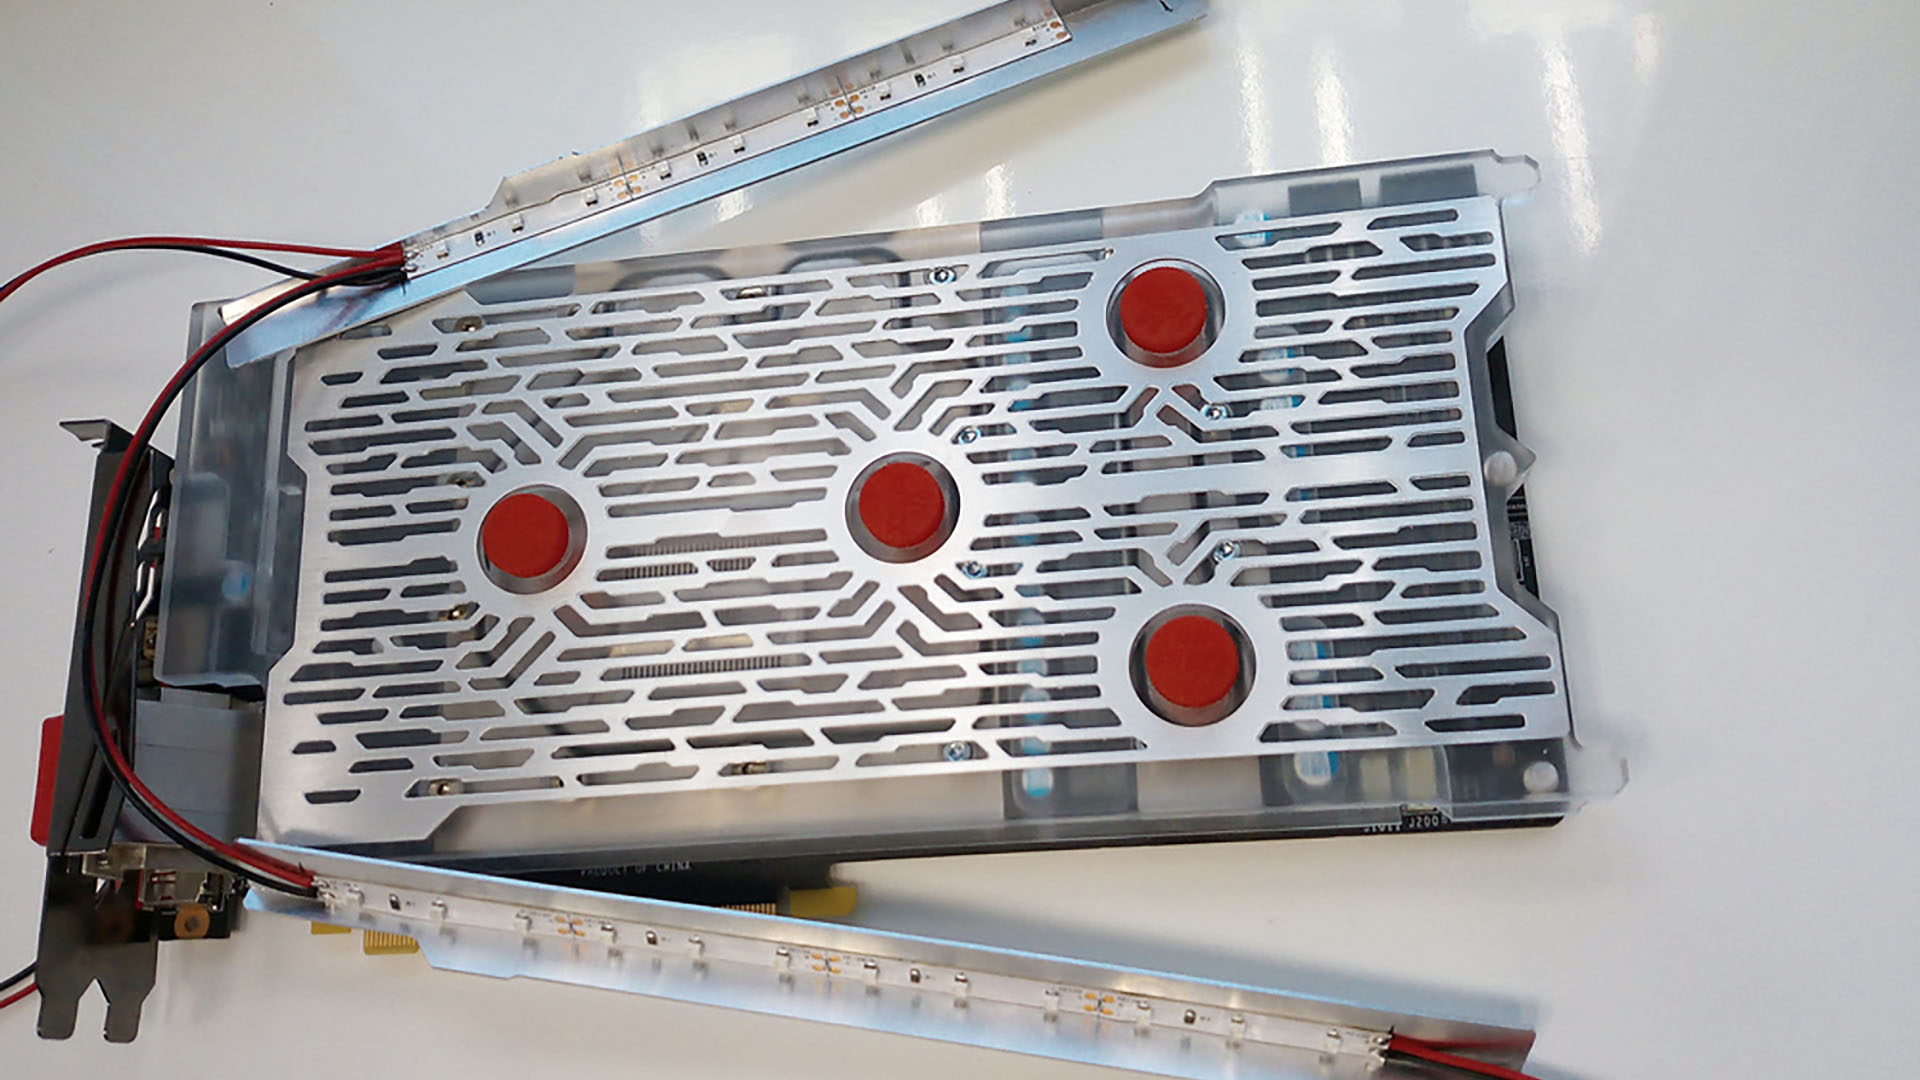
After this research, I realized that it would be possible to make two separate waterbloone for the GPU and memory, and one for the VRM area. This would allow me to make a completely symmetrical tube layout, at least on one side. However, I needed a CNC machine to do it, and the path to my machine wasn’t an easy one.
I had wanted to build my own CNC machine for a long time, and for several years I had been buying suitable parts, mostly from used machines. I made designs of different CNC machine constructions and figured out how it all could be assembled. When the number of these parts reached a critical mass, the machine was born. There was nothing special about it, but it just expanded my capabilities in a grandiose way.
After I got comfortable with it and made a few simple projects, I decided I could get back to this build. It was my first time doing most of the work involved – machining acrylic and aluminum on the outer panels, and very soft aluminum for the inner panels, plus copper for the cold plates – I had to learn how to work with all these materials from the beginning.
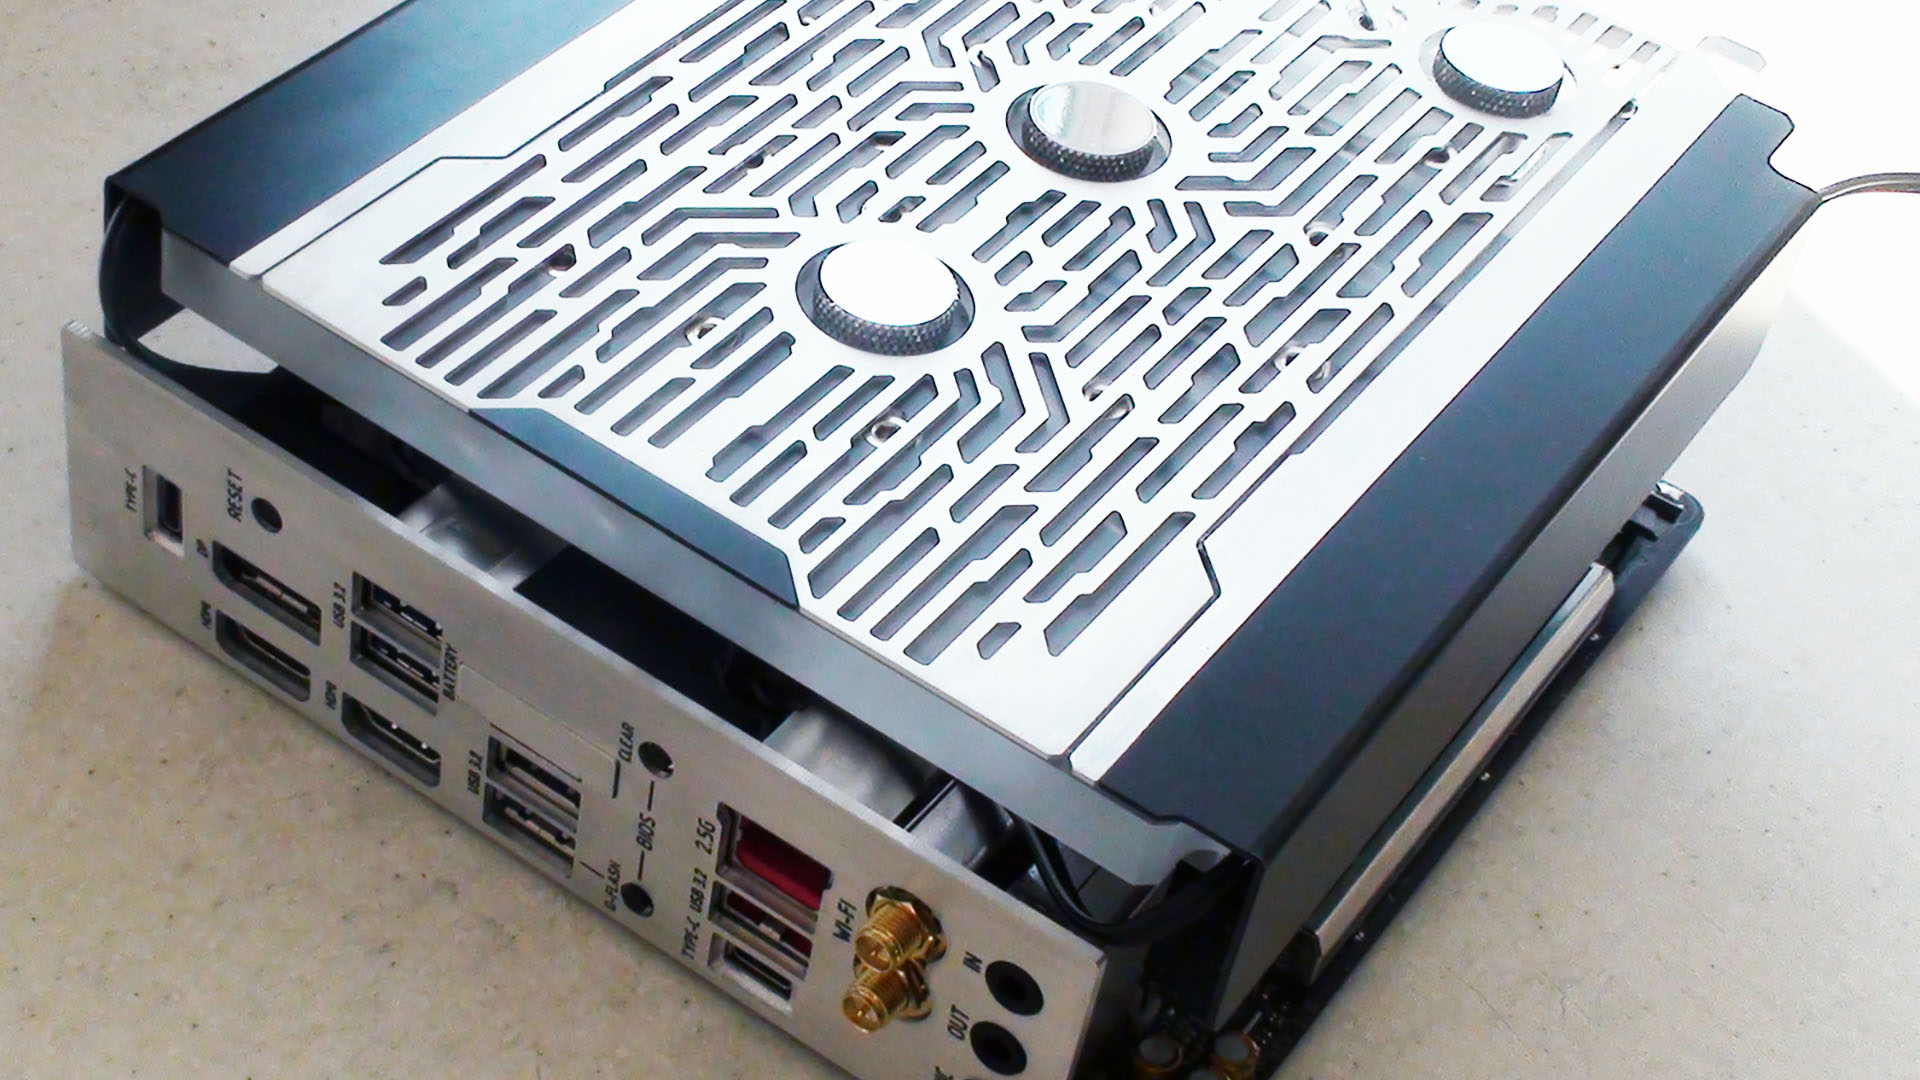
Despite the outward simplicity of the PC’s design, it turned out to be very complicated in many places. For example, to make a symmetrical waterblock for the motherboard, I had to design and fabricate all the cold plates, perform the electrochemical nickel plating, and add a three-layer distro plate on top, plus aluminum covers, and internal UV LED string. There’s also a custom I/O panel including external battery access and so on.
How long did it take you to make this Symmetry Essence, from start to finish?
That’s a complicated question. If you count from the time I bought this case to the completion of the finished project, it took about five years. However, I postponed work on the build for a long gap in between, as I’d underestimated the amount of work involved. If you count the work itself, it took a little more than a year. It took many hundreds of hours.
Did you come across any difficulties during the build process?
Perhaps the most difficult part was putting everything together. Despite the relatively large size of the case itself (170 x 650 x 274mm) the internal layout turned out to be very tight. Most of the gaps between the various components measured, on average, 1mm. Designing such a complex assembly was a big challenge for me.
Also, I thought of new ideas during the process, which made an already difficult job more difficult. For example, after the graphics card and the decorative plate were placed on one side, and the motherboard on the other, there wasn’t much space for a pump and reservoir. A lot of space was already occupied by two radiators, the PSU, the motherboard, and the glass of the case itself. Even a DDC pump wouldn’t fit in this space, so a stock reservoir was out of the question.
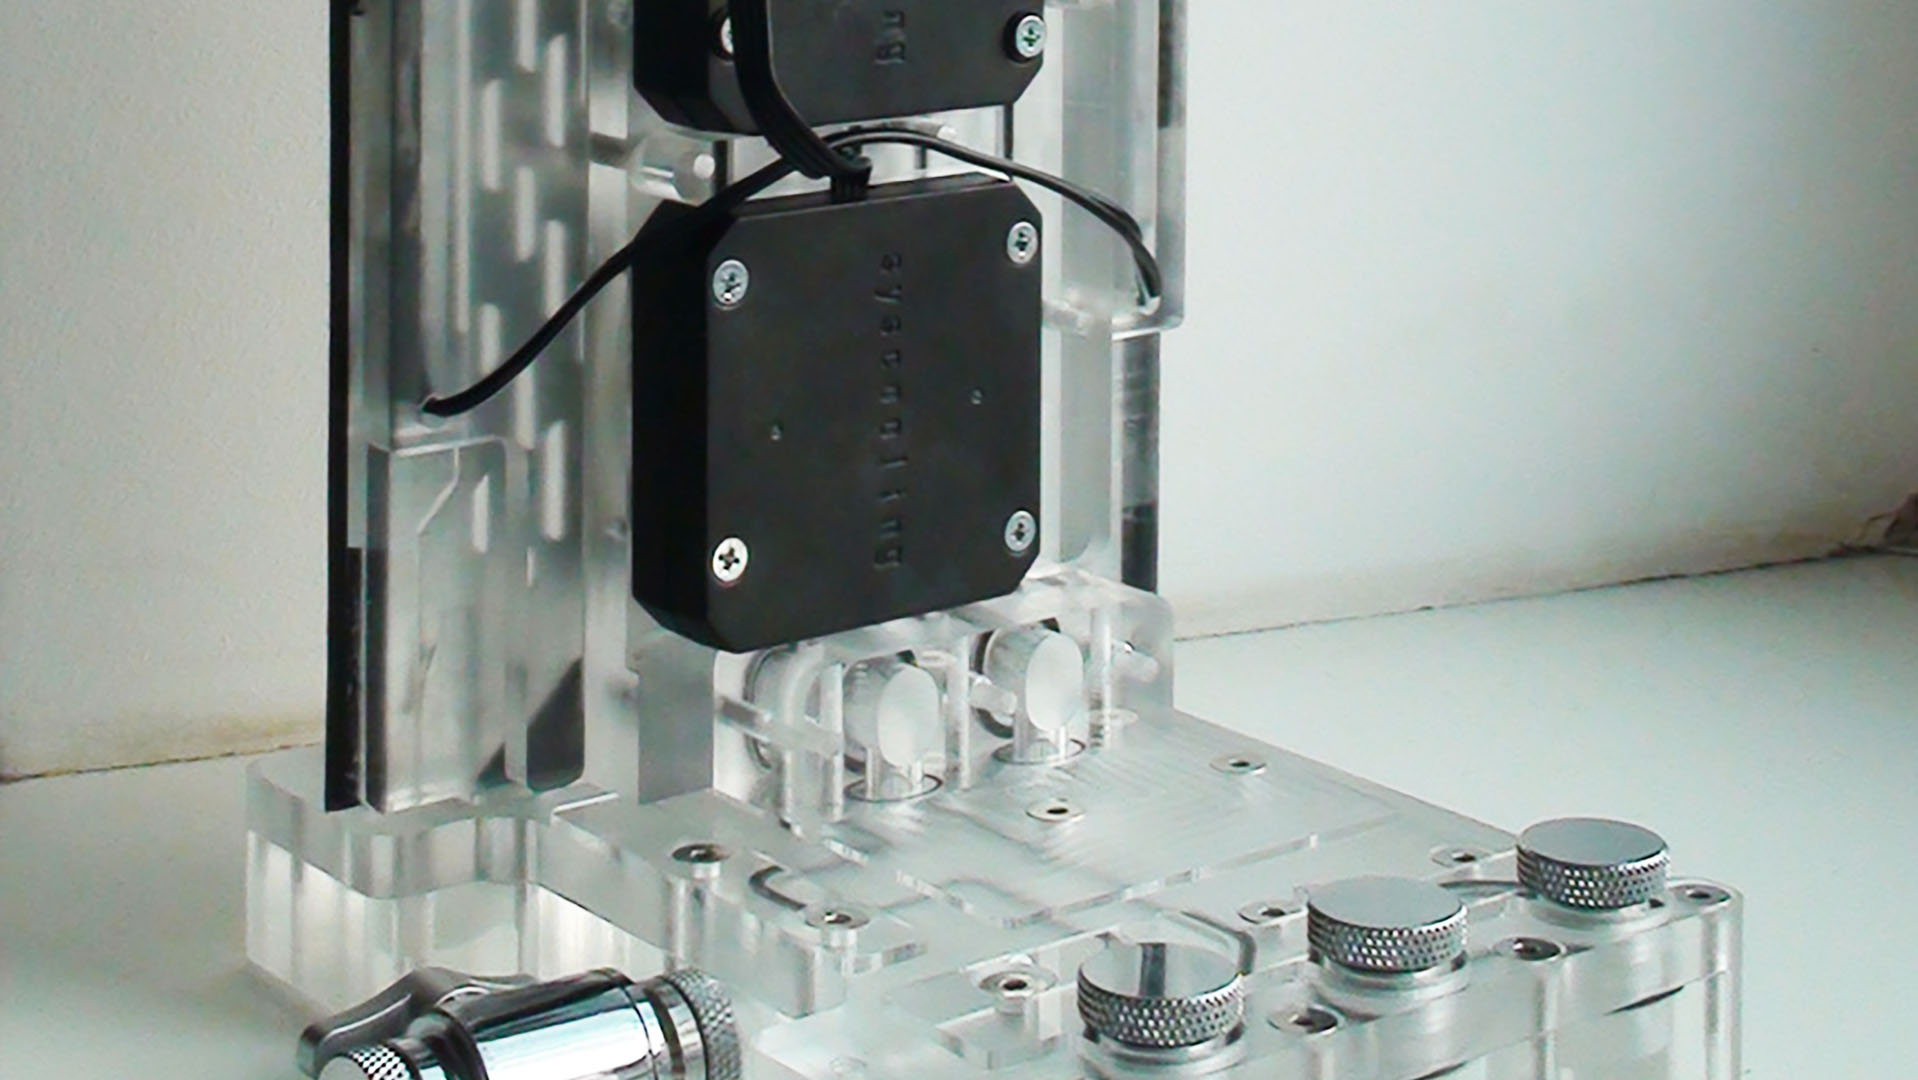
After doing a little research, I found some compact P60A pumps which, due to their smaller size, were able to be placed in the PC in two pieces. The distro plate that connects one side of the case to the other was placed at the bottom, but it was difficult to measure accurately in this place, so I came up with a design that incorporates the bottom distro plate, a reservoir, and an adjustable dual-top pump.
The point of the dual-top pump is that these two parts can be moved relative to each other without losing tightness. This allowed me to keep the right dimensions and maintain the integrity of the whole assembly – even a 1mm gap ruins the overall appearance.
Are you completely happy with the end result, or do you wish you’d done some of it differently in retrospect?
Despite the huge amount of time I spent on this project, I was very satisfied with the result, although this job was extremely challenging for me. All the work on this case was done by me personally without any outsourcing.
At the beginning, I only had a very rough idea of how the end result would look. However, in the process of working, and gradually mastering new technologies and materials, I came to understand what I could do. Without this understanding, I would not have been able to make a PC with this complexity from the very beginning. I have gathered tons of experience and skills on this path, and I hope that I can make the next project even more interesting – I already have a few thoughts about it.
Symmetry Essence specs
- CPU: AMD Ryzen 7 5800X overclocked to 4850 MHz
- GPU: MSI Gaming X GeForce GTX 1070
- Case: Phanteks Evolv Shift X Black
- Storage: 2 x 1TB Kioxia-Exceria M.2 SSD
- Memory: 32GB (2 x 16GB) Crucial Ballistix DDR4 3000MHz, overclocked to 3800MHz, with 16-19-16-35-1T timings
- Motherboard: Gigabyte B550I Aorus Pro AX
- PSU: 650W Supermicro-PWS-655P-1HS 80+ Platinum
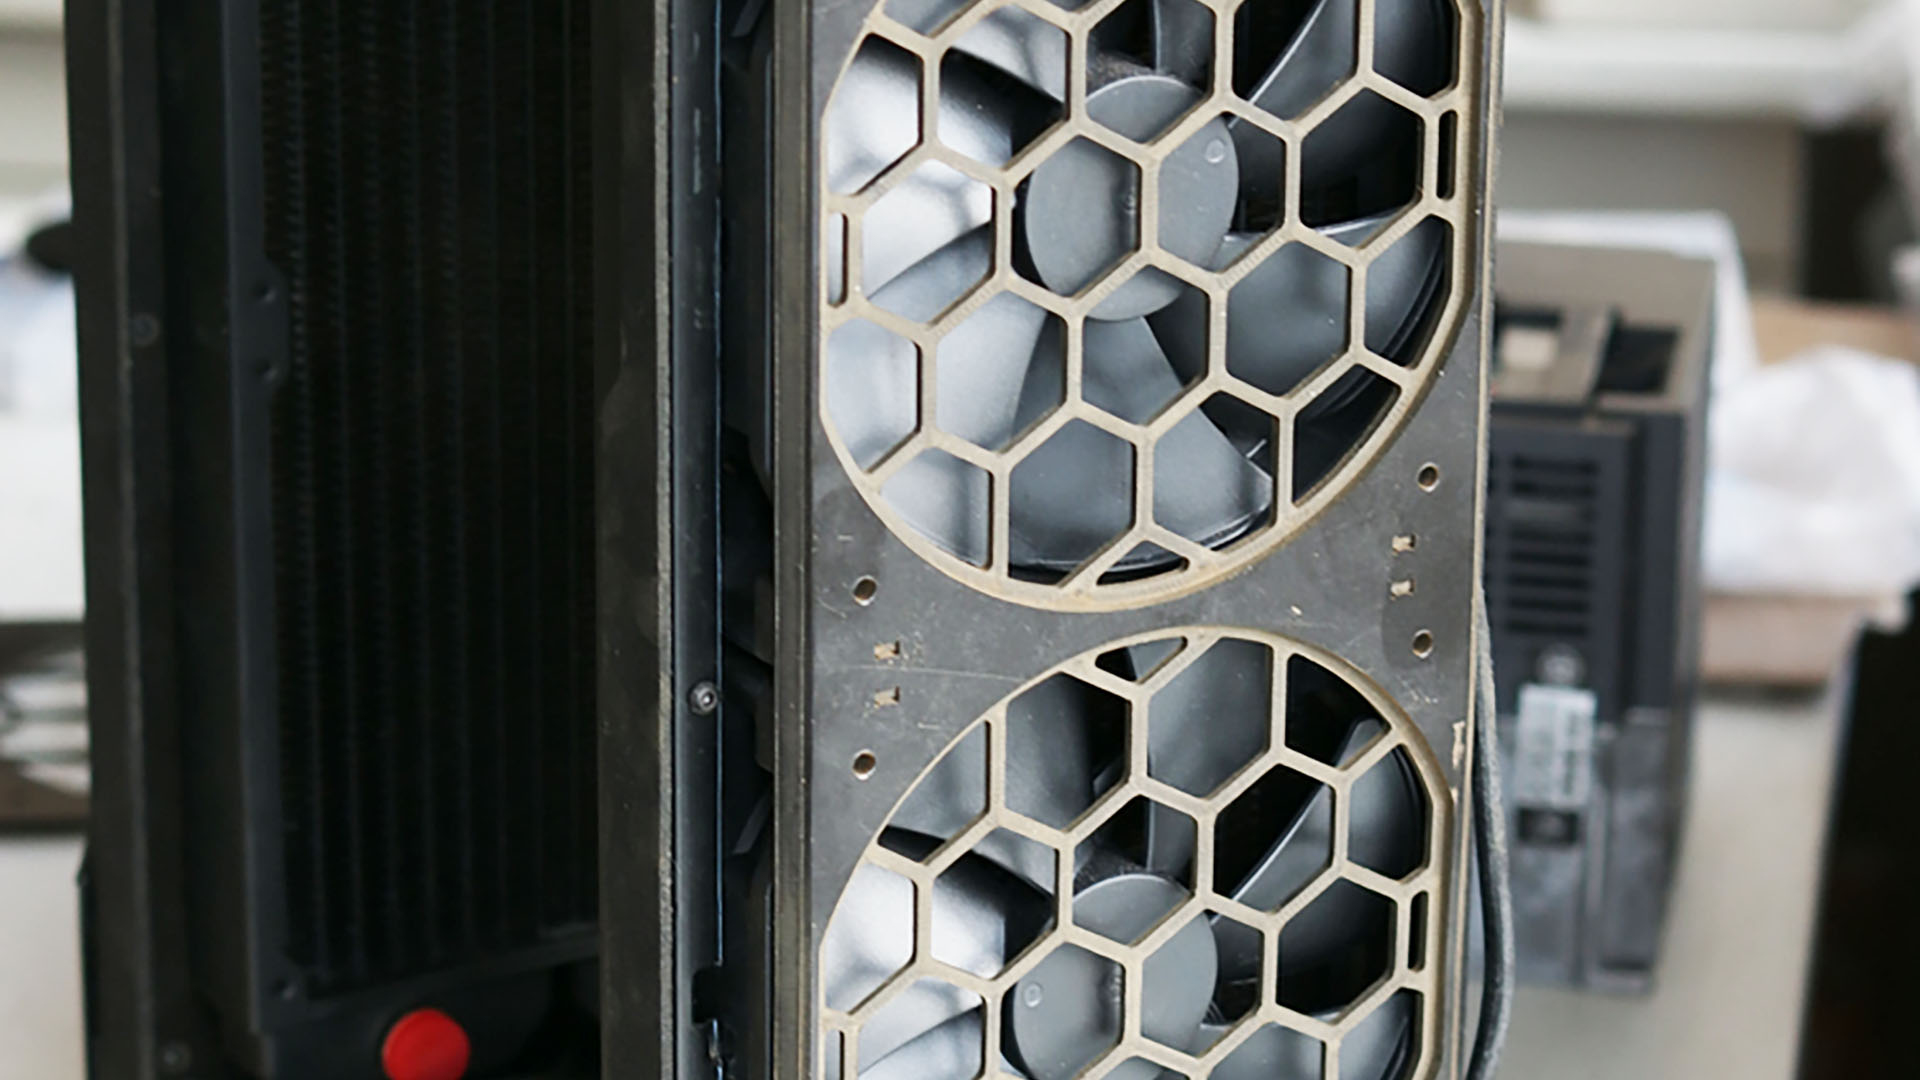
- Cooling: 2 x 280mm radiators with 4 x Phanteks F140MP fans (push), 2 x Phanteks F140MP exhaust fans, 2 x P60A pumps with custom dual-top and reservoir, custom CPU, RAM, M.2, chipset, and VRM waterblocks with multi-layer built-in distro plates, custom GPU waterblocks, custom bottom distro plate, custom upper distro plate with temp and flow meter
We love your commitment to making the build of your dreams, Mr. Mass – we’re in awe of the fact that you even made your own CNC machine so you could fabricate the parts, and the custom distro plates look amazing. The result is a really clean build in a tight form factor, with beautiful symmetry.
This post originally appeared on Custom PC, which has been covering amazing setups for over 20 years and is now part of PCGamesN. Join our 500k member Facebook group to discuss this build.
If you consider yourself to be an expert PC builder, you can submit your own custom PC build to us today for a chance of being featured on PCGamesN in the future.
