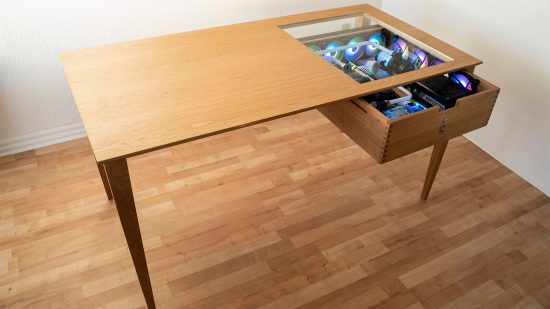
This wooden desk PC was built from scratch after its creator built a similar design for his carpentry course. Not only is it a brilliant desk in itself, but it also features a full water-cooled gaming PC in its drawer. The first design was so well received that he’s back with a follow-up version that he’s hoping to start selling, and it’s version 2.0 that we’re looking at here.
Thanks to our rapidly growing PC building Facebook page, we’ve seen many custom gaming PCs, from mods based on existing case designs to scratch PC builds. You can even submit yours for consideration right here. In this article, carpenter Mads Alexander takes me through the creation of his water-cooled wooden desk PC. Over to you, Mads.
This PC-in-a-drawer desktop carpentry project started in the fall of 2019 during my training to become a carpenter. I thought it would be awesome to use wood to build a computer case, or in some way combine the woodworking skills I was learning with the art of computer modding.
For my final exam project, I came up with the concept of a computer built into a desk. However, rather than taking the traditional approach with desk PCs, where the PC is just built into the desktop itself and topped by a large sheet of glass – making for a very thick desk – I decided to build the PC into a drawer.
What’s more, I decided to do it in such a way that the drawer looks like it’s hovering under the desktop, and when pulled out, a full water-cooled computer just appears. I also wanted the drawer to be openable while the PC was still running, so you could see all the lights flashing, fans blowing and coolant flowing in the tubes.
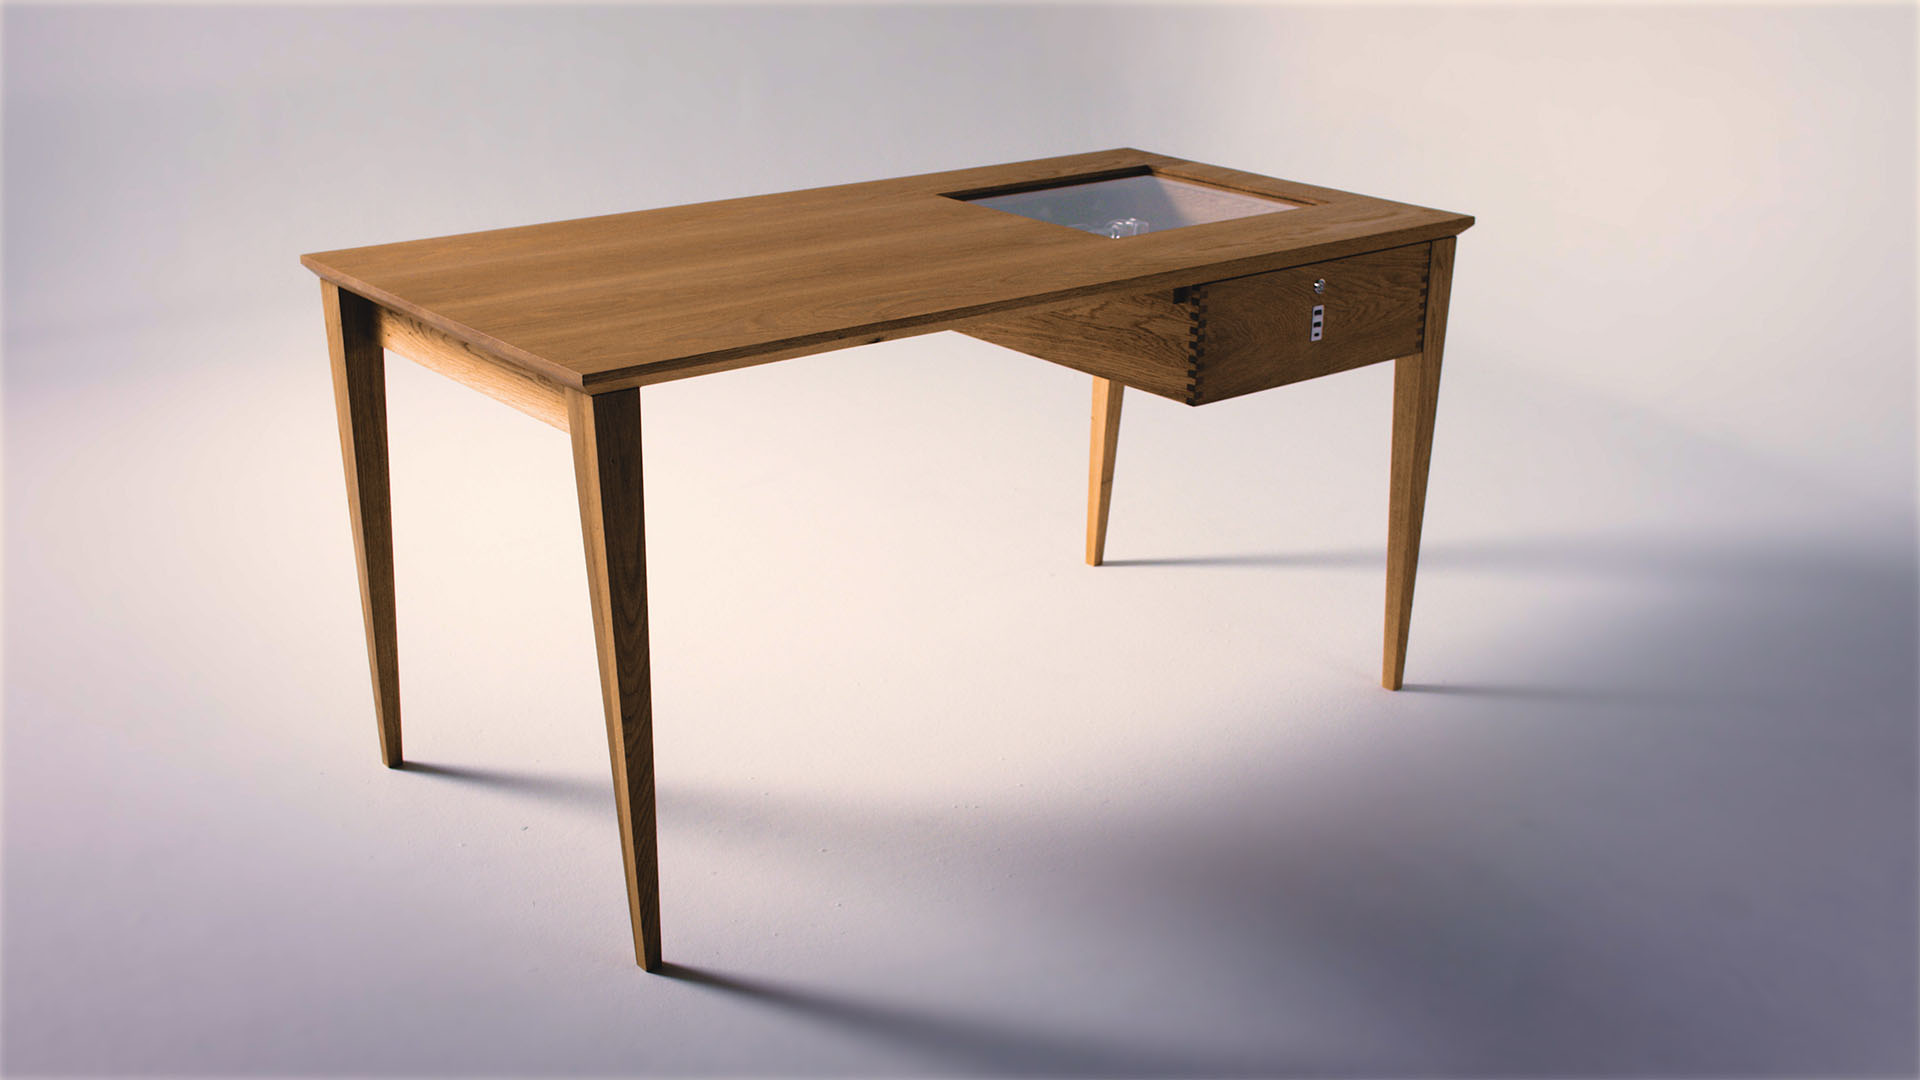
I got the green light from my teachers, so I began designing. It didn’t take more than a couple of hours to make a rough sketch, and from there I made the 3D drawings in Inventor and ordered all the components.
What I particularly liked about this project was that it combined three aspects that generally shouldn’t be combined. Water and wood don’t belong together, at least when it comes to fine furniture. Water and electronics also only mix well in very limited circumstances, and computers and wood aren’t often paired due to the poor thermal conductivity of wood, making it harder to keep your PC’s thermals under control.
I wanted to combine these elements in an elegant way that’s both beautiful and functional. It felt to me that no one had quite achieved this combination before, so it was a unique challenge. I’ve seen lots of people building computers into boxes and lots of awesome desktops, but I haven’t seen anyone combine all three parts at once, and in a sleek Nordic style.
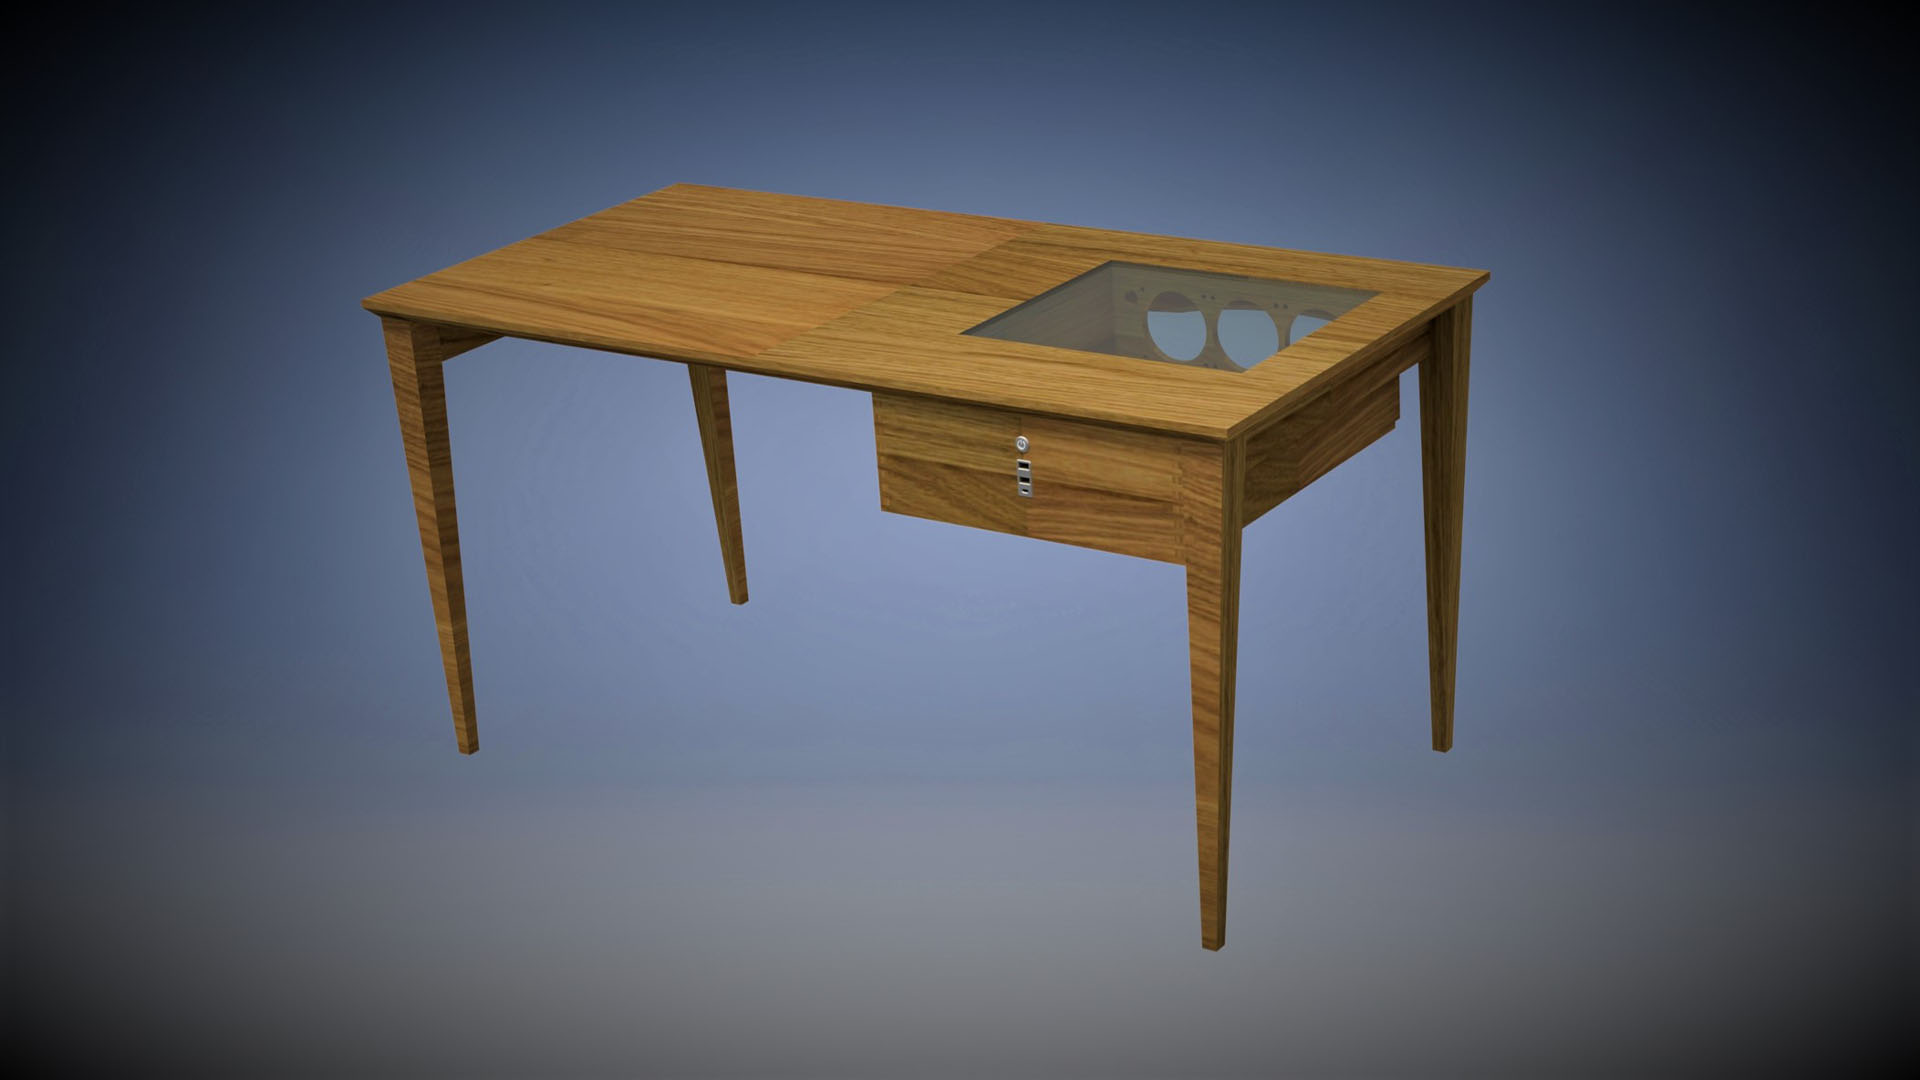
The first attempt at making a wood desk PC
At this point, I had only a few weeks of experience with woodworking, so my teachers helped me out a lot, but in the end, I did almost all the work myself. I came up with the idea, made the drawings from scratch, bought all the hardware with my own money, milled every hole by hand, and made sure everything was just right – with such a clean design, it had to be perfect or imperfections would be obvious.
As an example of the precision required, the chamfer around the edge of the table sits at the same three-degree angle as on the legs. In turn, those angles then determine where the drawer needs to sit, which determines if the glass is square with the drawer and so on. One wrong move and all those angles and straight lines don’t match up properly.
A part of the requirement for my course was that the table was built out of chipboard with a veneered top, which actually proved to be a problem in terms of the strength of the table. However, the oak – a classic choice for Scandinavian design – was the perfect fit for the clean look I was looking to achieve. It also helped that I love the beautiful golden-brown color of this wood. In my opinion, it just looks stunning!
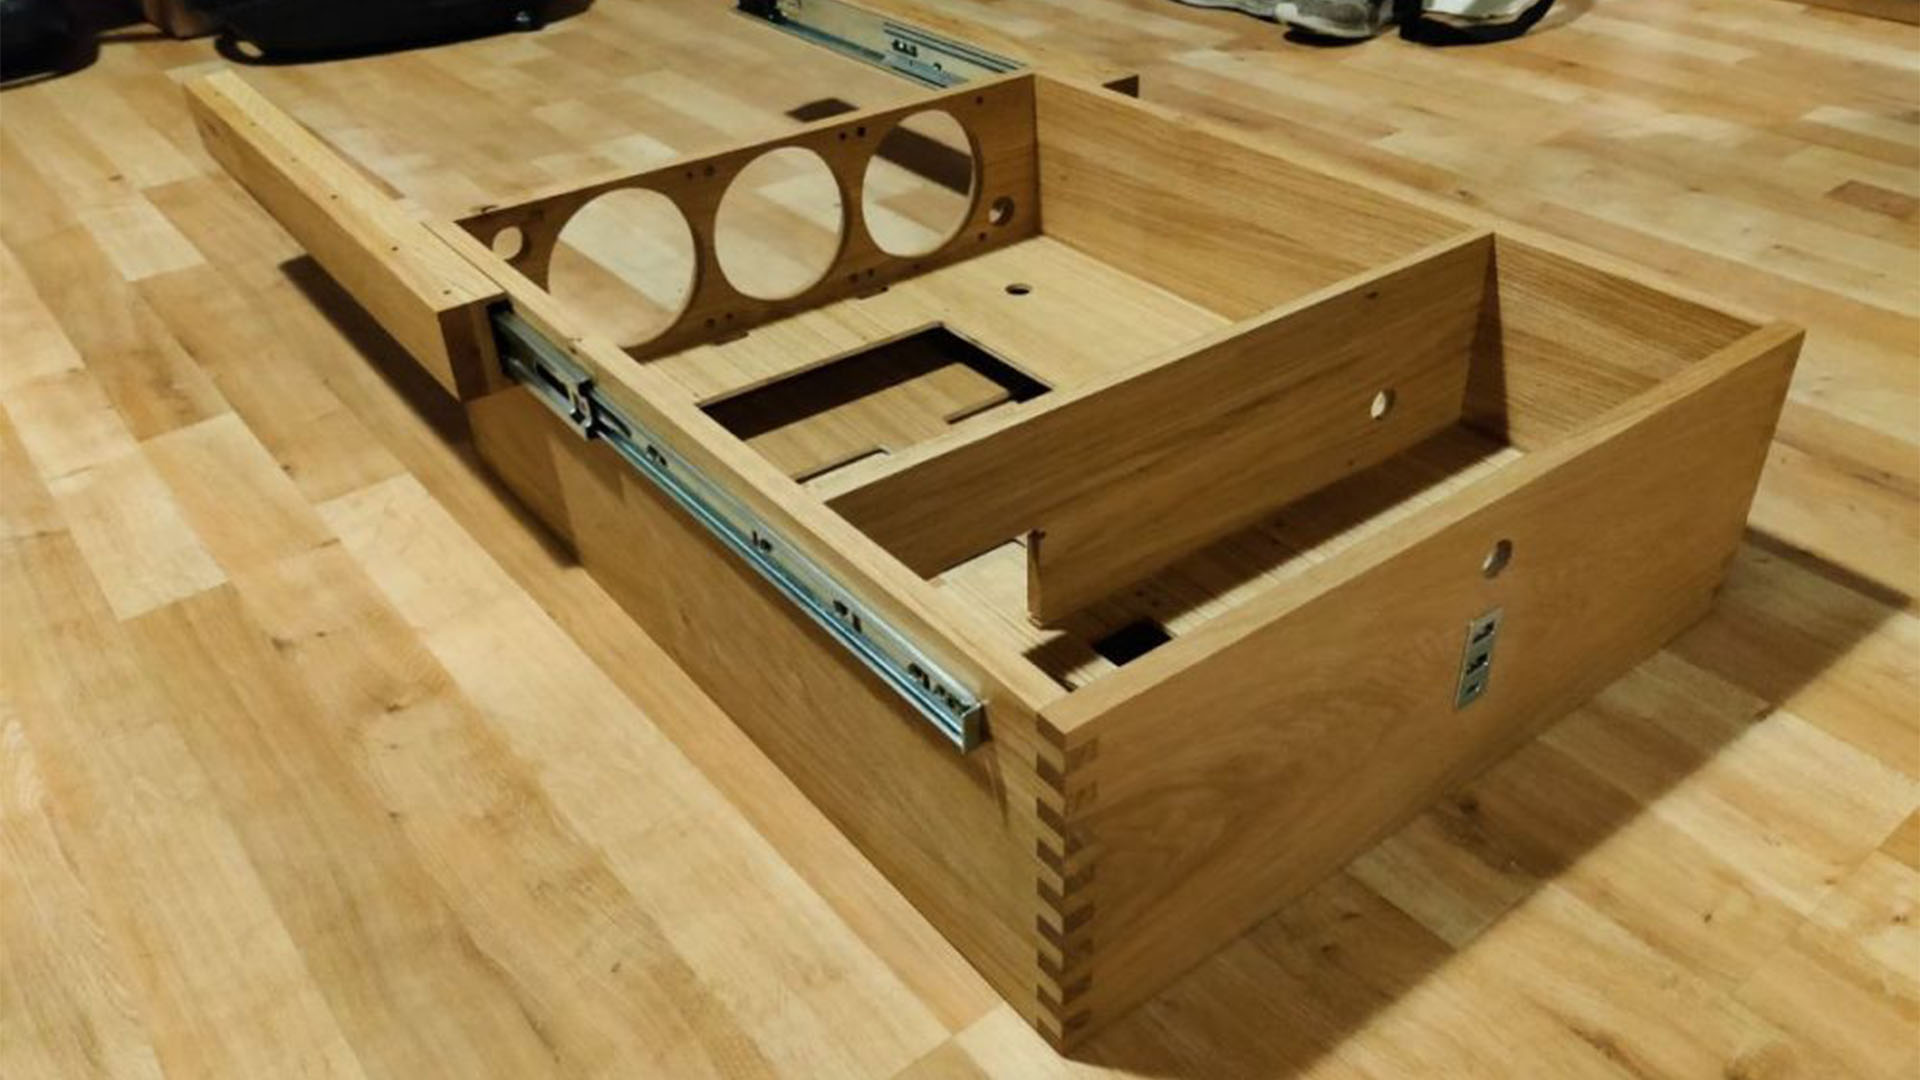
The overall measurements of the desk are 150 x 75 x 75cm, which is a fairly standard single desk size. Going larger would have provided more room for all the gear, but would make the build that much more difficult. Meanwhile, going any smaller would make the desk too cramped.
The hardest part of this build by far was the drawer, figuring out how to mill all the holes and making sure they were made cleanly without any burn marks. I used solid oak for the drawer, which helped a lot, as its strength meant the drawer panels could still be quite thin and filled with holes, while still maintaining their structural integrity. However, its hardness does make it more difficult to work with.
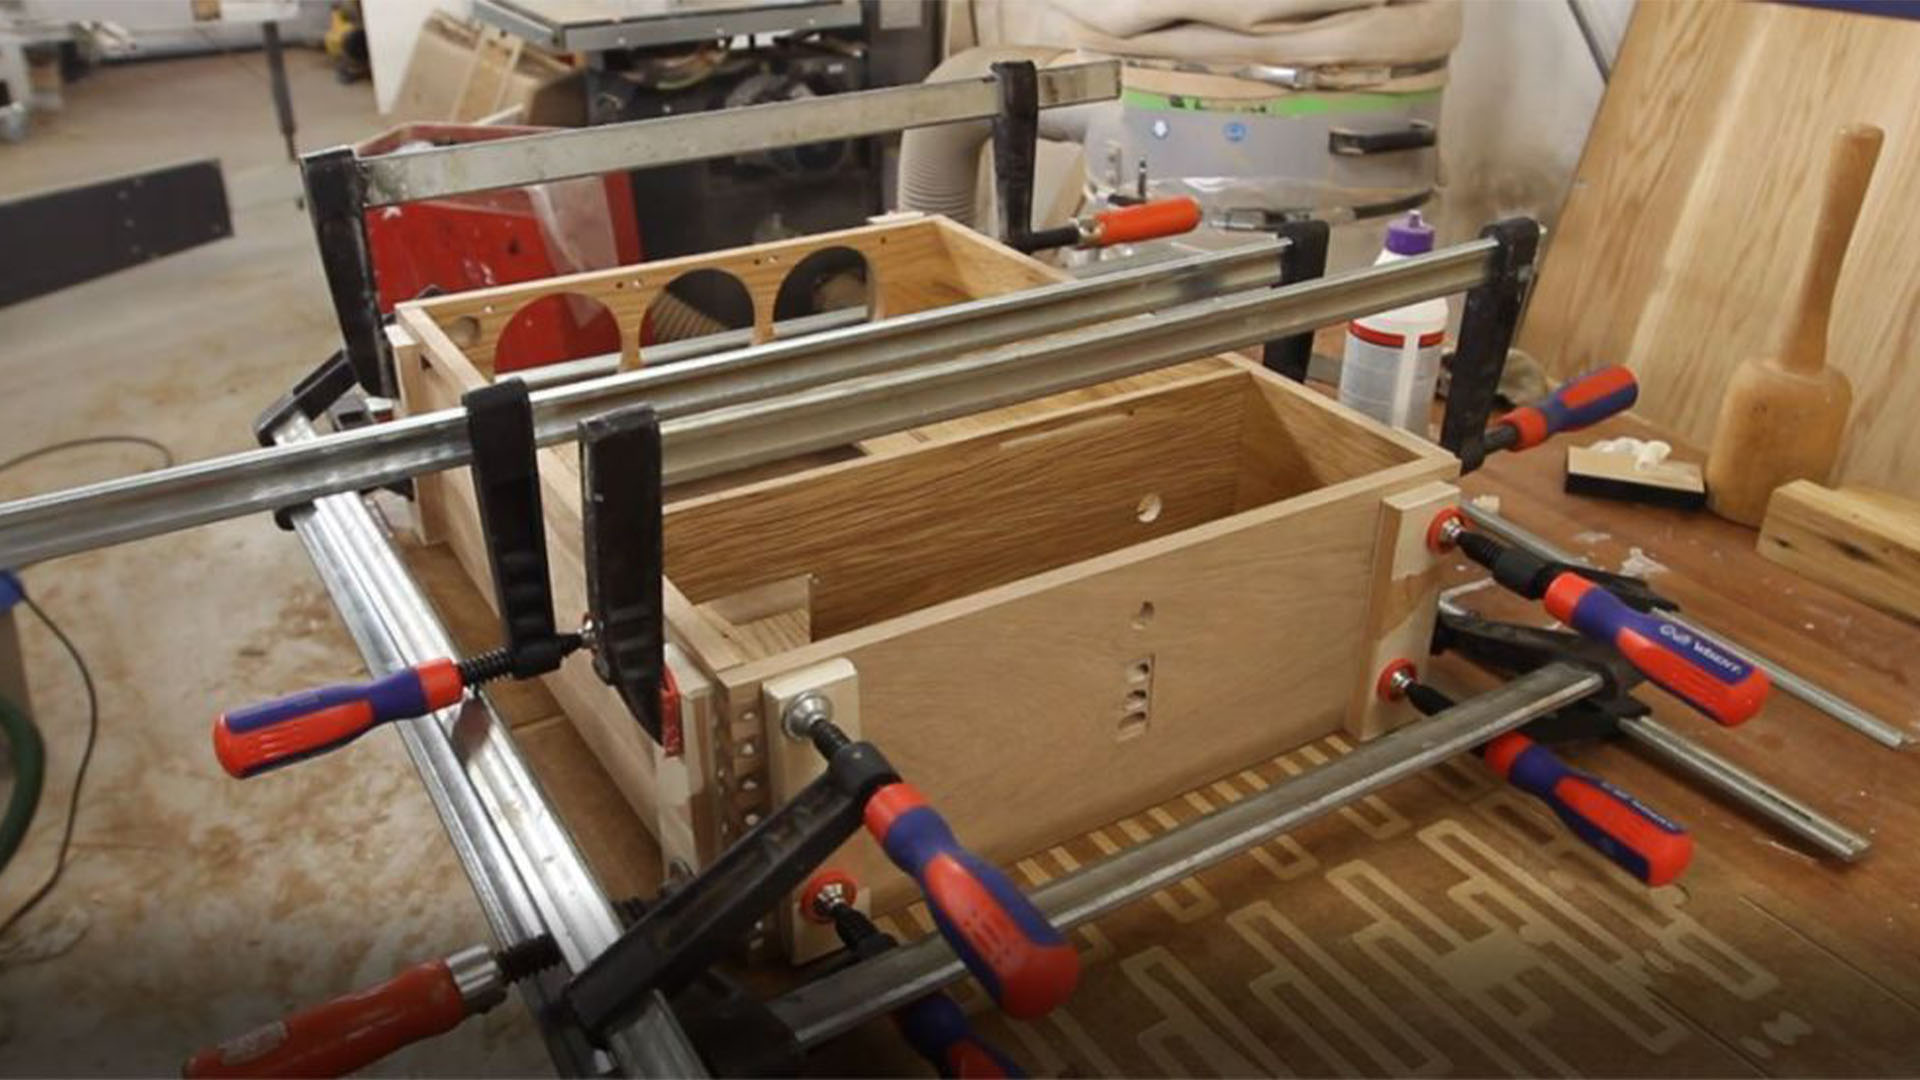
Overall, the desk, drawer, and PC came out looking stunning, in my humble opinion. I loved every aspect of it. I was also very happy to receive a 12/12 grade in my exam.
As I was building the desk, I filmed the process and, once it was finished, I put together a video and uploaded it to YouTube. The extra work of filming was a major headache but it was worth it, as that video received over two million views!
Because of this success, I immediately started working on a second version of the desk to improve its design, and with the hope that I could actually manufacture and sell the new version. This was the beginning of MA Modified, the modding company and YouTube channel.
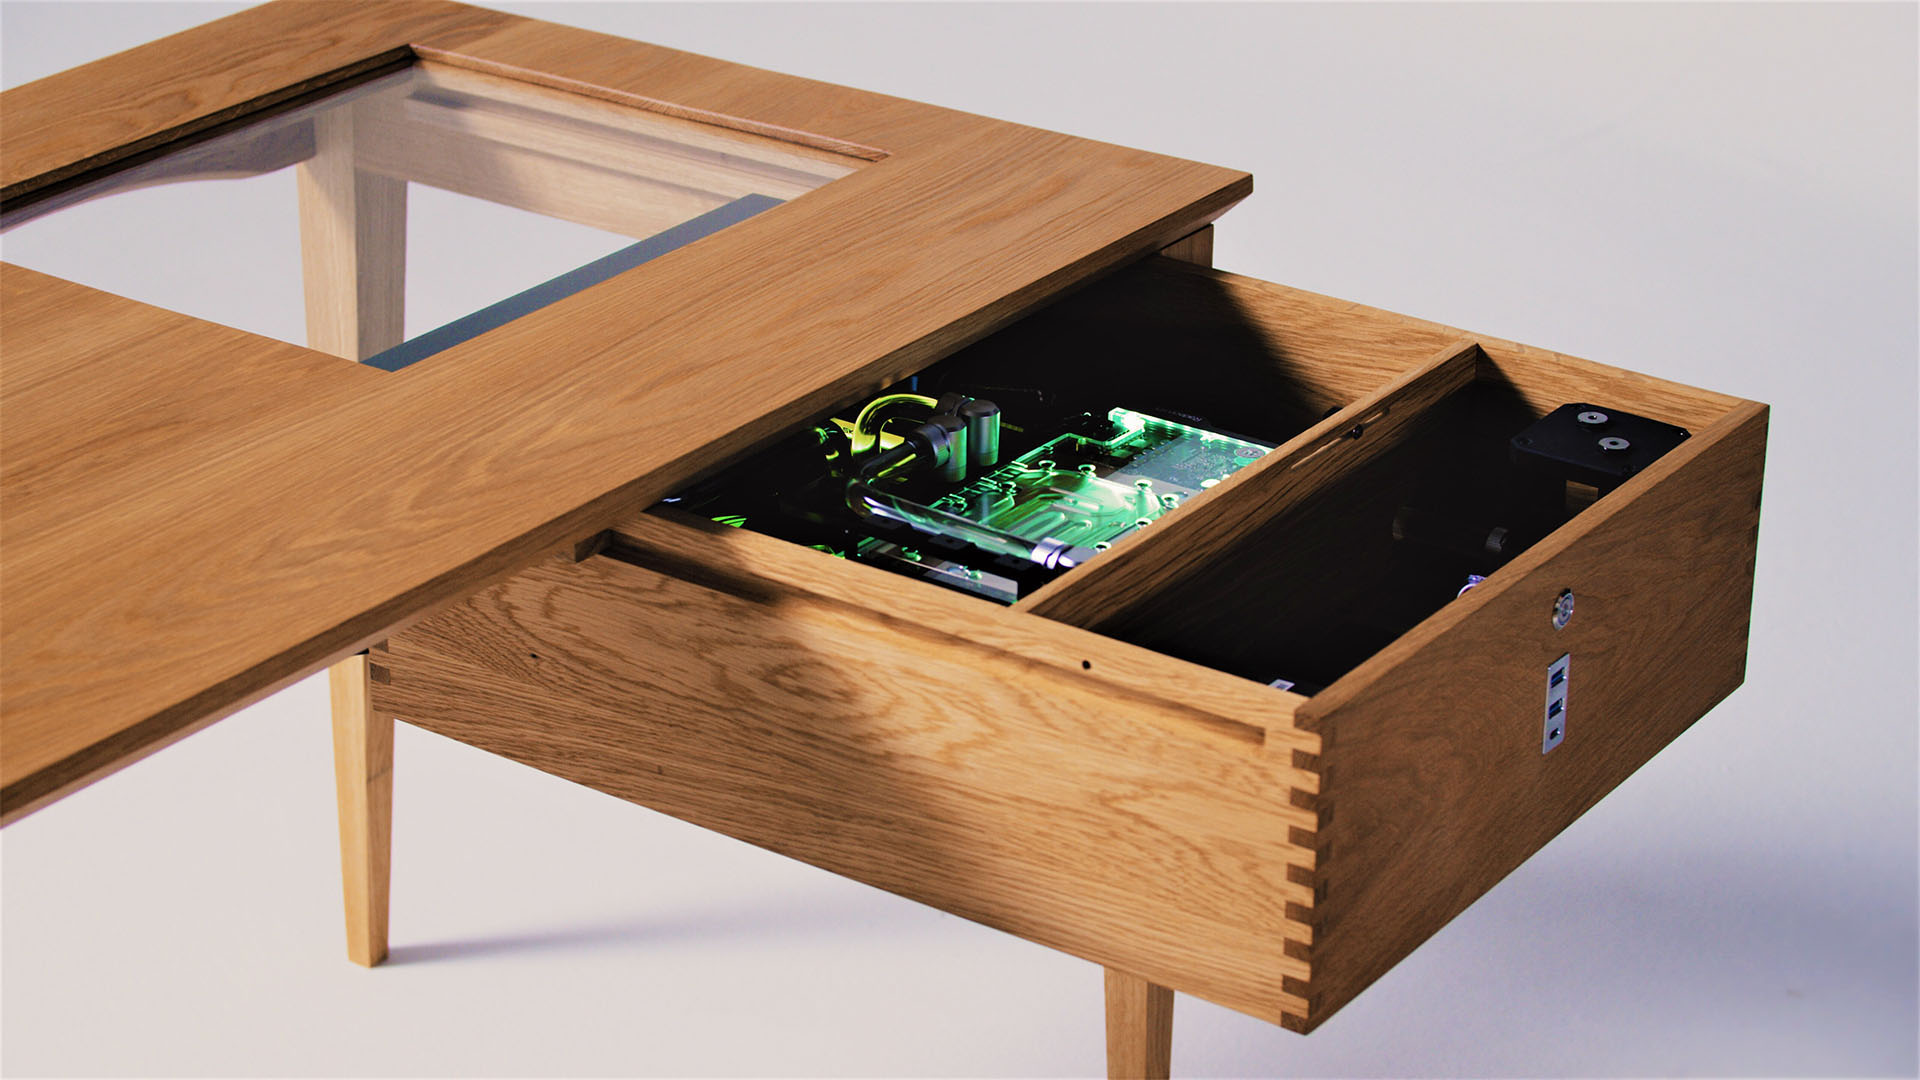
The second wood desk PC
I spent the next eight months working solely on developing the new version of the desk, working with skilled people in Denmark who excel at water cooling and high-end computer construction, as well as people who have their own companies and experience of all the small details needed to turn an idea into a business.
We sat down to examine my concept, thinking about how we could optimize it, and one of the first jobs was to reinforce the desk. The simple addition of a single cross brace fixed several problems, adding support for the desktop, as well as stabilizing the whole unit.
Next, we removed some fans. There were eight at the start, but we got this number down to just three in the back of the drawer. They were all arranged as exhaust fans, with no intake fans. Instead, air is drawn in through 12 holes in the bottom of the drawer. The holes are covered with dust filters to keep the insides of the PC clean.
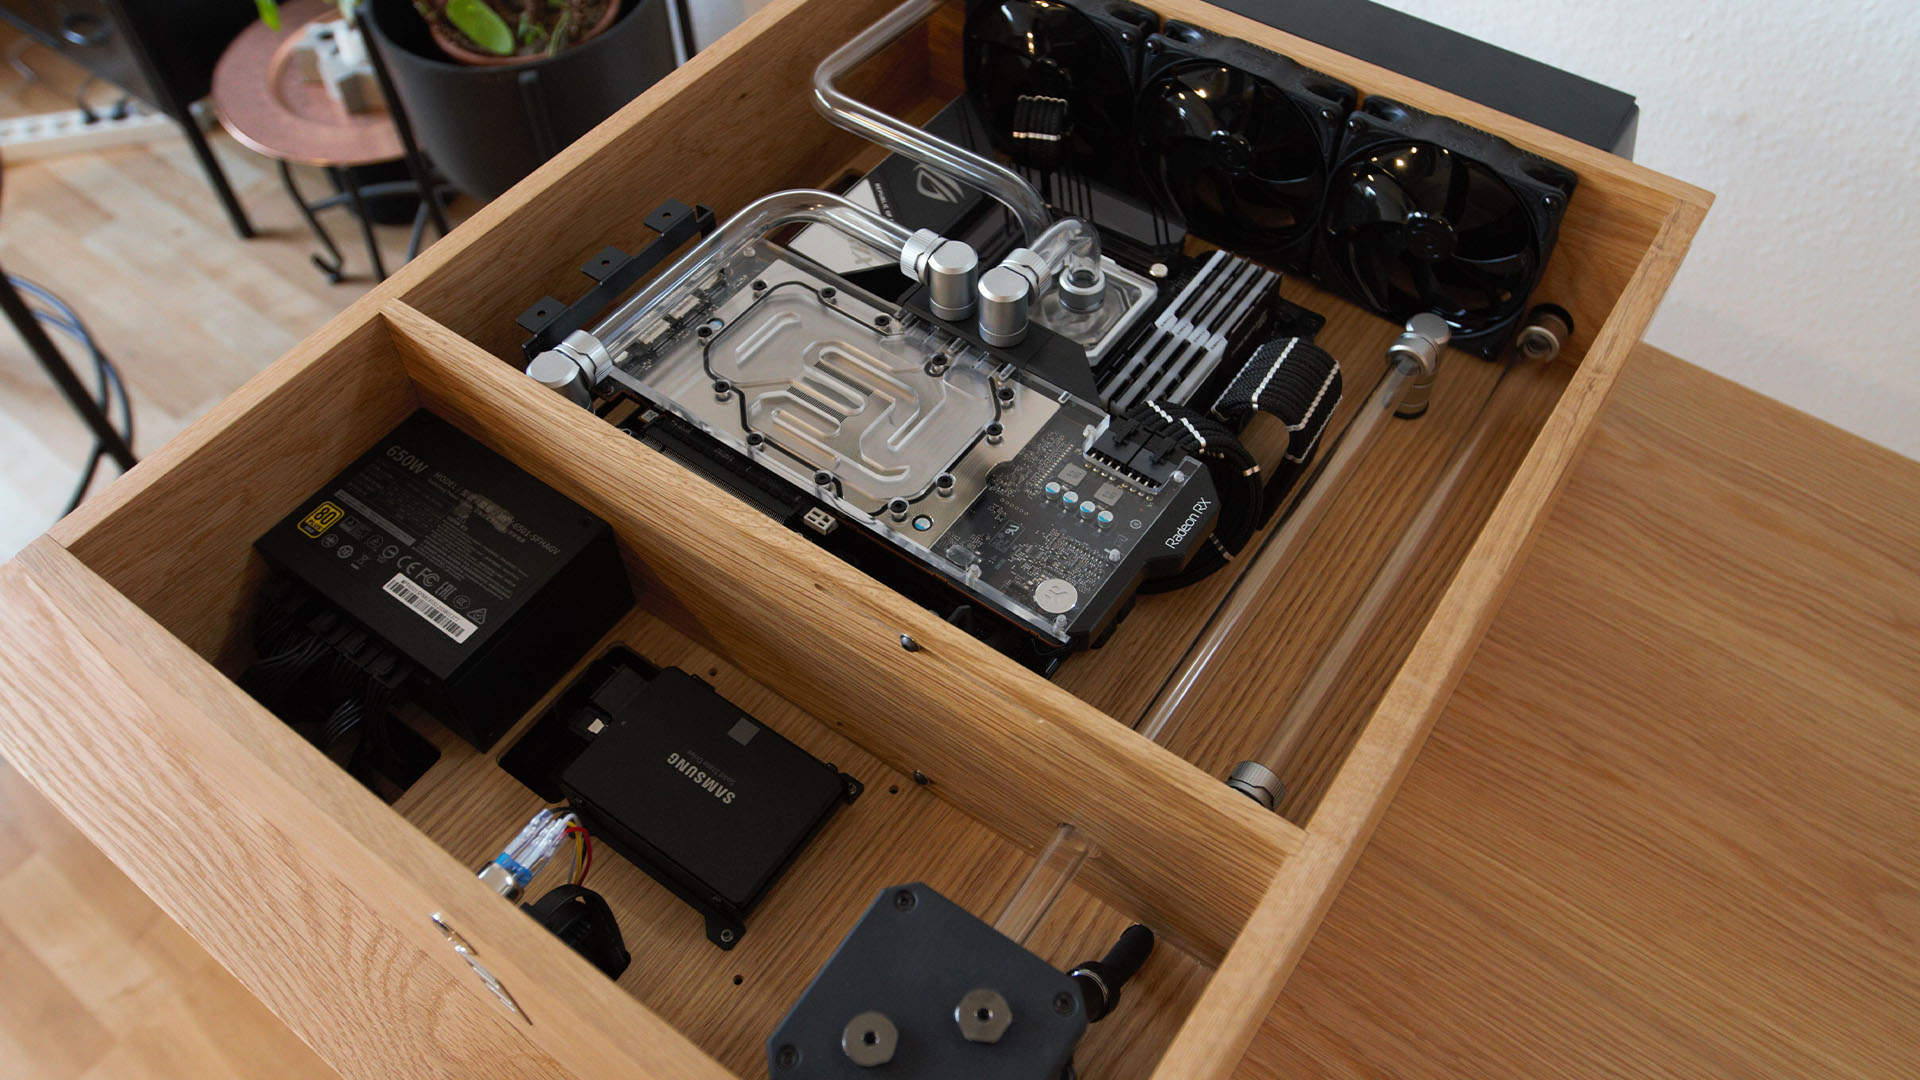
We were also able to reduce the number of fans because both the CPU and GPU are water-cooled. As long as the radiator is powerful enough to pull out all the heat, it’s the only part that needs to be supplied with regular, strong airflow. That requirement meant the radiator had to be very thick and the fans quite powerful. However, as we hid the 60mm-thick Alphacool X-Flow radiator at the back of the drawer, it will almost never be seen.
The drawer’s false bottom was also a crucial aspect of the design. The true bottom is the panel into which all the ventilation holes are drilled, then above this is the panel for mounting all the components. Air passes between the two panels via two big holes under the motherboard, which means the motherboard (with its hot power delivery components and M.2 SSDs) gets a good supply of cool air before it’s sucked through the radiator.
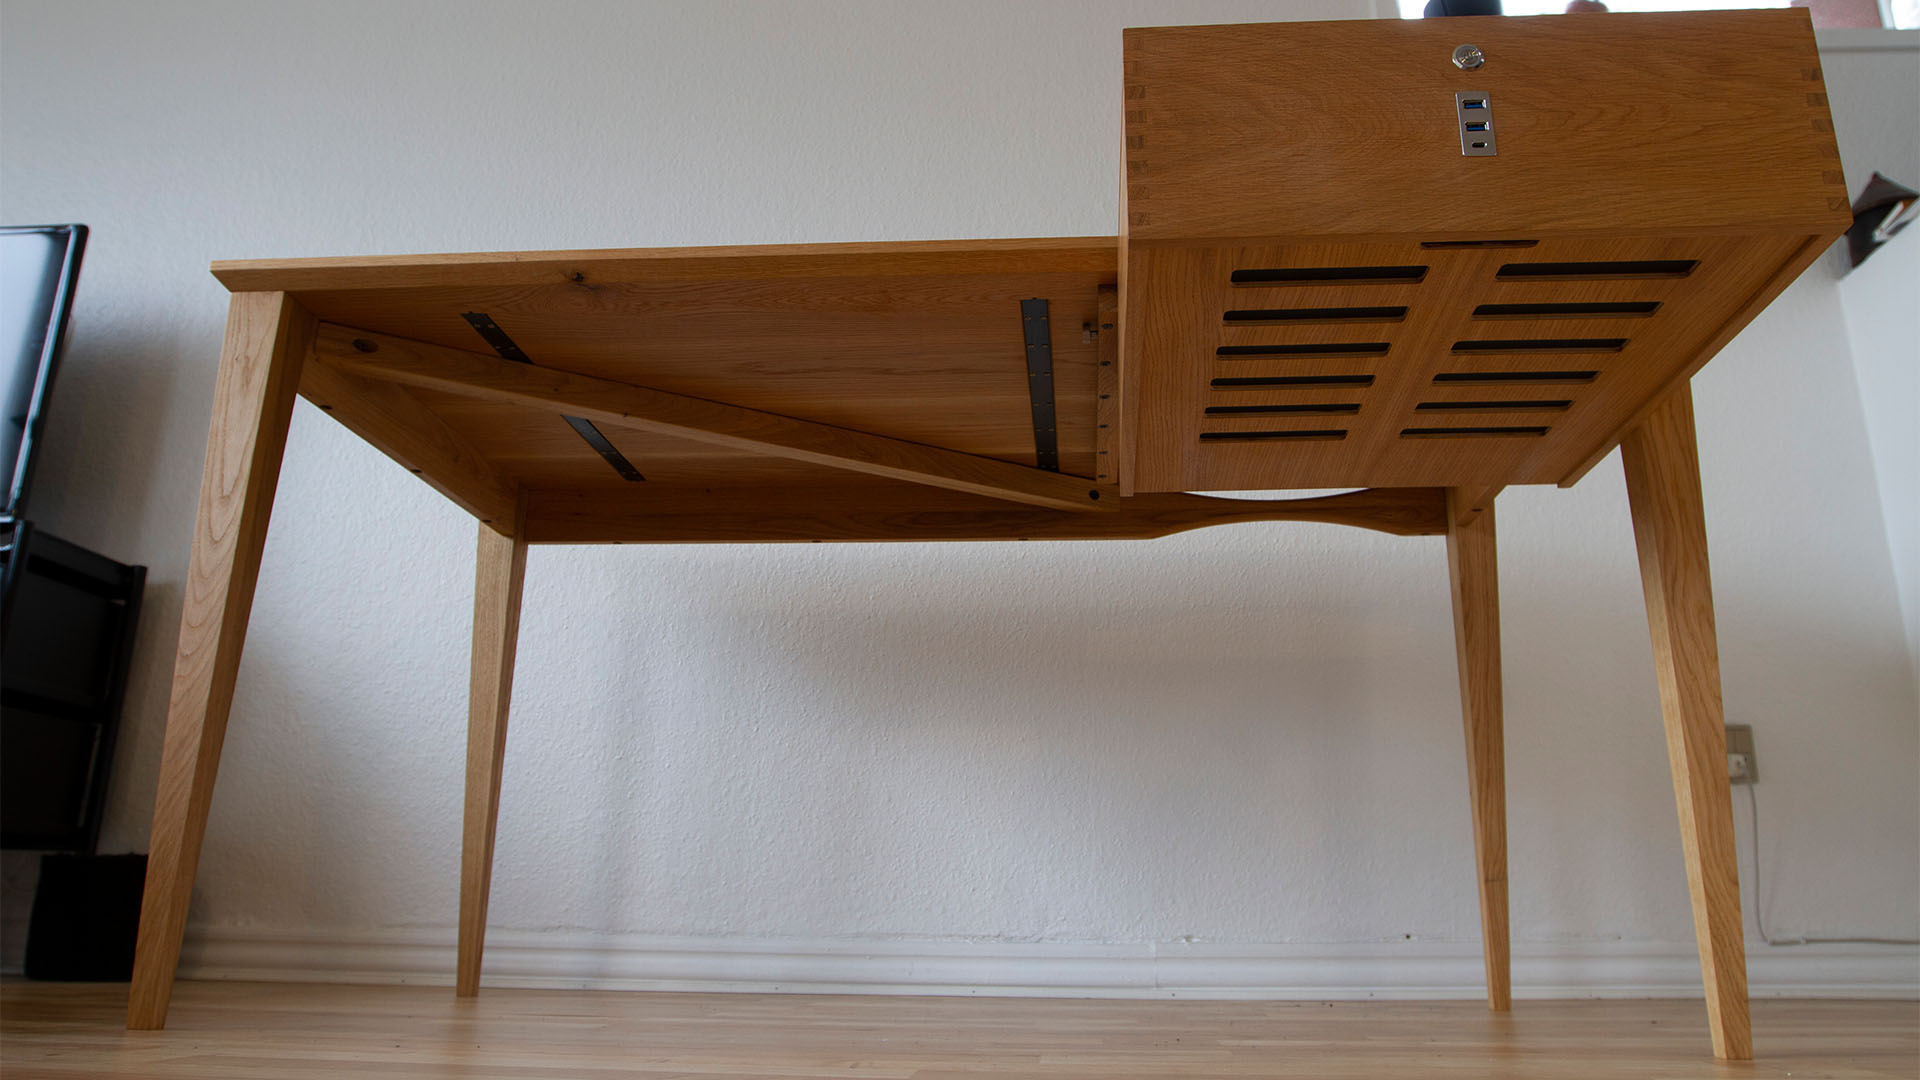
Also hidden – at least when the drawer is closed – is the power supply, pump, SSD, and the back of the USB ports and power button, which are on the front of the drawer. These are housed in a section at the front of the drawer, which is hidden under the front edge of the desk when closed.
It took months to find the right pump/reservoir combo unit that would allow us to mount the pump upright and still have it fit in the drawer, and we still ended up having to modify it to make it fit. By ensuring the pump is mounted vertically, and the tubing is carefully arranged, we eliminate air bubbles in the system, reducing noise. The tubing goes through the bottom of the drawer and comes back out again at other locations, adding a unique, stylish and clean look to the system.

Water cooling the wood desk PC
Creating such a clean look for the PC involved making a lot of small tweaks, such as the tubing and hidden radiator described above. Another example was the bracket used to hold up the GPU, which I found on EKWB’s website. It’s mounted to the wall separating the compartments, creating the appearance of the graphics card just plugging into the side of the drawer.
To aid with airflow and cable management, the motherboard is mounted on 20mm standoffs, rather than the more typical sub-10mm standoffs. This simple change means no further holes or other machining processes are needed in that general area, reducing the amount of work and still resulting in a clean look.
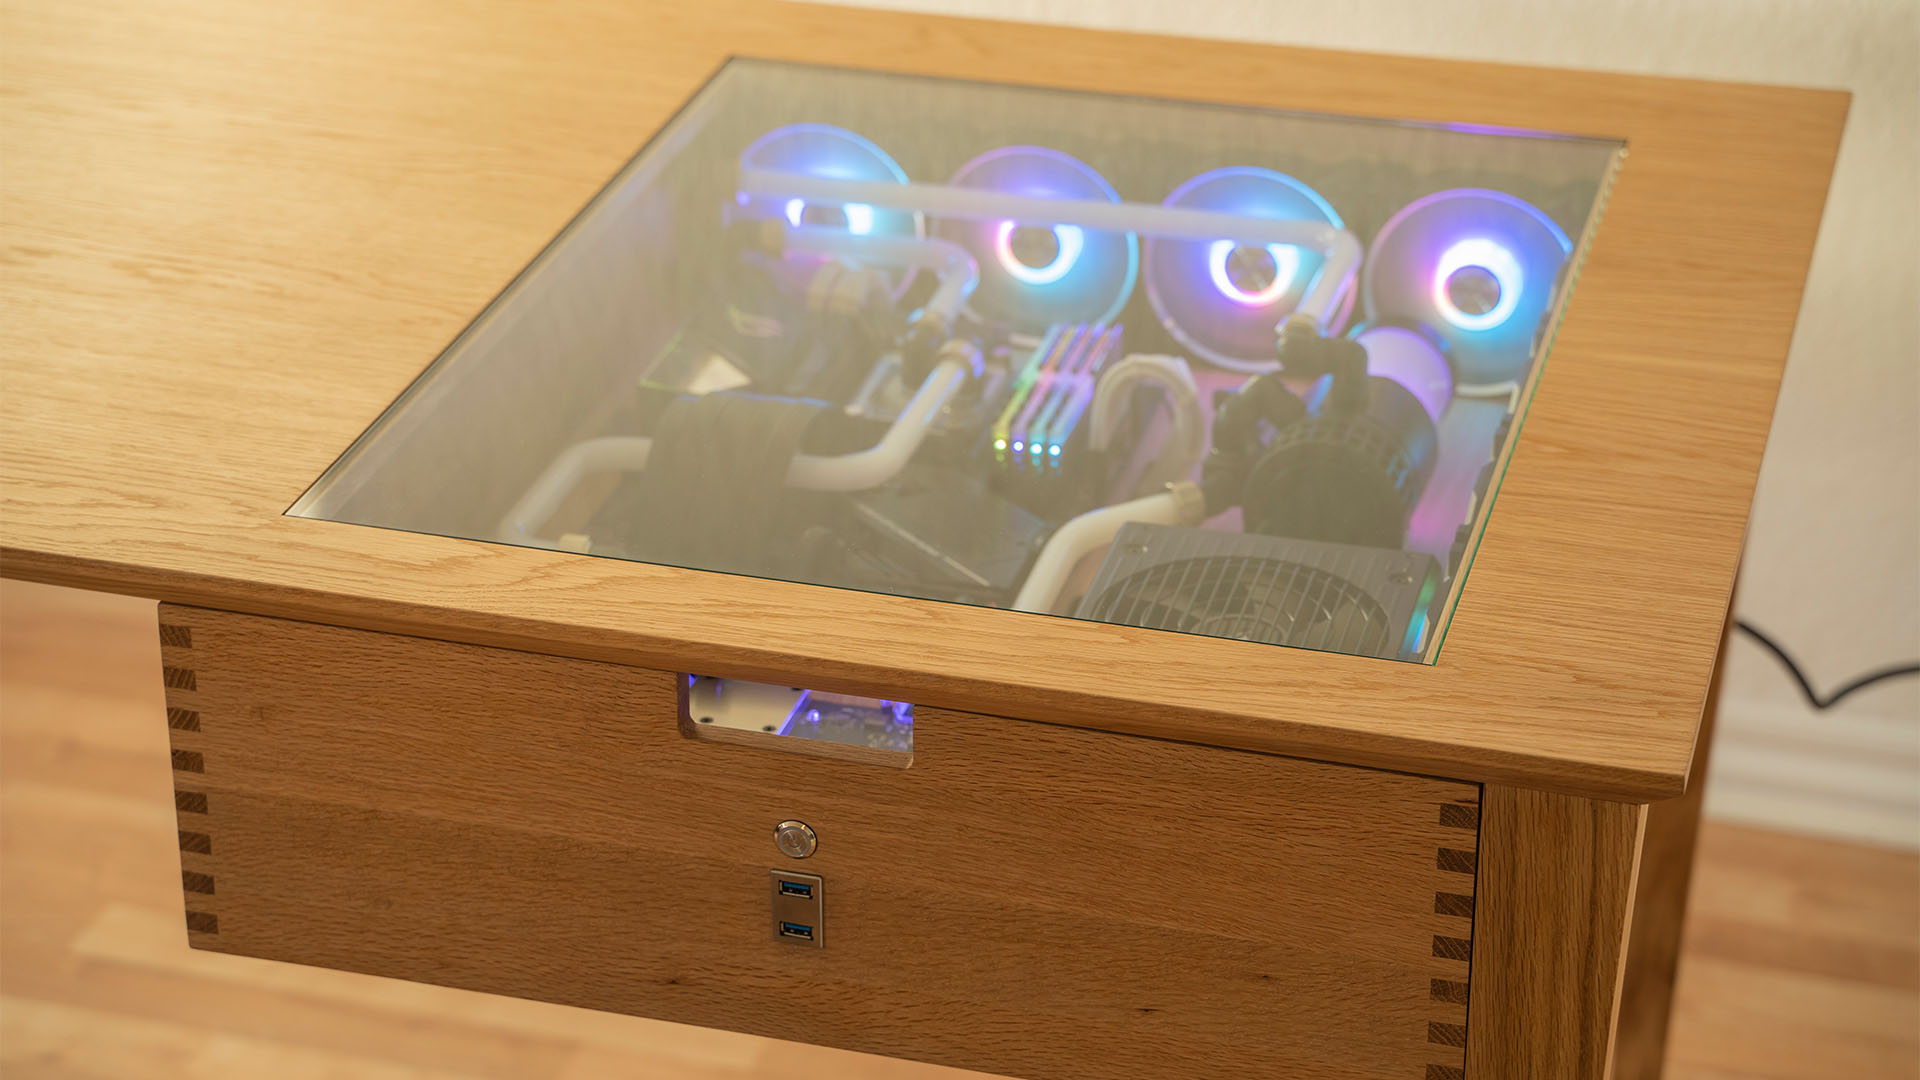
As we’re looking to sell these desks, we thought about where we could add customization options for buyers and we came up with a few ideas. The right side of the drawer next to the motherboard is available for custom names or other logos to be added, for example, or a custom reservoir/distribution block could be added.
On this version of the desk, we also drilled individual holes through the false floor for the 24-pin and 8-pin power cables, which looks super clean, but this will be a custom order option in the final product. I’ve also made a standalone drawer version with rails on the sides, so you can mount it under any table you like, as long as it’s pretty sturdy.
Desk drawer PC specs
- CPU: AMD Ryzen 7 5800X
- Motherboard: Asus ROG Strix X570-F Gaming
- Memory: 32GB (4 x 8GB) G.Skill TridentZ Neo 3200MHz
- Graphics card: AMD Radeon RX 6800
- PSU: Cooler Master SFX 650W
- Storage: 1TB NVMe SSD, 2TB 2.5-inch SATA SSD
- Cooling: Custom water-cooling loop, using EKWB waterblocks, a 360mm Alphacool X-Flow radiator (60mm thick), and a Swiftech pump/reservoir combo
I’m really impressed by Mads’ carpentry skills here – that is a fine looking desk, and the PC is integrated really well into the drawer – the attention to ventilation and tidy cable management is great.
This post originally appeared on Custom PC, which has been covering amazing setups for over 20 years and is now part of PCGamesN. Join our nearly 500k member Facebook group to discuss this build.
If you consider yourself to be an expert PC builder, you can submit your own custom PC build to us today for a chance of being featured on PCGamesN in the future.
