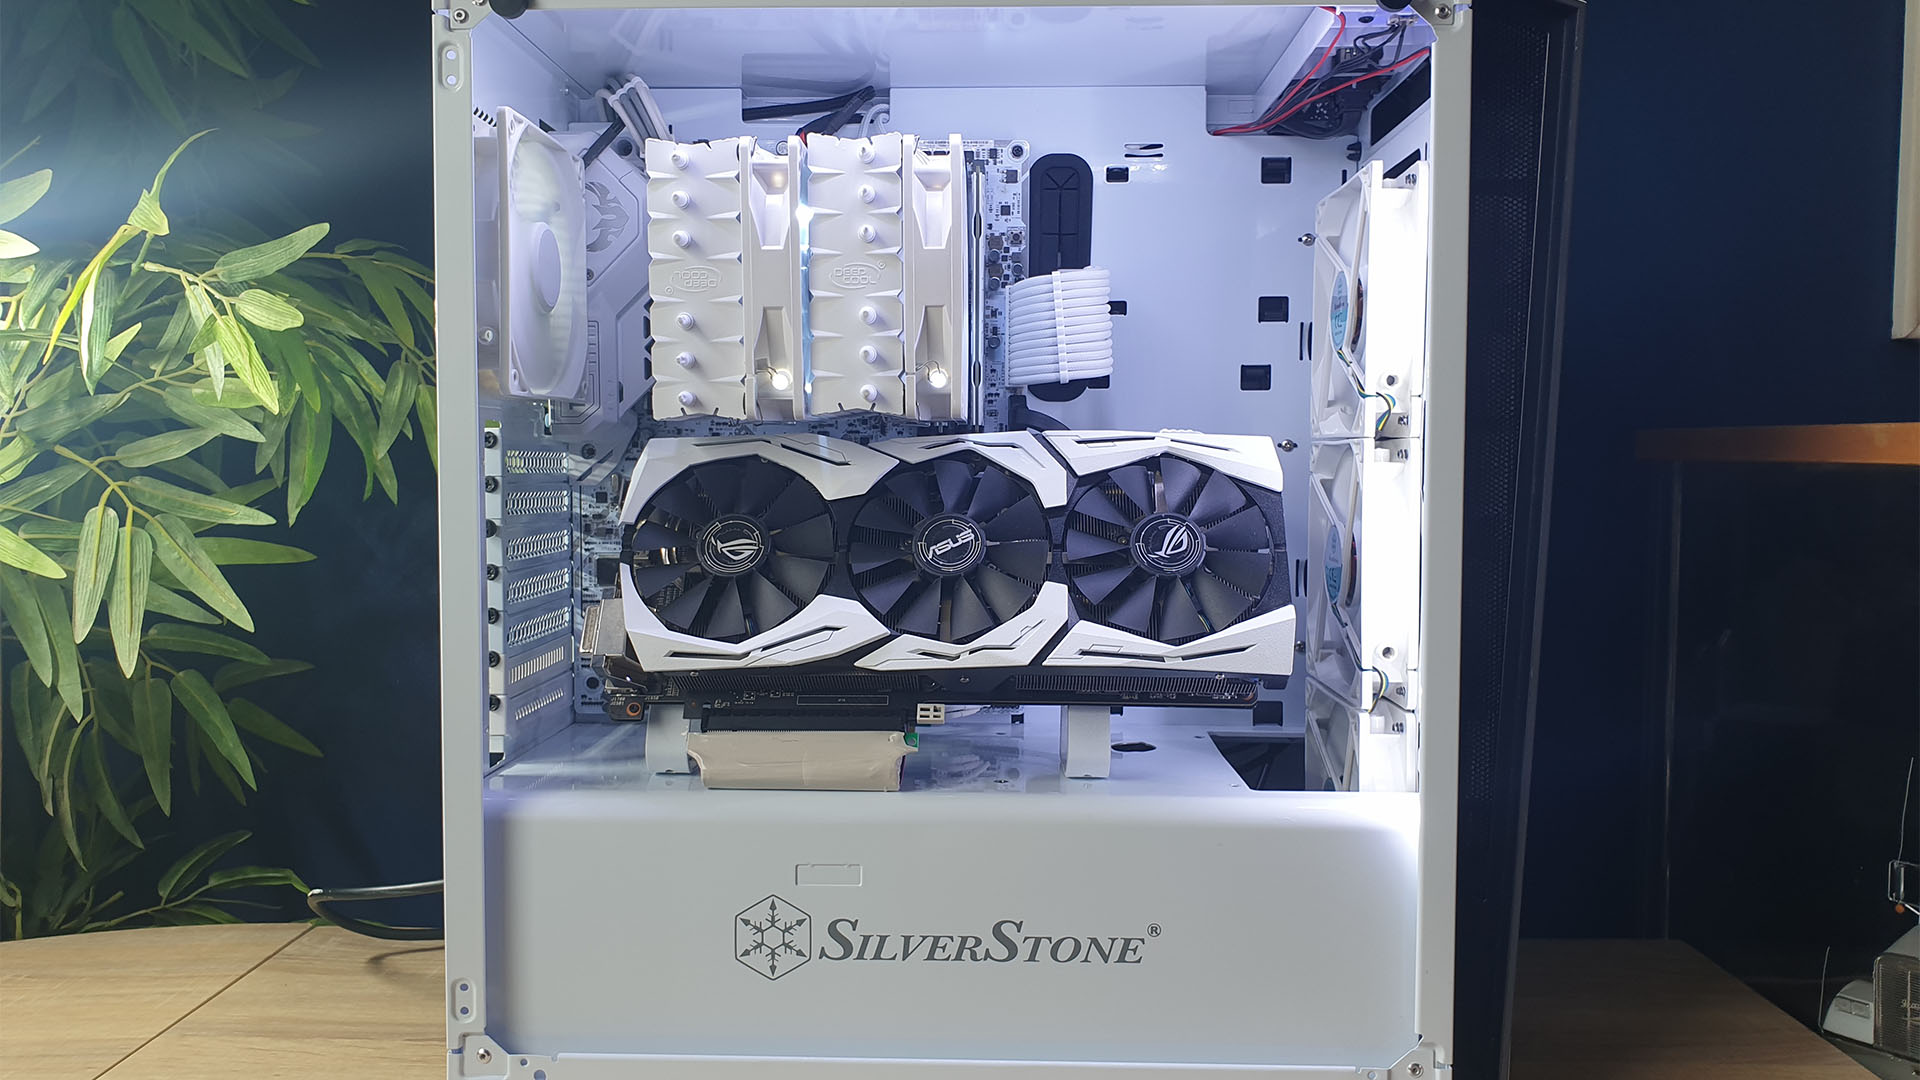
While a water-cooled rig with multi-colored RGB lighting can look the business, you can still make a bold statement with an understated air-cooled PC. This white gaming PC build by Paul Turton is a case in point, with a clean and tidy interior, and a striking angled graphics card dominating the center.
Thanks to our rapidly growing PC building Facebook page, we’ve seen many custom gaming PCs, from mods based on existing case designs to scratch PC builds. You can even submit yours for consideration right here. Now let’s talk to Paul about how he made this air-cooled white PC build.
PCGamesN: What made you want to build a PC with an all-white interior?
Paul: I’ve always liked white builds. Not many people do them, as there’s a lack of pure white parts. Most of the white cases that get released tend to have a black interior, but the SilverStone RL07 was pure white, so it started there.
Do you prefer air cooling to water cooling?
I love air-cooled systems. I build lots of water-cooled systems for customers, and have a lot of friends in the community who all do the same thing – they’re amazing systems. I just have a soft spot for silly big air coolers. I’ve done a lot of air-cooled builds to date, using coolers from Noctua, Cryorig, be quiet!, and a few more.
As far as I’m concerned, the smaller the better – trying to cram a Noctua NH-D15 into a mini-ITX build is just fun to me.

It looks like keeping the interior minimal is a big priority for you, and that’s some amazing cable-tidying work. Take us through the process of creating such a clean interior.
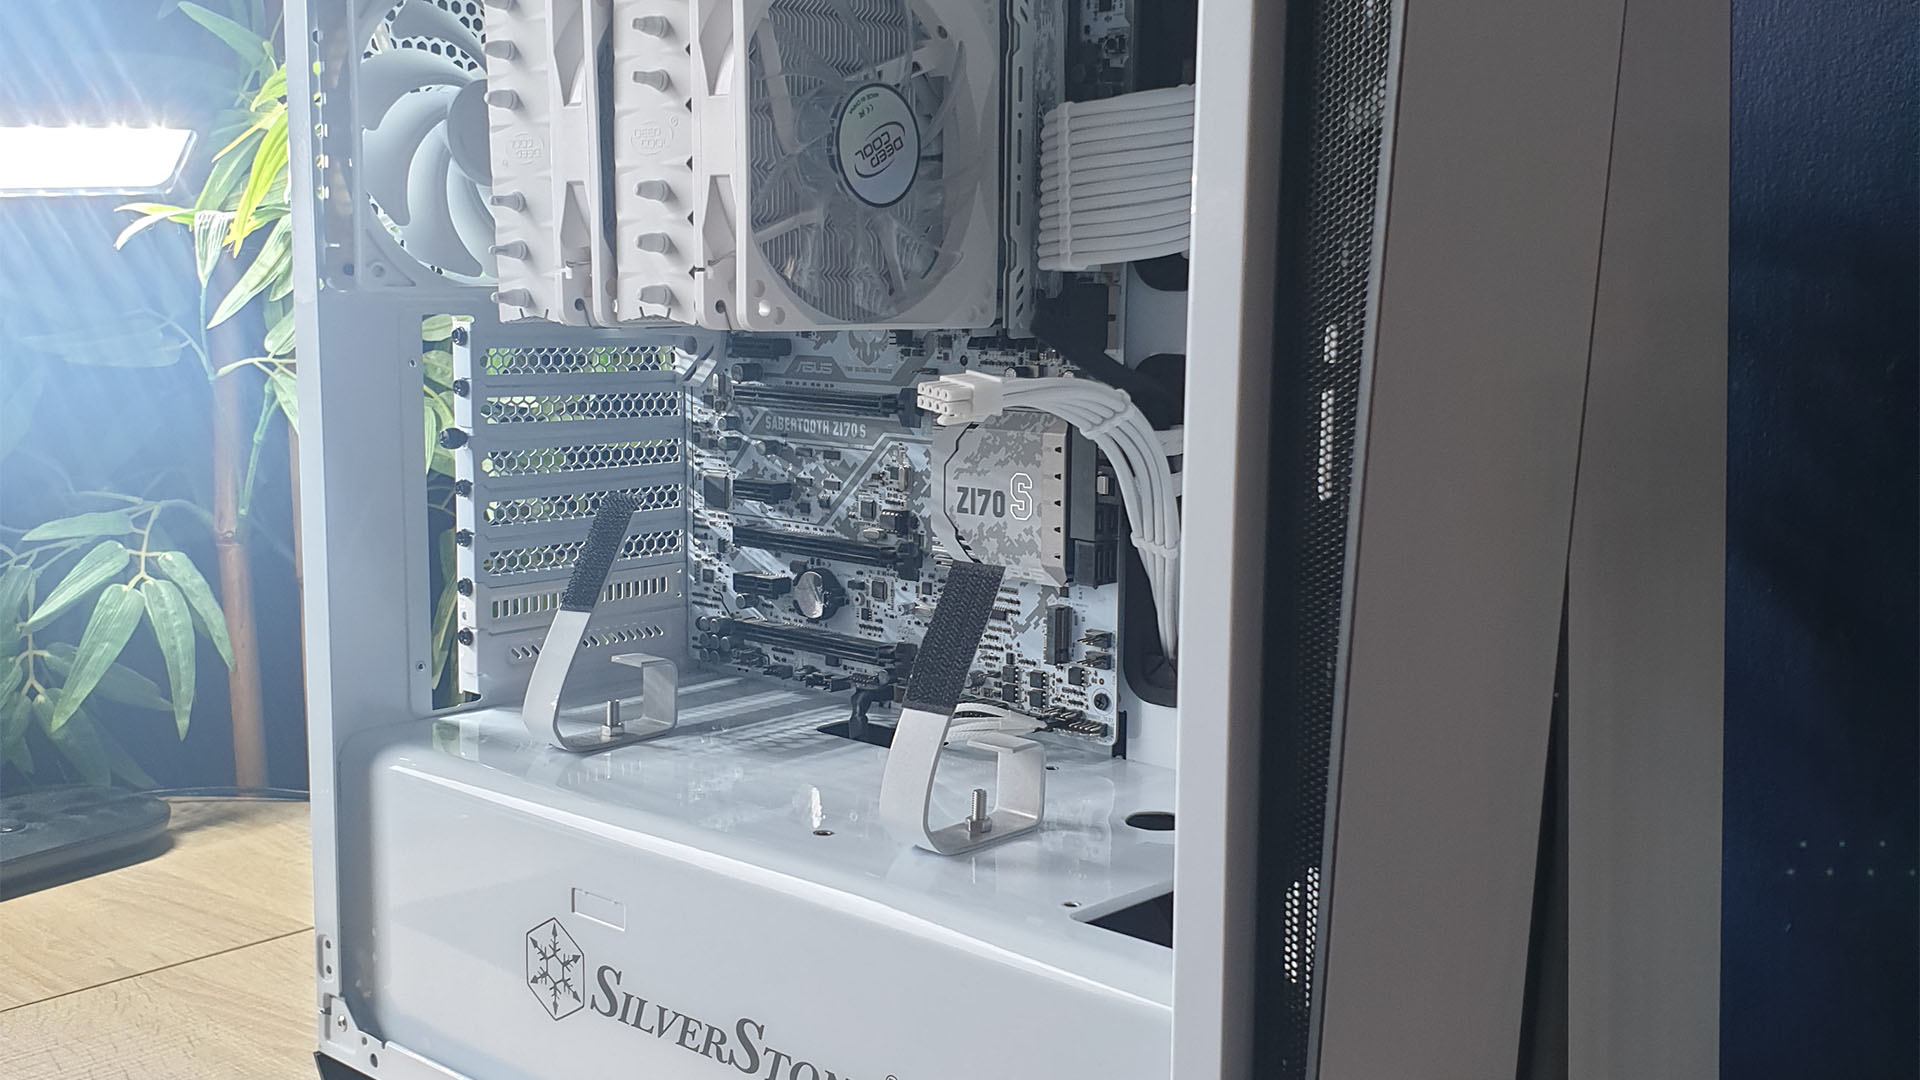
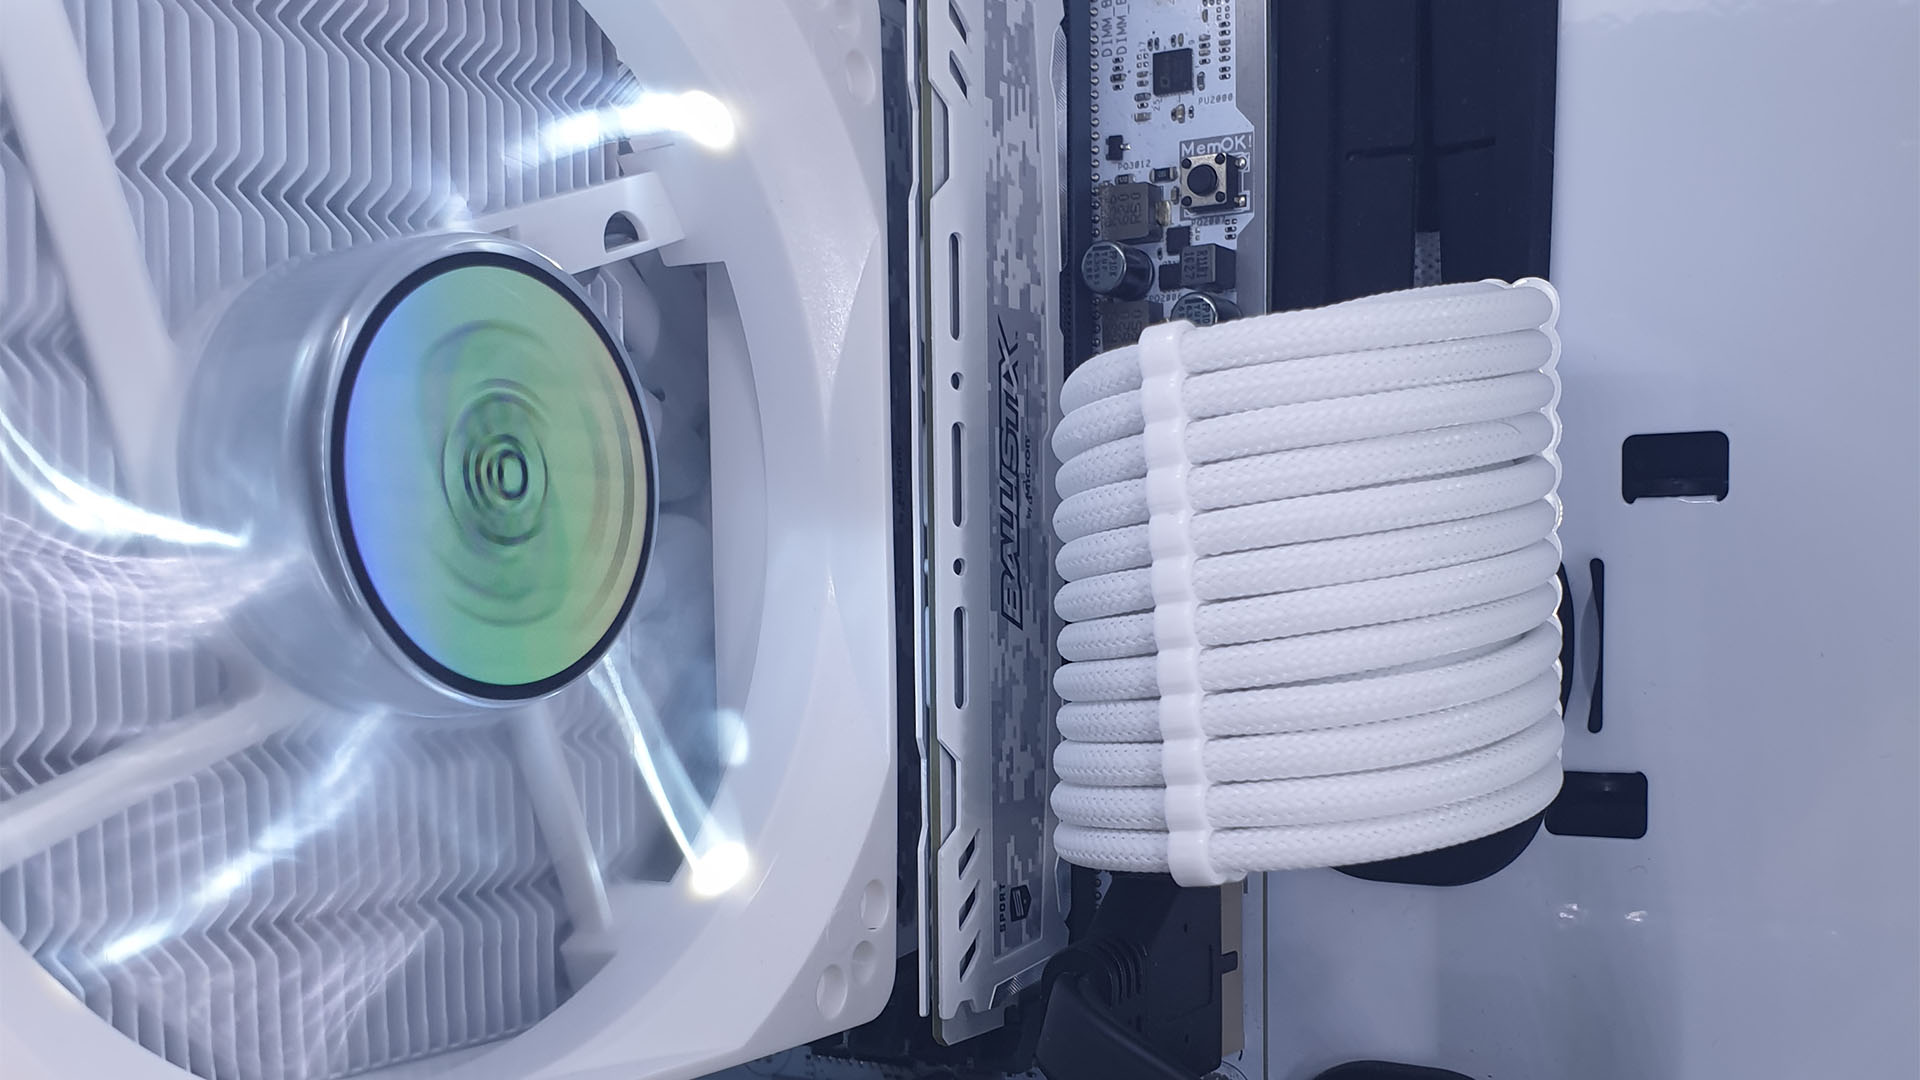
Planning a build doesn’t really take long once all the parts are there. I can usually see where the cables will go pretty quickly, and where I’ll need to make mods to make the cable tidying a little cleaner. It was really easy to work with this case – all the grommets were in the right places, and I didn’t really have to worry about PCIe power cables because of the way the graphics card is mounted – there’s a grommet directly behind it.
Did you make the angled graphics card mount yourself?
The graphics card mount was an idea I’d seen a while back on another system, and I wanted to try it out. There’s no advantage to positioning it like that; it’s just different to having it mounted in the traditional way or with a vertical bracket. The mount is made from just a couple of coat hangers from B&Q, which I bent to shape. I then drilled the mounting holes in the PSU shroud, added a couple of bolts and bingo! It’s just held in place by heavy-duty Velcro.

How do you access the graphics card’s outputs at that angle?
As the system sits at the moment, the HDMI cable just passes through the rear of the case where the PCIe expansion slot screws are located. However, I’m looking at getting wireless HDMI, which will remove the need for a cable altogether. If that doesn’t work out, then I’ll get an extension cable and run it down into the PSU shroud.
Some of those components, such as the Strix graphics card cooler, don’t have white parts on them by default. How did you paint them?
With white PlastiKote paint. I stripped down the graphics card, then pulled off sections of the Strix shroud with a knife – they’re only held in place by glue, so it’s fairly easy. Then I painted these sections – it only takes a few light layers to get good coverage. I then glued all the bits back into place.
I was going to paint the whole shroud white, but I thought it looked better with the end result I got. The SilverStone fan blades were also originally blue, but I painted them white.

How long did it take you to complete this build?
Not too long really – around three hours, and most of that time was spent sleeving cables and making the graphics card mount. It’s a fairly straightforward build.
Did you come across any difficulties? If so, how did you solve them?
I was originally going to use a Thermaltake Frio Extreme cooler, which is another dual-tower cooler, but it’s 140mm tall. The paint didn’t go to plan on that one though – I think it has a coating on the cooler from the factory, so the paint didn’t stick. The graphics card mount also clashed with that cooler, so I swapped it out in the end.
Are you completely happy with the end result, or do you wish you’d done some of it differently in retrospect?
The only part I’m not really too happy about is the graphics card. I wanted to use one of the Galax Hall of Fame cards, but when I was looking for parts, they were either really overpriced or just difficult to find.
Air-cooled white PC build specs
- CPU: Intel Core i5-6600K overclocked to 4.8GHz
- GPU: Asus ROG Strix Radeon RX 480, with BIOS flash to RX 580 specs
- Storage: 2 x 250GB Samsung SATA SSDs in RAID 0
- Memory: 8GB 3200MHz Crucial Ballistix
- Motherboard: Asus Z170 Mark S Sabertooth
- PSU: EVGA 750W G2i
- Cooling: DeepCool Neptwin CPU cooler, 4 x SilverStone SST-FQ121 120mm fans painted pure white
We really like the subtlety of this build, and Paul has shown that you don’t need to spend loads of money on proprietary case accessories either – a couple of coathangers, a drill and some Velcro can make a nice-looking angled graphics card mount.
This post originally appeared on Custom PC, which has been covering amazing setups for over 20 years and is now part of PCGamesN. Join our nearly 500k member Facebook group to discuss this build.
If you consider yourself to be an expert PC builder, you can submit your own custom PC build to us today for a chance of being featured on PCGamesN in the future.
