
FromSoftware are masters of the boss fight, so if you want to best all the Sekiro bosses then you may need a helping hand from. The adrenaline rush you get from each fight both spurs you on and hinders you, as you try to master perfect inputs while shaking like a leaf at the prospect of being sent straight back to the last Idol by a single devastating attack. There’s nothing quite like a FromSoft boss battle, and Sekiro: Shadows Die Twice is the pinnacle of everything the developer has learned so far.
While we can argue online about whether or not Sekiro is the hardest of the Soulsborne games, there can be no arguments about the fact that its bosses are meant to hand your posterior to you on a platter. To beat the toughest Sekiro bosses sometimes you need pointing in the right direction, even if that involves a hefty slab of cheese.
Below you’ll find a list of all Sekiro bosses, plus a couple of strategies you can employ to beat each one. If you’re used to hiding behind a great shield to soak up high damage in Dark Souls then you’ll need to relearn pretty much everything you know about FromSoft combat to conquer these baddies.
Here’s how to beat every Sekiro boss:

Gyoubu Masataka Oniwa
There are two strategies to this horse-riding samurai. The first is to simply stay away from him and use the grappling hook opportunities to slowly whittle away at his health. These appear as he turns around after running past you, and before some large attacks. To get the most out of these attacks, invest in the Grappling Attack skill as soon as possible.
The other strategy for dealing with this early Sekiro boss is a lot more aggressive. Despite the size of the opponent and the fact that he is riding around sat safely atop a sizeable steed, you can still deflect his attacks. If you weave in some Firecracker usage you can startle his horse, deal posture damage, and get some solid attacks in. Plus, his horse will be fine. Be nice to the horse folks.
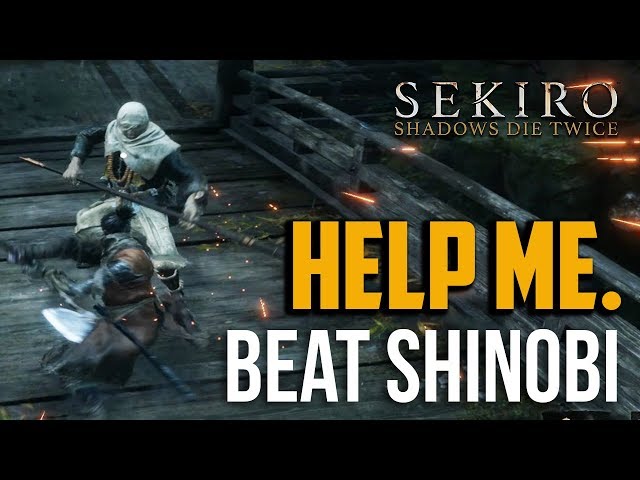
Shinobi Hunter Enshin of Misen
This miniboss can prove to be a bit of a pain as he has an envoy of goons to protect him, and he isn’t very close to a Sculpture Idol, either. You’ll want to take your time here, sneaking in to take out some of his protection, then fleeing until you can come back and do the same to the rest of the pack. Once everyone is taken care of, you can creep in again for a free Deathblow.
After that, the fight begins. You’ll quickly learn in Sekiro that fighting is all about aggression, and it was the Shinobi Hunter who taught us that more than most. It’s easy to go on the defensive here, but work an opening and go to town on him. On top of that, having the Mikiri Counter will do wonders to punish Enshin’s pugnacious nature.
If you’d like to see a more detailed breakdown of this fight, then you can find our Sekiro Shinobi Hunter Enshin of Misen guide here.

Lady Butterfly
We have a much larger guide for beating Sekiro Lady Butterfly if you need to know more, but here are the basics. The way you are actually meant to beat her is by being more aggressive than she is. Get up in her face, leaving her no chance to use her long-range attacks or her illusions. When it comes to attacking and deflecting, stick to this simple pattern: hit three times then deflect. You don’t need to do health damage, so don’t get discouraged, you just need to remove her posture.
The two attacks you need to watch out for are her low sweep, which you can see coming because of the red kanji when she is on the ground. Counter this by jumping onto her head when you see the kanji. The other move to avoid is when she summons illusions in the second phase of the fight. Don’t bother battling them, just run around in a large circle to avoid both them and the butterflies that follow them.
Alternatively, you can just cheese the whole fight by stun-locking Lady Butterfly with the Nightjar Slash Combat Art.

Genichiro Ashina
Genichiro is a monster of a boss and rightly so. He wields a bow and a sword in both forms and has access to huge lightning attacks in the second phase. The only way to overcome him is with aggression and liberal use of the Mikiri Counter, because boy does he love thrust attacks. If you get used to the fact that you can deflect arrows as well then you’ll be golden. There is a way to cheese this fight using the Shadowrush ability, which you can learn more about in our Sekiro Genichiro Ashina boss fight guide.

Seven Ashina Spears – Shikibu Toshikatsu Yamauchi
This spear wielding chap is as bothersome as his name is long. Much like the Shinobi Hunter Enshin of Misen, a good portion of the fight is finding your way to him, too.
You can sneak up on Shikibu by taking a left turn at the bottom of the stairs and creeping through a hole in the house he is standing in front of – once you get behind him, cash in your free Deathblow. Like Enshin, he is also a spear wielder, which means the Mikiri Counter will do wonders. On top of that, you can also stagger him with the Firecracker Prosthetic. Once you have him on the ropes, use the Ichimonji: Double attack to put in some posture damage.
Wanting a few more details? Then our Sekiro Seven Ashina Spears – Shikibu Toshikatsu Yamauchi guide will set you straight.

Folding Screen Monkeys
This is less a boss fight and more a puzzle that changes constantly. The monkeys will constantly be on the move and you have to take out all four of them to proceed. Every time you take one on the Folding Screen Monkeys out more illusory monkeys will appear to try and take you out, too.
The invisible monkey will follow you around, so just look for the yellow footsteps behind you and start swinging. The monkey with good eyesight tends to reside in the back-left room of this area. Go in, open the door, then wander off for a bit before returning and stealth killing it. The loud monkey leaves a trail of flames and stays on the rooftops. Sneak around in the buildings and look out for his trail above you, sneak up on him, and take him out. The last one is the monkey with the good hearing. Just keep an eye out and approach slowly while crouching. All of this is easier with Gachiin’s Suga, which makes it harder for you to be detected.

Guardian Ape
The first phase of the Guardian Ape boss involves him launching huge flurries of attacks. These can nearly all be parried, but if you want a safer fight you can just wait for him to uppercut and then thrash on the floor. This attack leaves him open for a couple of free hits. Just rinse and repeat if you struggle with the parry timing. The Firecracker shinobi tool is handy here as it will give you a couple of extra opportunities to get hits in. You’ll also want to watch out for the unblockable hand grab attack that’s signalled by the red kanji, simply jump over it to avoid taking any damage. Word to the wise: if you spend too long behind the Guardian Ape it will – we’re not kidding – fart you to death.
The second phase is trickier but there are two main things to keep in mind. Firstly, if you see him inhaling, run like hell. This is an area of effect terror attack will nearly always one-shot you, so keep your distance where possible in this portion of the battle. Secondly, he has an attack where he raises the sword high into the air before attacking. If you can parry this, he will stumble, and you will be able to land some free hits. The Firecracker won’t be useful here as the Guardian Ape is now classes as an apparition, but you can use the Flame Vent to dish out additional damage. Finally there is a red kanji attack to watch out for, but it’s easy to avoid by simply running backwards.
You fight Guardian Ape again, but this time against two apes. The best advice here is to try and kite the Guardian Ape on its own and draw out the overhead sword attack. Some will prefer to focus all of their attention of the Guardian Ape’s mate, as her posture pool is very low – it’s really up to you, just don’t try to fight both at the same time.

Great Shinobi Owl
This fight feels an awful lot like the one against Genichiro, but tougher. The attacks to watch out for in the first phase are mainly the shuriken throws, if you dodge to the side you can avoid the damage. The other one is when he drops an item that stops you healing. You can see him about to do this as he kneels down then throws it up in the air. Make your way around to his back and attack him as he remains vulnerable for a while. In the second phase the main attack to watch for is the smoke bomb. If he drops it just run out of the cloud away from where he was. Other than this, it is just a matter of deflecting what you can and hitting when you get a chance.
Whatever you do, don’t try a charged attack as Great Shinobi Owl will Mikiri Counter you with a one-hit kill. This fight is a bit of a slog, but if you learn to recognise his openings you’ll conquer this boss eventually. Finally, consider bringing the Firecracker shinobi tool, as this will give you an extra second or two to heal up.

Corrupted Monk
The Mibu Village fight, and the first two phases of the Fountainhead Palace fight are similar. You need to keep an eye out for low sweeps and thrusts, and either jump on him or Mikiri Counter depending on how confident you’re feeling.
This fight can be tough and is all about learning the patterns, but there are some easy ways to cheese it. For starters, you can simply grapple to the tree behind the Corrupted Monk and deathblow it from above. Incredibly, you can do this for the second phase of the fight as well, leaving you with only one deathblow to dish out. Bring along the Firecracker shinobi tool and you should be able to get plenty of damage in while she’s stunned. Watch out for her large sweeping attack and Terror attack during the third phase and you should be fine.
If you don’t want to cheese it, then you need to watch out for the phantom summoning move between phase one and two – the best way to avoid this is by grappling around the trees above.
There is a second meeting with the Corrupted Monk later in the game, but this really isn’t too difficult as you have a lot more space to fight in. Bring some Divine Confetti and prepare for a drawn out fight though, as the safest way to beat this boss is by whittling down the hefty vitality bar, one slash at a time.

Emma, the Gentle Blade
Despite her name, Emma is quite the fighter. The key move to watch out for in this fight is when she sheathes her sword, this means she’s about to unleash a rapid two-hit combo that you can parry or run away from. There is also a very powerful grab attack you need to jump away from when you see the red kanji. This is a straightforward duel so while she is a good fighter, her posture isn’t great, so it shouldn’t be too hard to whittle her down and deliver a deathblow.

Isshin Ashina
This fight follows the duel with Emma, the Gentle Blade and actually features a number of the same movesets, such as him sheathing his sword. The first phase of this fight is all about baiting out Isshin Ashina’s overheap chop move, kiting to one side, and attacking when there’s a window – this is also a move in the Isshin, the Sword Saint fight. The basic aim here is to strike once to bait out a flurry of attacks, and then punish depending on what final strike Isshin goes with: either the sword thrust (which you can Mikiri Counter) or overhead chop. You’ll also want to keep Isshin in the centre of the arena so you have space to get around him.
When the second phase begins you’ll want to immediately use the Firecracker shinobi tool on Isshin, which stops him from setting the whole arena ablaze. The strategy for the rest of this phase is largely the same as before, but a couple of moves might throw you off. His stomp attack will shoot fire at you, so as soon as you spot it start dodging left. Another new trick is that Isshin will quickly stoop low and then slash with his now flaming sword. The slash is unparryable, so you’ll need to jump once to get clear of the first strike, and then once more when you see the red kanji to jump over the slash. Do not parry this as the move has poise, which means you’ll get hit by the very powerful follow-up.
As with the start of the final phase, use the Firecracker on Isshin Ashina if you hear him growling – you do not want this attack to get through as it’s very tough to read. Once you’ve got all this down, you should manage to bring Isshin Ashina down in no time.

Demon of Hatred
The Demon of Hatred is the biggest of bois. He’s a true behemoth to fight and one of the toughest Sekiro bosses. Despite the size of this beast the best place to be is in front of the leading leg. If you kite anti-clockwise you should be able to avoid most attacks. The unblockable attacks have to be sprinted away from or jumped over depending on whether it is an explosion or the charge attack. After running away from the explosion, you can avoid the slash attack and fireballs by running back towards the demon and even get a couple of swings in. As for the rush attack, be ready to jump back after you spot the red kanji.
The first deathblow leads to him being temporarily invincible and is followed by a series of fiery explosions, so keep some distance and heal up as much as you can. The second phase is much the same as the first, so like before, play this patiently. After the second deathblow you will have a window to attack so make the most of it as during this phase the Demon of Hatred also gains more unblockable attacks, but these can be dodged with well-timed jumps. This is a very long fight and his posture and vitality pools are absurdly high, so just accept that it will be a very long fight and bring items to heal and protect from burns.
There is a way to cheese some of this if you have the fully upgraded Finger Whistle shinobi tool. Save this up for the final phase as you can only use it three times during the fight, but when you do you will gain a huge window of attack, so spam your most devastating moves.

Divine Dragon
This fight isn’t actually as tough as you might think, especially when you first meet the Divine Dragon and its towering sword. There’s a very simple first phase to clear where you need to wipe out a large mob of small, old dragons. First off, avoid them completely until a tree appears, then grapple off the tree to perform deathblows on each dragon. Rinse and repeat.
Now for part two. If you look to the trees that are scattered around you will see that some of them are crackling with lightning. Grapple to them and then use the lighting to attack the boss. The Divine Dragon will then blast you backwards and strike with some large, telegraphed wings that are easy to deflect. As above, rinse and repeat until the trees disappear and the dragon goes all aggro.
All you need to do during this part is survive until the trees remerge. You can do this by either deflecting or weaving in and out of these attacks. When you deal the final lightning attack simply run up the sword and prepare for a heartbreaking shinobi deathblow.

Genichiro, Way of Tomoe
This fight has Genichiro equipped with The Mortal Blade. He starts the fight be proving this fact and performing a large sweeping attack, so move backwards and well out of range. Other than that, this is largely the same fight as before. Keep the pressure on him and deflect his strikes to take him out. There’s a hefty wind up on the Mortal Blade, but you can easily avoid it by dashing clockwise around him.

Isshin, the Sword Saint
This fight is tough as diamond nails. The first phase requires you to do a whole heap of deflecting. You are best off staying close to him and parrying, just keep in mind that it will take some time to learn the peculiar timing of his attacks. Parrying is the easiest method, but you can also strafe left of him for most of this fight, allowing you to quickly respond to his attacks and avoid taking any damage or losing posture. Again, there are some curious timings for these movements.
When you spot the overhead attack, you’ll need to strafe left at the very last second then wait for a moment for Isshin to perform a follow-up attack, only attack after this second part. Another move is when you spot Issin putting his sword in his hilt – it will glow a little to telegraph this attack – simply dodge left, pause a second, then dodge left again before attacking. If you’re dueling and isshin pauses and withdraws a little, this means he’s about to zip through you, block and then keep your distance as this leads to a deadly AoE move – this can also be countered with the Firecracker shinobi tool if you time it right. The final move to watch is when you’re pushed back and then Isshin performs a thrusting attack with his sword, which you can easily riposte with a Mikiri Counter.
More Sekiro Shadows Die Twice guides to chop through:
Sekiro Treasure Carp scales guide
Sekiro endings guide
Sekiro Prayer Beads guide
Phases two and three are different though as he pulls a giant spear from the ground. This phase can be parried through with excellent timing and good memory of his moveset variations. Oh, Isshin also has a gun at this point, which he’ll fire off whenever you stray too far from him. You can deflect most of the shots quite easily. Phase three also introduces a large lightning attack which you can Mikiri Counter, just try to delay your jump and attack a little as if you go too early the full attack will hit you. The most difficult part of this fight is managing your posture, so keep your health topped out at all times so you have as much posture as possible.
Alternatively, you can cheese the fight a little. If you run around him in a large circle, he will do a leaping attack with his spear. At this point, run behind him and do a dash attack, then run away. You can repeat this until he is dead, provided you’re patient and able to dodge Isshin’s spear sweeps.
And there you have it. A complete guide to defeating all main Sekiro bosses, plus the odd miniboss for good measure. Good luck out there.