
On the hunt for a Destiny 2 Vault of Glass raid guide? We’ve got you. Although it’s the oldest of all the Destiny raids, harking back to the D1 days, it is still regarded as one of the best Bungie has ever designed, and well worthy of its rebirth with Destiny 2.
The Vault of Glass raid will push you and your fireteam to the limit unless you know what you’re doing, and that’s where we come in. Traversing the Gorgons’ Labyrinth, defeating the Gatekeepers, and downing Atheon all require coordination, skill, and a plan. Raids are the thing that Destiny 2 does better than any other FPS game, and it’s the reason it’s one of the best free PC games ever. With that, here is our Destiny 2 Vault of Glass raid guide.

Destiny 2 Vault of Glass guide
Waking Ruins
To access the Vault, players must activate three Vex plates outside its front door, and keep them activated continuously for five minutes. This builds a spire in the middle of the area, which unlocks the gate. If any of the plates become deactivated, the spire will rapidly disassemble.
As you probably know from the main game, to activate a plate, you must stand within it and keep it clear of enemies. Once you’ve captured the plate, Vex enemies spawn in waves and attempt to recapture it. Particularly powerful enemies called Praetorians should be killed first, as if they make it onto your plate, they will take it over quickly.
Once the spire is constructed, the Vault of Glass opens. Head inside and follow the tunnels until you emerge on a shelf in a vast cavern, overlooking a platform full of pillars and a glowing light in its centre. Jump down, and the Templar encounter begins.
Vault of Glass Templar Encounter
The Templar is the first Raid boss you face. In the first phase of this encounter, you must defend three confluxes from waves of Vex who are attempting to sacrifice themselves by throwing their bodies into the conflux (much like the Spire Integration public event). If four Vex sacrifice themselves to any one conflux, you will fail.
In the original Destiny, Fanatics could only be found in the Vault of Glass, and they’re now accompanied by Overload Minotaurs. The pools the Fanatics dropped when killed did more than just hurt you. First, they were green, but more importantly they applied the Mark of Negation debuff, as did the Fanatics themselves. Keep out of the pools and don’t touch the Fanatics. Periodically, the Templar performs a Ritual of Negotiation, which instantly kills anyone with the mark.
If you do get hit with a Mark of Negation, you need to cleanse it as soon as possible. This can be done by entering the pool of light in the middle of the area, in front of the Templar. However, the pool will empty if used too many times; it refills after the next Ritual of Negotiation.
First, you must defend the middle conflux. Enemies spawn in each of the three zones – left, middle, and right – and your team should split up to cover each spawn point and stop them from advancing.
The conflux then disappears and a wave of Fanatics attacks. Following this, you must defend the left and right confluxes. Split your team in half to cover both sides. In the next stage, you must coordinate to defend all confluxes.
Immediately after this, the Oracles appear; seven bright balls of golden light that all chime at different frequencies. There are seven waves of enemies to defeat, and Oracles appear periodically throughout these waves. They don’t attack or move; however, once they appear, they will mark every raid member with the Mark of Negation unless you destroy them within ten seconds.
During this phase, Hobgoblin snipers also spawn around the edge of the battleground. It’s important to coordinate with your team in order to communicate which Oracles have spawned and in which order, to ensure you take them down in the correct sequence, otherwise your team will be wiped out.
Once you have defeated the Oracles, there is a checkpoint and a break in the action. The pool of light is replaced with a Relic shield called The Aegis. Using this Relic is key to the remaining encounters.
The longer you hold the Cleanse button, the longer the ability spends on cooldown. Cleansing is often necessary at short notice, so you need to be efficient with its use to keep it ready. If the Relic is dropped, you have five seconds to pick it up again before everyone is killed by “Curse of the Aegis”.
When you pick up the Relic, the encounter with the Templar begins. The Templar is surrounded in a white shield that prevents it from being damaged, except by the Relic’s Super ability. Once the Relic wielder has charged the Super and hit the Templar, the Templar’s shield goes down. You won’t be able to attack immediately – when his shield breaks, bubbles will entrap a few members of your team, which you need to shoot your way out of before hitting the Templar. (If you find yourself in one of these bubbles, please do not use rockets to break it, as you will die.)
After a short time, the Templar teleports away to a new spot and regains its shield. This can be delayed slightly – once you see the notification “the Templar is attempting to teleport”, a white ring appears in the room signifying where the Templar is preparing to move to. If someone stands in this ring, the teleport will be temporarily delayed, but this spawns a wave of four Minotaurs.
Throughout this battle, Oracles will continue to spawn and mark the whole team if not destroyed promptly. While annoying, this is quite manageable as the Relic wielder can cleanse you at will, so it’s best to stay close to them rather than worry about destroying the Oracles. The Templar will enrage if the fight lasts longer than eight minutes, making it almost impossible to beat.
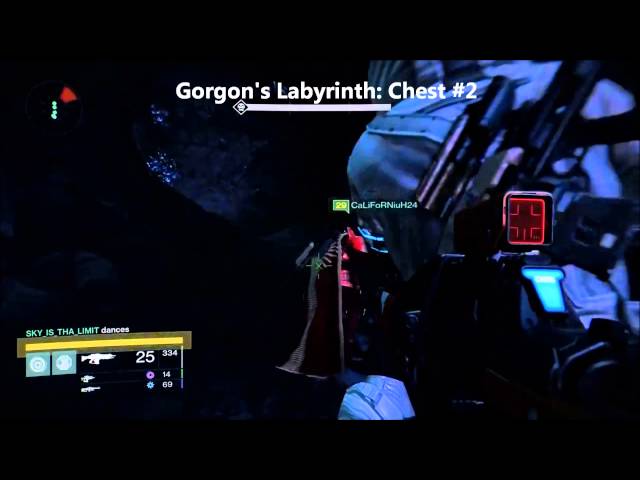
Gorgons’ Labyrinth
Stand in front of the stairs on the left side of the arena, and look for a crack in the wall to your right. You’ll find a chest inside (patrol-tier loot, unfortunately), and then a series of tunnels through which you can leave. Follow them until you fall into a huge chasm – be sure to save a jump charge before landing so you don’t perish from fall damage. The maze in this section is full of Gorgons, glowing Harpies who slowly move through the labyrinth. Being spotted by a Gorgon means a raid wipe if you don’t destroy it in ten seconds. This is possible, but will take all your firepower as they’re very tough. And once you destroy one, the others get stronger.
There are a couple of chests hidden in the Labyrinth. The first is in a hole in the cliff behind you when you land, and the second is found by following the right wall of the maze. To navigate safely through the maze, go left of the rock in front of you when you enter. Then turn left again and cross the hall, climb to the top of the rock in the middle and wait until the Gorgons on your right move away. Then follow the wall on your right side to the end of the labyrinth.
There is a jumping puzzle at this point that, like the Vex plates, debuted in the Vault of Glass but has since been reused many times. The idea should be familiar: you need to cross a series of platforms that disappear and reappear periodically, then jump across to the narrow ledge on the other side. You don’t have to use all the platforms – after the first few, you should be able to use double or triple jump to launch yourself all the way across.
Gatekeepers
To challenge Atheon, you must defeat three Gatekeepers; one each in the past, present, and future. The first Gatekeeper is in the room when you enter. Kill the Hobgoblin snipers and other enemies first; once you defeat the Gatekeeper, the encounter moves to the next phase.
You are now able to open two portals in the room; the left portal (as you enter) leads to the past (though most players simply call it ‘Mars’ as it appears to be set on the red planet), and the right portal leads to the future (aka, ‘Venus’). These portals are opened by standing on the corresponding sync plate. When you begin to capture a sync plate, Praetorians will spawn and attempt to re-capture it. Keep three Guardians back to defend the plate while three others head through the portal to kill the Gatekeeper. Defending the plate is crucial; if it is lost, a red Oracle spawns above the portal and will wipe the party if not destroyed immediately.
Once the Gatekeeper in a portal is defeated, it drops a Relic. Additionally, everyone in either portal dimension receives a debuff called ‘Marked by the Void’, which gradually clouds their vision over fifteen seconds until they can no longer see, at which point they begin to take damage and die. They must be cleansed by the Relic to remove this, so leave the portal as quickly as possible and cleanse the team.
Defeating a Gatekeeper also spawns a conflux back in the main arena, to which Vex Minotaurs will attempt to sacrifice themselves. Like before, if four Vex succeed, everyone dies. At this point, we recommend splitting your party into three teams – one to defend the Conflux, one to capture and defend the other plate, and one to head into the final portal to defeat the last Gatekeeper. This last team should include the Relic holder, so they can cleanse their comrade. The teams needn’t be the same size; one skilled player can defend the Conflux solo.
The first plate will inevitably become overrun, so the Conflux defenders must be sure to defeat Oracles that appear above it. You could keep the Relic back to cleanse, but this time the portal team will acquire the ‘Marked by the Void’ debuff as soon as they enter, so they’ll either have to be very quick to kill the Gatekeeper and get the second Relic or they should take the first Relic into the portal and the team in the main arena will need to destroy Oracles in the right order until they return. We advise the latter.
Once you’ve defeated the third Gatekeeper and returned through the portal, everyone should concentrate on defending the Conflux until the encounter ends.

Atheon
This is the final boss encounter in the raid. Early in the fight, Atheon teleports three of your teammates – the ones furthest away from him – to either Mars or Venus. On Mars, you must fight three Descendant Hobgoblins – the relic holder can kill them instantly, so don’t shoot them as this will activate their shields. On Venus, you must fight two Precursor Goblins and a Praetorian.
In either case, the team will be Marked by the Void. You’ll spawn next to a Relic, which one player must take and use for regular cleansing; additionally, six red Oracles will spawn in sequence and must be dispatched with urgency in the right order – assign one member of this team the job of killing Oracles exclusively.
Back in the arena, the remaining three Guardians should stack up on the plate that unlocks whichever portal the others have been sent to (again: left for Mars, right for Venus). You’ll need to defend it against Supplicant harpies that explode when they get close to you – stand on top of the pillars to mitigate this damage. The goal here is to survive and keep the portal open so the away team can return when they’ve cleared their room.
When the away team has finished killing all the enemies and Oracles in their room, everyone receives a ‘Time’s Vengeance’ buff that reduces your ability cooldowns and allows you to deal bonus damage to Atheon for 30 seconds. This is, in other words, the damage phase. The portal should be ready for the away team to use as soon as the last enemy is down.
Once they’re safely back in the arena, it’s time to hit Atheon. It’s best to gather on the small platform at the centre of the arena as the Supplicants won’t bother you here and you’ve got a clear shot at the boss. Drop your usual damage-boosting buffs and pile into Atheon. If you’re the Relic holder, note that its Super attack does a lot of damage, and the cleanse/shield function can be used constantly for as long as Time’s Vengeance lasts, keeping you all safe.
Once Time’s Vengeance wears off, Atheon will teleport three teammates away again. Simply repeat the cycle until Atheon is vanquished and you are victorious.

Destiny 2 Vault of Glass changes and new content
Here are all of the known changes to the Vault of Glass raid:
- Rather than destroying Oracles when you see them, you now have to listen to a ‘Vex Song’ and see when they appear, then destroy them in a sequence.
- Wyverns and Overload Minotaurs now appear in the raid.
- Some unlockable Vault of Glass specific mods are available.
- Balance changes on loot so that it’s functionally different, but doesn’t change the weapon itself.
We’ll be sure to update this guide once we’ve seen more of the raid but until then, here’s our Vault of Glass walkthrough.
Destiny 2 Vault of Glass Vex Mythoclast
Though the raid isn’t live, the information regarding the Vex Mythoclast’s stats and perk rolls have been uploaded to the game’s database. The Vex Mythoclast returns from the original Destiny 1 raid, albeit with one big change: defeating enemies with this weapon builds stacks of Overcharge – swap firing modes while fully Overcharged to fire stronger linear fusion rifle shots.

Destiny 2 Vault of Glass shaders
The Continuum Alloy and Omnichronia shaders are exclusive to the Vault of Glass and cannot be acquired any other way. Bungie has said in the past they wouldn’t put items themed after endgame events in the Eververse, but the Destiny community believes this doesn’t apply because the items in question are shaders.
Now you’re prepared to take on Vault of Glass – for the latest on the transmog system, take a look at our Destiny 2 Armor Synthesis guide.