In this guide, we’ll guide you through the wonderful world of thermal paste, or thermal interface material (TIM). We’ll show you how to apply thermal paste in its various different forms, using different patterns depending on the Intel or AMD CPU you’re using.
You might think that placing the metal on the best gaming CPU right up against the metal on the best CPU cooler would result in good enough contact for heat to conduct effectively, but that’s not the case. A layer of thermal material between your CPU and its cooler remains an essential part of any PC build, and that situation isn’t going to change any time soon.
With a huge amount of options on the market, using all manner of materials, including ceramic, silver, and liquid metal thermal paste, it can be tough to work out the right one to use and the differences between them. In addition, there are several different sizes of CPU heatspreaders with which to contend, each demanding its own way of applying thermal paste. In this guide, we’ll cover the different types of thermal pastes, how they work, and how to apply them.
How thermal paste works
You might think that placing one metal component against another one would result in good enough contact for heat to conduct effectively from one component to the other. In reality, though, there are several factors preventing an efficient transfer of heat.
Firstly, while the surfaces of metal components are often machined to make them flat, you’d need an almost impossibly flat surface to achieve the best thermal transfer – if it’s not completely flat, you quickly start compromising the two surfaces’ ability to conduct heat between themselves.
The resulting surfaces may look flat to the human eye, and some even sport a mirror finish, but on a microscopic scale, there will be peaks and troughs in the surfaces that prevent perfect contact across the entire area. In addition, the components themselves may not be sitting perfectly flat. Even if you were to achieve a surface as perfect as your average space telescope mirror, you’d still likely see your CPU overheating within minutes.

The answer to all these issues is thermal paste. It provides a malleable layer between the two surfaces that spreads out under pressure when, for example, you mount your cooler to your CPU’s heatspreader. It fills those microscopic peaks and troughs, ironing out any other imperfections. The paste itself is thermally conductive, creating the perfect filling for this component sandwich.
Thermal paste is created with this microscopic landscape in mind and incorporates sub-micron-sized particles to fill even the smallest gaps in these surfaces with thermally conductive materials. The actual materials used vary between pastes. The original thermal pastes were made largely from silicone grease, and performed relatively poorly compared to today’s ceramic-infused material.
No matter which paste material you use, though, all of them are designed to flow into these surface imperfections, in order to boost thermal transfer once two surfaces are placed together. Pastes can also differ in what’s known as cure time too. This is how long it takes for the suspended particles to flow into those microscopic gaps and achieve peak performance, which can take several days or more.
Thermal paste electrical conductivity
There are several types of thermal paste, and there are some situations where you should definitely pick one type over another, which we’ll get to in a minute. To start, standard pastes encompass two types, with the key differences being that they’re either electrically conductive or not. The goal of thermal pastes, of course, is to be as thermally conductive as possible, which has led to some exotic materials being used.
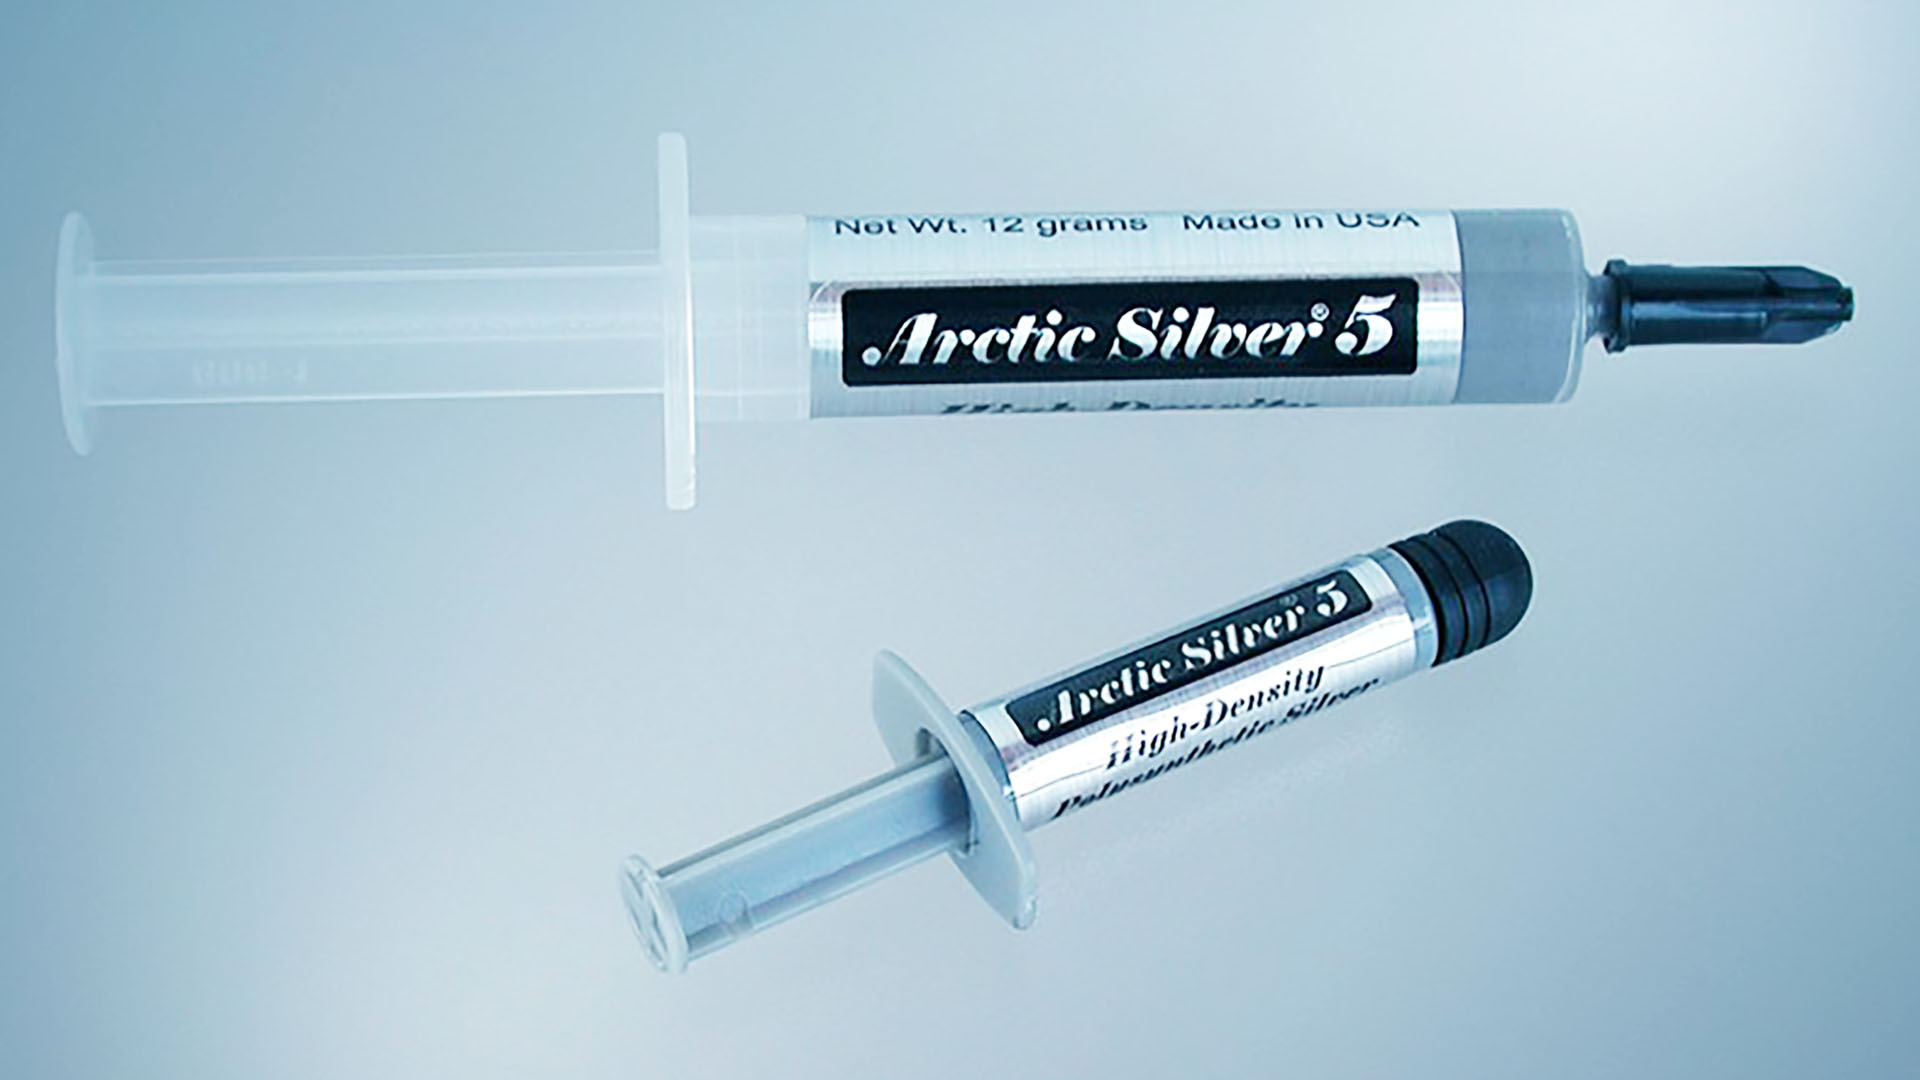
Some pastes use suspended particles of metal such as silver, as it’s even more thermally conductive than copper. Silver is used in Arctic Silver 5, for example. The downside is that it’s also even more electrically conductive than copper, so using it directly on dies without a heatspreader, and with nearby exposed components, is a very bad idea – the paste can potentially run and short-circuit components with disastrous consequences.
As a result, pastes that use unoxidized metals in their ingredients should only be used on chips with heatspreaders, or areas that have no exposed components nearby. The same is also true for liquid metal thermal materials, which we’ll discuss later.
Ceramic thermal paste
The most common types of pastes are based on metal oxides and other ceramic materials, with a silicone binding agent. Once they’re oxidized, metals such as aluminum lose their electrical conductivity, but retain a degree of thermal conductivity, making them ideal for use in thermal pastes. In fact, aluminum oxide can actually be used as an electrical insulator.
The exact make-up of the whole material varies between pastes, but most now use a mix of metal oxides, and some, such as ARCTIC MX-4, include other elements such as carbon. That’s not to be confused with carbon nanotubes, though, which are electrically conductive – MX-4, like other ceramic-based pastes, is also not electrically conductive.
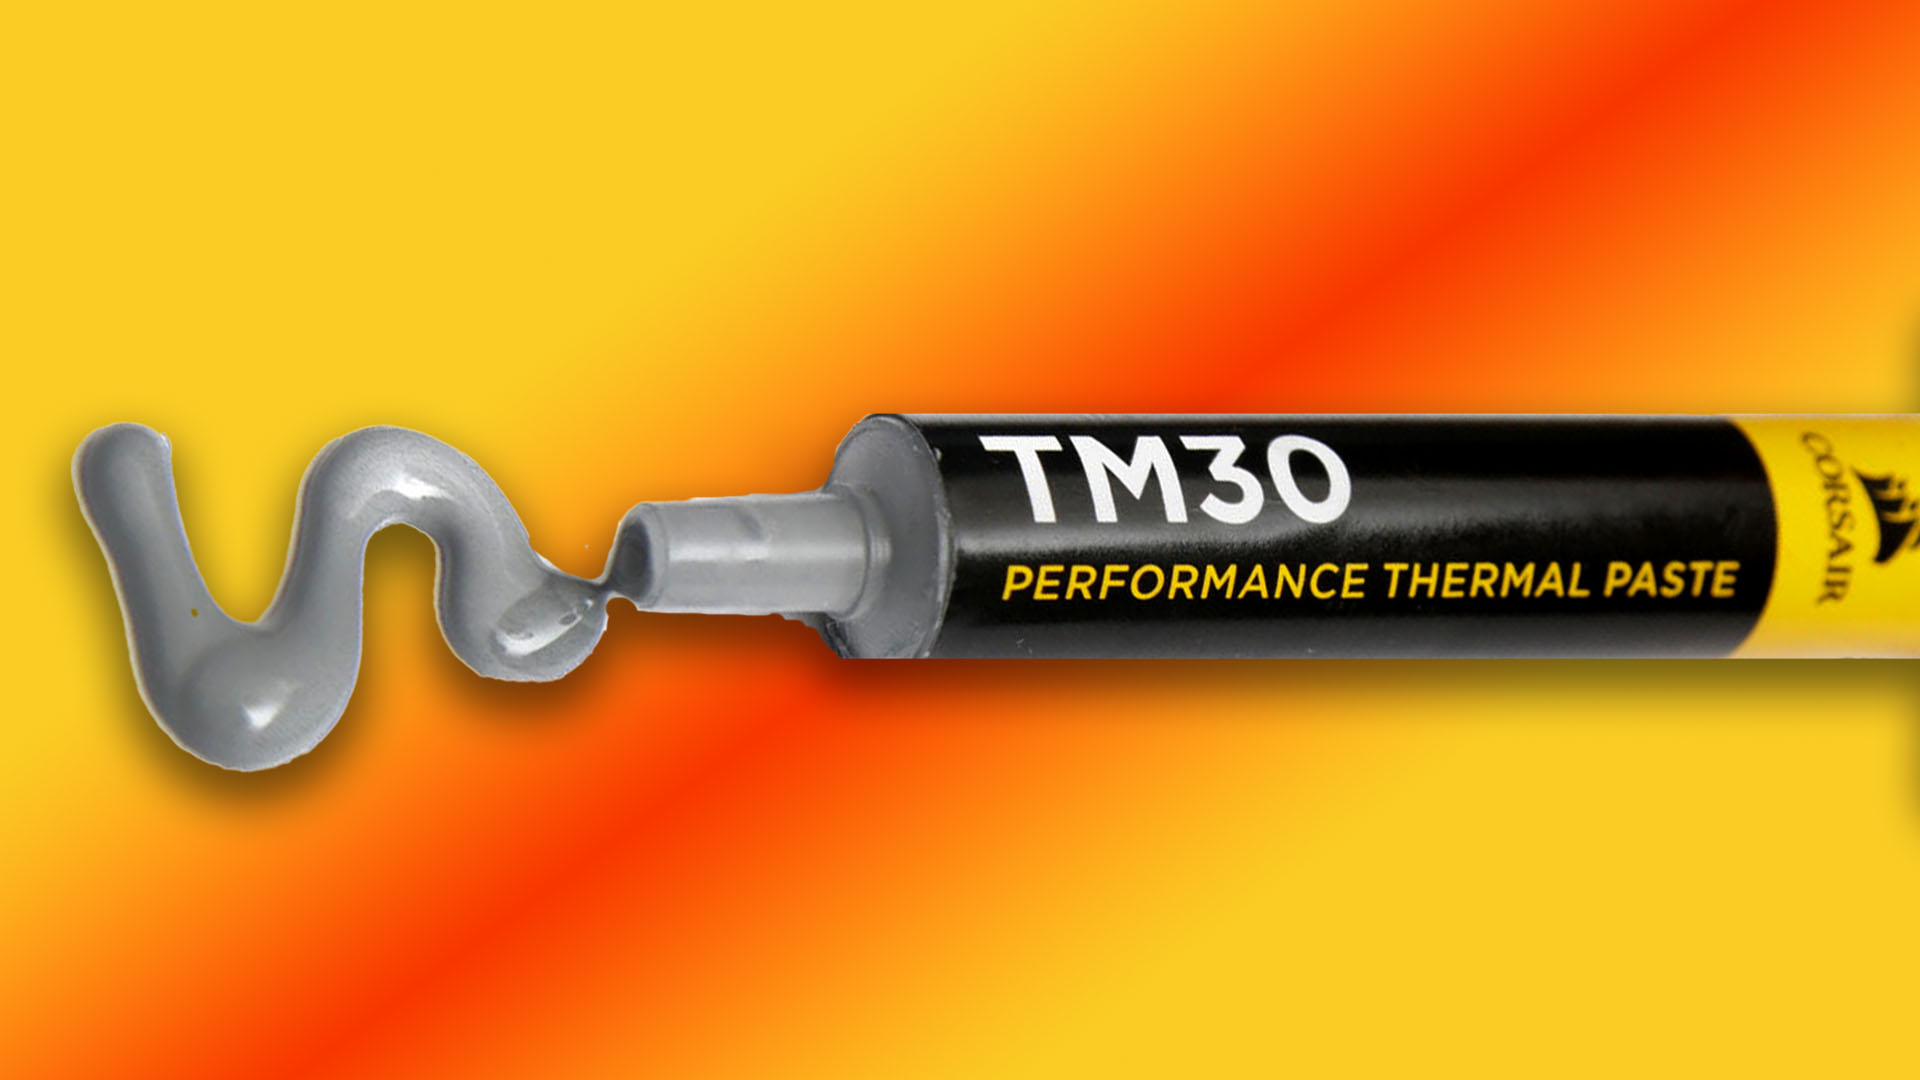
Ceramic pastes are often very easy to use, with a runny consistency that doesn’t require spreading, instead relying on the pressure between the components to create an even layer. However, as we mentioned earlier, some pastes require additional time after application before they reach peak performance.
For example, Arctic Silver 5 can take up to 200 hours for it to fully cure, during which time it will also thicken. However, Thermal Grizzly’s Kryonaut – a traditional ceramic paste – requires no cure time. This isn’t an issue for long-term use, but if you’re benchmarking or performance comparisons, you need to know if your chosen paste has a cure time.
Liquid metal thermal paste
Finally, there are liquid metal pastes. In fact, these materials are more like liquids than pastes, hence the title. They’re generally the best-performing materials for this purpose too, as well as the most expensive.
Thankfully, we’re not talking about using mercury to allow the paste to be liquid at room temperature, but neither are we talking about particles in a silicone suspension. These materials are real metal pastes that combine metals to create a eutectic alloy, with the unusual characteristic of having a melting point lower than any of the metals they comprise.
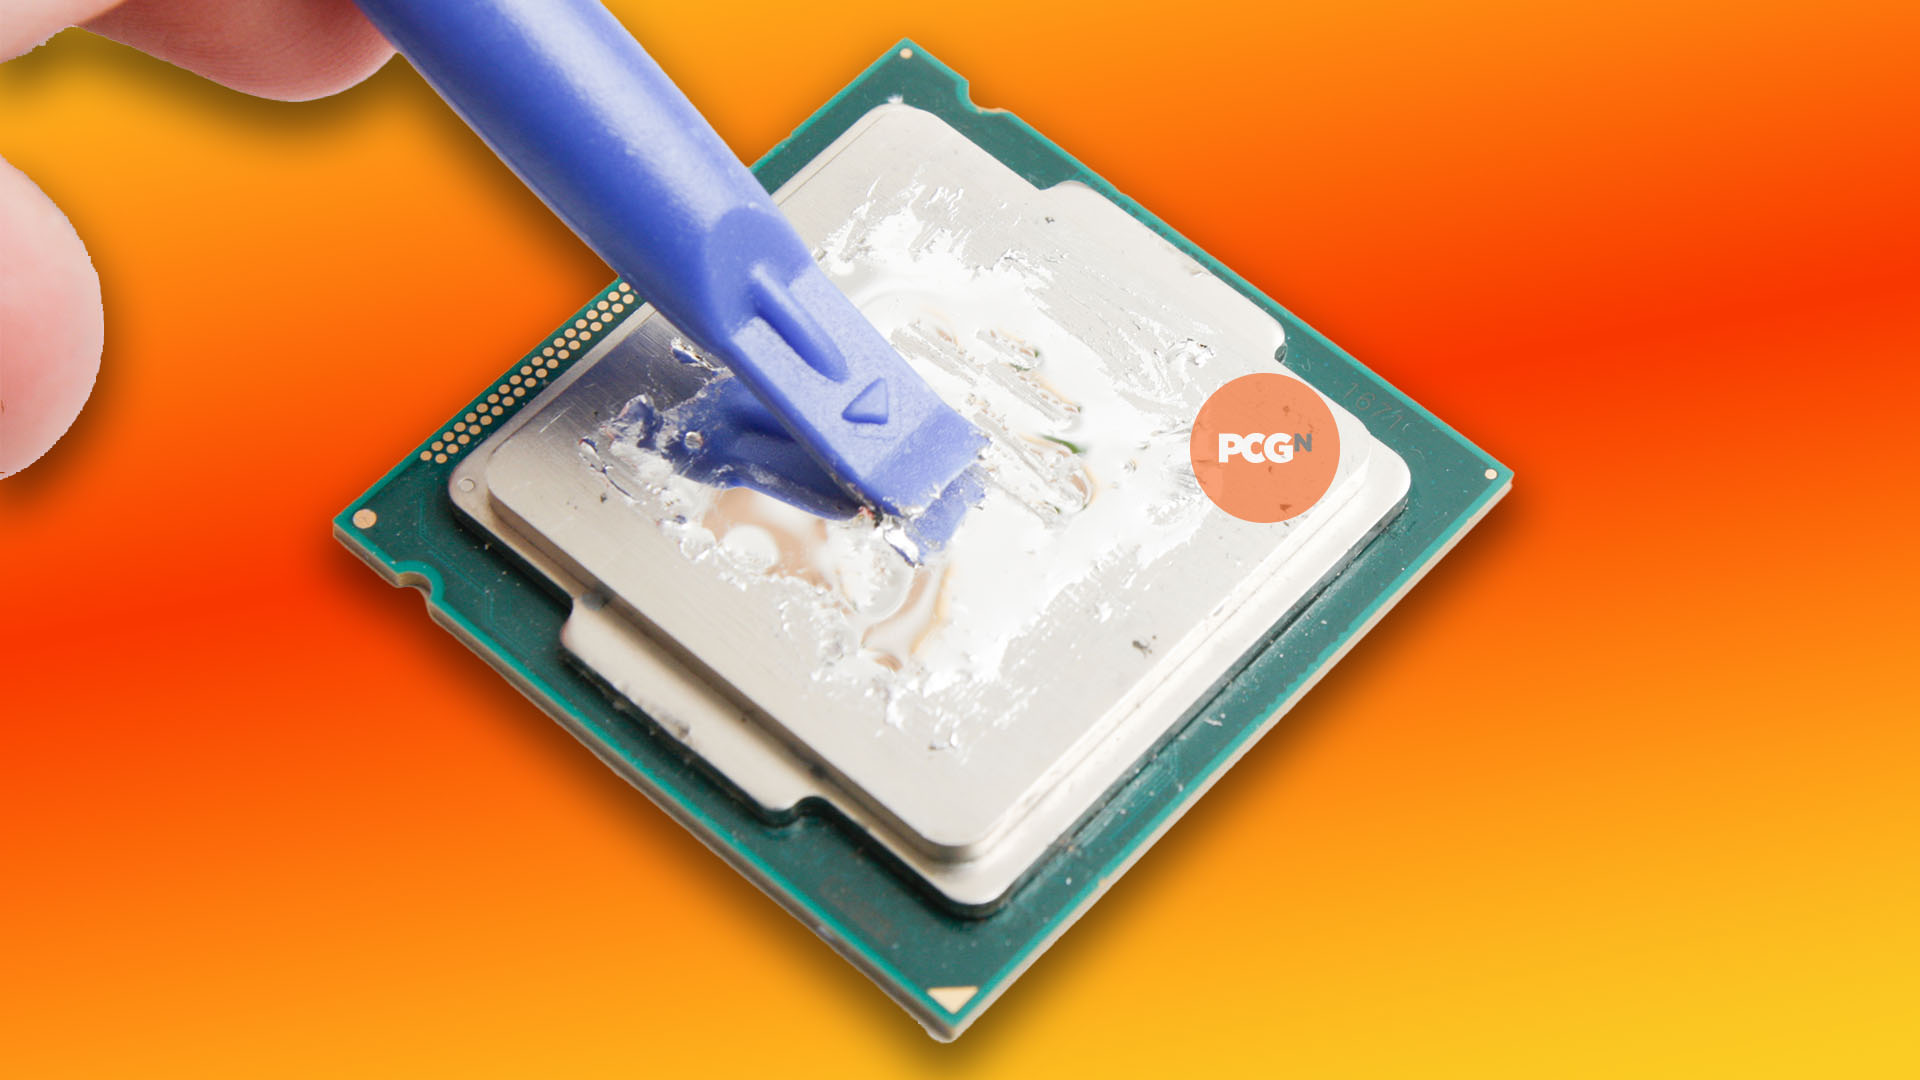
For example, Thermal Grizzly’s Conductonaut metal paste contains tin and gallium, both of which are solid at room temperature. When combined, though, they have a consistency even runnier than ceramic thermal pastes. As a result, they require a fairly lengthy manual spreading process. Needless to say, liquid metal pastes are electrically conductive and shouldn’t be used near exposed components, especially as they have more of a tendency to run than ceramic pastes.
Thermal pads
Due to thermal paste often requiring a degree of manual spreading or a specific application method, thermal pads are often used instead, especially on cooler-running components such as memory modules and chipsets. These pads are usually made from silicone and cut into specific shapes for individual components. However, these standard pads shouldn’t be used on CPUs, as they don’t have the right properties for filling microscopic gaps and dealing with high temperatures.
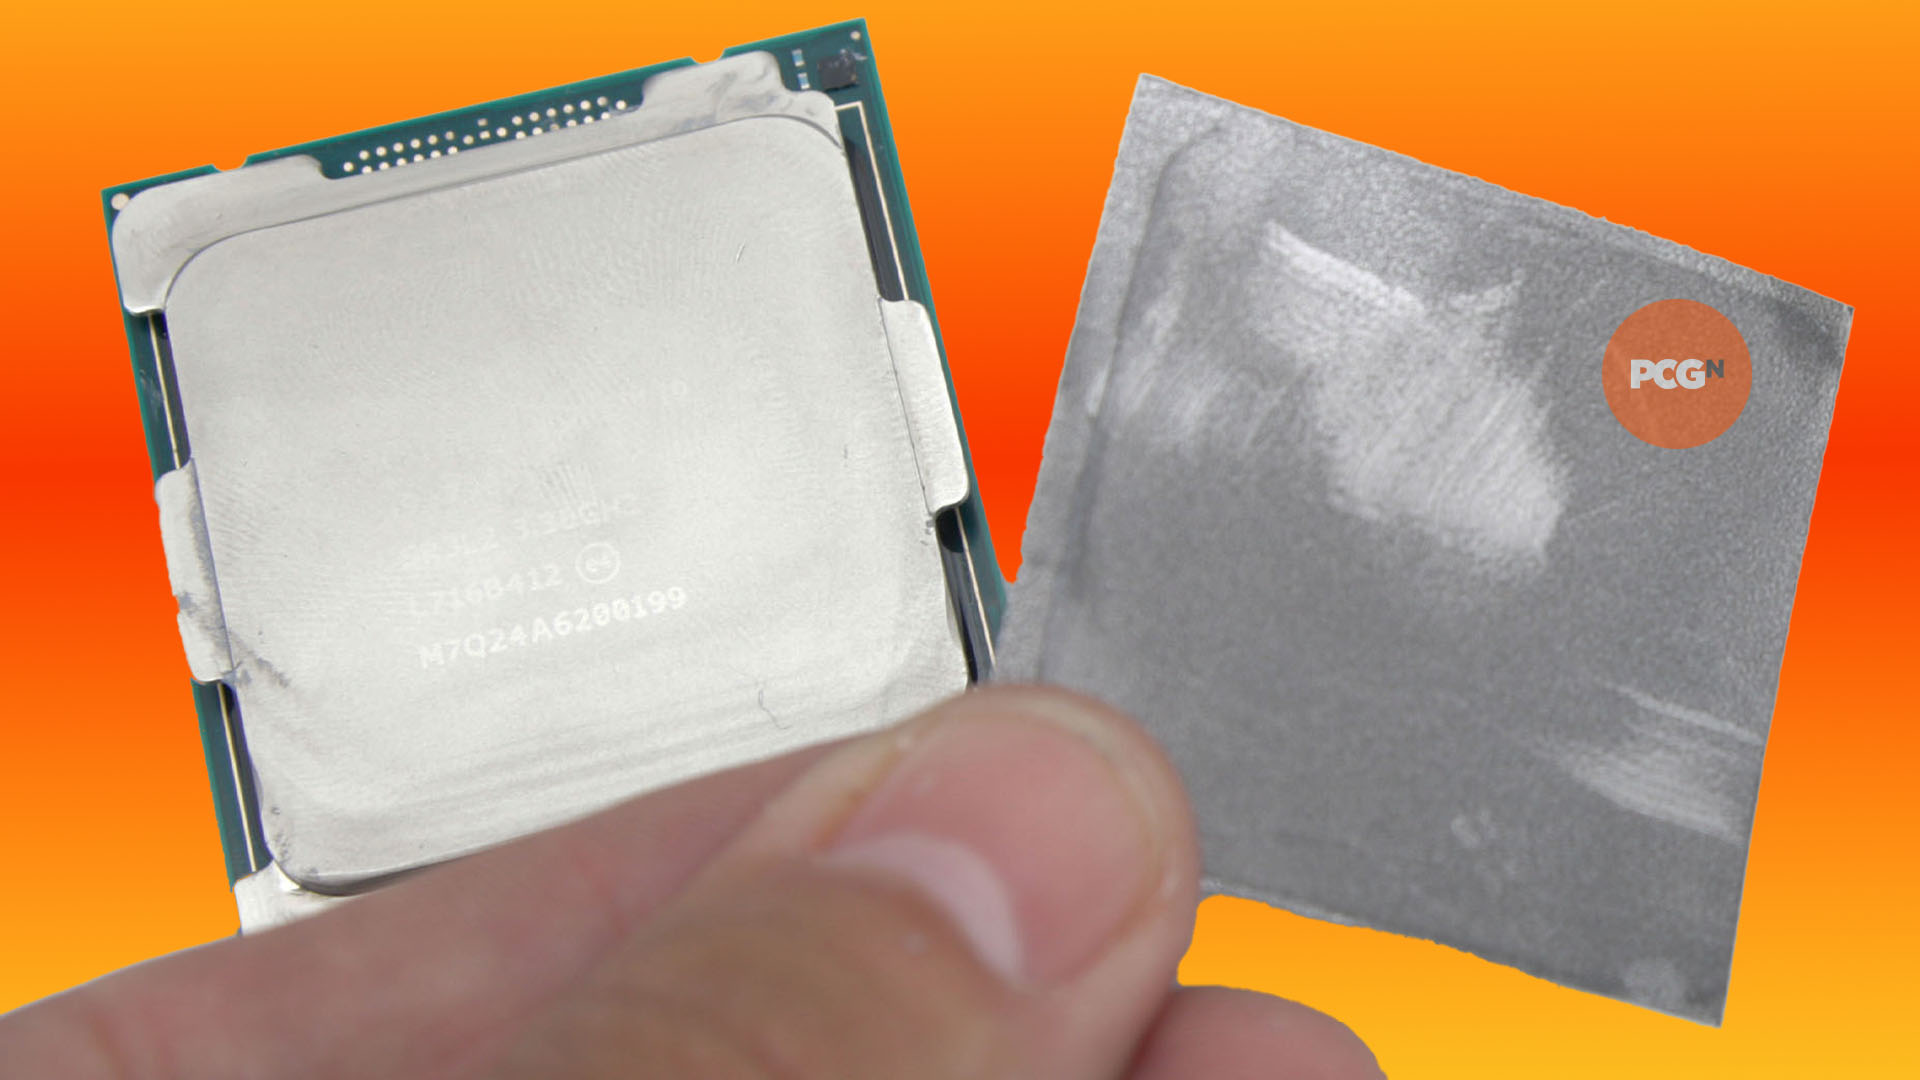
More recently, though, pads have been developed that use graphite and are actually designed to cool CPUs, replacing thermal paste entirely. IC Graphite’s thermal pads come in a variety of sizes to cater for the various CPUs available at the moment, and can perform similarly to high-performance thermal pastes. While they’re expensive, they’re also reusable, so they’re ideal if you regularly swap out CPUs plus you don’t have to worry about applying them in a specific way.
Which thermal paste pattern to use
Despite countless differing guides on how to apply thermal paste appearing over the years, plenty of recent testing shows that the only way it’s possible to really mess up here is if you apply too little paste. Applying too much should also be avoided, but mainly because it’s a pain to clean later on. Whether you use a single rice grain-sized dot, a cross shape or a line, there isn’t likely to be any difference in temperatures.
That said, on larger heatspreaders, especially those on Threadripper CPUs, applying a single dot of paste in the middle isn’t going to see it spread over the entire heatspreader. For this reason, there are some specific application methods you can use for each of the four sizes of CPU heatspreader available, when using traditional pastes such as ARCTIC MX-4. These methods will ensure that the paste spreads out across the heatspreader.
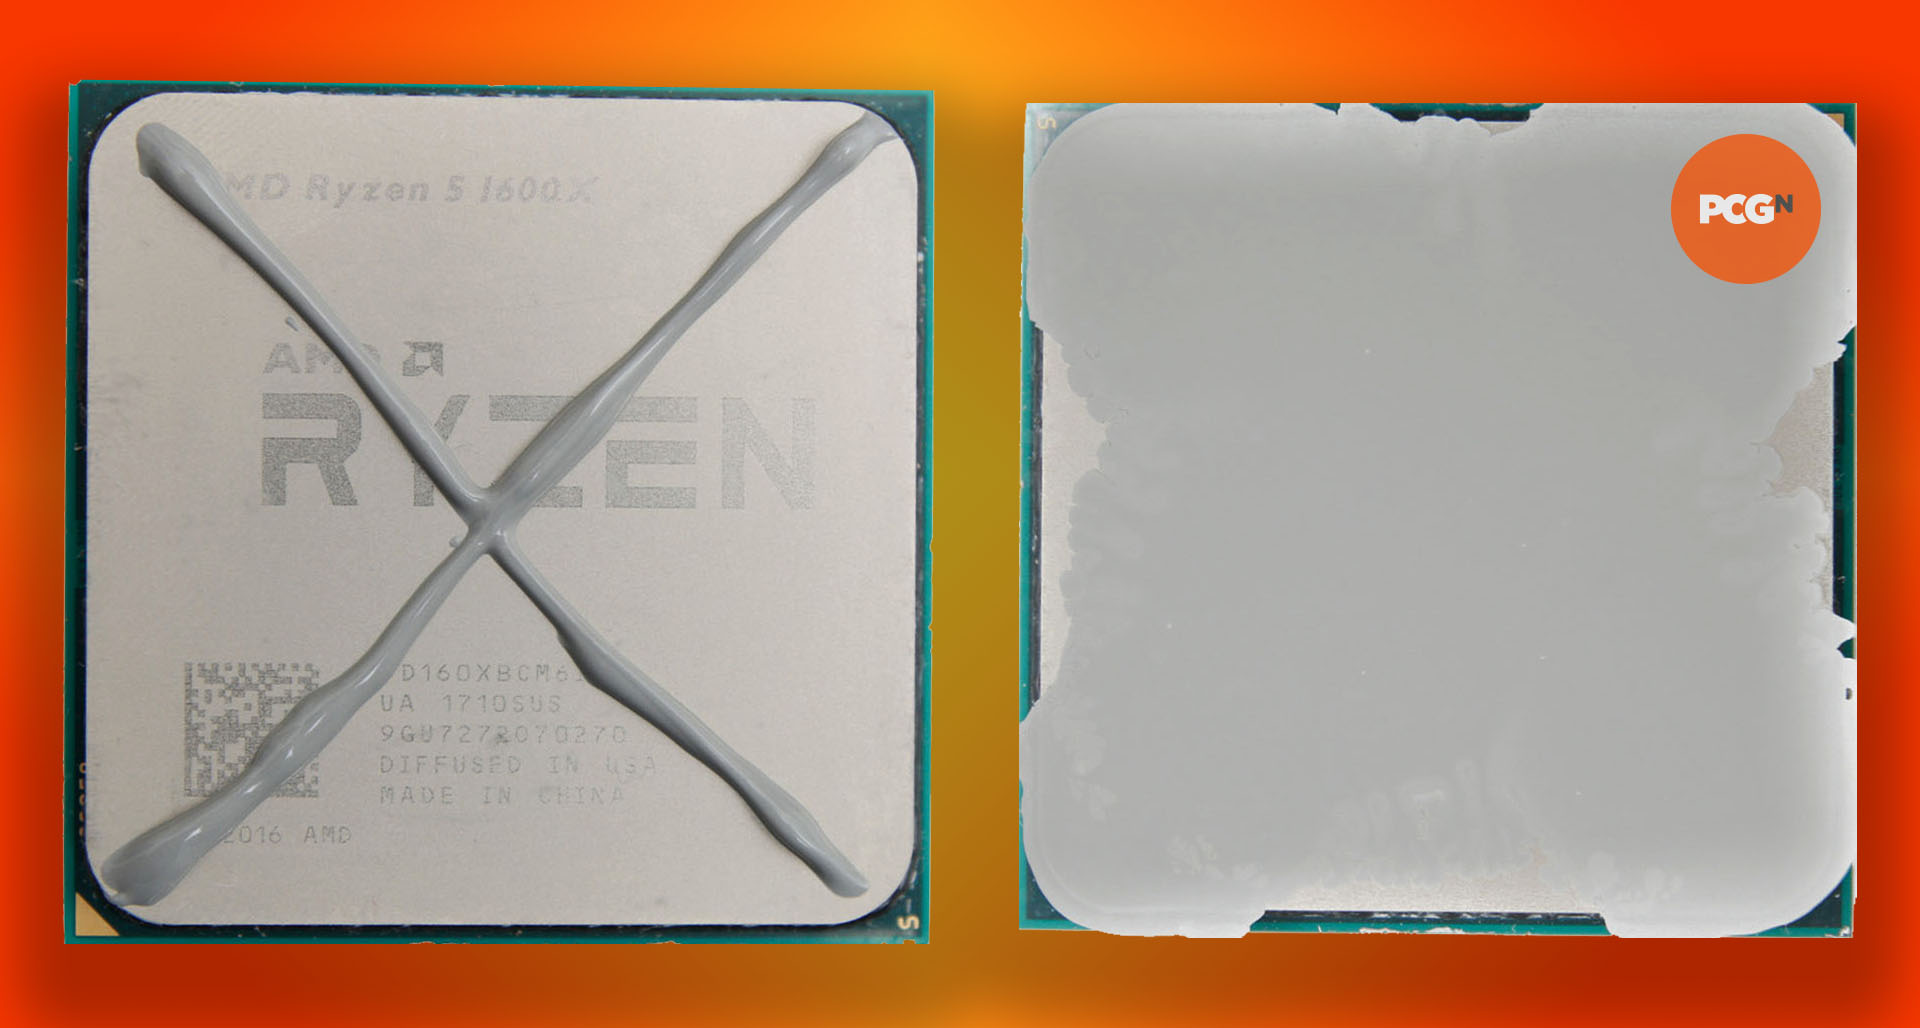
Below, you can see how to apply the paste onto the four current sizes of CPU heatspreader, and also see how some of the patterns spread once a glass block has been pressed on top of them, mimicking heatsink pressure.
Thermal paste on Intel LGA1700 CPUs
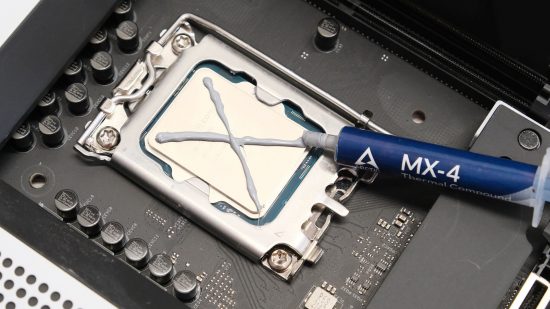
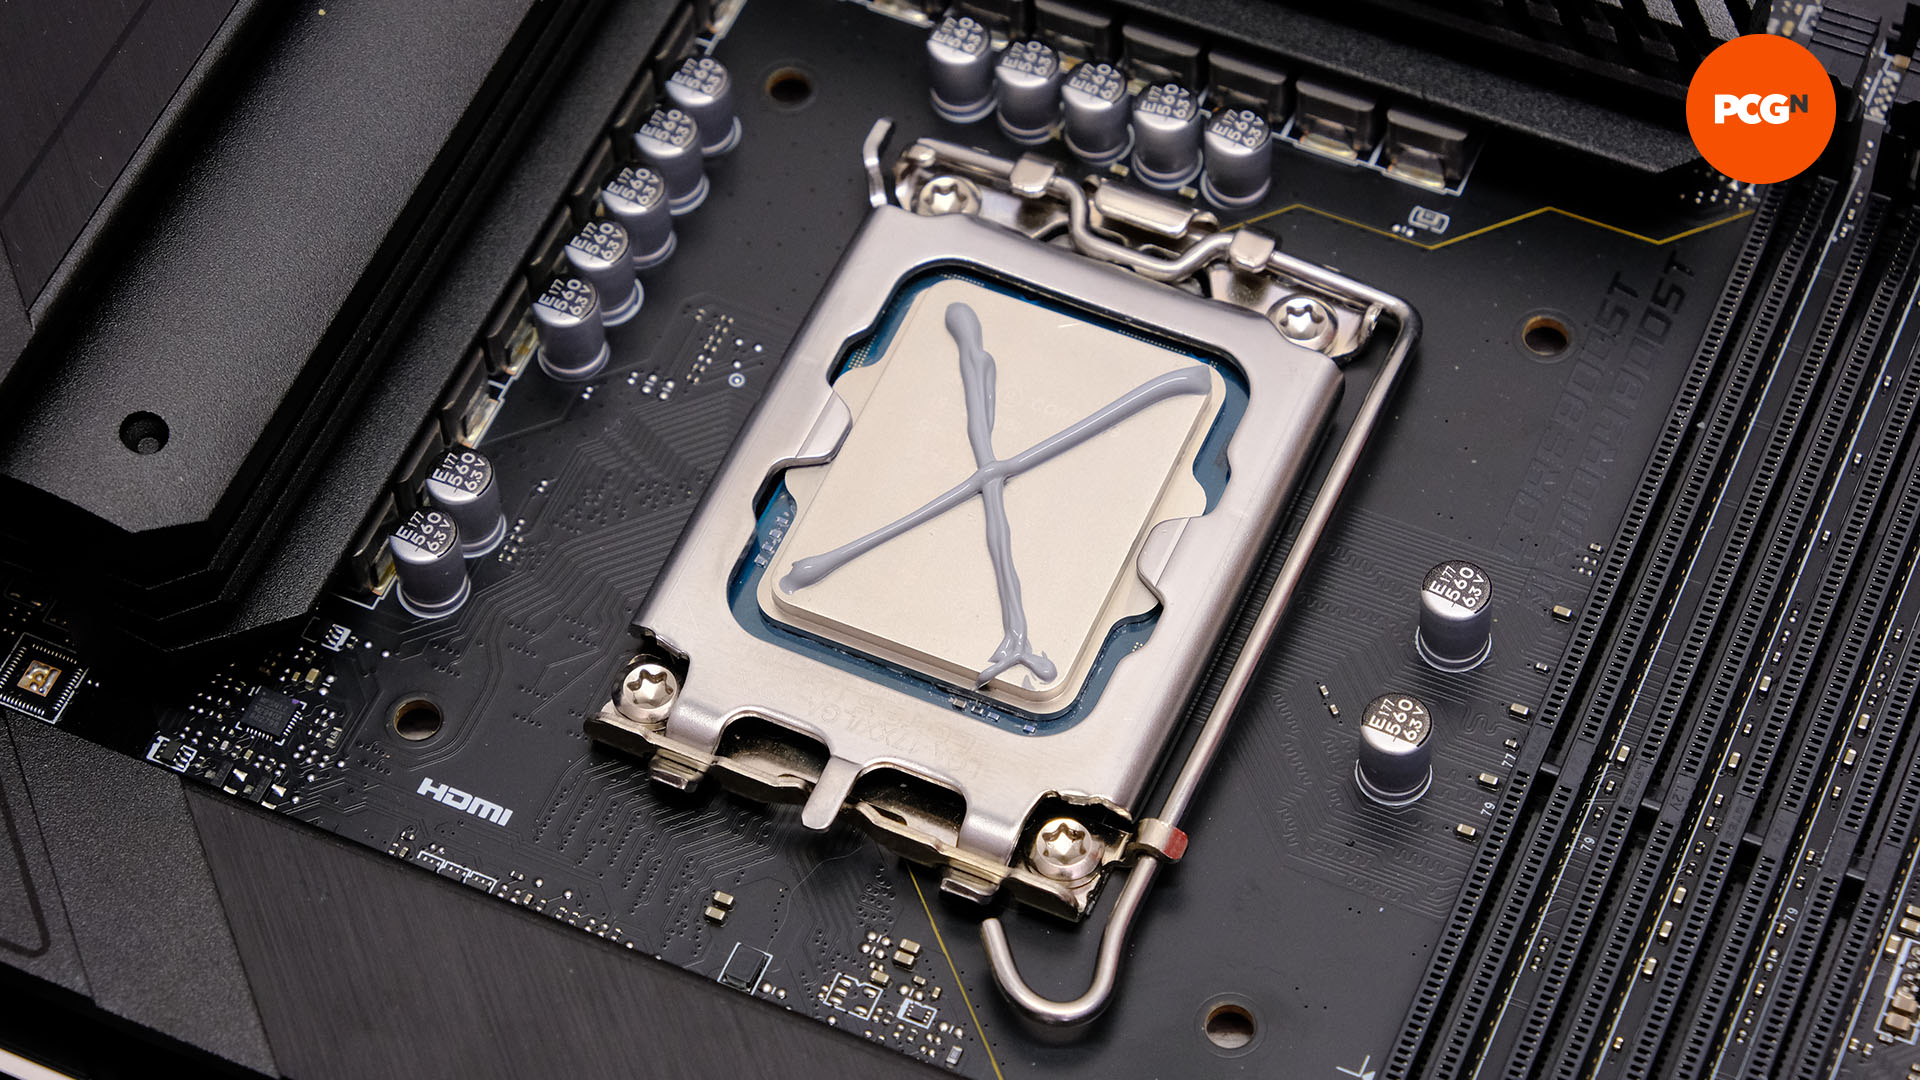
Intel’s latest 12th-gen Alder Lake CPUs are a bit longer than the company’s previous LGA115x chips, and applying a cross shape spanning the metal heatspreader from each corner, works really well for evenly spreading the paste.
Thermal paste on Intel LGA115x CPUs
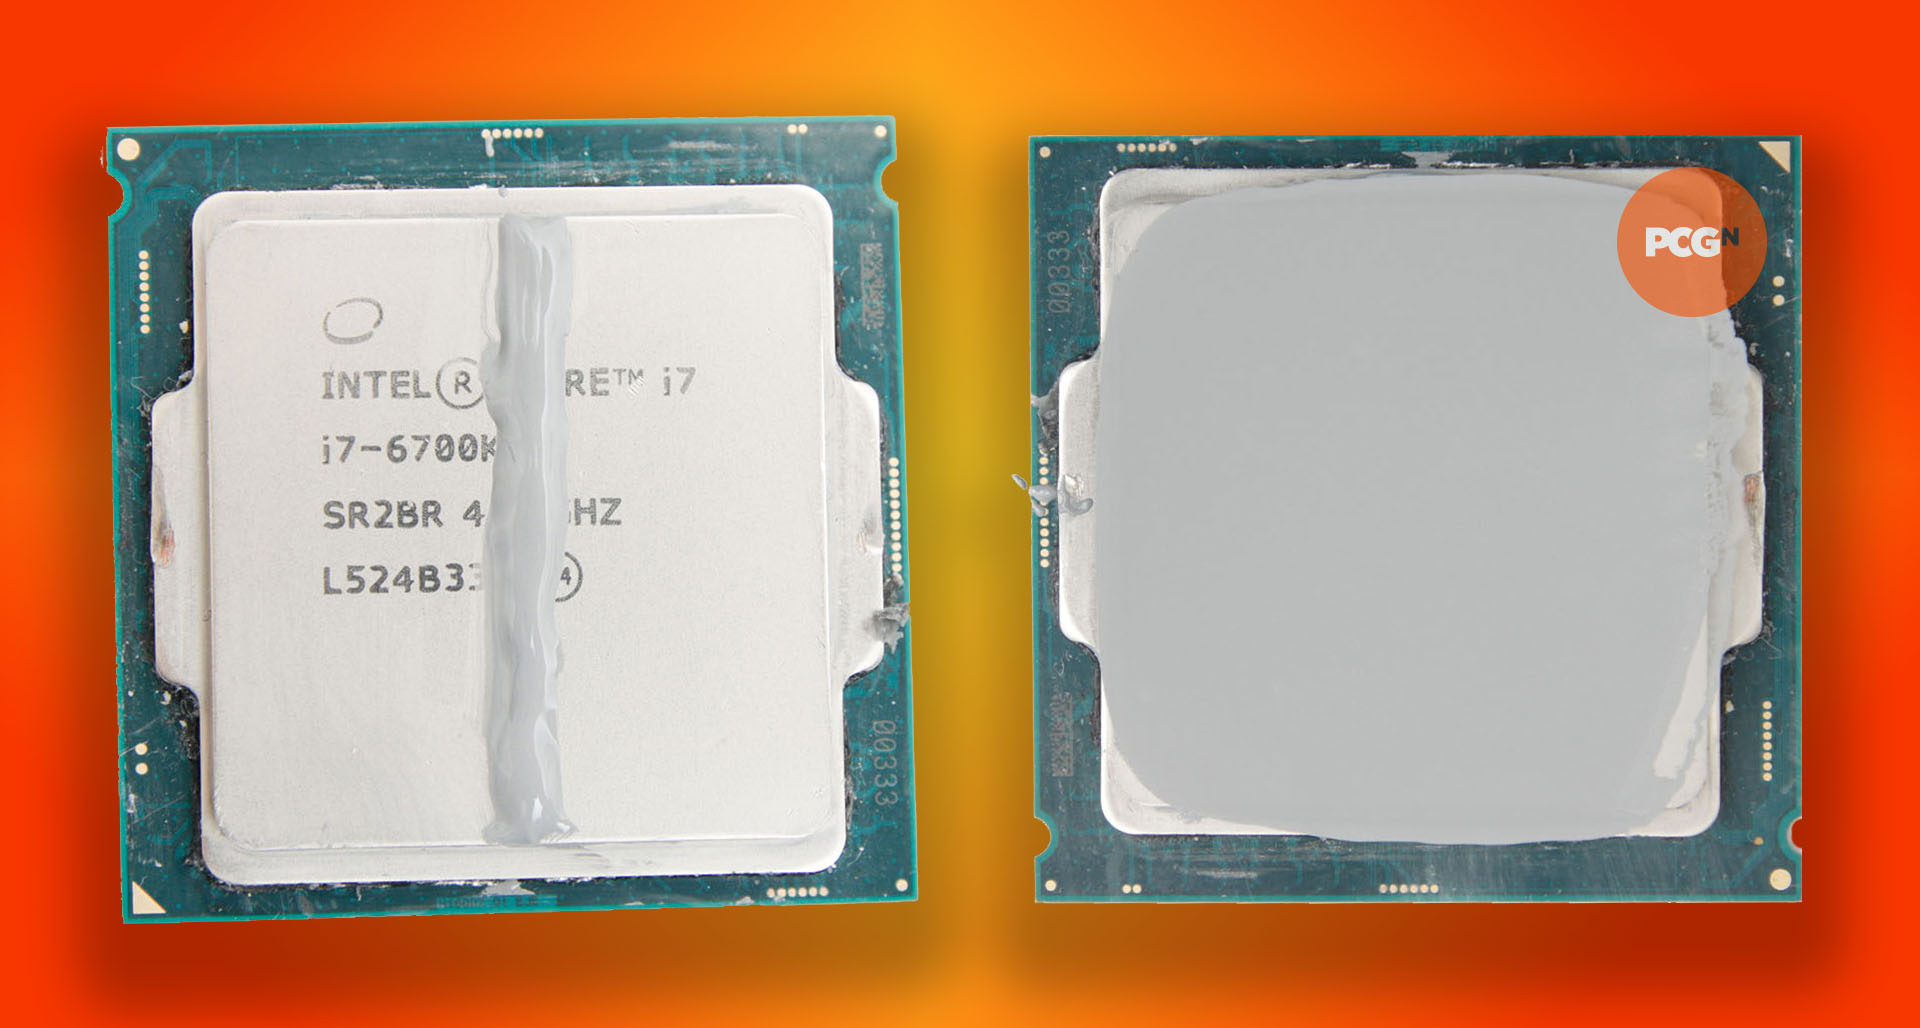
For Intel’s older mainstream CPUs, apply a thin line down the middle of the central, raised part of the heatspreader. Alternatively, apply a single large dot of paste, measuring 5-10mm across in the middle. When your heatsink is mounted, the pressure will allow the paste to spread over the entire heatspreader.
Thermal paste on Intel LGA2066 CPUs
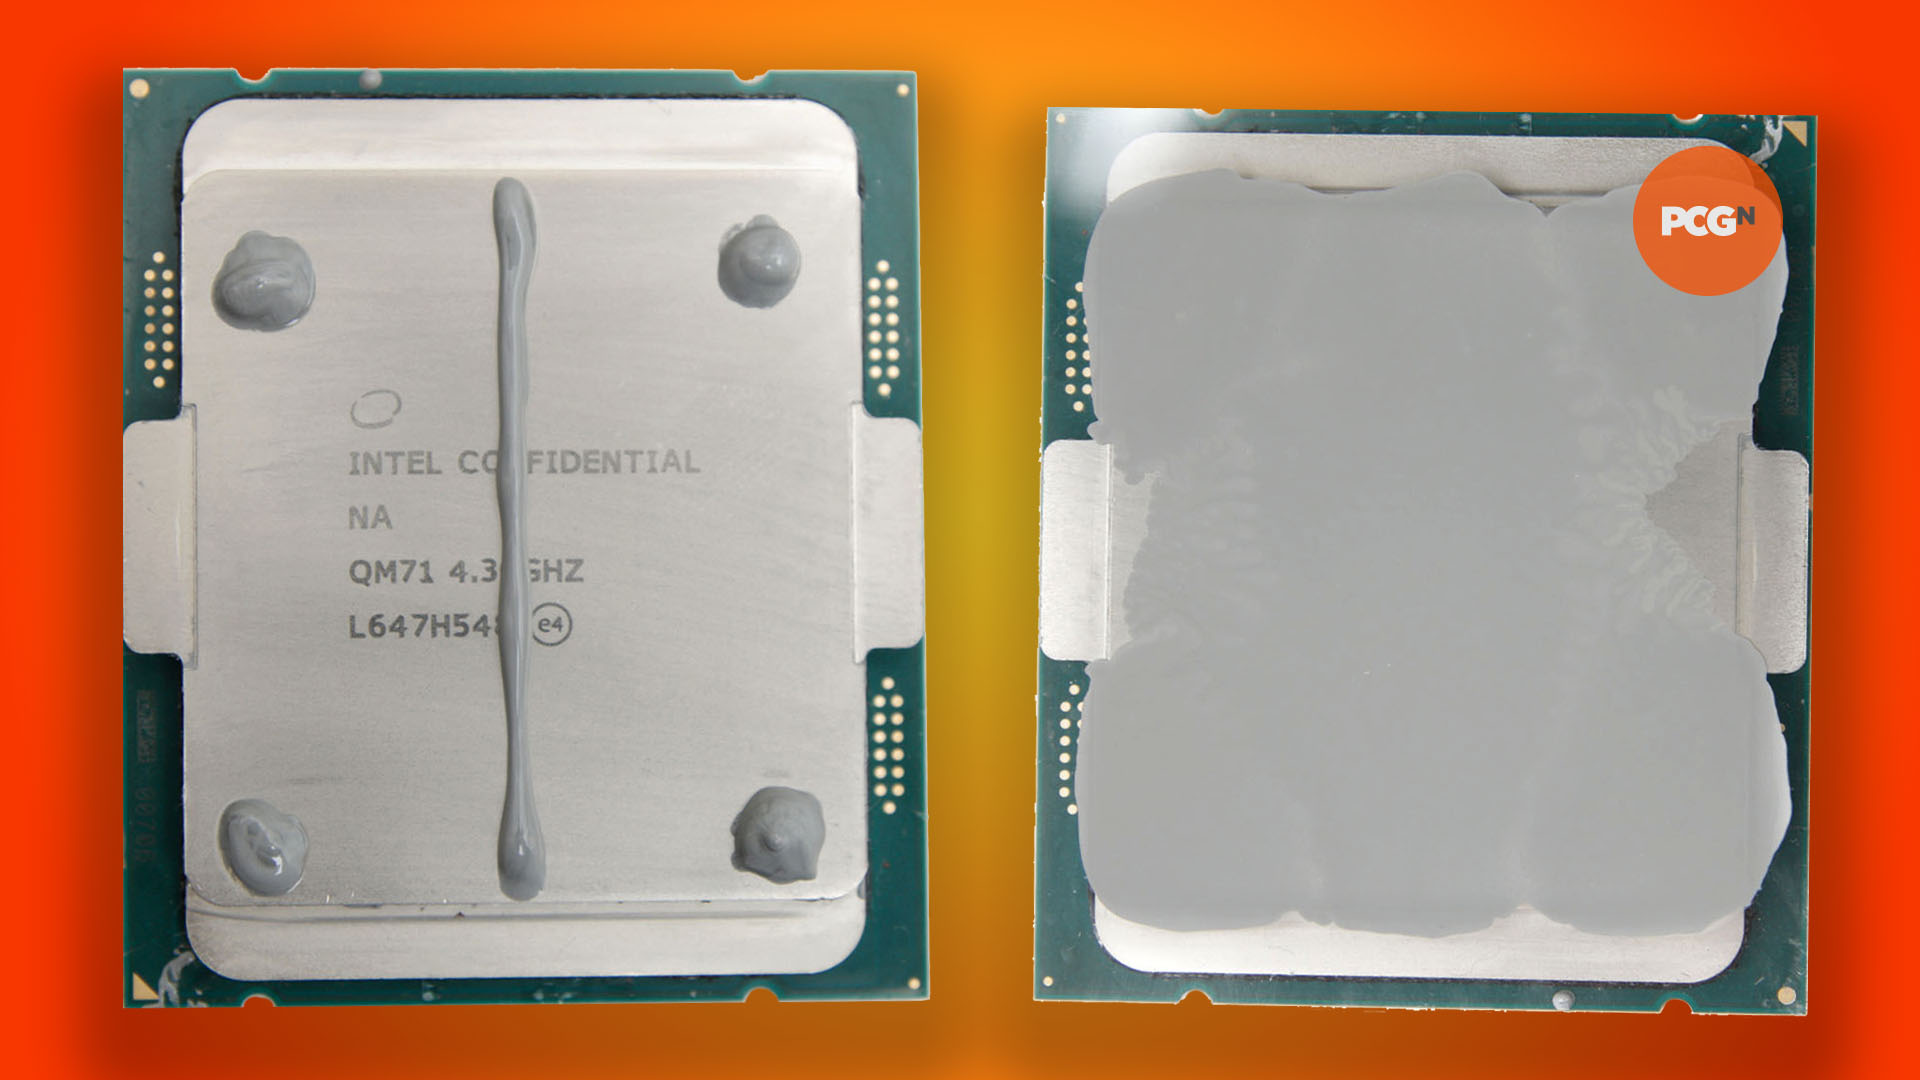
The line method works well for older LGA2066 CPUs as well, but due to the larger distance between the line and the edge of the CPU, you also need to apply four small (3-5mm across) dots of thermal paste a few millimeters in from each corner. As the line spreads outwards, it forces the dots to cover the middle edges of the heatspreader.
Thermal paste on AMD Socket AM5 CPUs
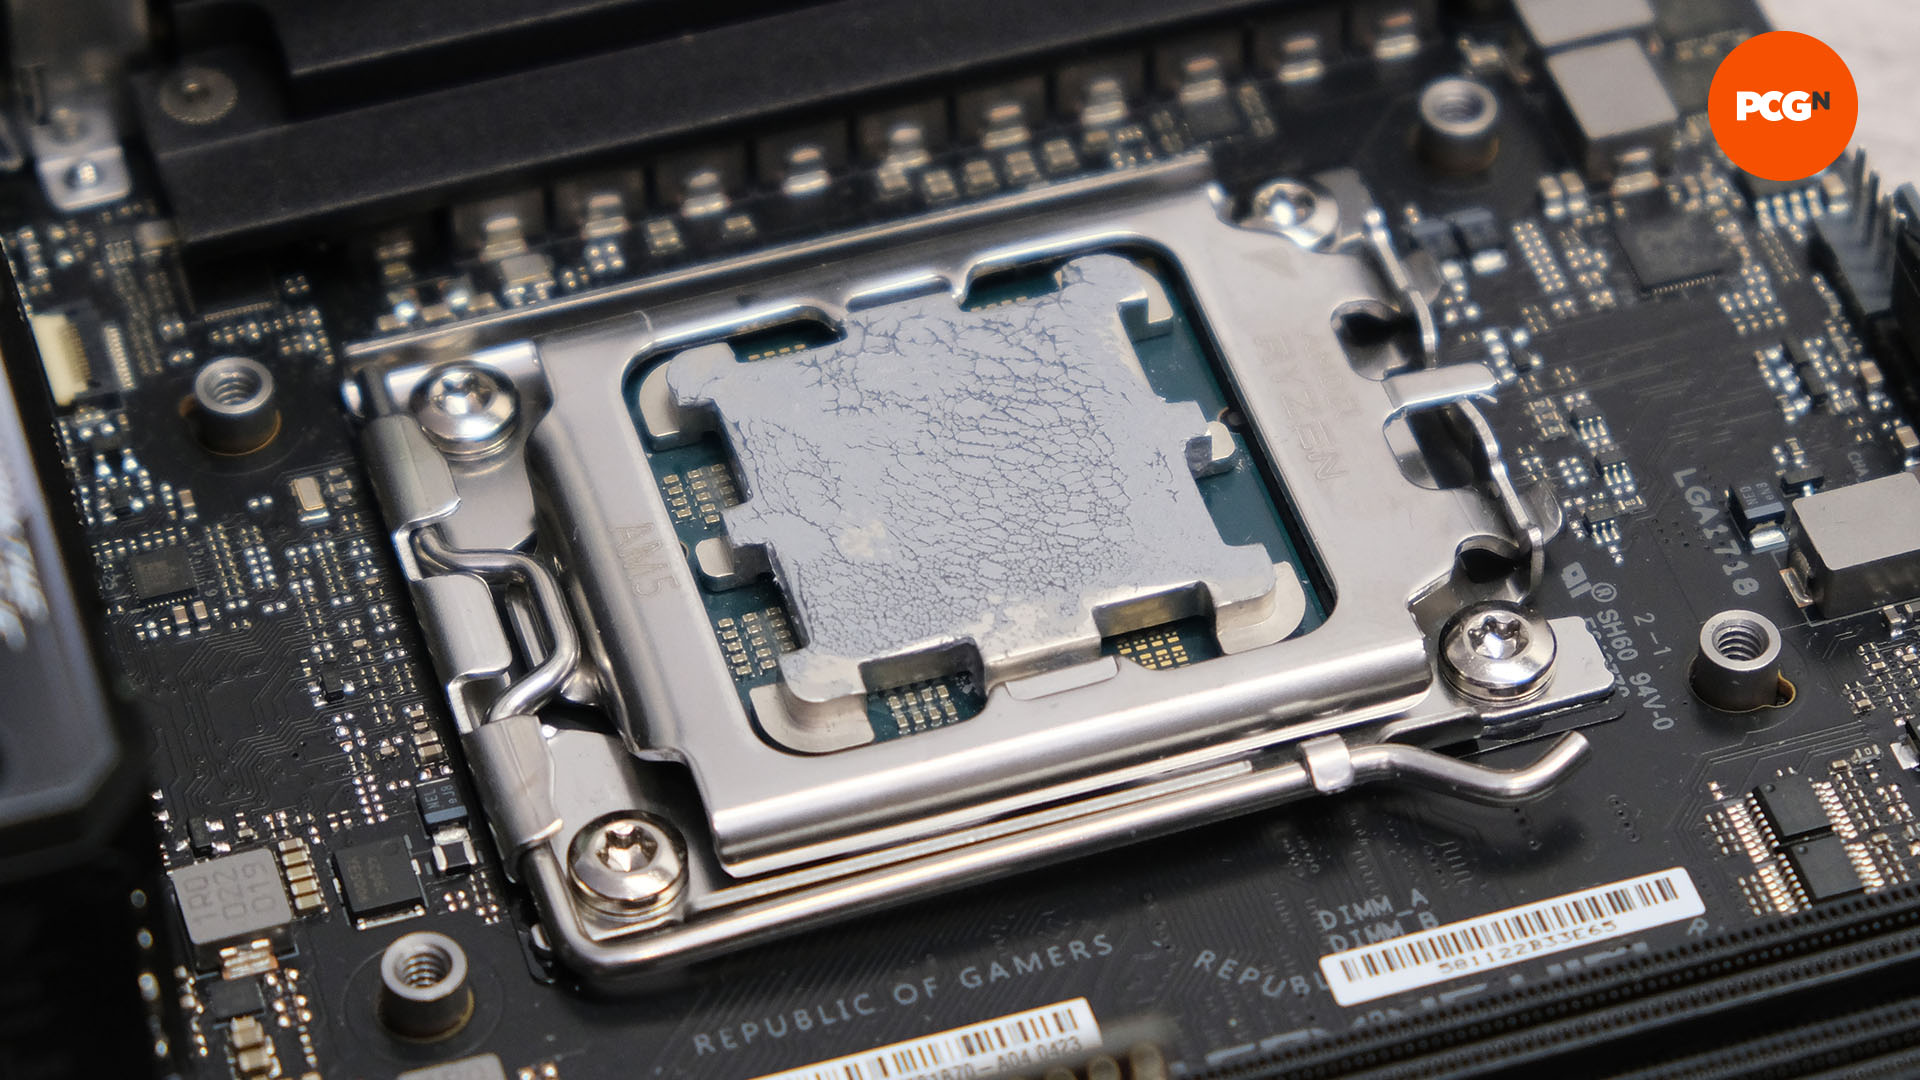
AMD’s latest Zen 4 CPUs introduce a new problem when it comes to applying thermal paste, which is a series of notches around the heatspreader, into which paste can get stuck. To avoid this problem, we recommend picking up a Noctua NA-STPG1 thermal paste guard, which sits around the CPU and stops you from accidentally getting paste in these notches.
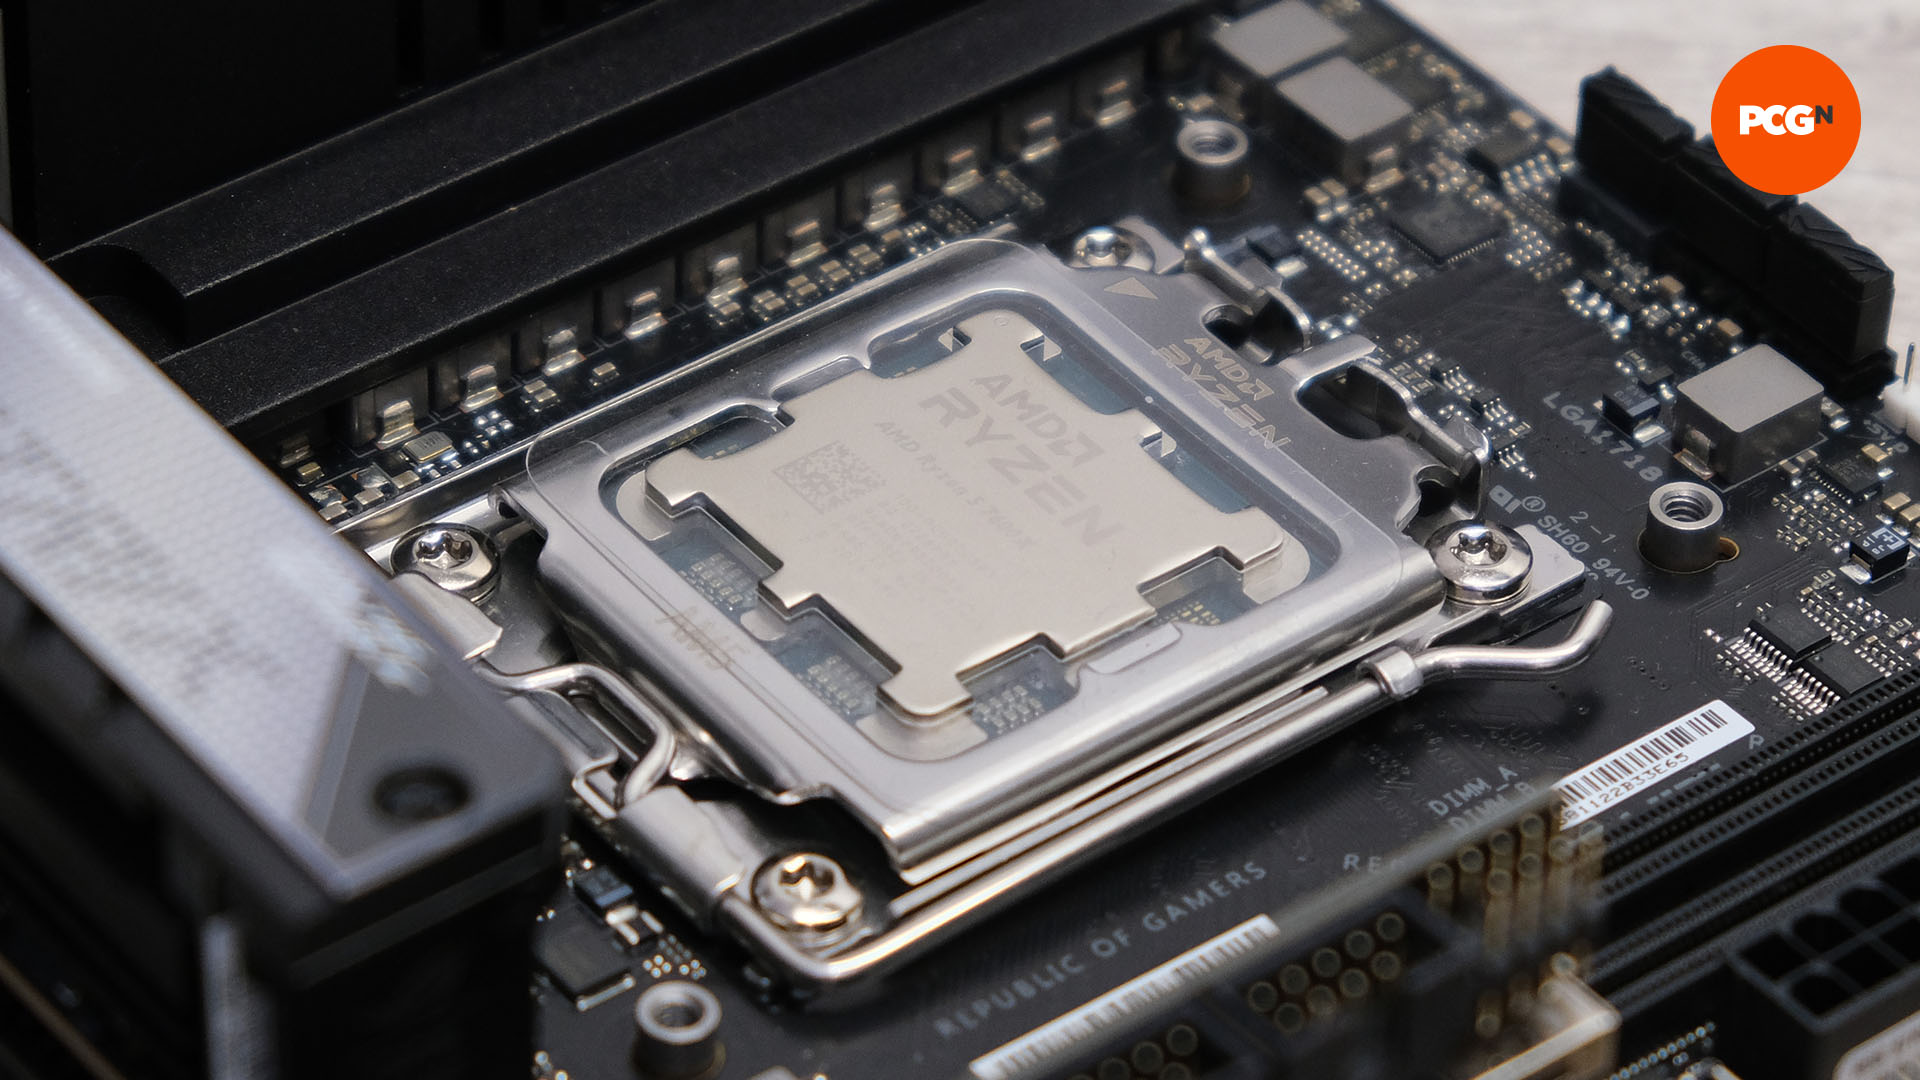
You place the guard around the CPU after you’ve put it in the socket and closed the latch, then apply thermal paste in a cross shape from corner to corner, as with AMD Socket AM4 CPUs. As you can see in our image below (after removing the cooler), this spread the paste evenly without it making a mess in the heatspreader notches.
Thermal paste on AMD Socket AM4 CPUs
AMD’s Socket AM4 Ryzen CPUs are slightly larger than Intel’s LGA115x chips, and applying a cross shape spanning the metal heatspreader from each corner (as shown in our example), works really well for spreading the paste. Alternatively, the single line method we used on our LGA115x CPU can also work here, running down vertically through the Ryzen logo.
Thermal paste on AMD Socket TR4 Threadripper CPUs
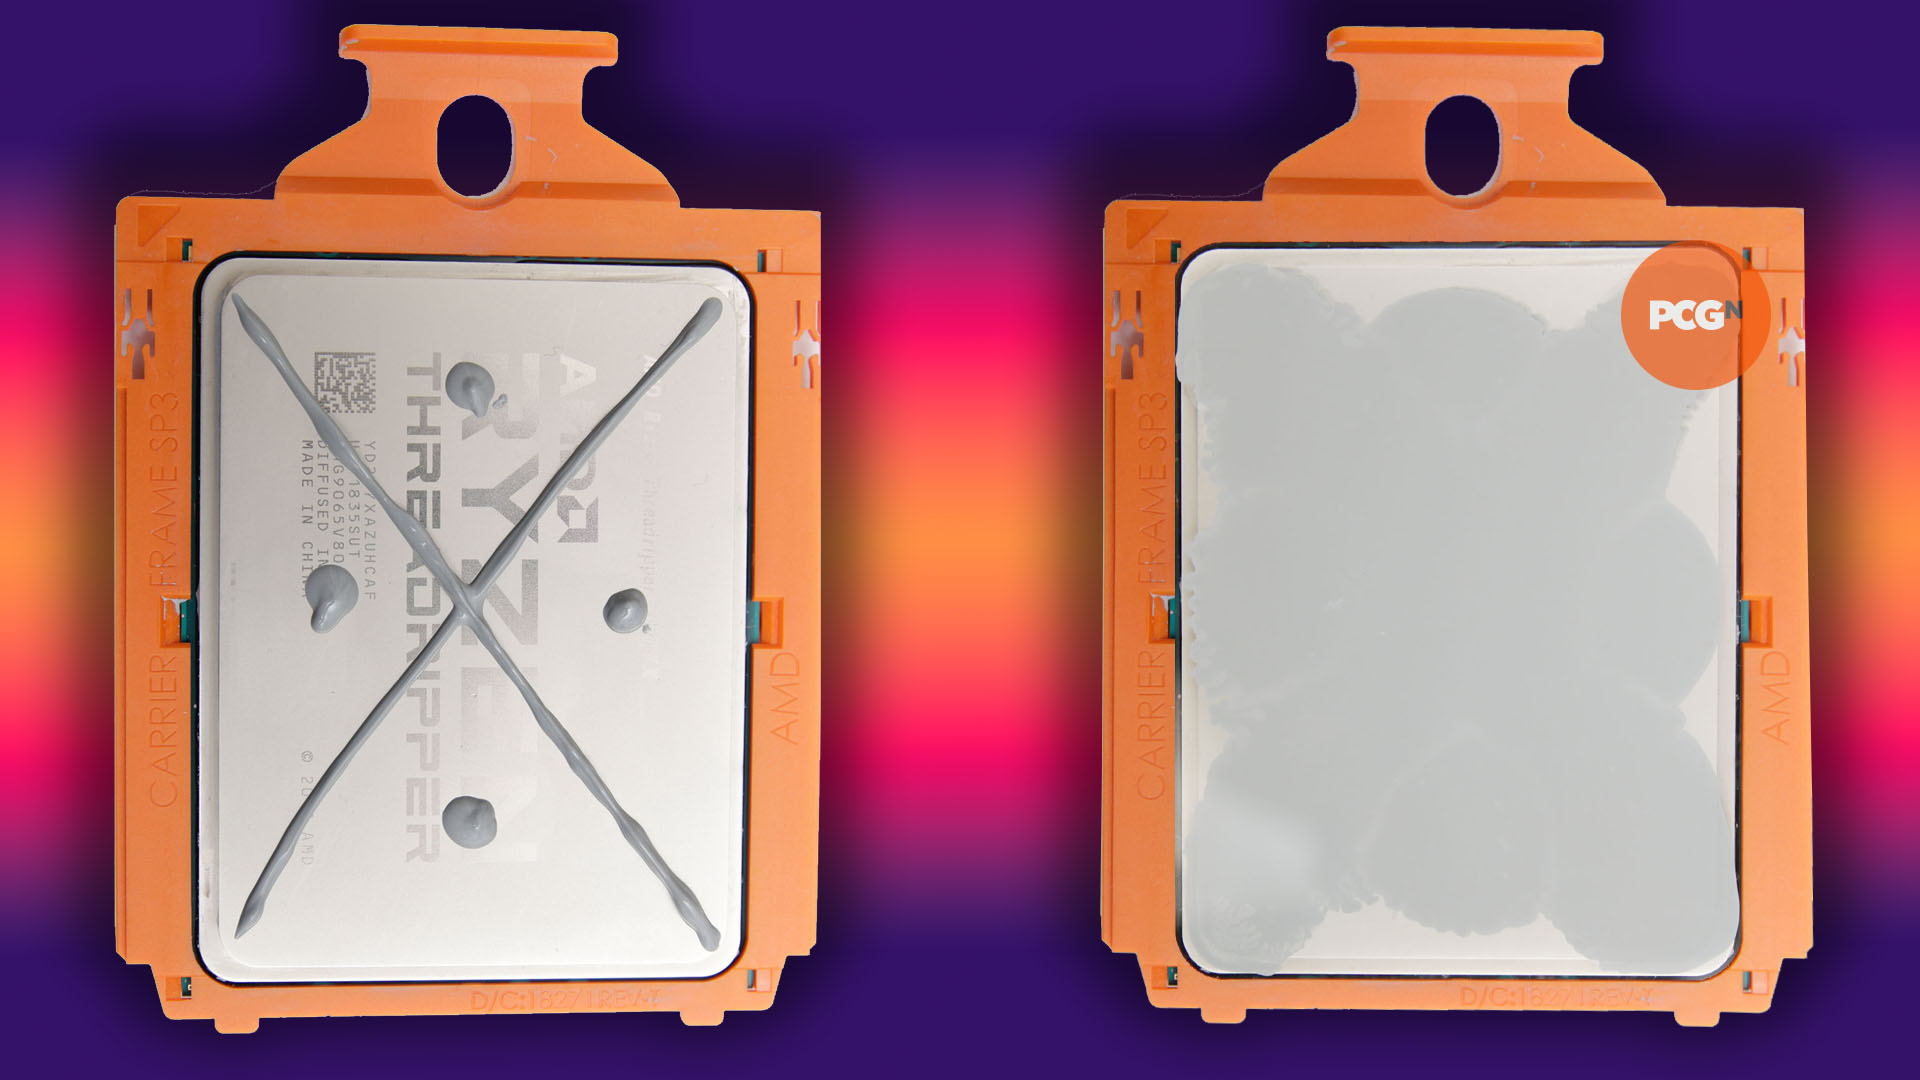
AMD’s Threadripper CPUs need a large amount of thermal paste, due to their size. The best application pattern is two lines in a cross shape, running from corner to corner, in addition to small dots in the center of each triangle made by the cross.
Alternatively, manually spreading the paste evenly over the surface also works – use a plastic spreader, rather than a cotton bud, as the latter can disintegrate and leave cotton fibers in the paste, acting as insulators. Just make sure there’s an even spread over the whole heatspreader.
How to apply liquid metal thermal paste
Liquid metal pastes need to be manually applied to the heatspreader, as they’re too thin and runny to spread evenly on their own. Start by applying a small, 5mm ball of paste on your CPU heatspreader. You only need a small amount.
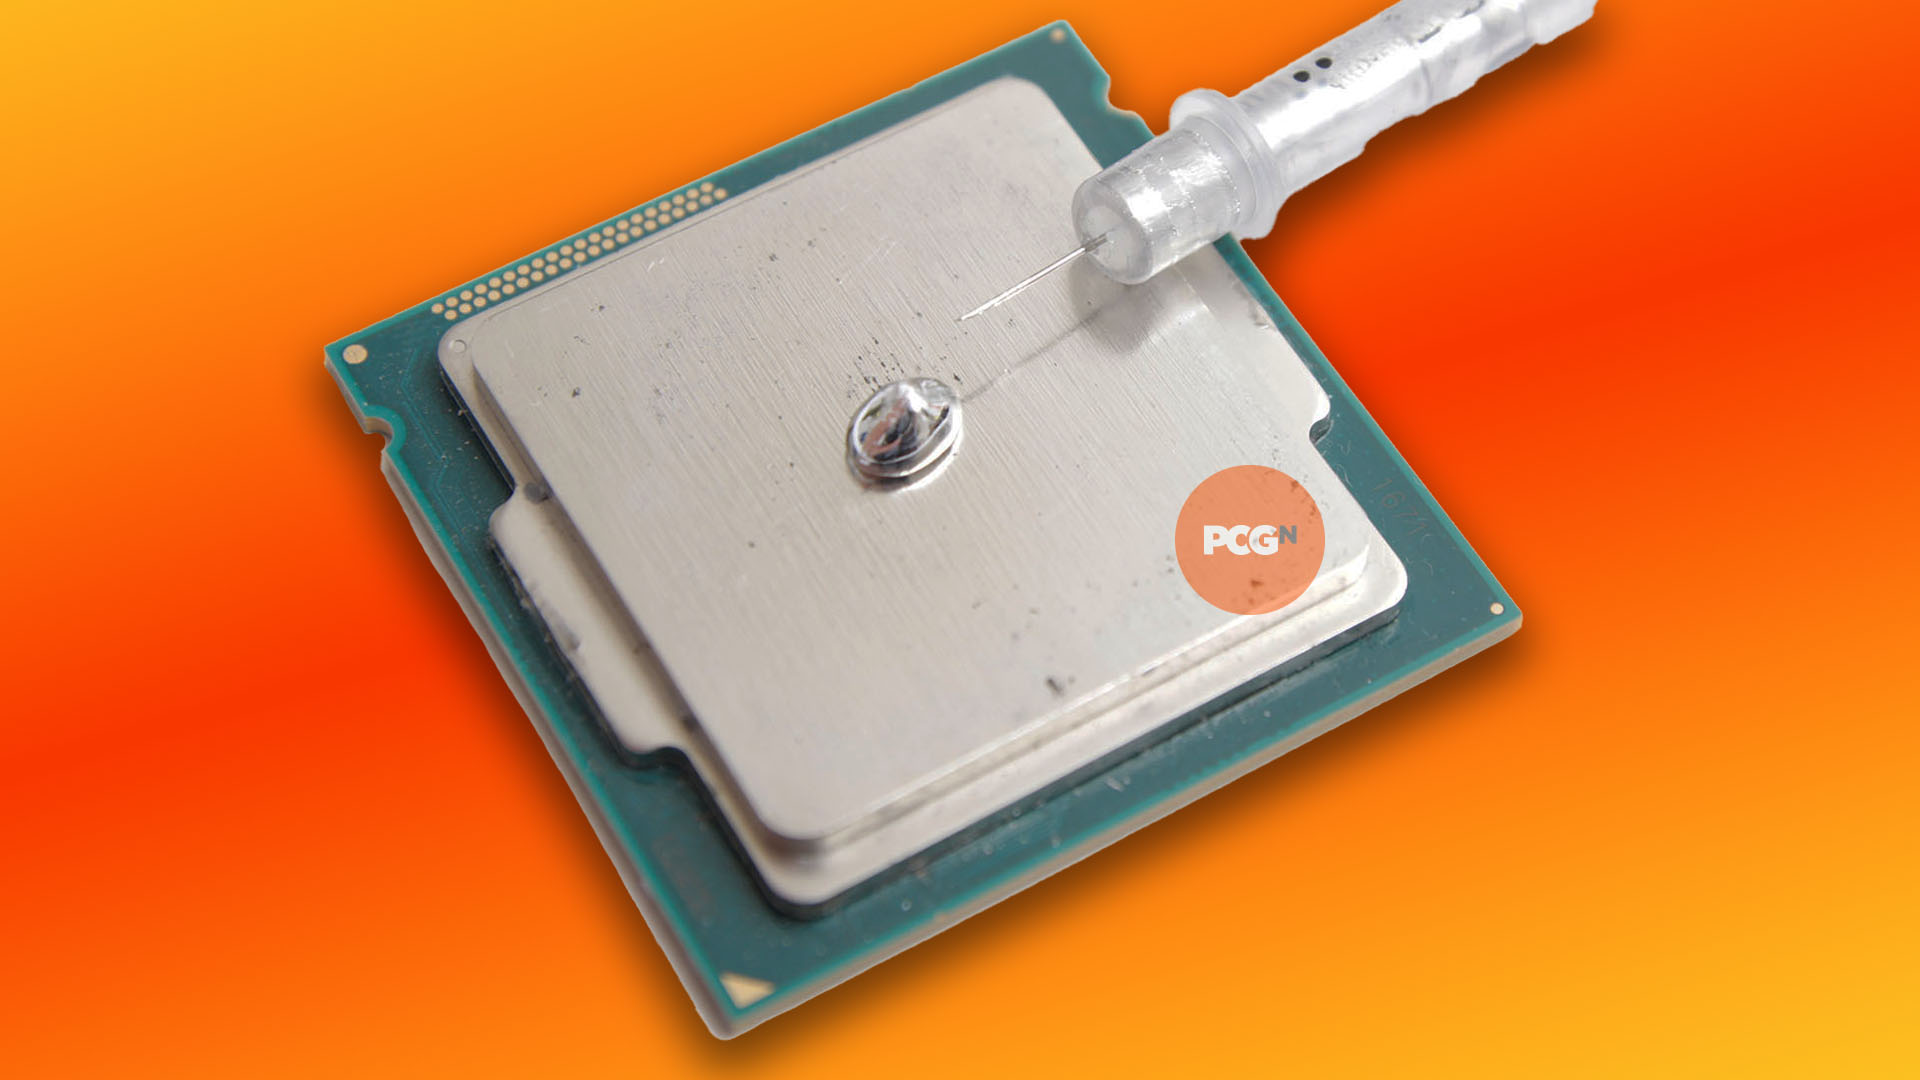
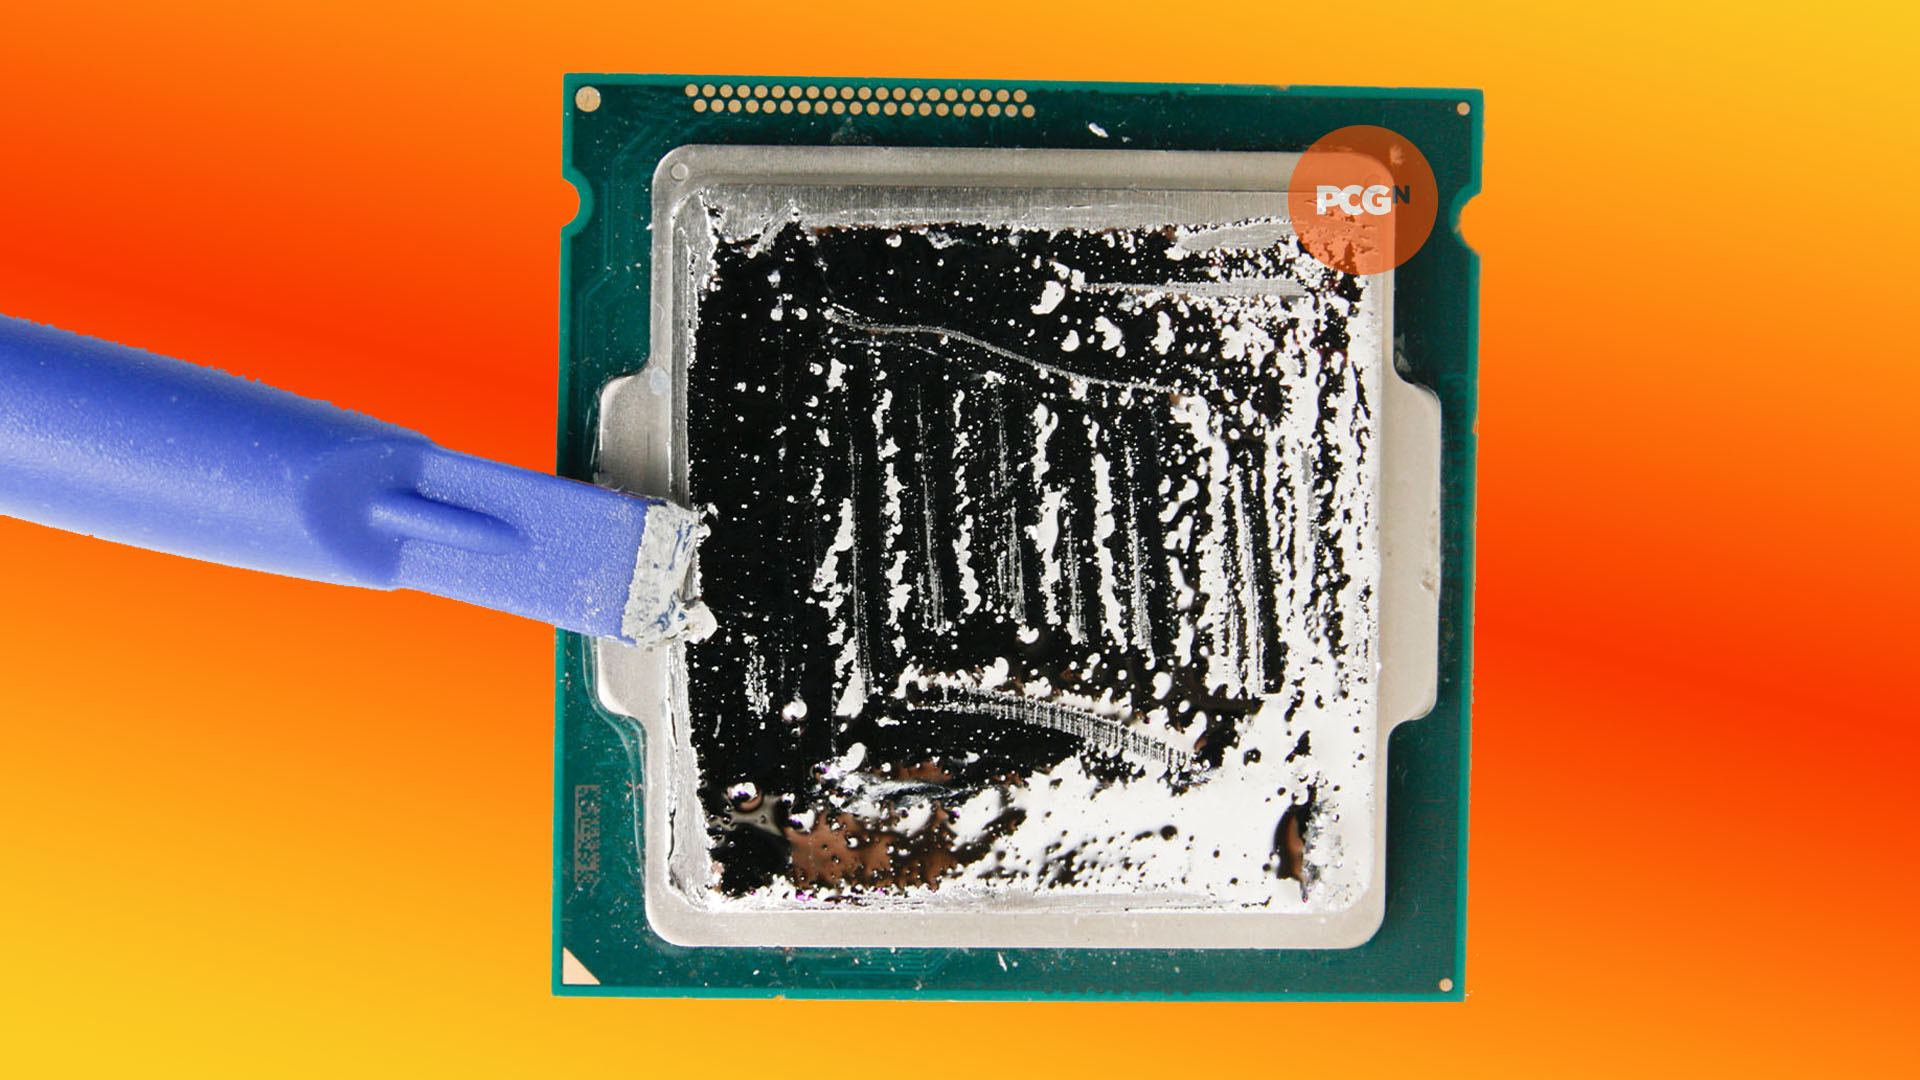
Then, use a plastic spreader (again, don’t use cotton buds) to work the paste into the heatspreader’s surface. After a minute or two, the metal will start to stick and then form a glossy even surface as it beds in. Now go ahead and do the same for the base of your cooler – you need to apply it to both surfaces.
And that’s all there is to know about applying thermal paste to a CPU, and how it works. If you’re looking to construct a new system, then you’ll also want to read our full guide on how to build a gaming PC, which covers every step of the process.
