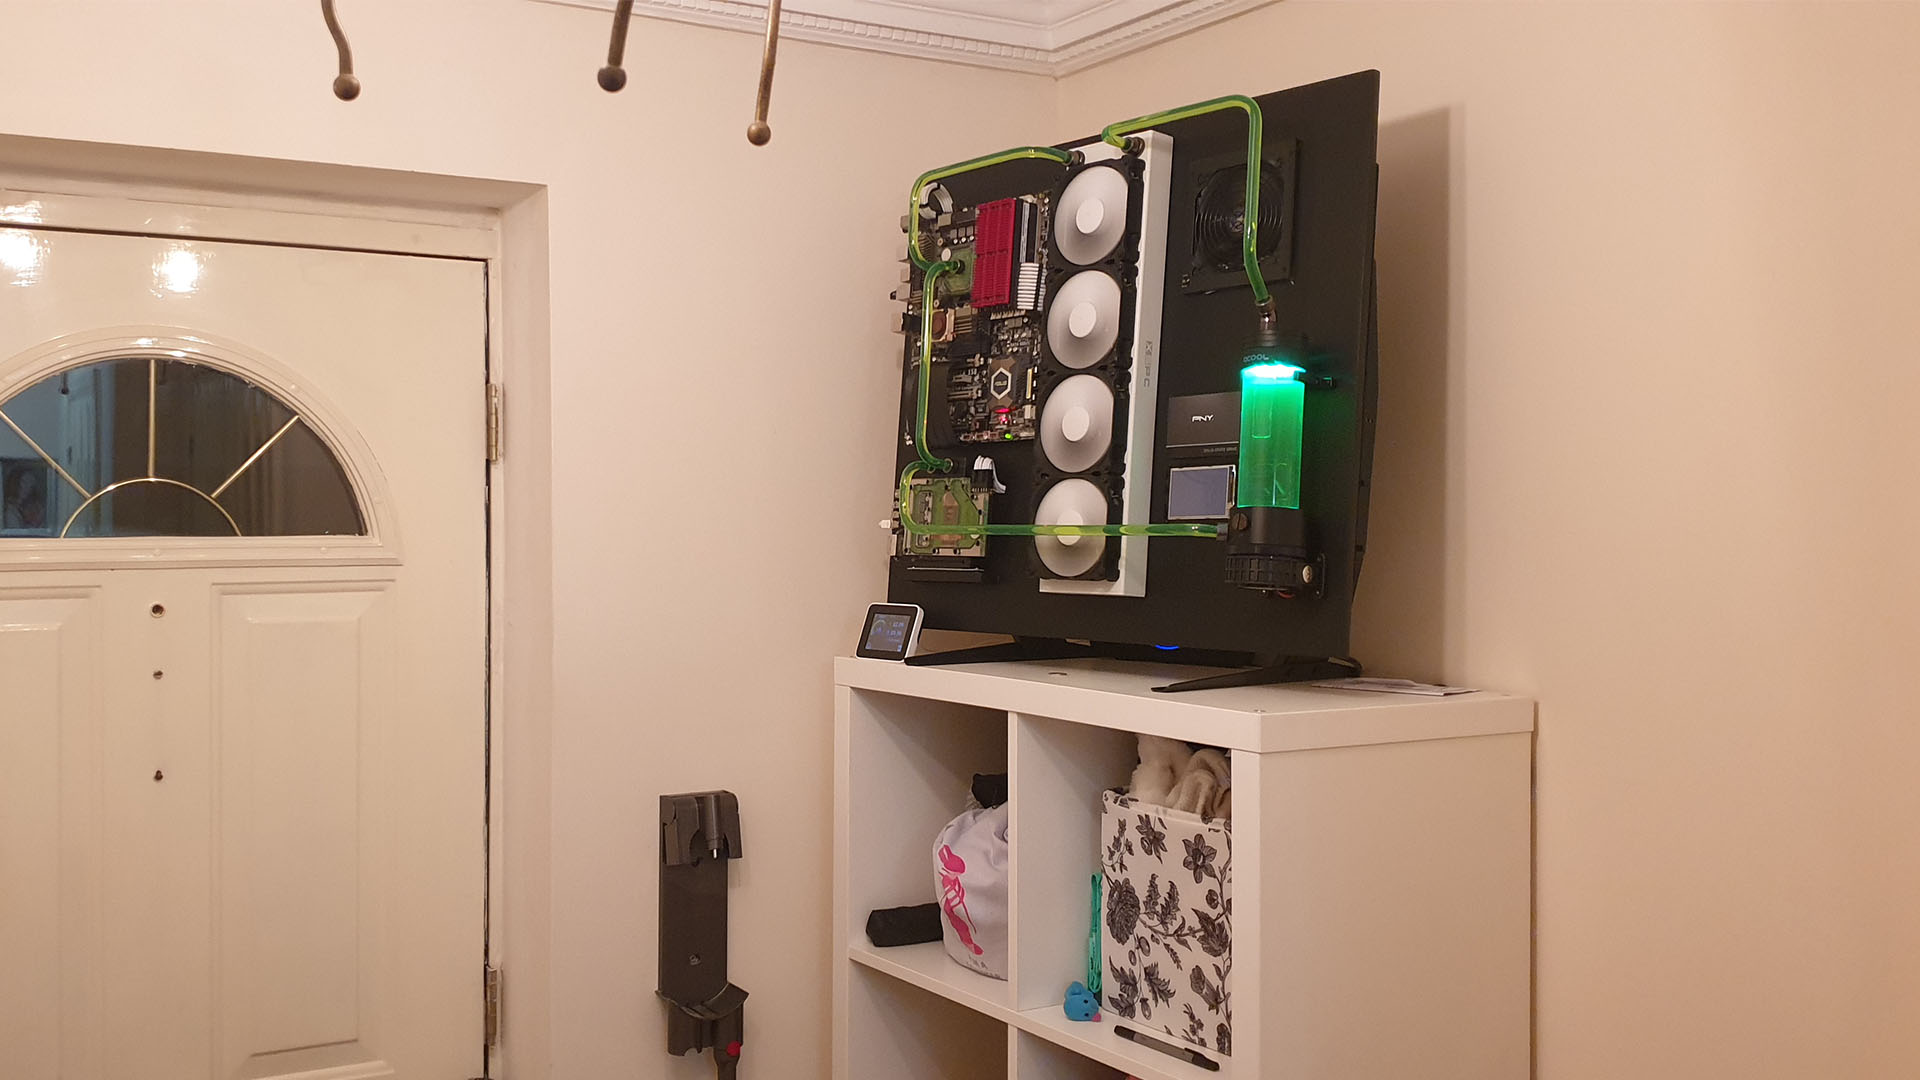
There’s no reason why a Plex server has to be the usual unassuming box in the corner of the lounge. Chris Marsh wanted his one to wow people on their way through the front door, and it has an extravagant design. It features a custom MDF flat chassis, which could be wall-mounted, along with a 480mm radiator and a water-cooling loop with hard tubing.
Thanks to our rapidly growing PC building Facebook page, we’ve seen many custom gaming PCs, from mods based on existing case designs to scratch PC builds. You can even submit yours for consideration right here. Now let’s talk to Chris about how he made this wall-mountable build.
PCGamesN: How did this project start?
Chris: I’m a total geek, and I wanted to advertise this fact to people the moment they walked into my home. Me and my partner moved into our first home together a couple of years ago, which is a typical suburban townhouse.
I’d always run a Plex server in my old home, and when it came time to set up one up for our new home, I decided to make it special and show off my skills. I’d only recently changed my main gaming PC’s water-cooling loop to hard tubing, and had a few parts left over. The overall look was inspired by some of the early images of wall-mounted PCs I saw over a decade ago.

What are the benefits of running this type of machine as a Plex server? Is it also used for TV gaming?
I wanted the freedom to run a normal PC as well as a Plex server. It runs Windows 10, and I not only use it for Plex, but also for downloading and as a Steam cache. The initial idea was to use it as a remote gaming station with a Steam Link in another room, but my friends tend to play online instead of visiting. One day I will have a barbecue and finish it off with an impromptu LAN game.
What’s the spec?
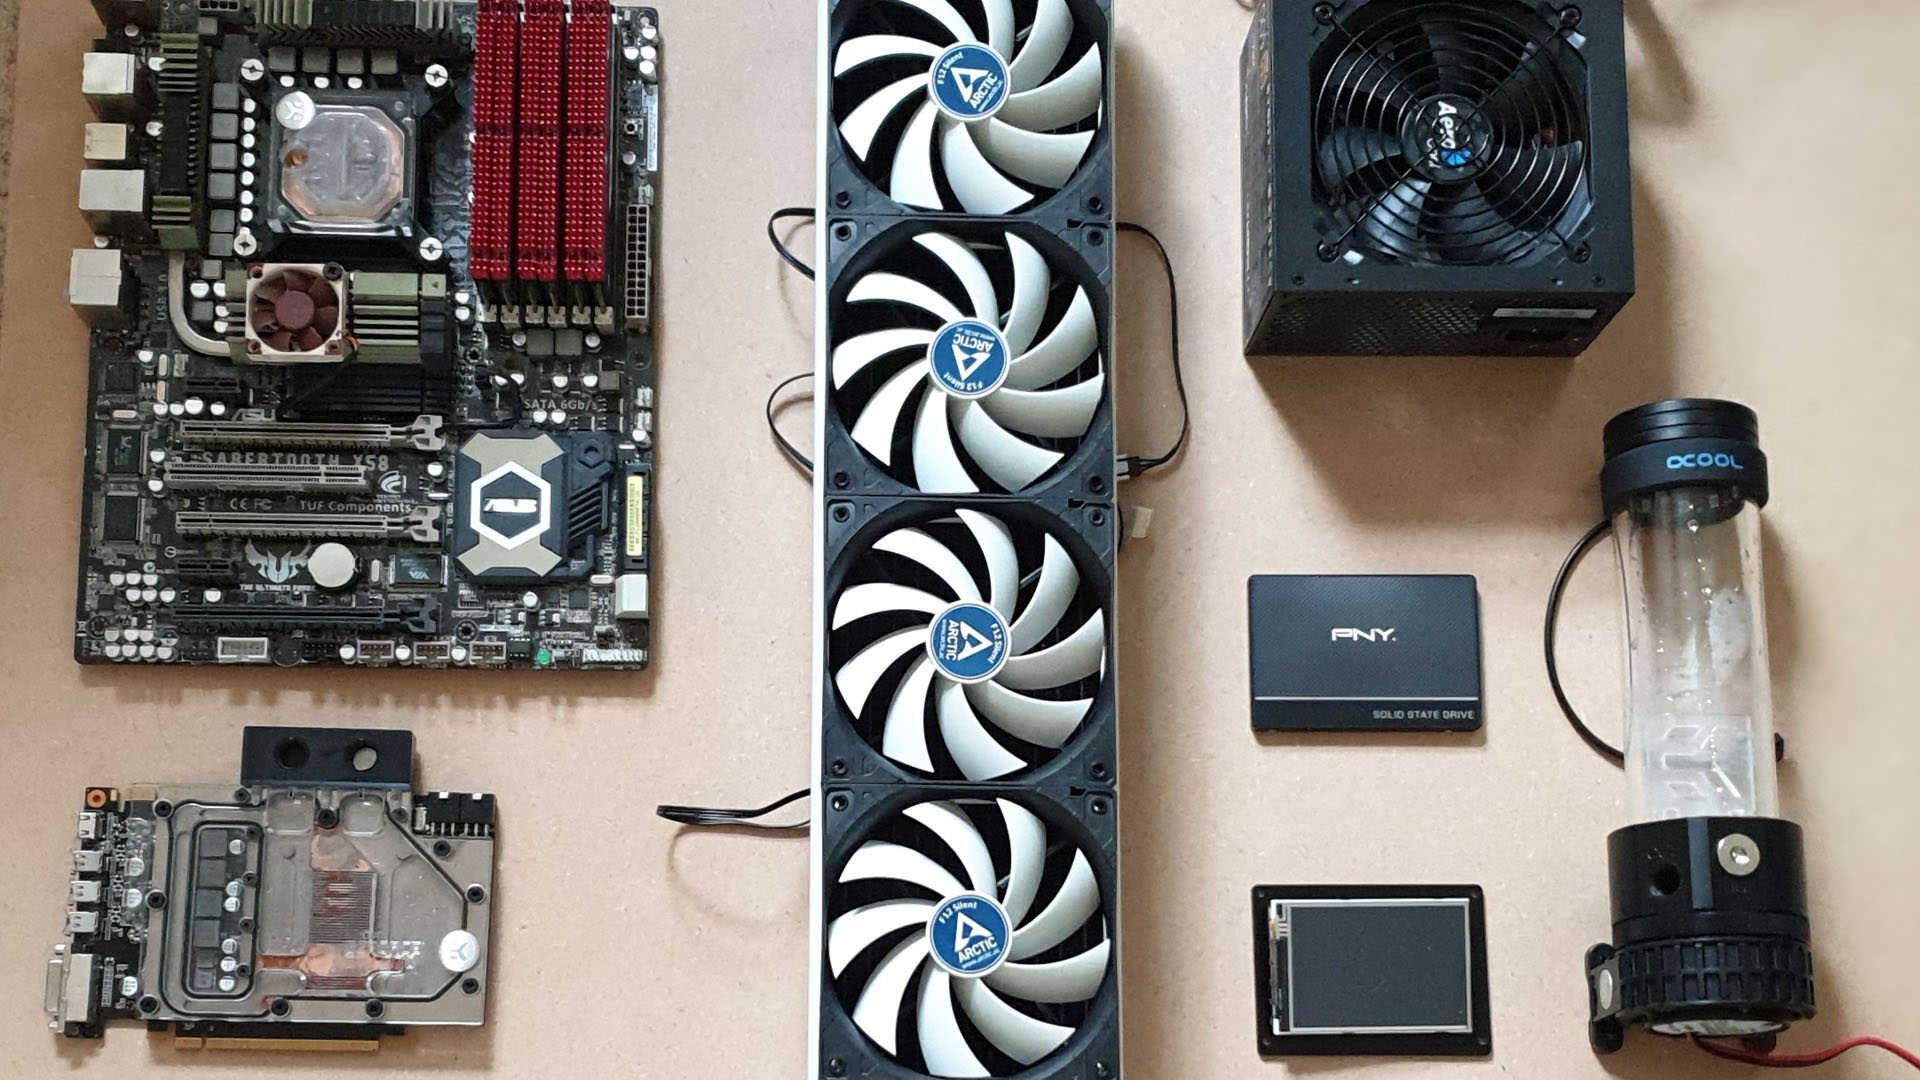
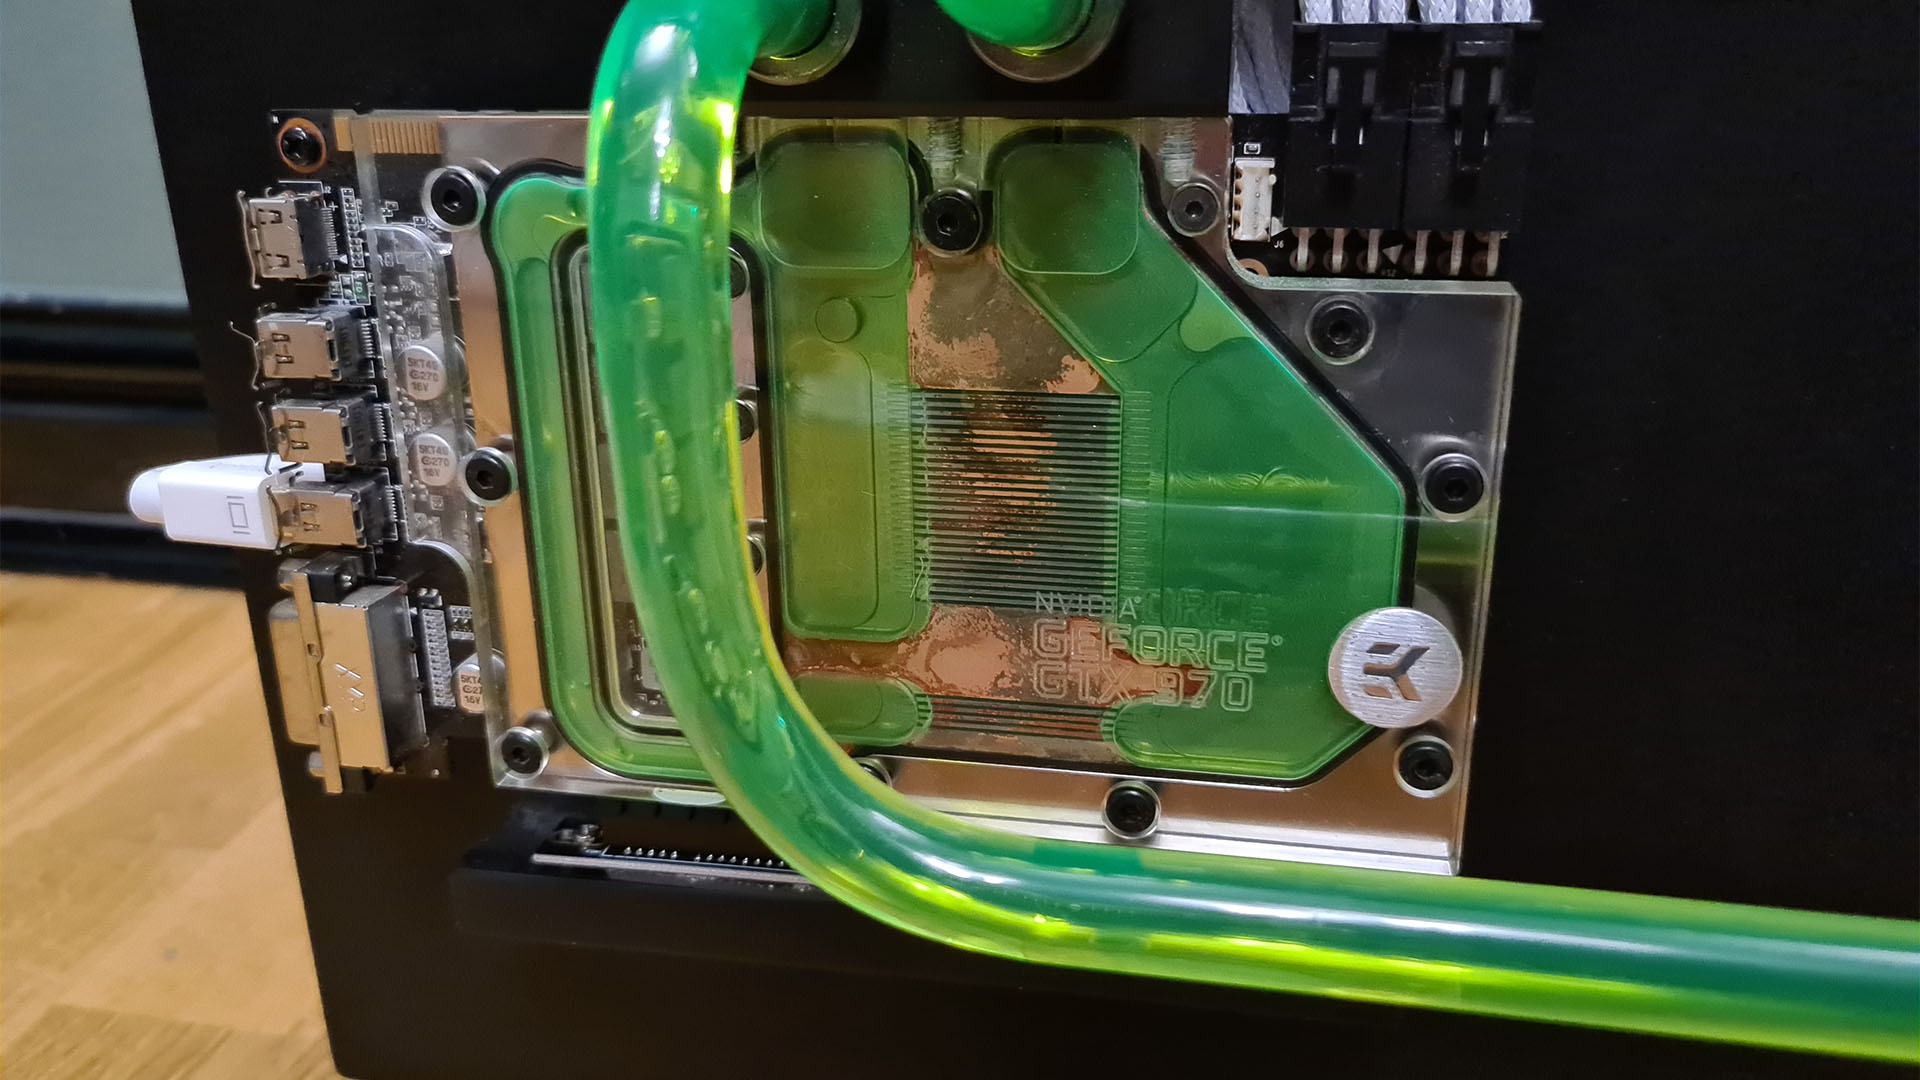
It’s my mainly my old gaming PC. The processor is an Intel Core i7-950 running at 4.2GHz, plus an Asus Sabertooth X58 motherboard with six sticks of Corsair Dominator GT RAM running at 2133MHz. The graphics card is a reference Nvidia GeForce GTX 970 and, aside from the radiator and fans, all the cooling parts are EK. As it was all from my old gaming machine, the main system hardware would have ended up staying in my cupboard for years until it was e-waste – only the cooling and ancillaries were purchased specifically for this build.
Did you make the chassis yourself from scratch?
The chassis was built from scratch apart from the feet (they were a cheap purchase from Amazon as an afterthought). I couldn’t bring myself to buy a case when I knew that a piece of MDF would do the job and fit all my parts perfectly(ish).

How did you go about designing and constructing the chassis?
The design process was fairly simple. When I was working out how to place the components, I laid them out on my carpet and took a picture from above. I moved them around multiple times, taking a snap each time. This enabled me to review the images and decide on the layout.
Once I was certain of the layout, I marked out the components on a piece of MDF and drilled holes where they needed to be screwed down. I took out my jigsaw and cut the relevant holes under the components, so I had somewhere to route the cables, and I cut holes for the radiator and PSU.
Once I had the basic frame ready, I prepped it with MDF sealant, sanded it down with 800-grit sandpaper and gave it several coats of satin black paint. After every second coat had dried, I sanded it down and sprayed it again. I got through eight cans of spray paint, which was total overkill, but the finish is nice and smooth – it actually feels like coated plastic. I then assembled the feet, screwed them to the back and stood it up.
I then took a piece of Plexiglas to which I would mount the hard drives. I marked out where the drives would go, and drilled out the holes needed to could fasten them. They’re mounted to the Plexiglas with rubber grommets to ensure no vibrations. For any parts that need to be screwed into place, such as the motherboard, I attached a double female standoff, which I secured from the back. Mounting the components pretty much involved the same process as any PC build from that point.
It looks very neat from the front. How did you plan the cable routing?
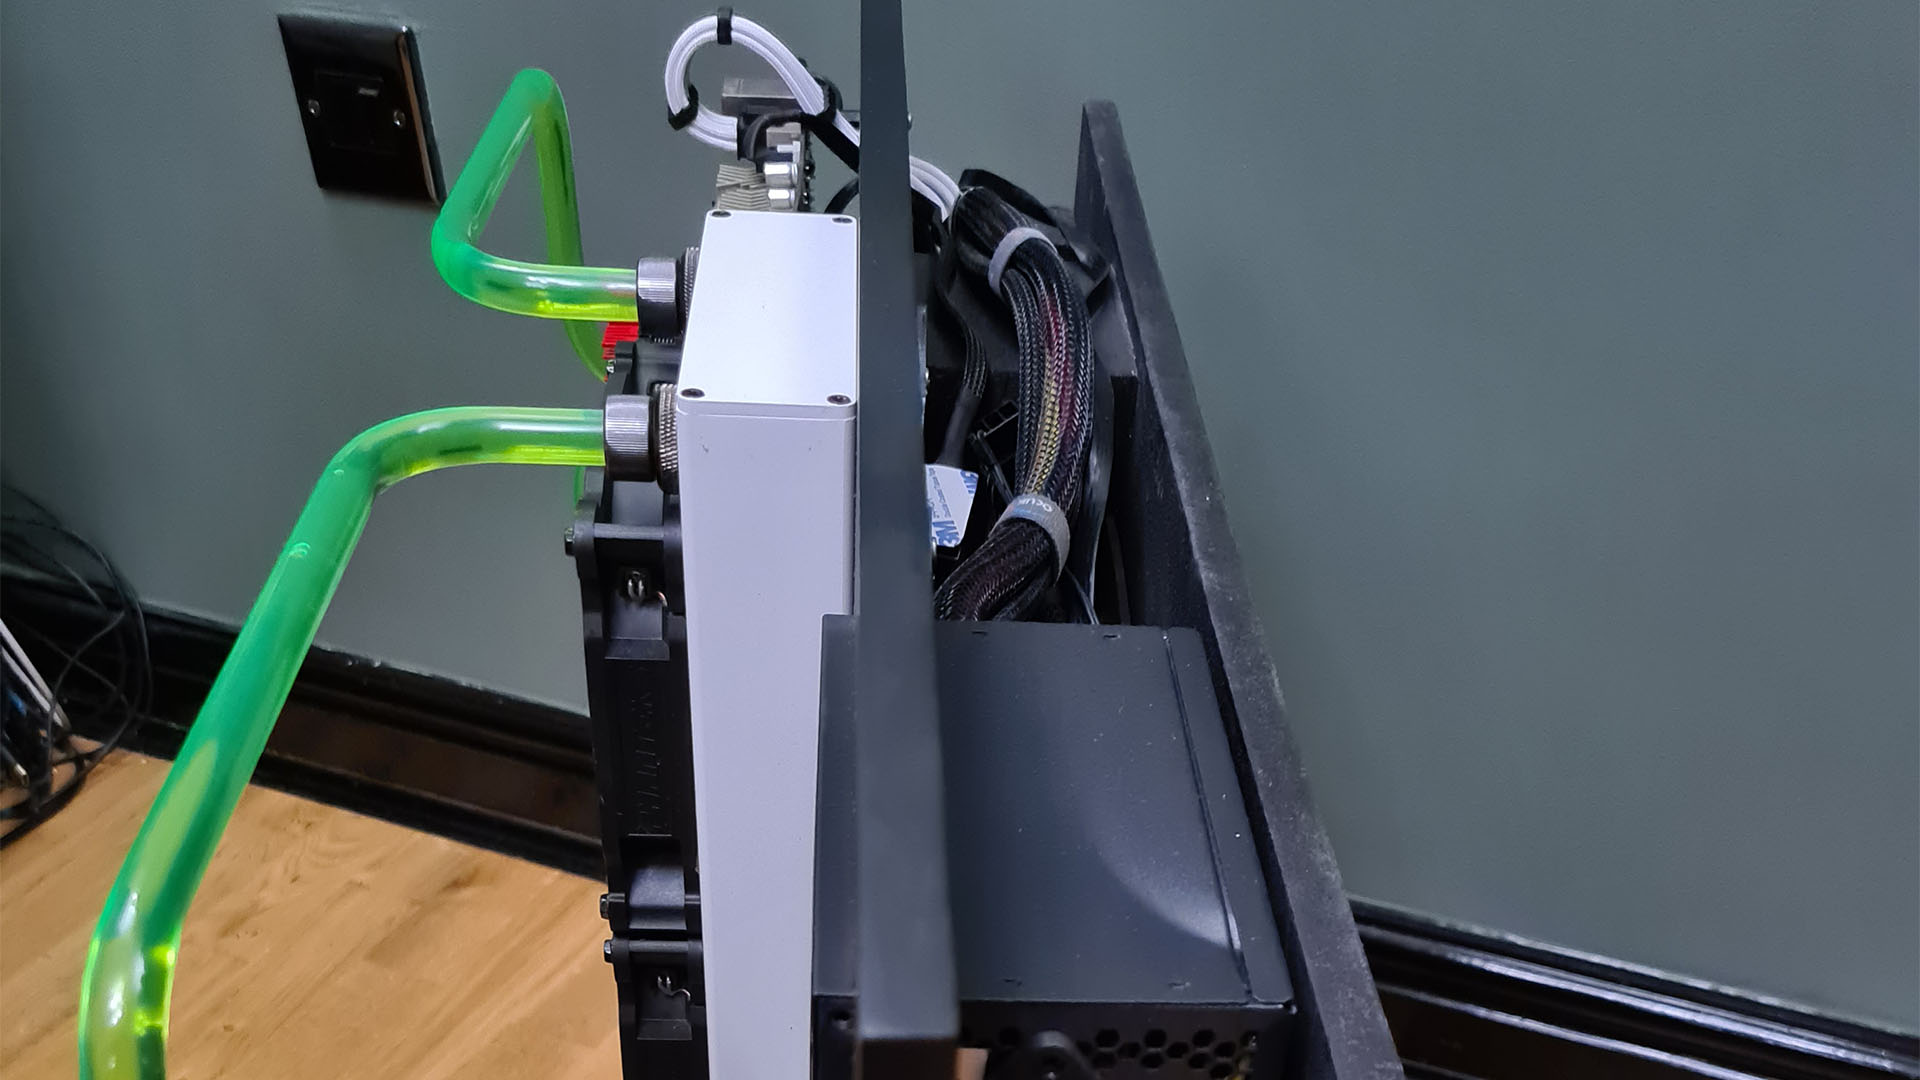
It looks a bit of a mess from the back! I managed the cables as best I can, but my primary focus was making sure they weren’t visible from the front if at all possible. When I cut the pass-through holes in the front, I made sure the cables would be covered by components. Also, when it came to the fans on the radiator, I removed the shroud around the core and pulled the cables through there. The routing at the back was very much a utilitarian affair – I did what needed to be done!
How did you mount the graphics card vertically?
I used a 40cm PCIe 3 riser cable made by a company called LinkUp. I chose that particular one because it was long enough, it had a right-angled PCB for the female slot (this gave me the ability to mount it) and it’s shielded. It’s actually the second brand I tried, as the first wasn’t shielded and didn’t work. I mounted it by gluing and screwing a strip of MDF to the chassis, and attaching the riser via standoffs.

Take us through the water-cooling loop. How big is that radiator?
The radiator is an XSPC AX480 Premium – it measures 128 x 40 x 526mm (W x D x H) with four 120mm Phanteks fans. I chose the radiator for the build quality and overall look, and the fans because they’re near-silent. The rest of loop includes EK fittings and components with a D5 Pump. The loop is filled with EK Cryofuel Neon coolant, which has held up for a year so far with no issues.
The most interesting part to do (after finding a second-hand EK waterblock for my old GPU) was mounting a CPU block to an LGA1366 socket. I couldn’t find any blocks that were officially compatible, and the one I had fouled the metal cage surrounding the CPU socket.
To get around this problem, I simply removed all of the metal parts around the CPU socket, leaving just the LGA pins, so the CPU is now held in place by the waterblock – you only live once! My thinking was that if it’s good enough for high-end server gear then it’s also good enough for my old Plex server.
How did you go about cutting and bending the tubing to shape?
I used EK-HD PETG tubing with a 10mm inner and 12mm outer diameter. The hardest part of making a hard tube loop is doing double bends. You heat up the tube with a heat gun and then bend it to shape. The tricky part is getting the second bend to line up with the first. I used three 1m lengths to do all the tubing, and 1m was wasted as a part of the process.
What are the benefits of the water-cooling system?
I run the CPU at 4.2GHz, which is a 37% overclock, and it’s near-silent. In normal use, it idles at room temperature and peaks at around 45°C – it will go up to around 65°C if I hit it with stress tests, but not in real-world use. The only audible part of the system is the PSU, which I may swap out.

Where are the hard drives, and what’s the blue screen under the SSD?
I was initially going to have the drives on display, but they’re mainly unmatched, so they would look ugly, and the build was taking up loads of space already! Instead, I decided to mount them to Plexiglas, attached to the rear of the chassis with standoffs where the radiator air blows.
This not only hides the drives but also cools them. The LCD is a 3.5-inch WaveShare screen designed for a Raspberry Pi. It’s connected via HDMI, so if ever I have issues, I only have to plug in a keyboard, and I can see what’s going on without needing to hook up a separate monitor.
Do you ever get any problems with dust building up on the components?
Surprisingly no – all the dust gets sucked into the fans, so it doesn’t have a chance to settle on the other components. I have to remove the fans and give the radiator a clean every couple of months, but it’s nothing too tedious. When it’s switched off, I give it a quick blast with my CompuCleaner, but cleaning isn’t generally a problem.
Did you come across any difficulties?
It all went relatively smoothly, except the PSU, which is only mounted with friction. The hole through which it fits is so snug that, after all the coats of paint, it was a bit too snug, and the PSU wouldn’t fit any more.
Like the Neanderthal I am, I decided to remedy this problem using a rubber mallet. It was going well until I lost my patience and started whacking it instead of tapping it around the edges. The PSU case is now dented on the back, and there’s a crack in the chassis there – no one ever notices it, but I know it’s there and it annoys me something rotten.
Are you completely happy with the end result?
My only regret is you can’t really see the fluid flowing through the loop, I was really hoping a new show fluid that’s usable over long periods would have come out by now, but sadly not.

Wall-mounted Plex server specs
- CPU: Intel Core i7-950 overclocked to 4.2GHz
- GPU: Nvidia GeForce GTX 970 reference
- Storage: PNY CS900 120GB SSD boot drive, 4 x Seagate BarraCuda 3TB hard drives, Seagate BarraCuda 8TB hard drive, WD Red 4TB hard drive
- Memory: 24GB Corsair Dominator GT 2133MHz
- Motherboard: Asus Sabertooth X58
- PSU: Aerocool Integrator 600W
- Cooling: EK-XRES 250 reservoir, Laing D5 Pump, EK-HD tubing, EK-AF Black Nickel fittings, EK FC970 GPU waterblock, EK-Supremacy Evo CPU waterblock, XSPC AX480 Premium Quad 120mm Fan Radiator V2 White, Noctua NF-A4x10 FLX fan, 4 x Phanteks PH-F120MP PWM fans
We really admire your commitment to making an over-the-top Plex server, Chris – you could have hidden a small form factor PC under your TV, but you’ve gone all out with this great-looking water-cooled system. If you’re new to the world of water-cooling and want to have go yourself, then make sure you also read our full guide on how to water-cool your PC.
This post originally appeared on Custom PC, which has been covering amazing setups for over 20 years and is now part of PCGamesN. Join our 500k member Facebook group to discuss this build.
If you consider yourself to be an expert PC builder, you can submit your own custom PC build to us today for a chance of being featured on PCGamesN in the future.
