Where can you find a Destiny 2 Crota’s End walkthrough? The brand new reprised raid for Destiny 2, Crota’s End, is upon us. Whether you’re a Destiny veteran who has played the original Crota’s End in Destiny 1, or are diving into the raid for the very first time, our Destiny 2 Crota’s End raid guide is going to be an essential tool for you. We’re going to break down every encounter in the raid, as well as some generally good weapons and subclasses to bring for each as well. Even if you’ve studied up on the past raid, there are some significant changes to this raid, and it isn’t nearly as cheese prone as the original.
If you’re looking for more Destiny 2 content, then be sure to check out our Destiny 2 classes guide, as well as our Destiny 2 builds guide for all the information that you’ll need to suit up with a brand new build. But with that, let’s dive into Crota’s End.
Crota’s End opening
The opening encounter is an introduction to the main mechanic of the raid, the Chalice of Light. The opening presents you with a Chalice to pick up, and a plate to stand on. When a player picks up the Chalice, they will see a bar show up on the left side of their screen. When the bar fills up, a new countdown timer will show up, called ‘Engulfed in Light’.
Another player will need to take the Chalice from the person holding it before the timer expires or they die. The person who had it taken from them will now have the Enlightened buff. Deposit your buff on the plate to start building the bridge that will extend over the chasm. Repeat this a few times while killing waves of adds and you’ll be able to cross the bridge and drop down to the first encounter, The Abyss.
Crota’s End The Abyss guide
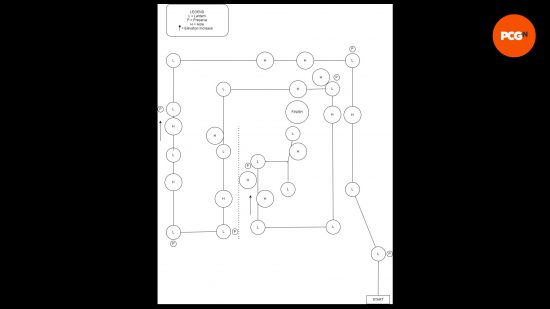
The first encounter is The Abyss. This is a gauntlet style encounter, where you’ll have to trade off and carry the Chalice to lanterns, all while being weighed down by darkness and racing against the Engulfed in Darkness timer. See above for our Destiny 2 Crota’s End The Abyss map to help when reading these instructions.
- When a player gains the Enlightened buff, they can deposit the buff at one of the lanterns to temporarily remove the weight of darkness.
- A player who deposits at a lantern will gain the Drained of Light debuff, preventing them from gaining the Enlightened buff. There will be pedestals at most of the lanterns to preserve or deposit the Chalice. Depositing the Chalice will activate the next set of lanterns. This will also reset your Engulfed in Darkness timer. These lanterns seem to change locations except for the first one, so be on the lookout.
- Upon reaching one of these preservation locations, the player holding the chalice should fill their bar, and get Enlightened by having another player take the Chalice. That player should deposit the Chalice immediately. This action will also give the Drained of Light debuff. A third player will need to pick up the Chalice and carry it to the next lantern.
- During all this, waves of enemies will spawn in and attack you, and you’ll also have to deal with swinging lanterns and holes in the ground that can kill you so you must be aware.
- At the end there will be another plate where you must dunk the Enlightened buff to build the bridge. There will be unstoppable ogres. When crossing the bridge, take care as enemies will spawn on the bridge.
Add clear and surviving is the name of the game here, so Well of Radiance Warlocks and wave frame grenade launchers will serve you very well.
Crota’s End The Oversoul Throne guide
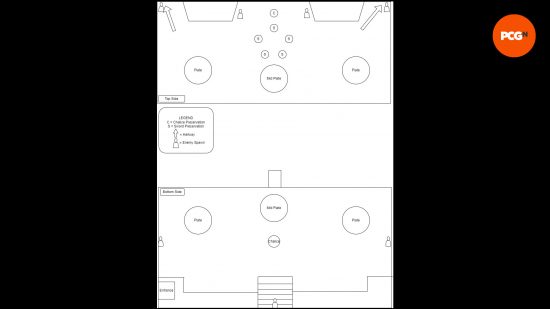
The next encounter is The Oversoul Throne. The goal of this encounter is to get everyone across the large chasm, while also bringing five Hive swords across as well.
- To start, split into three teams of two. There are three plates to stand on, someone always needs to be standing on a plate.
- Someone from the middle plate will pick up the Chalice. They will trade it out with a few other people.
- Players need to dunk their Enlightened buffs on the middle plate 3 or 4 times, which will start building the bridge between sides, as well as accelerate its progress.
- Swordbearer Knights will spawn in and these need to be killed relatively quickly, especially once the bridge is complete. The sword that is dropped can only be picked up by a player with the Enlightened buff, consuming the buff. Once the sword is dropped, it cannot be picked up by the same person, but can be picked up by someone else who has Enlightened.
- Player A with the Enlightened buff will need to pick up a sword, head across the bridge, along with Player B, who is holding the chalice. Player A starts killing the Gatekeeper that has spawned, and Player B ideally drops a well, or helps CC the Gatekeeper. Do this until the Chalice player’s bar is full.
- Player A drops the sword and takes the Chalice, then heads back across the bridge. Player B picks up the sword, and kills the Gatekeeper that has spawned, and deposits their sword in one of the pedestals in the middle. This will spawn another Swordbearer on the bottom side.
- Player A who took the chalice back across the bridge will get everyone else on the bottom side Enlightened, except for the last person who will be holding the Chalice. One of the Enlightened players and the Chalice player will bring another sword across.
- The sword player will kill their Gatekeeper and deposit their sword, but this time the Chalice player will deposit the Chalice at the pedestal at the base of the stairs at the back of the room.
- At this point, the three players on the top side will stand on the three plates while killing adds. The three bottom side players can now freely roam around the area, killing sword bearers and bringing swords across one by one.
- Once all swords are across and deposited, players will need to kill waves of adds, including Barrier champions and Fissure Ogres, all while standing on the plates.
- When the Fissure Ogres spawn, someone will need to pick up the chalice, get Enlightened, and pass it to one more person to get the buff. A third person will need to take the chalice and deposit it back into the pedestal.
- Five more Gatekeeper Knights will spawn and the players with Enlightened will need to pick up two of the swords in the middle and take them down. This completes the encounter.
The same classes and subclasses will do well here, but one thing to consider is bringing a blinding grenade launcher, which can help keep the Swordbearers and Gatekeepers at bay.
Progress up the stairs, and head left. You’ll have another Chalice to pick up. Getting the Enlightened buff allows you to pass through the green barriers, so take out all the enemies and progress to the next encounter, Ir Yut, The Deathsinger.
Crota’s End Ir Yut, The Deathsinger guide
Ir Yut, The Deathsinger is the DPS check of the raid. This boss has a maximum of three damage phases, but we’ll explain that in a minute.
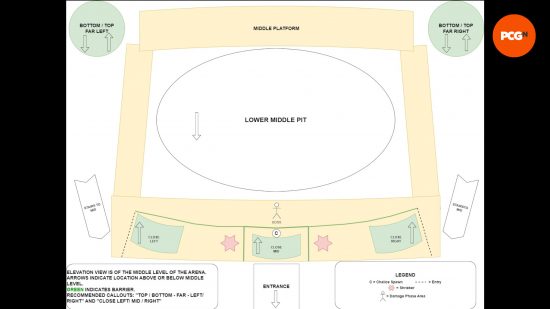
- To start, split the team into two teams of three. Kill any and all adds, especially the arc-shielded Blistered Knights. On the main level of the arena, there will be two sets of hallways that can be entered from the sides. There will be a Shrieker at the end.
- Kill the arc-shielded Blister Knights to activate the Shrieker and kill it. Once both have been killed the middle section of the hall will open up, where a Chalice buff will be.
- Get three people buffed with Enlightened as quickly as possible. Then have those three head out and scout around at any of the seven green barrier sections.
- There will be towers on the far right and left sides with a top and bottom section, as well as three rooms directly above where you pick up the Chalice.
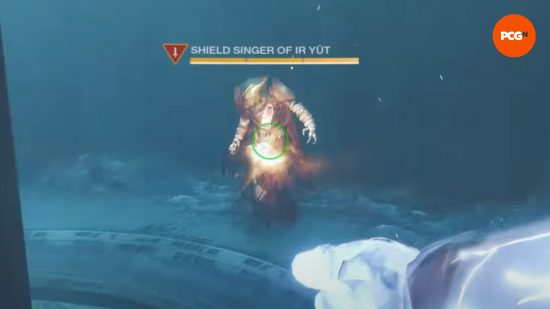
- Four of these rooms have Shriekers, but three of the rooms have Shield Singer Wizards. Those three need to be taken out quickly and within a short time of each other.
- Upon killing the first Wizard, the group will get a debuff called “Dark Liturgy”. If this debuff expires, it’s a wipe. Killing all three Wizards will kick off the damage phase.
- During the damage phase, Dark Liturgy is still counting down. Ir Yut has a damage threshold that you must DPS her past before Dark Liturgy expires to avoid it killing everyone. It’s roughly about 1/3 of her health, though you can DPS her past this amount to decrease the number of damage phases needed to kill her. At most you’ll need three damage phases, but it can be done in two.
- Subsequent “shield breaking” phases will start with the Enlightened buff section, except there are four Wizards that need to be found, so four people need to receive the Enlightened buff and kill all those wizards at the same time.
Loadouts here are going to demand some high boss DPS. Multiple Well of Radiance Warlocks are highly recommended. Ir Yut doesn’t move too much, so Divinity is perfect here. If the Divinity user is a Warlock and has the Cenotaph Mask, this will help you sustain your heavy ammo in between damage phases. Additionally, good linear fusion rifles or Leviathan’s Breath with the catalyst will do great. It’s also possible that Thunderlord or Rockets will also be a great choice here too.
Crota, Son of Oryx walkthrough
We’ve reached the final boss of the end, Crota, Son of Oryx. Crota’s fight takes place in the same room as Ir Yut. It is mechanically demanding and is also another DPS check. This is another maximum three DPS phase encounter, as Crota will enrage after three damage phases. There is also a final stand phase as well.
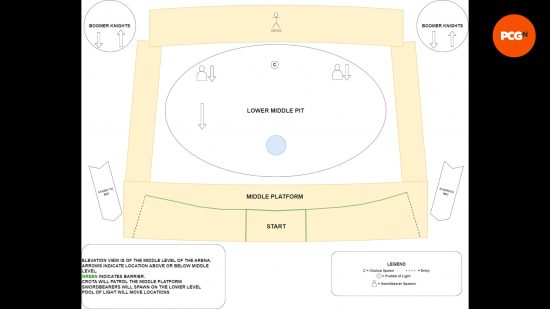
- Start the encounter by fanning the group out to kill any and all adds.
- Send a person to the top section of each of the towers to kill the two orange bar Boomer Knights that spawn.
- Killing the four Boomer Knights will spawn an Ogre and a Swordbearer.
- The Boomer Knights will respawn periodically, so kill these if you need another Swordbearer to spawn.
- The Chalice will spawn in the lower middle section of the arena, as well as a pool of light on the ground. This is the only place where the Chalice buff can be exchanged, and the location of the pool does change.
- An Enlightened player will need to grab one of the Hive swords, get up in Crota’s face, and hit him a few times with the sword. This deals damage to his immunity shield. You may need a couple of swords to take the whole thing down. You don’t have much time with the sword, so a good combo to do is light attack, heavy attack, heavy attack, super. This should deal a good amount of damage to the shield.
- While this is going on, be sure to pass around the Enlightened buff, as it’ll be necessary for the damage phase.
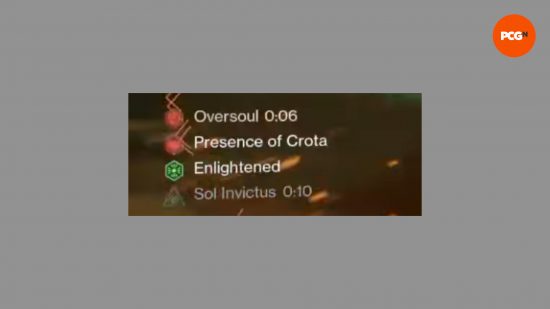
- Once Crota’s shield is brought down, it’s time for damage. When the DPS phase starts, a new timer will appear for the Oversoul. This is the massive ball that’s spawned behind where Crota spawns.
- An Enlightened player will need to shoot down the Oversoul before the timer goes off otherwise it will wipe the raid. This will end the damage phase, so be sure to kill it closer to the end of the timer.
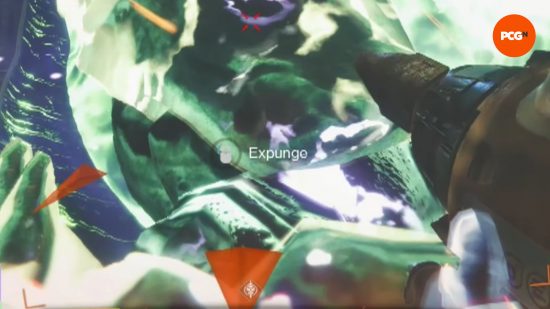
- Extra players with the Enlightened buff can “Expunge” their buff on Crota to deal some extra damage to him. If you’ve gotten extra people Enlightened, this may be a great way to push through some of the damage phases.
- After you do this a couple times, you should be close to pushing Crota to his Final Stand. Once there, he will gain immunity for a short while, and then become damageable for a short window before he wipes the raid. There will be two Oversouls here, the first being killable and the second being the enrage. But if you can burst him through that phase, you’ve completed Crota’s End!
Loadouts for this are going to require Well of Radiance, and a Solar Titan with Phoenix Cradles wouldn’t hurt either. Weapons wise, the Contest mode strategy was to use a Tractor Cannon to debuff Crota, then drop a well at his feet and go to town on him with the Lament sword. This should work just fine after contest mode is gone, but you could experiment with Rockets as well if you want.
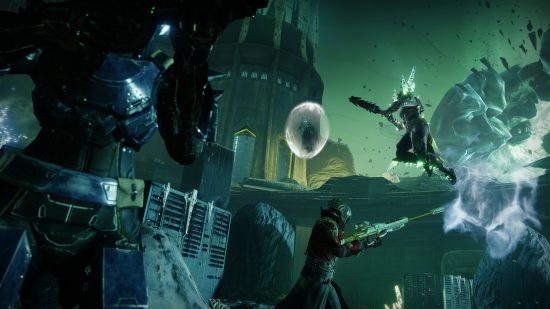
One other tip from Contest Mode is that it seems that Crota takes more damage to his immunity shield from the Hive swords if you shoot him with Tractor Cannon beforehand, so use this to your advantage.
Lastly, be very careful of your positioning, because Crota hurts. His ranged attacks will pick you off quickly and a slam from his sword will break a Well of Radiance and can easily one shot you.
Destiny 2 Crota’s End secret chest
There is a secret chest found by following the wall after the first encounter to the left. Count the doors as you go, and the secret chest is inside the fifth door.
But that’s all there is to Crota’s End in Destiny 2. This may well be the last reprised raid that Bungie releases for Destiny 2, and it was one that was very well done. They did a great job redeeming this raid from the “meme dungeon” status that it held in Destiny 1. Good luck in your raid attempts, and may you be one of the lucky first in your group to get the raid exotic, Necrochasm! You might be wondering where you can grab some freebies for Destiny 2, so check out our list of all of the current Destiny 2 emblem codes up for grabs.
