How do you complete Warlord’s Ruin in Destiny 2? The complete Warlord’s Ruin dungeon guide is here for anyone wishing to face ancient secrets of the Dark Age of Earth and get their hands on some new loot and peak fashion. To begin exploring this relic of an ancient past, go to Ikora Ray at the tower, pick up the new Dungeon Quest, head to the EDZ and launch Warlord’s Ruin.
You’ll begin your adventure on a snowy peak in Destiny 2 which you’ll need to climb to get to the first encounter, simply look for, and follow, the red flags scattered across the landscape to reach a suspended bridge. Crossing it will take you directly to the first boss – make sure to lock in the best Titan build, best Warlock build, or best Hunter build before facing him.
Destiny 2 Warlord’s Ruin loadout suggestions
The Warlord’s Ruin dungeon has three bosses, two of which you don’t want to get near to. One, because it will stomp you to death, the other because it’s a floating meatball. You’ll be swarmed with annoying and damaging minor Taken enemies so survivability is key.
Make sure one person in your fireteam has a Well of Radiance for the damage phases which will happen in different places around the arena. For the first boss, a close quarters build will do just fine: Berserker One Two Punch Titan or Liar’s Handshake Hunter are great.
In the weapons department, if you have three Legends of Acreus, the first boss is an easy one phase. If you don’t, a Lament with its Exotic perk timed right will do the trick.
For the other two bosses we recommend rocket launchers as the heavy (Solar ones if possible to take advantage of the many Solar-related artifact mods) and a special that can inflict some damage. In both the second and third boss rooms, there are chonky major minibosses that you’ll need to take down in order to access the damage phase. A Riptide fusion rifle with Chill Clip was our favorite.
How to defeat Rathil, First Broken Knight of Fikrul
The first encounter of the Warlord’s Ruin dungeon is quite simple in terms of mechanics and serves the purpose of teaching the player how to activate and, most importantly, extend a damage phase.
When the encounter begins you’ll notice that the boss is immune. To damage him you’ll have to activate the iron lanterns that he drops every few seconds. They look exactly like the ones the normal Scorn majors throw at you, only this time there’s a blight in the middle and a white circle on the ground. Stand inside the white circle for 15 seconds to cleanse the lantern to activate it. You’ll know the activation is complete when the blight at the center goes away and there’s a faint blue light in the middle. The more lanterns you can activate before the timer runs out (see the bottom left of your display to check how long you have) the longer the subsequent damage phase is going to last.
Occasionally during this fight you’ll get teleported to a prisoner’s cage that’s suspended above the arena. To get out look for three Taken eyes surrounding the cage and shoot them to free yourself. As these eyes are sometimes difficult to reach, listen to your teammates as they might need help shooting theirs.
Activate lanterns and damage the boss until he’s dead but, before collecting your loot, there’s a mini-puzzle you have to solve. Players have called it the Jail Encounter.
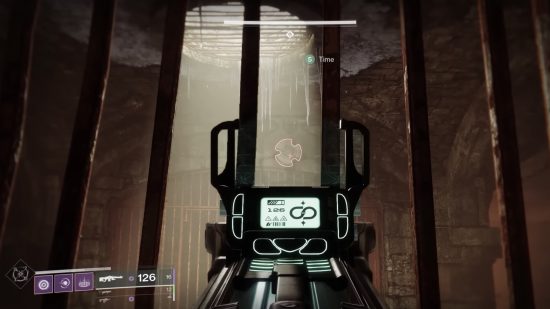
To solve the Warlord’s Ruin puzzle, you’ll see on the floor of the jail you’ll get teleported into, a skeleton pointing at a number. That indicates the number of gears that need to be spinning in one direction (clockwise or anti-clockwise) before one of you can shoot an object in the middle that looks like a big medieval-style lever.
For example, if one skeleton has the number two beside it and another one the number four, that means that either two gears need to spin clockwise and two anti-clockwise or vice versa. The number will always total six.
To better find the gears on the walls of the cell, equip a gun like Commemoration which has an infrared sight as it will highlight them. To activate a gear, shoot it once for one direction, twice to make it stop, and three times for the opposite direction: once all six gears are spinning the right way, shoot the lever on the wall beside one of the cells and the doors will open.
How to beat the Locus of Wailing Grief
Before facing the next encounter of the Warlord’s Ruin dungeon, you’ll have to get through a short maze that has chests hidden away in some nooks. There are only two genuine secret chests, but there are four decoys that will spawn Screebs to kill you. To tell the difference and find the genuine ones, simply look at the chest for a few seconds. If it emits a blue mist like in the image above, do not open it because you will die.
In pure Destiny 2 tradition, if you are guiding a friend through the dungeon for the first time, it is mandatory not to tell them this information, and laugh at their misfortune afterwards. Once you are through the maze you’ll be facing the Locus of Wailing Grief, a big Taken ogre with a lot of health.
First of all, shoot at the Taken eyes surrounding the ogre. This will spawn two major Scorn enemies that look like the first boss – one on the left side and one on the right side of the map. After shooting one of these bosses for some time it will drop the same lantern as the previous encounter which you’ll have to stand near to activate. Don’t delete this enemy otherwise it will spawn only one lantern, slowing down the process.
While doing this, you’ll notice a debuff and frost piling up on your screen. To cleanse yourself from the Biting Cold debuff, simply head towards the back of the arena where you’ll find lit torches that, in two or three seconds, will completely remove the buff. It’s impossible to completely activate a lantern without dying from the cold, so when they spawn, stand in the white circle until the debuff reaches 6 or 7 stacks, cleanse yourself, then go back and finish the lantern.
Once you have activated four lanterns you’ll find four glowing fire orbs in the center of the back of the arena. These need to be dunked inside four pillars at the center of the arena (where the ogre is) to begin the damage phase.
Make sure that when you dunk the fourth orb you and your team are grouped up, because entering the circle surrounding a pillar to damage the boss will activate it and consume its charge. To have the longest damage phase possible you need to use the pillars in sequence so move from one to the other in a circle, stay together and don’t forget to clear the Taken minors – they are very annoying. Usually it takes two rounds to kill this boss so take your time when doing the lanterns and stay safe from the storm.
How to defeat Henfd Vengeance Blighted Chimaera
After another short maze and a jumping puzzle that all Warlock mains are going to love, you’ll find yourself in front of the final boss. Damaging Henfd Vengeance requires similar mechanics to before, but with a twist.
Like before, to start the mechanics you need to shoot the Taken eyes surrounding the boss, which will spawn two majors that drop the Taken lanterns that need purifying. Again, do not delete these enemies as you need them to drop two lanterns each to extend each damage phase.
This time, when one of them dies you’ll find yourself with a debuff that will kill you after 10 seconds, unless you play a little game of tag with some immune Scorn enemies that will storm you. If you simply try to melee them, they will transfer the debuff back to you immediately. The best strategy to avoid dying is to use a throwing melee like Celestial Fire, the Throwing Hammer or a Hunter’s Knife to keep a distance and survive. Once these enemies are killed and a few lanterns have been activated, the first damage phase begins.
There are three floors where you have to do this sequence (eyes, majors, game of tag, lanterns and damage) before getting to the last floor and having two more free damage phases.
Watch out for this boss’s final stand that, when reached, will teleport you directly to the last arena. Make sure you have enough ammo or super energy to finish him before triggering the final stand. When you defeat this boss for the first time, make sure to pick up the Ahamkara bones beside the final chest as this will start the dungeon-specific quest which will give you multiple lore entries about Warlord’s Ruin.
To complete the lore quest, you’ll have to run the entire dungeon again 5 times while collecting Ahamkara bones, crystals and dark ether. Maybe you’ll even get the new exotic sidearm Buried Bloodline along the way if the RNG gods favor you.
There you have it – the newest Destiny 2 dungeon under your belt and more endgame content to face with your shiny new Exotic. If you’re struggling with other difficult content, we’ve got all you need to know about the best Destiny 2 class and the best Destiny 2 builds to help you through.
