In this guide, we’ll show you how to enable resizable BAR on your graphics card, which is a great way to improve your frame rate in many of today’s PC games for free, including a lot of the Assassin’s Creed games.
How does it work? AMD and Nvidia GPUs have recently added the ability for the CPU to access your graphics card’s entire frame buffer, instead of smaller chunks of up to 256MB, and this headroom enables you to boost performance in some situations with compatible hardware and games.
First introduced by AMD on its RDNA 2 graphics card range, this tech was originally christened AMD Smart Access Memory, but it’s since been adopted by both Intel and Nvidia as well.
It offers a simple way to boost performance that doesn’t have the side effects you might expect with overclocking, and often just needs one or two settings enabled in the EFI. We’ve seen a big boost in frame rates in games such as Assassin’s Creed Valhalla with resizable BAR enabled, and the latest Intel Arc GPU models heavily rely on it to get the best performance.
Get resizable BAR working
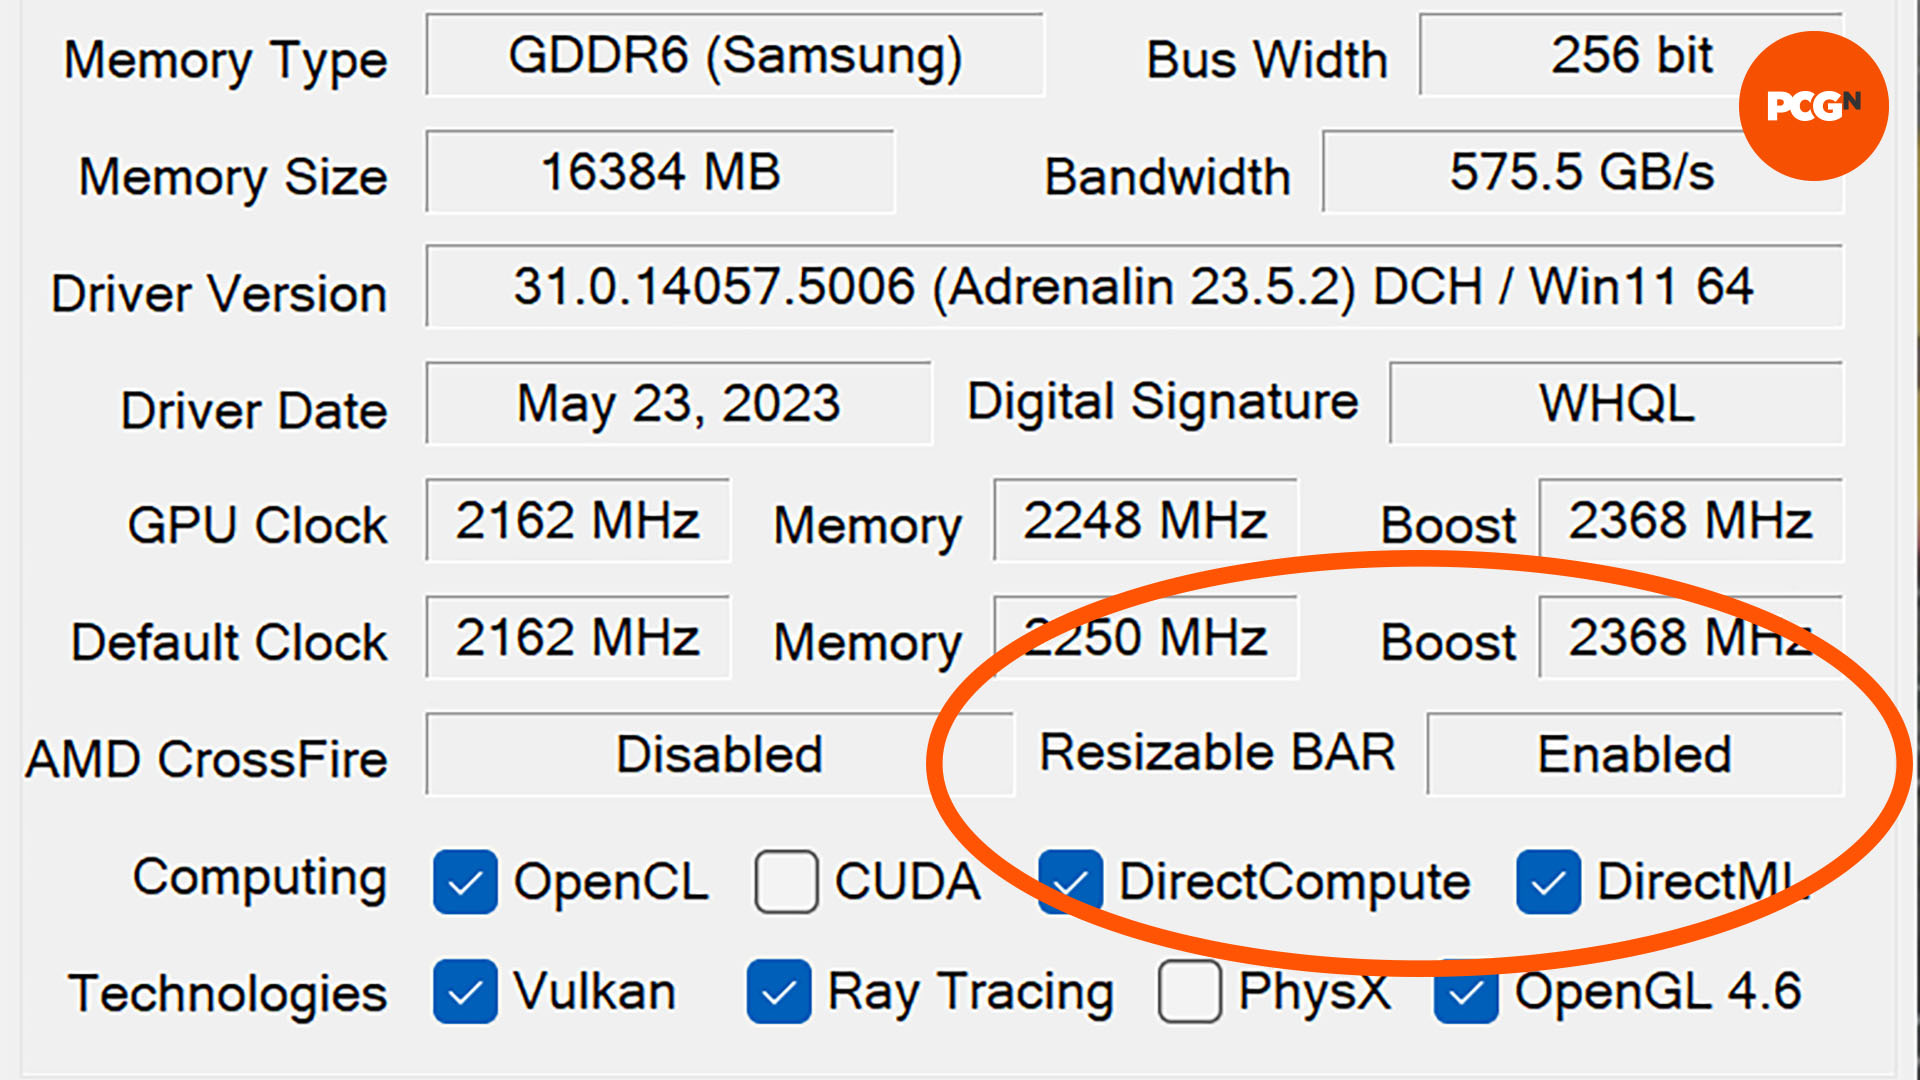
Your first step is to run GPU-Z and see if resizable BAR is enabled or disabled in the bottom right box. If it’s enabled, then you don’t have to do anything else – your PC is already set up properly. If it’s disabled, then you’ll need to follow a few steps to enable it.
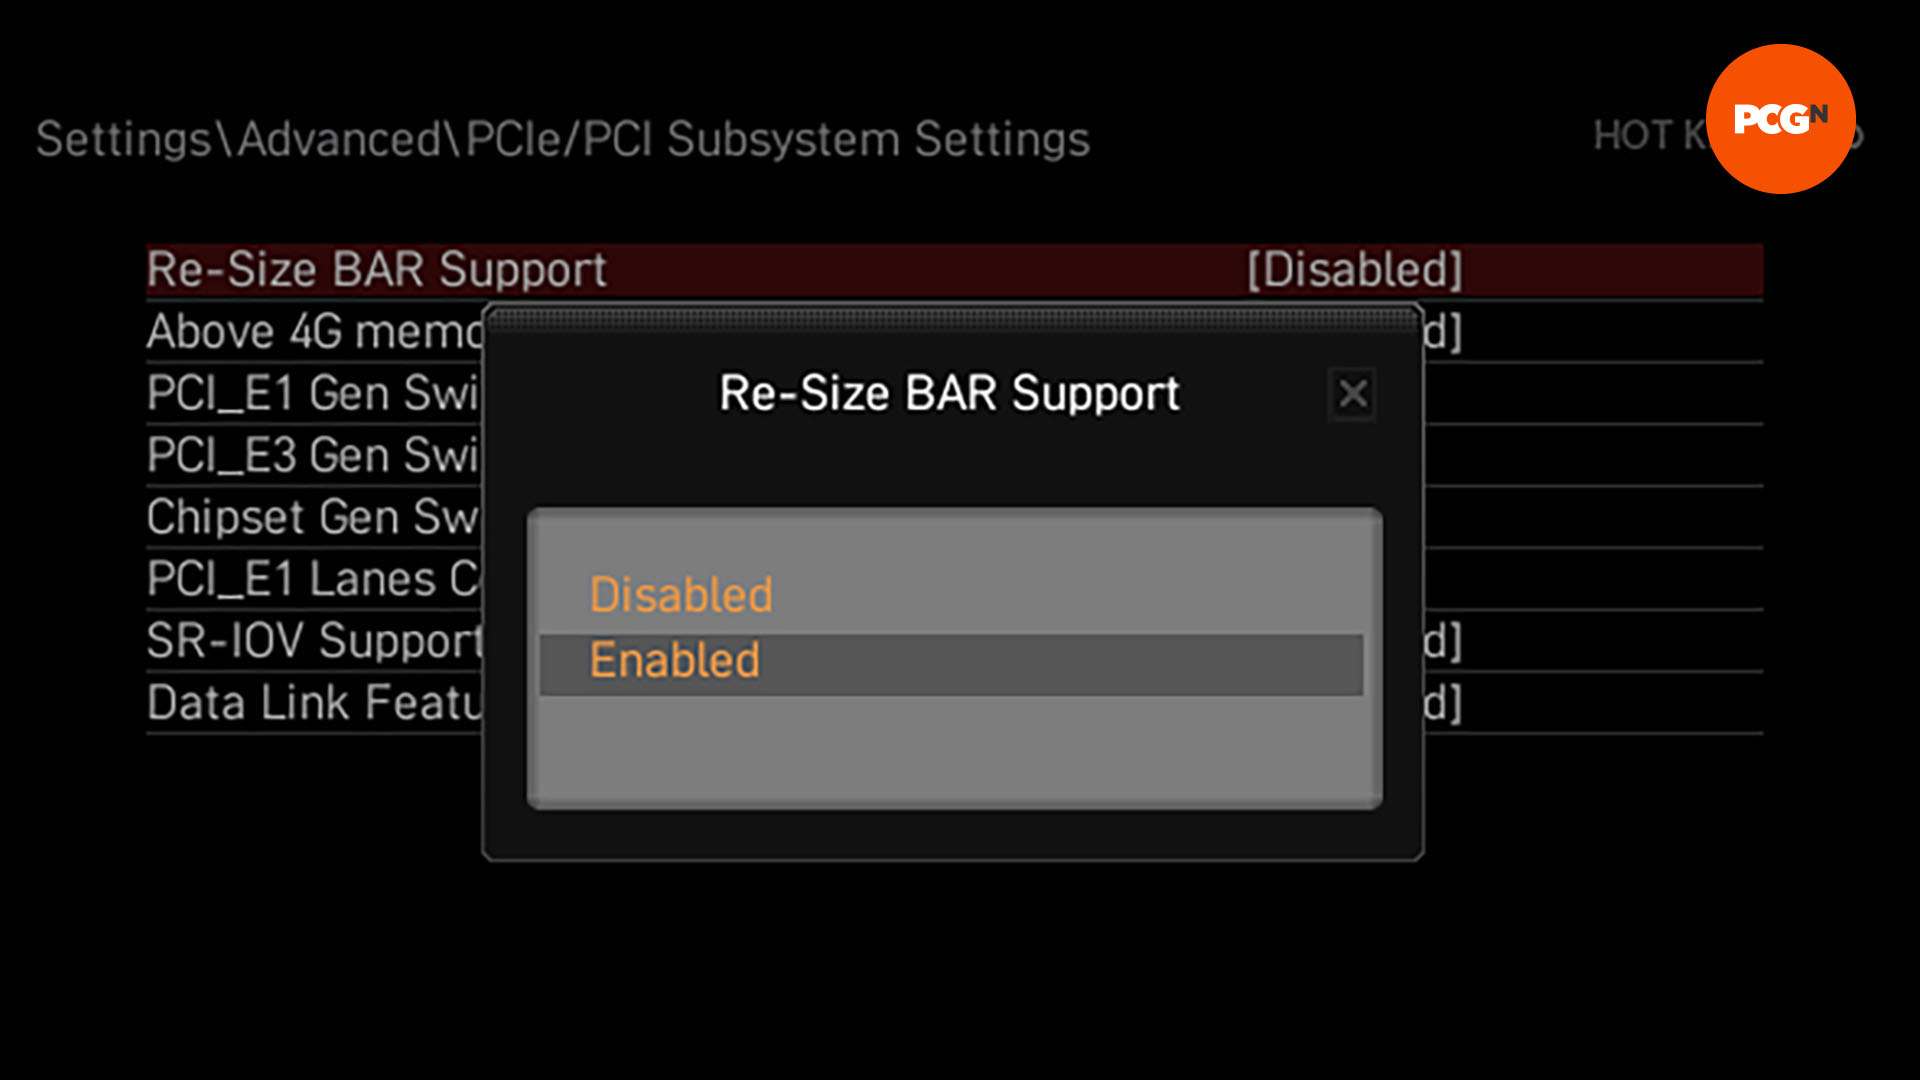
The BAR option is usually located in the PCI subsystem settings of your motherboard’s EFI (this is where you’ll find it on Asus motherboards, as in the screenshot below). You can enter your motherboard’s EFI, or BIOS, by tapping the Delete key as soon as your system powers up.
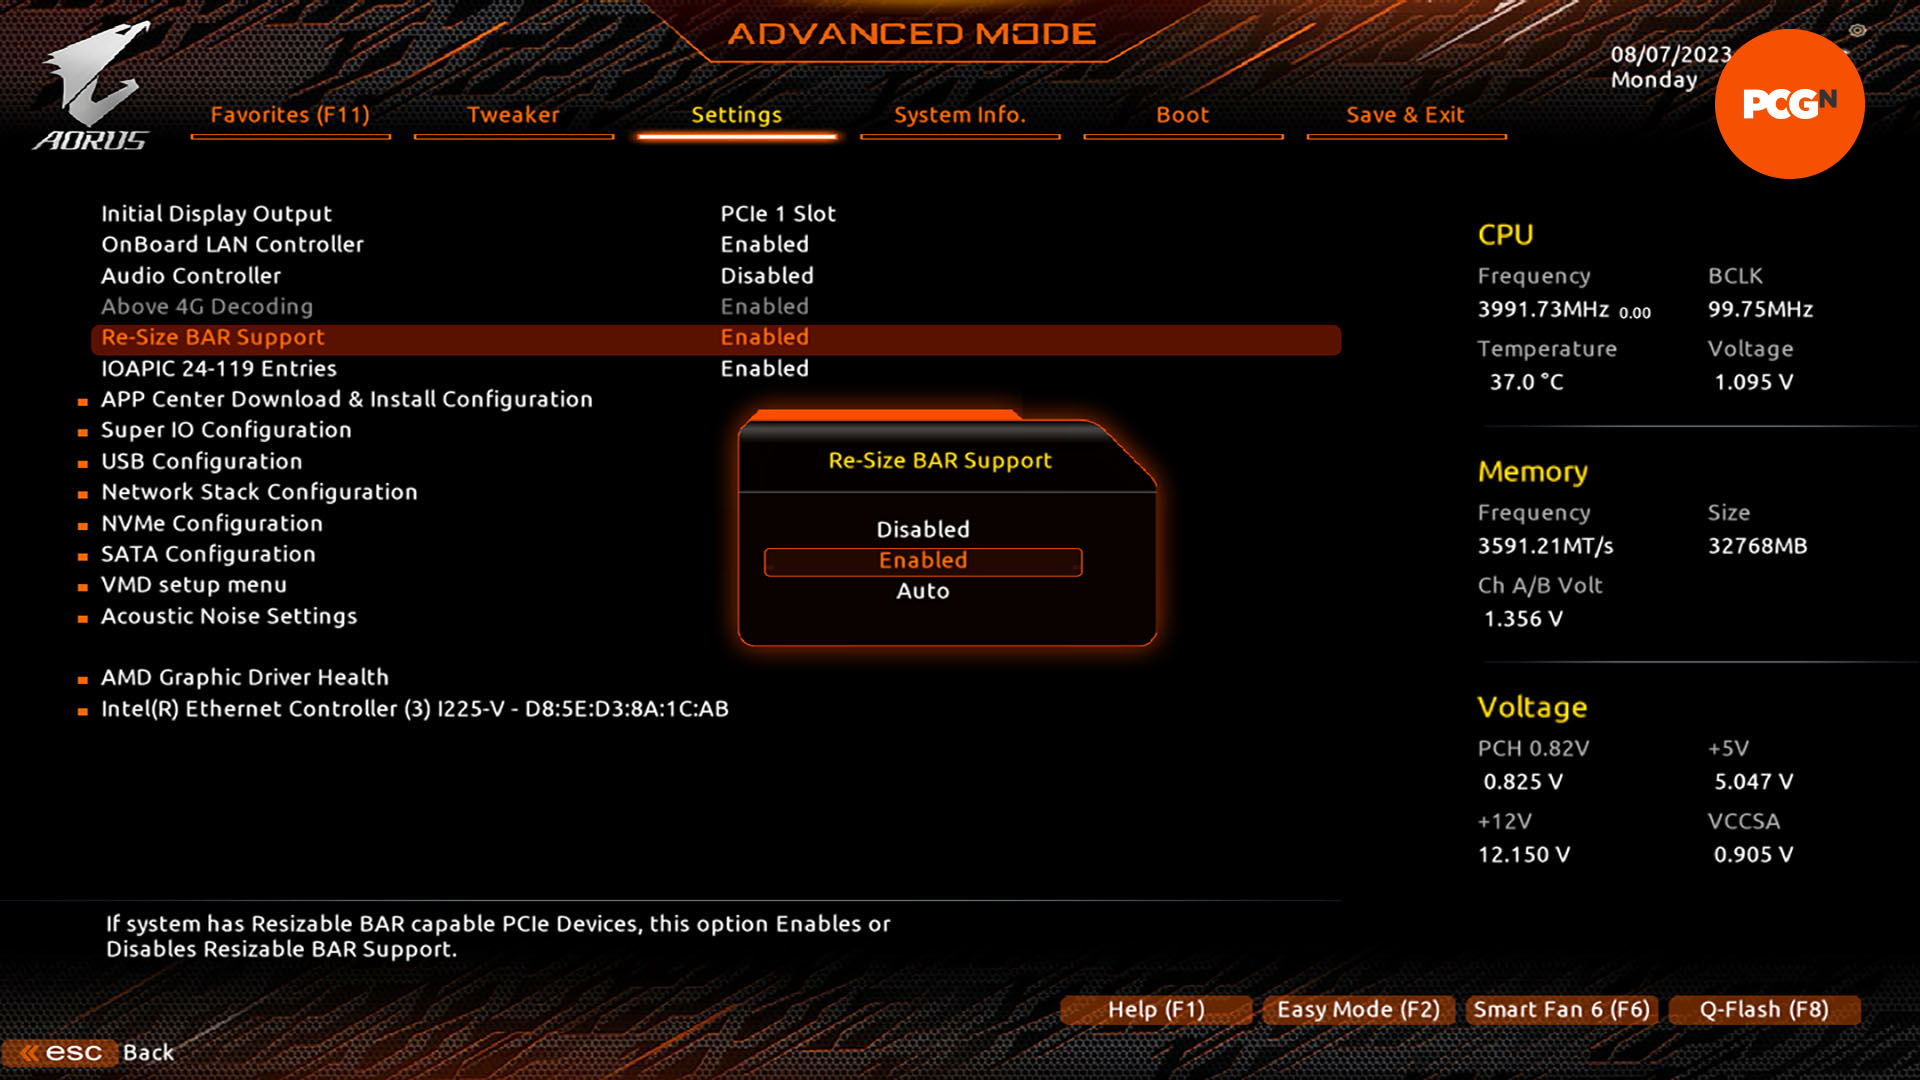
Its location may differ between manufacturers. For example, on the Gigabyte motherboard EFI screenshot below, it’s in the Settings menu when you enter Advanced mode. You’ll also want to enable Above 4G decoding in order to access the resizable BAR option. On some motherboards, you only get the option for ‘Auto’ rather than ‘Enabled’, but this option will enable it if your setup is compatible.
If the Compatibility Support Module (CSM) is enabled in the Boot section of your motherboard EFI, you’ll also need to disable this setting. Once you’ve made these changes, save your settings and exit the EFI, then head back into GPU-Z when your PC boots up Windows.
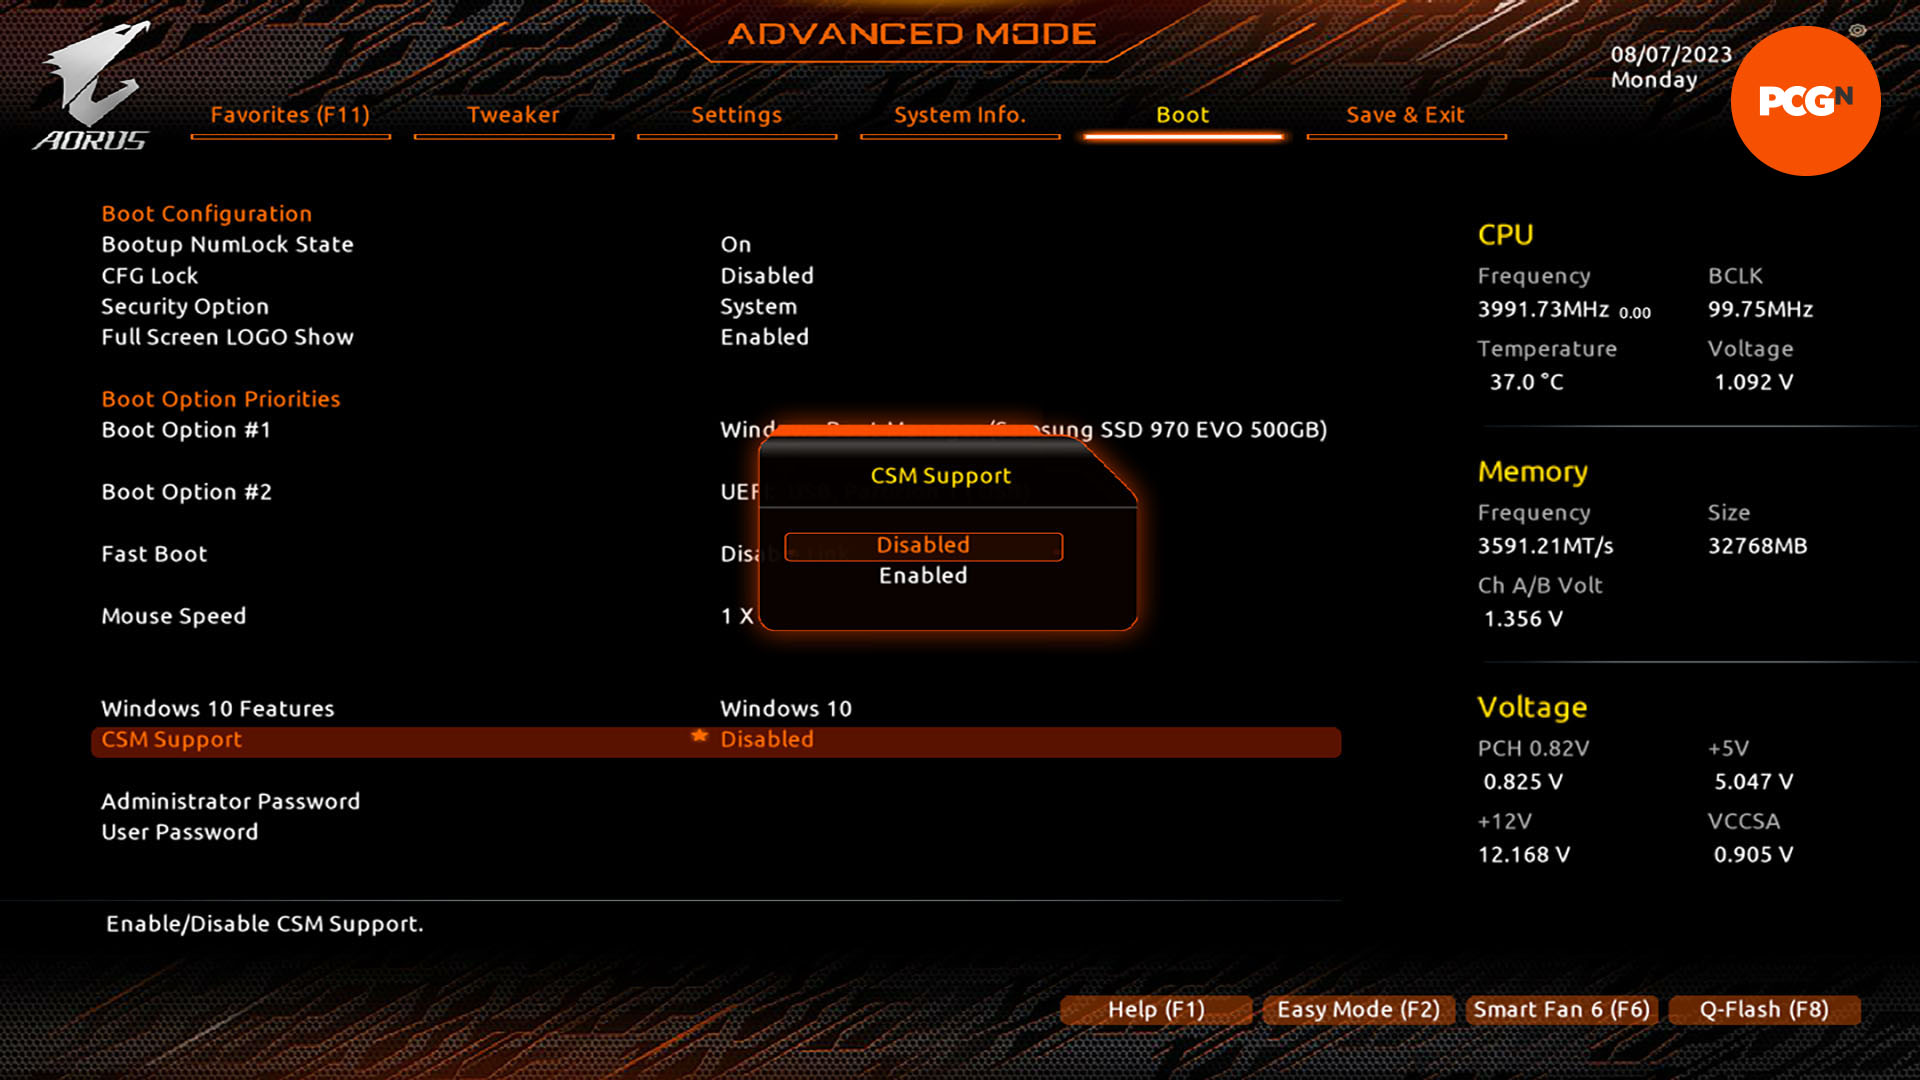
At this point, you should see a friendly ‘Enabled’ in the box. If not, and it’s still showing as Disabled, you may have hit a compatibility problem with your Windows installation. This will also be the case if your PC no longer boots into Windows after enabling resizable BAR (if you need to get back into Windows, re-enable CSM).
Your Windows install drive will need to have a GUID partition table (GPT), rather than the older master boot record (MBR) partition table, for resizable BAR to work. There are ways to convert your partition table, which are beyond the scope of this guide, but reinstalling Windows is your safest bet here. Make sure you fully erase your drive, then install Windows with your motherboard boot setting on UEFI, again making sure that CSM is disabled.
That’s it for our guide on how to enable resizable BAR. We hope you enjoy your extra frame rates, and that you didn’t have to go through too much hassle to get it working. If you’re looking to buy a new gaming GPU, make sure you check out our guide to the best graphics card, where we run you through all the best options at a range of prices.
