What is the best Skull and Bones ship loadout? There are only two main types of ship in Skull and Bones, based on size: small and medium. Sounds simple, right? Well, there’s a bunch of ships in each category, and then there’s weapons and furniture to fit it with, so it gets a little trickier from there on out.
It’s obvious – to be even a somewhat decent pirate, you need a ship that’s up to the job, and the best Skull and Bones ships are going to do a lot of the work in helping you and your crew rule the seas. Sure, keeping your crew’s Skull and Bones morale high and adopting the most adorable, we mean fearsome, Skull and Bones pet might help, but the right ship and the correct weapon loadout is essential in Skull and Bones, so here’s how to kit yourself out with the best ship build.
The best ship build in Skull and Bones
The best ship to work towards in Skull and Bones is the Brigantine, a medium ship with excellent fire and resilience. However, you unlock the Padewakang first, which is a more than capable early ship. Here is the best Skull and Bones ship build for both the Brigantine and the Padewakang.
As you work your way up in Skull and Bones Infamy and earn your place as one of the best pirates around, you’ll build a fleet of ships you can switch between, so chances are you’ll end up with both of these ships – and more. Which you use will depend on your situation and what you need it for, since the Brigantine is better at close-range combat, while the Skull and Bones Padewakang can set ships ablaze from afar.
Best Skull and Bones Brigantine loadout
Infamy required: Cutthroat I
Bow: Ballista
Broadsides: Basilisk Culverin or Zamzama Demicannon
Stern: Basilisk Culverin or Zamzama Demicannon
Auxiliary: Leopold Mortar
Furniture: First Aid Station, Iron Cladding Station, Storage Compartment, Double-Planked Hull, Boatswain’s Call.
The Brigandine, or Hullbreaker, specializes in ramming other ships, and it’s perk, Bullhorn, increased damage from ramming by 45%. As such, you want to equip the strongest armor and powerful short-ranged weapons for full effect.
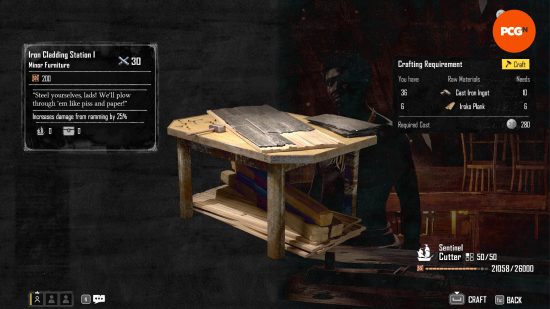
The Iron Cladding Station increases damage dealt by ramming by 25%, so perfectly compliments the Hullbreaker’s perk. Meanwhile, the First Aid Station increases the repair offered by repair kits, which you’ll need when smashing hull-first into other ships, and the Double-Planked Hull simply increases the hull’s resilience. The Brigantine has superior stats in almost everything, such as speed and strength, but it lacks in cargo hold, so we’ve increased this with the Storage Compartment. The Boatswain’s Call increases Crew Attack damage by 10%, which you can make the most of since you’re getting up close and personal during battle.
As for weapons, the Ballista II can be obtained at Cutthroat I, so go straight in at this level, but level up the Ballista when you are able. The deck’s Basilisk and the Zamzama both utilize cannonballs, and operate well at short range, rendering enemy ships more vulnerable to crew attacks – perfect for the short range ramming attacks that are this ship’s wheelhouse.
Best Skull and Bones Padewakang loadout
Infamy required: Brigand I
Bow: Sea Fire
Broadsides: Bombards
Stern: Bombards
Auxiliary: Mortar
Furniture: Scoping Station, Volatile Fuel, Gunpowder Bench, Balanced Mast or Sterile Galley.
In complete contrast to the Brigandine, the Padewakang is a better ship for longer-range combat, so you don’t need to get up close and personal until the enemy crew is long since underwater and you’re raking through the waves for their loot. This might seem like a better option, and, in some ways, it is, but the Padewakang also suffers in most of its stats in comparison to the Brigandine, including one less furniture slot, but does have a larger cargo hold.
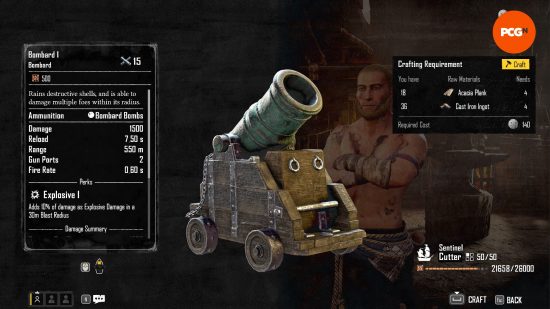
The Padewakang, or Bombardier, comes with the Detonate Perk, meaning explosive hits have a 70% chance of triggering an explosion, dealing 1,000 damage within a 125 meter blast radius. This increases to 100% if the target is ablaze. As such, we’ve built this Padewakang loadout to focus on explosive fire damage. The Sea Fire bow weapon hurls liquid fire over the target, while the bombards and mortar deal explosive damage.
For furniture, the Scoping Station is the perfect choice as your major furniture item, marking targets more than 320 meters away. Marked targets then take an additional 100% damage to their weakpoints – use the Sea Fire here for additional accuracy. Since you’ll want targets to be Ablaze for additional perk damage, the gunpowder bench is another great choice of furniture, increasing damage by 10% to ships that are ablaze, while Volatile Fuel increases the charge rate of Ablaze. Finally, given the Padewakang’s slightly lower stats, you can add a navigation item to your furniture kit, such as the Balanced Mast or Sterile Galley.
With either of these best Skull and Bones ship builds, you’ll have among the most powerful ships on the water, and should have no trouble taken out opponents for their loot and their lives. Among some of the loot you’ll gather from fallen enemies are Skull and Bones treasure maps, so use our guide to finding hidden treasure in the pirate game – but it’s up to your whether to share it with mates or not.


