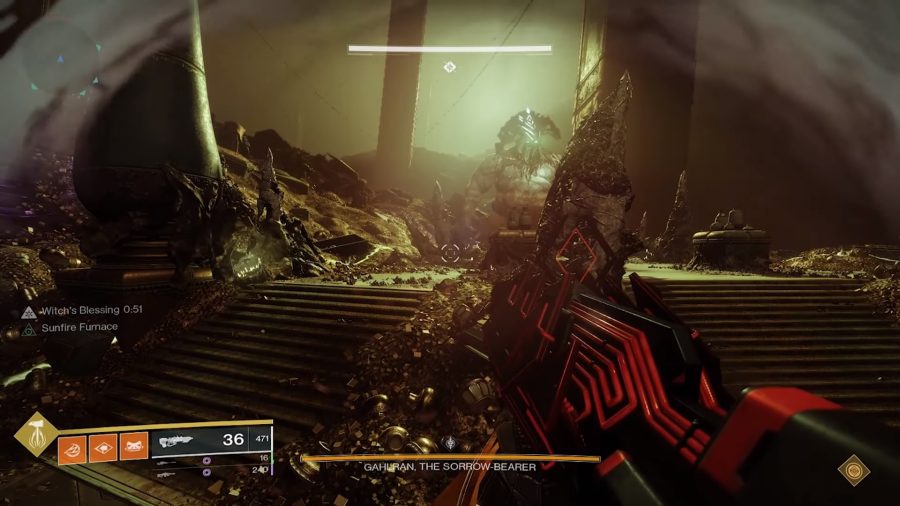
How do you beat the Destiny 2 Crown of Sorrow raid? Bungie’s Destiny 2 roadmap typically sees a new expansion drop on a Tuesday, with the new raid unlocking on the following Friday. This time, however, it was a mere six hours between the two releases. Don’t fret, though, with some prep work you’ll be ready for the Crown of Sorrow rain in no time.
First things first, to gain access to the Destiny 2 Crown of Sorrow raid you’ll need to complete The Invitation quest, and you’ll want to level up past 720 Light for the raid itself. Don’t feel too put off if you’re a bit behind, or skipped out on the Season of the Drifter, though. You’ll get 690 gear from The Invitation quest, so make sure you do that before anything else.
Apart from that, make sure to do your dailies, weeklies, then unique activities from the Season of the Forge and Season of the Drifter, and you should be just about there. Also, now that a fireteam has beat the Crown of Sorrow raid, you can do the old raids again, too. Now that you’re ready to go, gather five of your finest Guardians, or randos from Destiny ‘Looking for Group’ Discord, and fire the Crown of Sorrow raid up.
Destiny 2 Crown of Sorrow raid walkthrough
Best Crown of Sorrow weapons
Certain weapons always play a starring role in Destiny 2’s raids, and this is no exception. The early front runners are The Recluse SMG, which proves quite effective at melting smaller enemies. the Mountaintop and Wendigo grenade launcher have also proven to be pretty nifty at putting out a massive amount of damage to bosses and elite enemies. The Outbreak Perfected exotic pulse rifle is another handy weapon that proves useful in every situation.
The first three weapons are a bit of a grind, as they are all Pinnacle weapons. As for the exotic pulse rifle, we have a Destiny 2 Outbreak Perfected guide to help you get it and its catalyst.

Find Calus’ Hive Commander
When you first begin the raid you’ll enter an open room with a circle straight in front of you that surrounds a pile of bones. Who ever steps inside of it will get buffed, so you’ll want to assign three players who’ll do just that. Once you’ve done that, divide your six-person group into three smaller groups, with each team having one buffed player and one unbuffed player, and designate those teams to the left, middle, and right areas of the room that you’re currently in.
Buffed players have one minute to live, and when the timer runs out they will be cursed for about 3 seconds before dying. So, to avoid that and reset the timer, the entire team needs to gather around a Witch Vassal that’s located in the front middle of the map. Once you’re all gathered around the Witch Vassal, shoot it and the buff will transfer from those who have it to those who don’t.
While you’re buffed you can only do damage to two things, Knights and Blessed Ogres. There will be two Knights that spawn in the left, middle, and right, so whoever is buffed needs to kill the knights in their assigned area. Once the knights are killed two Ogres will spawn, one blessed and one normal. If you have the buff, team up on the blessed one, and if you’re unbuffed, go for the regular one.
While this is all going on, there will be crystals that spawn around the map at random as well. A buffed player and an unbuffed player will need to coordinate with each other to shoot them at the same time, otherwise they won’t break. While unbuffed players are not being called into action, they should focus on clearing out normal enemies.
Repeat this sequence four times and you’ll be onto the next encounter.
Complete the jumping puzzle
It’s not a Destiny raid without a finicky jumping puzzle, and the Crown of Sorrow raid is no different. Much like the previous encounter, you’ll notice a glowing circle in front of you, and just like before, it’ll dish out some buffs.
Crystals will now spawn on different platforms, and some of them will have shields. You can shoot a normal crystal wherever you are, but you’ll need to go beyond a shielded crystal’s protection to damage it. It’s also worth noting that these crystals are the same as in the previous encounter, so a buffed and unbuffed player will need to shoot them in unison. The buff swapping mechanic is also in place, so you’ll need to work with that, too. This is basically the same as the first room, except with jumping puzzles instead of Ogres and Knights.
While making your way up this jumping puzzle, you’ll find another Witch Vassal, which you use to transfer the buff once everyone is inside. It also acts as a save point, so if you fail, you won’t have to start the whole thing again.
Not much apart from that, keep going until you reach the top.

Defeat Gahlran’s Deception
Before you start this encounter, you’ll want to divide your team into three teams of two again and designate those teams to a side of the map. Much like before, the buffed and unbuffed player mechanic comes into play.
To start the fight, punch Gahlran’s Deception. If it disappears you’re safe, but if it stays in your area you’ll need to avoid it while doing your roles as it can one-shot you.
The buff plate will spawn on one side of the map, and one of your teams of two should be there to intercept it. Whoever is nominated to step on it and take the buff should do so quickly. After that, two Witches will spawn and will be dealt with by the non-buffed players before a Blessed Ogre appears and is killed by the buffed players.
After this cycle finishes, one Witch’s Vassal will prime. The first team, which is the buffed player and their partner, should go to the Vassal. The second team, which is whoever’s side had a disappearing Galhran’s Deception, should send their nominated player over to take a buff. The final team doesn’t need to worry about sending anyone over. Once this completes, the cycle of killing Witches and Ogres starts again.
When the Witch’s Vassal primes for the last section, all players will need to go over. For this part, assign an unbuffed player and a buffed player to punch Gahlran’s Deception at the same time to break the shield and do damage. Once his guard is down, unbuffed players will be able to deal damage to him, and buffed players will be able to take his shield back down when it appears again to prolong the damage phase. To get the most time here, have your buffed players assign themselves in order and take their shield back down. Once a buffed player destroys the shield, they lose the buff but can deal damage to the boss.
Once you get this down, you can knock off a good half of Gahlran’s Deception’s health. Repeat this process until you’ve won the fight.
Defeat Gahlran
Now it’s time for the final encounter of the raid. To start it off, shoot Gahlran, and three versions of it will spawn at different points in the area. You can call this out as you wish. Top, left, and right work just fine, though, as the room is shaped like a triangle. Much like the other fights in this raid, this one also has a buff plate. Assign three players to jump on it, and have the other three return to their side of the map where a vision of Gahlran will be waiting. Just like before, you’ll be in three teams of two.
You’ll also notice that all three Witch’s Vassals are active. To stop any overlap, you and your buddy should only use the Vassal that is to your right while you’re looking at your Gahlran. The crystals are also back, and they are all shielded. These can be quite nasty as they can cause your team to wipe, so make sure you take care of them when they pop up. These crystals also move clockwise, so if top room gets it, right room will be next.
Players with a buff need to kill the two Knights that spawn on their side. When four Knights die, an Ogre or a Gahlran’s Deception will spawn – anyone call kill an Ogre. When Gahlran’s Deception generates, a buffed and non-buffed player will need to coordinate to hit it and destroy its shield when it’s at the top of the stairs. When its protection is down, it’ll remain still, and players on that side will need to keep an eye out for when their Gahlran’s hand turns green. When that happens, shoot it, and when enough damage is done it’ll crush the Deception.
Gahlran will soon start channelling the green energy from their hands to their face. For this part, you’ll want to assign a player to each hand. When enough damage is done, you’ll be able to shoot their face. After this, two versions of Gahlran will disappear, leaving one. At this point, everyone should gather at that location’s Vassal and refresh their buffs. Once that’s done, repeat the process of shooting Gahlran’s hands and face again.
Remember to keep on top of the crystals alongside exchanging and refreshing the buffs, and you should be fine. Just repeat this and Gahlran should fall after two or three cycles.
More Destiny 2 guides to loot:
Destiny 2 Void Configuration
Destiny 2 Exotics
Destiny 2 Thorn guide
And there you go, how to defeat Destiny 2’s Crown of Sorrow raid. It’s undoubtedly one of Bungie’s more demanding raids from a technical point of view, and you’ll rarely find yourself in a moment when you’re not collaborating with someone. So make sure to keep talking and communicating. This is very much an early version of how to beat the raid, and, as players usually find a way of simplifying these encounters, we’ll update this guide in time if easier forms of overcoming the Crown of Sorrow raid appear. Until then, keep plugging away, and you’ll soon prove triumphant.


