How do you solve the Imbaru Engine in Destiny 2? The Imbaru Engine puzzle room becomes available at step 34 in The Bladed Path quest, which is the Season of the Witch seasonal questline. Once unlocked, you can enter the Imbaru Engine, which is situated within the oubliette in Savathun’s Throne World, via a new node at the Helm.
If it’s not showing up in Destiny 2 for you right away, you may need to claim the Gift of Cunning Minor Arcana card from the Lectern of Divination, which is located via the portal in the Helm. You might need your best build for some of these riddles, but it doesn’t matter which of the classes you enter as – there are different challenges on offer in the Imbaru Engine and some do require combat.
Destiny 2 Imbaru Engine The Cunning test solution
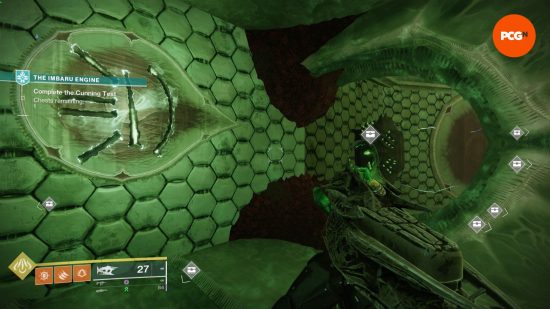
Before trying to solve the Cunning Test in the Destiny 2 Imbaru Engine puzzle room, you should equip your Ghost with cache tracking mods. This will mark all of the chests in the room on your HUD, making them easier to find.
Two Hive symbols will appear on plates on the ground, pointing towards chests. For the first two chests, you should loot the one resembling an X shape. Then head to the next location and choose the chests with the same symbol pointing towards them. You’ll need to jump on to a platform to reach these. The first two stages are relatively straightforward.
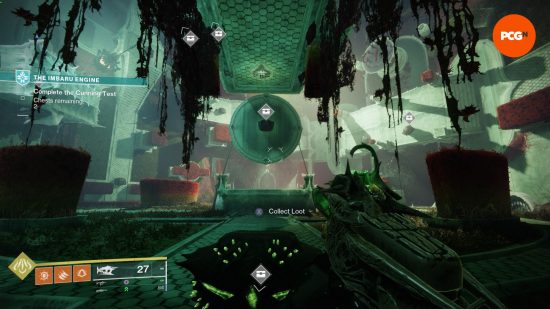
On the final step, the in-game HUD will indicate that you must open three further chests. The chest locations are randomized every time you run the Imbaru Engine. You’ll see there are symbols on plates scattered around the room. Ensure you are following the correct symbol in the direction it is pointing, and don’t be tempted to loot the chest nearest to it. You’re still looking for the symbol resembling an X, so double-check the plates if you’re unsure which symbol is nearby.
You’ll have to traverse the room’s strange layout to find the symbols which could be nearby or behind the chest they’re related to. Once all chests have been correctly looted, you will earn the Mist and Mysteries seasonal triumph and the Mother Morph secret triumph as well as some Witch Engrams and Witch keys.
Destiny 2 Imbaru Engine The Strength Test solution
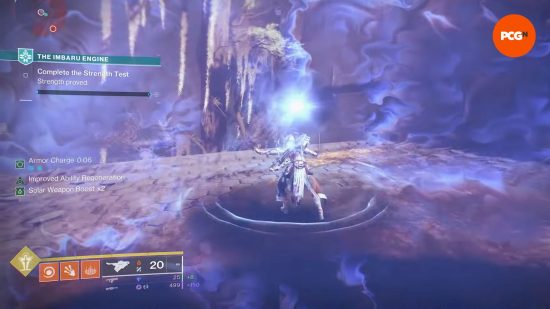
To complete Strength Test in the Imbaru Engine, you will need to complete the Savathun’s Spire activity via the node in the Helm to get a secret opaque card. Before activating the final mirror portal to enter the boss fight arena, turn right and you’ll see the card next to a pillar. Taking this card to the Lectern of Divination will turn it into A Gift of Strength.
This Minor Arcana power can be taken with you into the Imbaru Engine where you should skip the Cunning Test, and go through the door between the two chests to reach the Strength Test.
After activating the puzzle, get the Deepsight buff from the back of the room and follow the glowing footsteps to kill the first enemy, a Knight. After the Knight is down, follow the plate pointing you in the direction of the next enemy. This Knight is hiding behind a rock. The third Knight is on a ledge near a pillar.
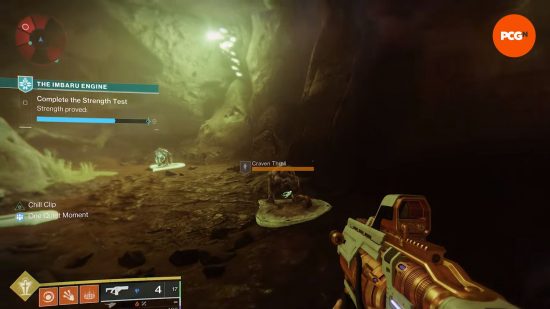
After all three Knights are dead, jump up to the platform and then inside the pillar, shooting a Cursed Thrall. Lines of enemies will spawn – you should only shoot the second in line. Kill three Cursed Thralls to continue to the final area of the Strength Test.
Jump up the platforms to exit and enter the room underneath the platform by using Deepsight again. You’ll again need to shoot every other Cursed Thrall, with the first one being the front-left. If you kill the wrong enemy, a giant Shrieker will spawn and kill you, and reset your progress to the beginning.
After successfully completing the Strength Test, you will get the Knight Morph secret triumph as well as seasonal rewards.
Destiny 2 Imbaru Engine the Navigation Test solution
To access the test of Navigation you’ll need to find the Minor Arcana card A Gift of Navigation which is located in the Alters of Summoning in the hands of the Hive statue. Shoot the crystal in its hands to reveal the card.
We strongly recommend bringing the Hard Light Exotic with you to this test, as you can use it for any of the three Light subclass elemental damage types. It’ll become clear soon why this is important.
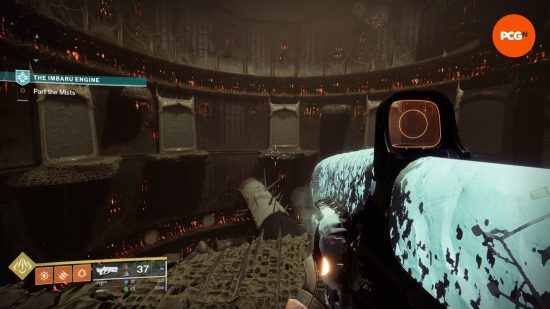
In the Imbaru Engine, take the green lifts up to the same room as the Cunning Test location. You don’t need to complete the Cunning Test to proceed through the door which leads to the Strength Test. Stop outside the door to the Strength Test and turn around to find another door. Head through this and up another lift to the top of the spire. Here, you’ll find a staircase leading to another door, and this is where you can activate the Hive magic to begin the Navigation Test.
You’ll enter a small, round room with various blocked doorways and symbols. Turn around and look at the door you entered through to see an Arc symbol on the left-hand side. Find the doorway with an Arc symbol in the same place and shoot it with an Arc weapon to open the portal and head through it. Remember when we said Hard Light would be useful?
After going through the portal, you’ll see another symbol above your door. Check what it is and where it’s positioned, and again shoot the matching symbol with the correct elemental damage to proceed through another portal. This is where it gets a bit trickier. This time, some symbols will be positioned directly in front of the others, so you’ll need to get closer to each portal to find the correct symbol to shoot. Head through the portal once more, to the final stage of the Navigation Test.
This time, the symbols are floating in midair. You’ll need to jump to the various platforms around the room to get them to line up with the doors. When you find the right perspective, you’ll see a symbol that matches what you’re looking for, but it can take some trial and error to choose the correct platform. As you jump through the final portal, the Navigation Test is complete.
Destiny 2 Imbaru Engine Test of Truth and Lies solution
To access the Test of Truth and Lies you’ll need to find the final Minor Arcana card. It is located on top of a pillar in the Altar of Feracity in the Altars of Summoning.
After unlocking it and collecting it from the Athanaeum, head to the Imbaru Engine and go up the spire, beyond the doorway to the Navigation Test. There’s a portal near a staircase, so head through it. There, you’ll find three braziers and you’ll need to collect a flame for each of them.
The three flames for the Imbaru Engine Test of Lies are located in the Imbaru Engine itself, in the Altars of Summoning, and in the Savathun’s Spire activity.
The one with the hint ‘This flame burns with the mist below…’ can be found by heading down the spire of the Imbaru Engine into the Cunning Test room. With the doorway behind you, head upwards and to the right to find the green flame. Platform up to collect it.
‘This flame burns within the Altars of Summoning…’ can be found in the activity towards the main building. Next to the door is a Deepsight which you should activate and then ascend the platforms that appear. Collect the flame from the top.
‘This flame burns within the halls of the Spire…’ is within the Savathun’s Spire activity. After heading through the Spire, defeat the first two bosses and then head towards the jumping puzzle. Towards the end of this jumping puzzle there are some round platforms and a Deepsight orb. Activate the Deepsight orb and then turn around to face where you’ve just traveled from. You’ll see platforms near the tower which you can use to head around the side and grab the hidden flame.
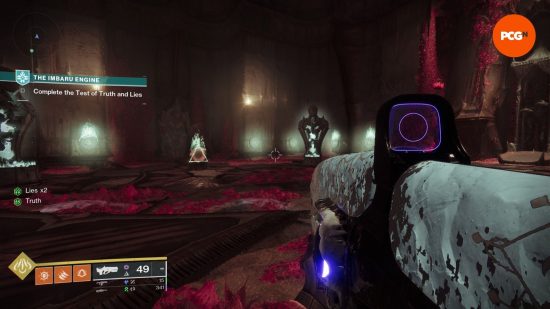
After collecting all three flames, you can complete the Test of Lies as many times as you want without having to go and locate them again. When you head back to the Imbaru Engine, you can now light the three braziers that stand in the room and activate the center plate to begin the test.
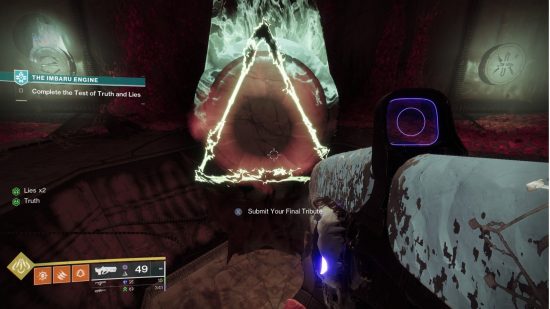
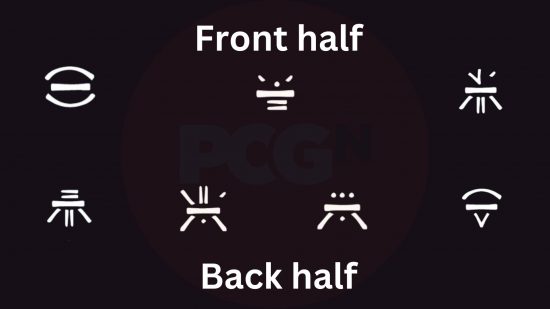
Around the outside of the room you’ll see a variety of Hive runes and a glowing triangle. You need to activate the right symbols in the right order, with the first three symbols being in the front half of the room and needing to be activated from left to right. The correct symbols for the front half of the room are, as we refer to them, burger, upside-down turret, and campfire. I’ll add some pictures, as there are no universally known names for these symbols, and every fireteam refers to them differently.
The back half of the room has four symbols: turret, barbed wire, dotted turret, and ice cream. They again need to be activated from left to right. After checking your answers by activating the glowing triangle at the front of the room, you’ll receive your rewards.
As one of the most complex puzzles Destiny 2 has introduced to date, explaining why these symbols are the right ones could take a while – bear with me. Each statue in the four rooms of the Imbaru Engine states that the Hive symbols on it are either a circle or a triangle. Two of these shape claims are a lie, and one of them is true. Your job is to discover which shapes are a triangle and ‘modify your tribute’ to submit the correct ones in the final puzzle. Each statue will eventually give one symbol’s true shape value.
As we are told there are two lies and one truth, we need to assume that the more often a Hive symbol is claimed to be a shape, the less likely it is to be true, and vice versa. As there is only one statue that claims the dotted turret is a triangle across all of the rooms, we used this as our starting point as a truth. Knowing this, we can eliminate the other symbols that share that statue as lies. We now have three triangles we can mark down, and cross-referencing these across the other rooms will eventually lead us to discovering all truth and lies. It’s complex, and you’ll probably need a pen if you want to prove our working out, but it’s much easier to just input the symbols above and enjoy your rewards.
At the end of the activity, if it’s your first time completing it you’ll see a cutscene with the final story information for the Season of the Witch – which reveals some exciting news for the Season of the Wish release date.
If that’s not enough rewards for you, check out our regularly updated list of free Destiny 2 emblem codes for in-game rewards. If you’re looking for more of a challenge, why not complete the newest reprised raid, Crota’s End, with your strongest fireteam?
