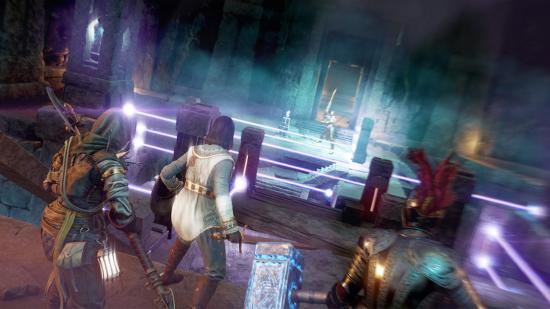
The New World Starstone Barrows Expedition is a step up in complexity compared to the Amrine Excavation. The second major dungeon in New World tests your abilities against strong foes, and how well you can work together with your party members. After completing Amrine, you should work on New World leveling a fair bit before you can tackle Starstone Barrows, as it doesn’t unlock until almost ten levels later.
Like the previous expedition, Starstone Barrows is split into multiple sections – but this time, you’ll encounter deadly puzzles and several mobs with Elite leaders. Similar to most MMO dungeons, the expedition also has a strong mini boss to contend with before a final fight against a much more challenging opponent. You’re probably used to tackling objectives with others by now, but Starstone Barrows requires careful coordination between roles and a united effort to overcome its pesky Elite mobs.
It’s a long dungeon with plenty of room for error. To help you on your way, we’ve put together the definitive Starstone Barrows guide, including how to unlock Starstone Barrows, and what rewards you obtain for making it through.
How to start the Starstone Barrow Excavation
Starstone Barrow location
The Starstone Barrow entrance is in Everfall, southeast of the Everfall Settlement, and north of the Amrine Excavation location.
How to unlock Starstone Barrow
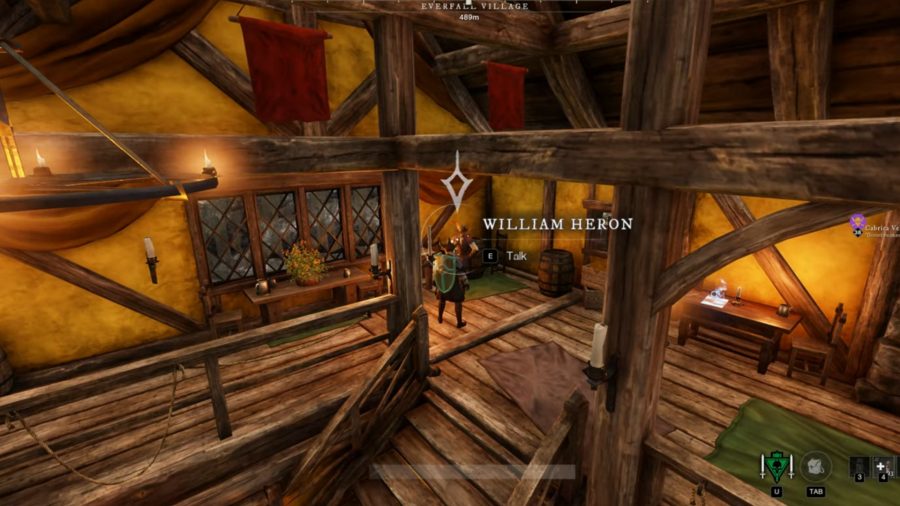
To unlock Starstone Barrow, complete the quest ‘Researcher’s Request’, then speak with William Heron in Everfall. He gives you a new quest chain, during which you’ll complete another Amrine Excavation. Once you’ve finished these and reach level 33, he offers you the Starstone of Shattering quest that leads to the Starstone Barrows.
How to get a Starstone tuning orb
Each time you want to run Starstone Barrow, you need to use a Starstone tuning orb. You will get one free Starstone tuning orb from William Heron’s quest chain, but after this, you must craft the tuning orb yourself.
To craft a Starstone tuning orb, you need:
- Corrupted fragment x10 – close tier one Corrupted Breaches to obtain these
- Steel chisel x1 – purchased for 500 points at your New World faction shop
- Stone brick x50 – reach tier two stonecutting, then refine stone
- Elemental heart x1 – combine Death Mote x50, Life Mote x50, and Soul Mote x50 at a stonecutter
Only one member of the party needs to use a Starstone tuning orb to access the expedition. We recommend you reach level 35 before attempting this expedition. We also advise bringing two healers, a tank, and two DPS players to the dungeon.
New World Starstone Barrow Excavation Tips
Starstone Barrows has several areas in which more than one enemy group attacks at once. Having one life staff user focused on the healing tree and another in the protector tree reduces your party’s chances of getting overwhelmed, while adding a tank is required to retain aggro and avoid your vulnerable party members taking damage.
You have greater flexibility when it comes to DPS specialties, though the musket’s trap abilities are particularly handy here. If one DPS is using the fire staff, make sure they also have a good secondary weapon, as the expedition’s mini-boss has high resistance to fire. This boss is weak to lightning, though, so consider slotting some New World gems in your weapons for an extra advantage in that fight.
Check the global chat for recruiting parties you might fit with. As with most MMOs, healers and tanks often find themselves in greater demand. If you plan on doing multiple Starstone runs, it’s worth leveling a secondary weapon that lets you slot into either of those roles.
Read more: The best New World weapons
Whatever the speciality, everyone should mind their movements more than usual. Starstone Barrows includes dozens of lasers – ‘arcane barriers’, technically, but basically lasers – that instantly kill anyone who touches them.
The Expedition unlocks at level 33, but unlike the Amrine Excavation dungeon, you’ll want to be at least two levels higher. Most enemy mobs in Starstone are level 36, and you also face several Elite enemies leading the rabble.
New World Starstone Barrow Walkthrough
Objective — Explore the Halls for a Path to the Shattered Obelisk
The expedition drops you in the Ancient Halls with few immediate threats. Continue forward, and you come across your first mobs of Javeliners, Warriors, and Shieldmen. It’s usually easiest to defeat them in that order. Ranged enemies deal heavy damage if left unchecked, and tank foes require concentrated effort from more than one of your party members.
You encounter more of the same until you reach the end area. Centimas, a new Elite monster, spawns with Javeliners and a Shieldman, and it has a random Elite buff as well. Defeat the Javeliners, ignore the Shieldman, and pummel Centimas quickly.
Objective — Continue to Explore the Ancient Complex
Lasers are the next area’s biggest hazard, though there aren’t many of them yet. Touching one means instant death, so crawl under them, grab the supply chest near the respawn checkpoint, and carry on.
The next area has moving lasers. Always defeat nearby enemies so they can’t interrupt your movement, then time your dashes to make it through the corridor into the Forbidden Passage.
Objective — Navigate through the Forbidden Passage. Gain Arcane Protection to Pass through the Barriers
The Forbidden Passage is essentially a giant laser maze with one clear safe route leading to the right. There’s a New World iron vein shortly after you start, which is your sign this is the right path. You’ll hit a laser dead end, but there’s a ledge above you. Climb up it, and follow the path until you reach an area where you can jump to another ledge. Turn right, crawl under the lasers, and continue making your way through the maze until you reach a wooden walkway.
Related: How to fast travel in New World
Leap across the gap, and follow the path until you see a wooden doorway. The checkpoint is through here, but you can’t pass through the lasers just yet. Follow the path left of the doorway, and you arrive at a statue and a pool. One party member needs to interact with the statue and gain Arcane Protection, which lets them pass through the lasers unharmed.
Go back to the checkpoint area, and have the character with protection stand in front of the beams so the others can pass.
Objective — Continue to Explore for a Path to the Shattered Obelisk
The Amphitheater area is next, and it’s much simpler. Your first challenge is a mob with an Archer, Reaver, and Shieldman, plus the Elite Javaliner Ioane. Take down the Archers and Reaver, then focus on Ioane. Defeating the Elite monster is the only way forward, and other Ancients will continue to spawn until you do.
Clean up here, then move forward a little. Another mob greets you at the top of the room – this one led by the Elite Shieldman Erine.
Objective — Defeat the Obelisk’s Guardians and then Approach the Shattered Obelisk
The mobs are a bit trickier here. You face two groups at once, and one of them has a mage stronger than most of the foes you’ve dealt with so far. Take care of it first, then deal with the remaining enemies. It’s possible to aggro only one group at a time. If both at once is too much, give that a try after respawning.
The next part is straightforward and just involves following the path until you reach a new checkpoint. There’s another path beyond this point that ends in a sealed door and a route to your right. Follow that route into the crypt.
Objective — Search for a Way to Navigate through the Arcane Barriers
The only noteworthy part of this section is the set of Elites you face, Erebas and Limos. Focus on Erebas first, as he wields strong magic and summons lesser enemies. Apply the Arcane Protection once you’re finished, then continue working your way down the corridors until you reach a new checkpoint.
Defeat any enemies you encounter after this point instead of pulling multiple mobs. It’ll make the boss fight easier.
How to defeat New World Alectos the Relentless
Alectos’ main tricks are firing Arcane Orbs in the direction he faces, summoning mobs, and letting off a powerful Nova attack. Always have one DPS character deal with the minions as soon as they appear, since some of them receive special buffs, and try distracting Alectos with your tank so the Orbs don’t hit the rest of your party.
Tuning up: The best New World settings for performance
Alectos can be staggered and is surprisingly vulnerable to strong attacks. Keep an eye on his moves, and you should be able to power through with few issues. Here’s what you get at the end:
- 99 Gold
- 1,350 XP
- 270 Weapon Mastery
The next step is also linear; push forward by using Arcane Protection until you get the Shattered Obelisk Key at last. Now it’s time for some backtracking.
Objective — Disconnect the Power Lock on the Ancient Shrine and Use the Shrine to Bless the Obelisk Key
Go back to the Shattered Obelisk and have the player blessed with Arcane Protection interact with the monolith to remove the Shrine lock. Use the Shrine where you fought Alectos, and you obtain the Blessed Obelisk Key. Now go back to the Hall of the Crypt and the door that was previously locked, and be ready for another tough fight.
How to defeat New World Grendgul the Regent
Grendgul is significantly stronger than Alectos, but noting her patterns makes the fight much easier. She uses standard melee attacks for the first half, telegraphed by the direction she begins her sword slash. The one exception is when Grendgul tosses a bone. The bone has a separate health meter and spawns new enemies, so deal with it quickly.
When she reaches half health, Grendgul adds a deadly leaping slash attack that generates a shockwave. She can use this up to five times in a row, but careful dodging — and good healing — should keep you alive.
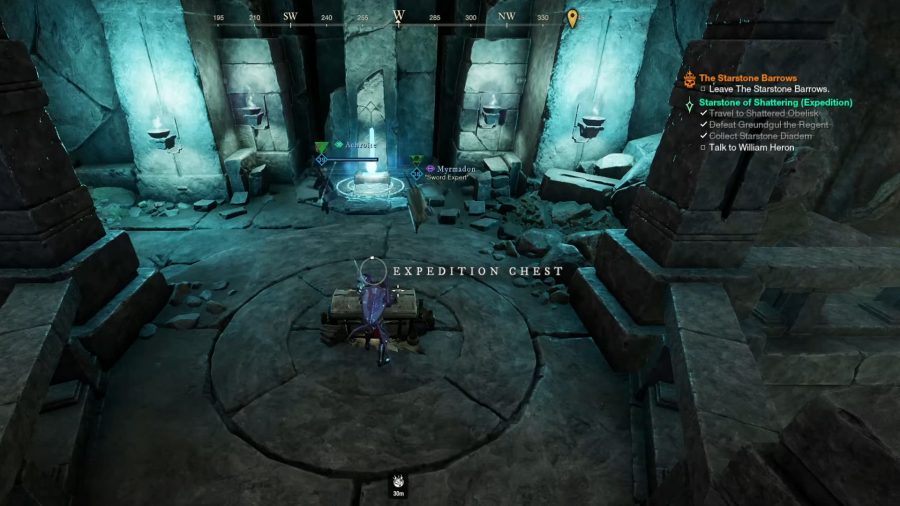
Like Alectos, Grendgul is weak to lightning, but resistant to fire. Defeating her ends the Expedition and gets you:
- 99 Gold
- 1,350 XP
- 540 Weapon Mastery
New World Starstone Barrows Drops
Completing the Starstone expedition rewards you with the following:
Graveguard’s Seal
- Type: Jewelry
- Tier: III
- Weight: 0.1
- Level requirement: 35
- Gear Score: 420
- +16 Constitution
- Slash Ward III: +3% Slash Damage Absorption
- Slash Protection: Take 3.7% less Slash damage
Staff of the Immolated Veil
- Type: Staff
- Tier: III
- Scales with: Intelligence
- Weight: 11.2
- Level requirement: 35
- Gear Score: 420
- Damage: 57
- Critical hit chance: 4%
- Critical damage multiplier: 1.25
- Block stamina damage: 28
- Blocking stability: 15%
- Of the Scholar: +20 Intelligence
- Keen: +8.2% critical chance
- Empowering Meteor Shower: Meteor Shower hits deal +23% damage to foes at full health
Obsidian Rapier
- Type: Rapier
- Tier: III
- Scales with: Dexterity (90%), Intelligence (65%)
- Weight: 4
- Level requirement: 35
- Gear Score: 420
- Damage: 61
- Critical hit chance: 5%
- Critical damage multiplier: 1.4
- Block stamina damage: 28
- Blocking stability: 15%
- Of the Ranger: +20 Dexterity
- Keen: +8.2% critical chance
- Keen Speed: Landing a critical hit grants +30% haste
Creeping Cold
- Type: Ice Gauntlet
- Tier: III
- Scales with: Intelligence
- Weight: 3.6
- Level requirement: 35
- Gear Score: 420
- Damage: 56
- Critical hit chance: 3%
- Critical damage multiplier: 1.3
- Block stamina damage: 38
- Blocking stability: 30%
- Of the Scholar: +20 Intelligence
- Keen: +11% critical chance
- Mortal Siphoning: Restores 4.8% mana after defeating an enemy
Fleeting Reality
- Type: Hatchet
- Tier: III
- Scales with: Strength (90%), Dexterity (65%)
- Weight: 3.6
- Level requirement: 35
- Gear Score: 420
- Damage: 63
- Critical hit chance: 4%
- Critical damage multiplier: 1.4
- Block stamina damage: 38
- Blocking stability: 19%
- Of the Fighter: +20 Strength, +6 Dexterity
- Enchanted: Light and heavy attacks deal 7.9% more damage
- Refreshing Move: Light and heavy moves reduce weapon cooldowns by 2.2%
If you need a break after all that questing, track down some of New World’s rarer items to help level up your gathering skills. New World petal cap locations and Petrified Wood locations are always handy, though you might want to cast a line at a New World fishing hotspot and get some fish oil while you’re out in the wilds.


