Looking for a Saints Row guide to get tips on how to make a quick buck? As you see in the intro sequence for the open-world game, you eventually become the leader of the Saints – a criminal organisation with a taste for flashy churches and extravagant parties. But, before long, you’ll go back in time to before your rise to power as you struggle to make the monthly rent.
Now you may wonder how it’s possible to go from these humble beginnings as a bumbling servant to becoming the boss of a criminal empire. The simple fact is that you’ll have to get your hands dirty, and our Saints Row guide will help you with that by giving you tips on which money-making schemes to prioritise, what to spend your cash on, and how to survive the most intense gunfights.
Progress through the story missions to get the best gear
It may be tempting to complete all side objectives before tackling the campaign, but this is far from efficient. Missions are a great source of cash, which you need lots of to afford some of the more expensive upgrades to your arsenal. Around a third of the way into the campaign, you’ll get access to Saints Row criminal ventures, which will be your primary way of making money.
On top of that, without giving too much away, some story missions hide the best weapons that will easily overpower your foes. You can use these to breeze through the endgame missions and finish the campaign in no time, as well as a massive cash injection.
Complete the criminal ventures to get to the endgame quickly
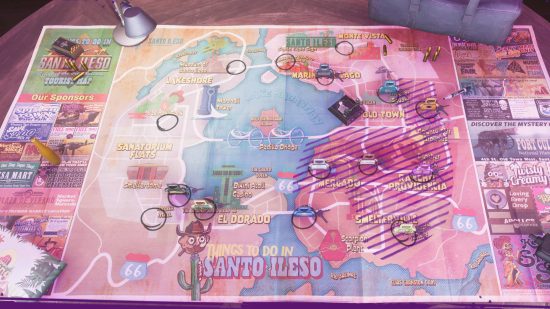
To unlock the final story mission, you need to place at least six criminal ventures onto the Saints Row map, and of those, you also need to completely finish the questlines for two of them. We recommend starting with JimRob’s Garage, as his tasks require you to steal some vehicles, including some of the best Saints Row cars, and bring them back to him. Once that’s done, move on to the Bright Future venture. The foreman at the waste disposal plant has you drive trucks with nuclear waste back to the facility for his team to dump nearby. While the first four trucks are stationary, you can finish the rest of the Bright Future venture by stealing trucks filled with waste that NPCs are driving around the local area rather than hunt down the remaining hidden ones.
Those ventures can take a while to finish, so you can also complete the Eurekatabor! venture as it’s only three missions long. You get some cool prototype tech – including hoverboards – as a reward. If you’re focused on speedrunning through the campaign, finishing the Castle Kraken venture only requires burning two statues, which should only take a few minutes.
Frequently check the cash app to get money instantly
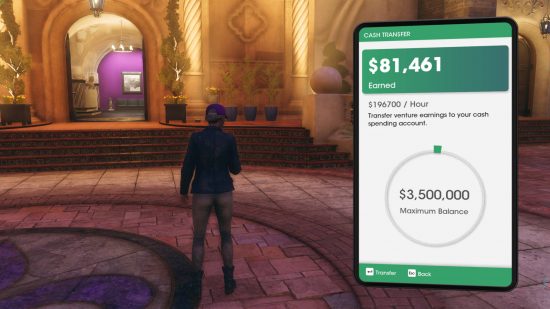
Once you begin investing in criminal ventures, don’t forget about the cash app. This app will generate money over time, but there is a cap on how much you can store here. By moving funds over, not only will you get a fair sum to spend on new ventures, guns, or vehicle upgrades, you’ll also reset the app. Leave it to do its thing at this point, then come back to it every three hours or so to get a cash injection.
Kill Wanted targets if other money-making opportunities dry up
Sometimes though, you’ll need some extra funds quickly. Open your phone and check the Wanted app for contracts, as they can be worth a fair amount and involve driving to a specific location to pick up a vehicle before heading out to eliminate your target. There are only a limited number of Wanted missions, so should these run out, look to one of the other side activities shown on the map as blue icons.
Spend some time finishing weapon challenges to unlock signature abilities
While vehicles also have challenges with unlockable signature abilities, it’s far more critical to unlock the signature abilities for weapons instead. These make all the difference when facing more formidable foes as they can, for example, set enemies on fire or turn a single-shot pistol into a fully automatic gun.
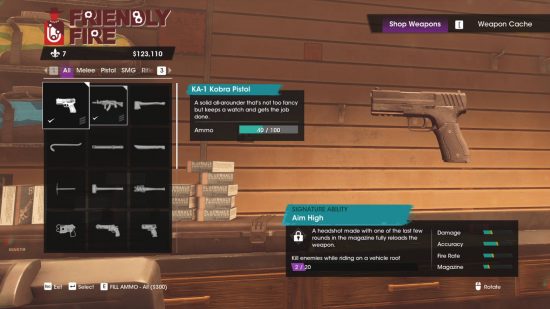
We recommend you at least unlock the abilities of the Idol Lite Pistol, either the AR-55 Burst Rifle or K-8 Krukov AR, and the Sawed-Off shotgun. You should also work towards finishing the D4th Blossom SMG weapon challenge, though you may not complete it by the time you reach the last story mission. Once you unlock the signature ability of any weapon, return to the Saints armoury or visit any Friendly Fire store. From there, you can customise that gun to enable its ability.
To survive intense gunfights, dodge often, use takedowns, and rely on the Tough Mother and Transfusion skills to stay healthy
Occasionally, Saints Row will throw a lot of enemies at you at once, which as you can imagine, can quickly get out of hand. However, you can avoid a lot of damage by constantly using dodge rolls, though you’ll still get hit by some bullets while in the frames of animation where you aren’t rolling.
If you don’t have a takedown to hand or you’re facing a lot of armoured enemies, you can activate the Tough Mother skill, one of the best Saints Row skills you get at level 6, to negate staggering effects and gain 100% temporary health. You can also use Transfusion you unlock at level 11 to heal yourself and your allies whenever you inflict damage. It costs two skill points to use, which you recover by hitting enemies, so try to keep it active as long as you can for constant healing.
Call for backup if you find yourself outnumbered
If you’re pinned down by many enemies, you can ring a friend to lend you a helping hand. Access the contacts section to summon Neenah, Eli, or Kev. You can also request the Saints to deliver your favourite vehicle to your location if you need to make a quick getaway.
Take the time to explore Santo Ilesos to uncover fast travel spots
As Santo Ilesos is quite large, it can be a pain to get to the other side of the map to start a new mission. We recommend seeking out the Saints Row fast travel locations in each of the main districts. As you get close to the fast travel area for the first time, its precise position will show on the in-game map until you take a photo of the target object, thus permanently unlocking the fast travel location.
Make sure you either pick up or take photos of all the collectibles in the area
With so many different types of collectibles, from photographable structures and the lost wheels artefacts you can decorate your base with to dumpsters and art exhibits you can open for quick cash, it can be tempting to move on to the next location. However, with a quick glance at the in-game map, you may find other items nearby that you can fetch or photograph while you’re here, so be sure to do that before moving on.
Now that you know the tips of the trade, thanks to our Saints Row guide, you should go forth and make your mark on the city of Santo Ileso. You can also play co-op with a friend by accessing Saints Row multiplayer, but you need to have completed the first few missions for this option to open up to you. We also have a dedicated guide detailing all of the Saints Row perks, including our recommendations for the best ones to equip, as well as a guide on how long Saints Row is for those curious about the game’s length.

